Mastering Image Compression: Optimizing Your Visuals for Speed, Storage, and Stunning Quality on Tophinhanhdep.com

In today’s visually-driven digital landscape, images are the lifeblood of websites, social media, presentations, and personal communication. From breathtaking nature wallpapers and abstract backgrounds to high-resolution photography and intricate digital art, stunning visuals captivate audiences and convey powerful messages. However, the pursuit of visual excellence often comes with a trade-off: large file sizes. Unoptimized images can significantly slow down website loading times, consume excessive storage, and make sharing cumbersome.

On Tophinhanhdep.com, we understand the critical balance between image quality and digital performance. Whether you’re a professional photographer showcasing your latest work, a graphic designer crafting a digital masterpiece, or simply looking to refresh your device with an aesthetic background, knowing how to compress image size effectively is an invaluable skill. This comprehensive guide will delve into the various methods, tools, and best practices for image compression, ensuring your visuals remain vibrant and impactful without compromising speed or efficiency.
The Imperative of Image Compression: Why Smaller Files Matter for Your Digital World
The digital ecosystem thrives on speed and accessibility. Every image you upload, share, or store contributes to the overall weight of your digital footprint. Large, uncompressed images, while offering maximum detail, can inadvertently hinder your online presence and user experience. Understanding why compression is crucial sets the stage for mastering how to do it.

Faster Website Loading & User Experience
Imagine browsing a website adorned with beautiful photography or intricate digital art, only to find yourself waiting endlessly for images to load. This frustrating experience is a primary cause of high bounce rates. Search engines like Google prioritize fast-loading pages, and optimized images are a cornerstone of this. For Tophinhanhdep.com, which hosts vast collections of wallpapers, backgrounds, and thematic image collections, swift loading ensures that users can seamlessly explore trending styles and find their next visual inspiration without delay. Quick loading times translate directly to a more enjoyable and efficient user experience, encouraging visitors to stay longer and explore more.
Enhanced Mobile Performance
A significant portion of internet traffic originates from mobile devices, often relying on limited data plans and varying network speeds. Large image files are particularly burdensome for mobile users, leading to slower load times and increased data consumption. By compressing images, you ensure that your visual content is accessible and performs optimally across all devices, making your aesthetic and nature photos equally stunning on a smartphone as they are on a desktop.
Seamless Sharing & Storage Efficiency
Sharing high-resolution stock photos, creative ideas for graphic design, or a collection of beautiful photography with colleagues or friends can quickly hit email size limits (typically around 20 MB). Compression streamlines this process, making it possible to send multiple images without breaking them into smaller batches or resorting to external file-sharing services. Furthermore, for enthusiasts who collect wallpapers and backgrounds, efficient compression means more stunning visuals can be stored on devices and cloud services, optimizing valuable storage space without sacrificing visual fidelity.
Boosted SEO for Visual Content
Search engine optimization (SEO) isn’t just about text; it’s profoundly influenced by image performance. Search engines favor websites that are fast, responsive, and provide a good user experience. Images that are properly compressed contribute to all these factors, indirectly boosting your website’s search engine rankings. For photographers and digital artists whose livelihood depends on their visuals being discovered, optimizing images is a strategic move to ensure their high-resolution and unique works are easily found.
Foundational Techniques: How to Effectively Compress Images
Image compression isn’t a one-size-fits-all solution; it’s a nuanced process that involves understanding different techniques and choosing the right approach for your specific needs. The goal is always to achieve the smallest possible file size while maintaining acceptable visual quality.
Lossy vs. Lossless Compression: Understanding the Trade-off
At the heart of image compression are two primary methodologies:
- Lossy Compression: This method achieves significant file size reduction by permanently removing some data from the image. While the removed data is often imperceptible to the human eye, especially at lower compression levels, excessive lossy compression can lead to visible degradation, such as blurring, pixelation, or artifacts. JPEG is the most common lossy format, ideal for photographs and complex images with many colors, such as beautiful photography or vibrant nature scenes. The degree of data loss is adjustable, allowing you to find a “sweet spot” between file size and perceived quality.
- Lossless Compression: As the name suggests, this method compresses the image without discarding any data. When a losslessly compressed image is decompressed, it is an exact replica of the original. This means perfect quality retention but generally results in less drastic file size reductions compared to lossy methods. PNG is a popular lossless format, particularly suitable for graphics, logos, or images with sharp lines and transparent backgrounds, where any quality loss would be immediately noticeable in visual design projects.
For web optimization and general sharing, lossy compression is often preferred due to its superior file size reduction. However, for digital art, graphic design elements with transparency, or images intended for print, lossless compression might be the better choice to preserve every pixel.
Resizing vs. Compression: A Dual Approach
Often, the biggest culprit behind large image files isn’t just inefficient storage of pixel data, but simply having too many pixels. High-resolution cameras produce images that might be 4000 pixels wide or more, far exceeding the display needs of most websites or screens.
- Resizing (Changing Dimensions): This involves reducing the actual width and height of an image (e.g., from 4000x3000 pixels to 1200x900 pixels). If an image is only ever displayed at 800 pixels wide on a website, there’s no reason to upload a 3000-pixel-wide version. Resizing significantly cuts down the total number of pixels, directly reducing file size. This is particularly relevant for wallpapers and backgrounds, where you might need different resolutions for desktop vs. mobile, or for high-resolution stock photos.
- Compression (Reducing File Size within Dimensions): Once an image is resized to its appropriate dimensions, compression further optimizes its file size by intelligently encoding the remaining pixel data, using either lossy or lossless methods as discussed above.
Combining resizing with compression is the most powerful strategy for achieving optimal image file sizes without noticeable quality loss.
The Right Format for the Job: JPEG, PNG, WebP, and Beyond
The file format you choose has a direct impact on compression efficiency and suitability for different visual content.
- JPEG (Joint Photographic Experts Group): The go-to format for photographs and complex images with subtle color variations and gradients (e.g., beautiful photography, nature scenes). It offers excellent lossy compression, allowing you to balance quality and file size effectively. It does not support transparency.
- PNG (Portable Network Graphics): Ideal for images requiring transparency (like logos, UI elements, or digital art overlays) and graphics with sharp edges or large areas of solid color. PNG uses lossless compression, preserving image quality perfectly, but can result in larger file sizes than JPEG for photographic content. PNG-8 (256 colors) and PNG-24 (millions of colors) offer different levels of detail.
- GIF (Graphics Interchange Format): Best for simple animations and images with a very limited color palette (up to 256 colors). Its lossless compression is not as efficient as PNG for static images, and its color limitation makes it unsuitable for high-quality photography.
- WebP: A modern format developed by Google, WebP offers superior compression for both lossy and lossless images compared to JPEG and PNG, often resulting in 25-35% smaller files at comparable quality. It supports transparency and is widely supported by modern web browsers, making it an excellent choice for web optimization on Tophinhanhdep.com.
- AVIF: An even newer format, AVIF (AV1 Image File Format) provides even better compression than WebP, potentially leading to even smaller file sizes. While it offers impressive efficiency, its browser support is still growing, so it may require fallback options for broader compatibility.
Choosing the appropriate format based on your image type and its intended use is a crucial step in effective compression.
Stripping Unnecessary Metadata for Leaner Files
Every image captured by a digital camera or smartphone contains embedded information called metadata (EXIF data). This can include camera model, lens used, aperture, shutter speed, ISO, date and time, and even GPS location. While useful for photographers, this data adds to the file size and is often unnecessary for web or email use. Removing this metadata can offer a minor, yet cumulative, reduction in file size without affecting the visual quality of the image itself. Tools that strip EXIF data are readily available and can be a subtle but effective part of your compression workflow.
Hands-On Compression: Tools and Methods for Every User
Compressing images can be done using a variety of tools, from convenient online services to powerful desktop software and even built-in operating system features. Tophinhanhdep.com aims to provide or guide you to the best options for image optimization.
Online Compression Tools: Quick and Accessible Solutions
For users who need to compress images quickly without installing software, online image compressors are invaluable. Tophinhanhdep.com offers advanced compression solutions directly on our platform, allowing you to optimize images effortlessly.
How to Use Tophinhanhdep.com’s Online Compressor (or similar generic tools):
- Navigate to Tophinhanhdep.com’s Compressor: Visit the dedicated image compressor section on our website (or a reputable online tool like imagecompressor.com, xconvert.com, ezgif.com, youcompress.com).
- Upload Your Files: Click the “UPLOAD FILES” button. You can typically select multiple images (e.g., up to 20 images in JPEG, PNG, GIF, WebP, HEIC formats) at once.
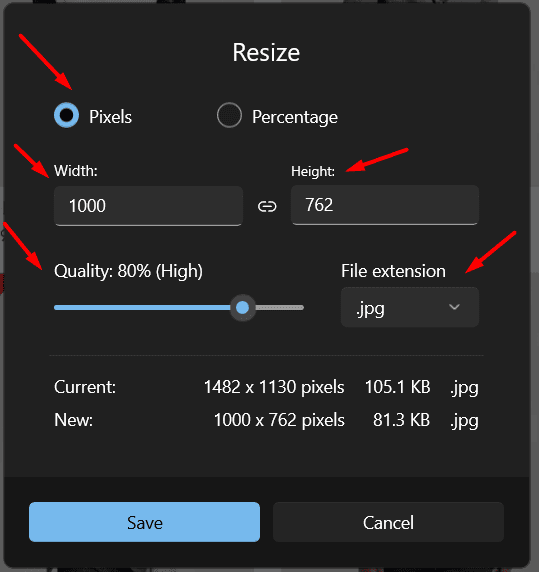
- Select a Photo and Adjust Compression: Once uploaded, the tool will often show thumbnails of your images. Click on a photo to select it. You’ll usually see a “Quality” slider. Drag this slider up or down to decrease or increase the compression level. As you adjust, you’ll see a real-time preview of the quality change and the resulting file size.
- Expert Tip: Pay attention to the file size the target platform (website, email service) expects. Files that are too small can look pixelated, while those too large slow things down.
- Apply and Download: After finding the desired balance, click “APPLY” to process the image. Repeat for other photos if needed. Finally, click “DOWNLOAD ALL” to get your compressed images, often packaged in a convenient ZIP folder.
- Extract the ZIP Folder: Once downloaded, locate the ZIP file.
- Windows: Double-click the ZIP folder, then click “Extract” at the top, “Extract all,” and “Extract” when prompted.
- Mac: Simply double-click the ZIP folder, and it will automatically extract its contents to a new folder.
Online tools on Tophinhanhdep.com or similar platforms are perfect for quick adjustments to wallpapers, backgrounds, or preparing a batch of stock photos for upload.
Desktop Solutions: Built-in Apps for Windows and Mac
Your computer’s operating system often includes basic tools that can help with image compression, primarily through resizing and format conversion.
Windows: The Photos App & Microsoft Office
- The Photos App (for basic resizing):
- Locate Your Photo: Find the image file you wish to compress in File Explorer.
- Open with Photos: Double-click the photo to open it in the Photos app (if it’s your default viewer). If not, right-click, select “Open with,” then “Photos.”
- Resize Option: Click the “⋯” (ellipsis) icon in the top-right corner, then select “Resize.”
- Choose a Size: A pop-up will offer predefined sizes (e.g., S for small, M for medium), typically with estimated dimensions and file sizes. Select a smaller size.
- Save: Enter a new file name to avoid overwriting your original, select a save location, and click “Save.”
- Note: The Photos app provides limited compression control. For more nuanced adjustments, an online tool or dedicated software is recommended.
- Microsoft Office (for in-document compression): If you’re inserting images into Word documents or PowerPoint presentations (important for visual design and creative ideas), Office applications have built-in compression.
- Select Image(s): In your Word document or PowerPoint presentation, select the image(s) you want to compress.
- Compress Pictures: Go to “Picture Tools” (usually appears when an image is selected), then the “Format” tab. In the “Adjust” group, click “Compress Pictures.”
- Options: Choose to apply compression to “Selected pictures only” or “All pictures in the document.” Select a target resolution (e.g., “Web (150 ppi)” for screen viewing, “E-mail (96 ppi)” for sharing).
- Confirm: Click “OK.”
- Tip: You can also set a default picture resolution for all new documents in Office via File > Options > Advanced > Image Size and Quality.
Mac: Preview & Microsoft Office
- Preview (for flexible export and compression): Preview is a versatile built-in Mac app for image manipulation.
- Locate and Open Photo: Find your photo in Finder, then right-click, select “Open With,” and click “Preview.”
- Export: Go to “File” in the menu bar, then “Export…”
- Name and Location: Enter a new name and choose a save location.
- Format and Quality: Ensure the “Format” is set to “JPEG” (for photos). You’ll then see a “Quality” slider. Drag this slider to the left to reduce the file size; the estimated file size will update in real-time.
- Save: Click “Save.”
- Microsoft Office (for in-document compression): Similar to Windows, Office applications on Mac allow in-document compression.
- Select Image(s): In your Office document, select the image(s).
- Compress Pictures: Go to the “Picture Format” tab (or “Picture Tools” > “Format”), then click “Compress Pictures.”
- Quality and Scope: Select an image quality option and choose whether to apply to “Selected pictures only” or “All pictures in this file.”
- Confirm: Click “OK.”
Professional-Grade Editing Software: Harnessing Photoshop and GIMP
For photographers, digital artists, and graphic designers who work with high-resolution images or require precise control over their output, professional editing software offers the most robust compression capabilities.
- Adobe Photoshop: The industry standard for photo manipulation and digital art.
- Open Image: Open your image in Photoshop.
- Resize (Optional but Recommended): Go to “Image” > “Image Size” to adjust dimensions (pixels, inches).
- Save for Web (Legacy): For web-optimized images, go to “File” > “Export” > “Save for Web (Legacy)…” This dialog box is powerful:
- Choose your format (JPEG, PNG-8, PNG-24, GIF, WebP, AVIF).
- Adjust quality sliders for lossy formats.
- Preview the image at different compression levels.
- Remove metadata if desired.
- Export As/Save As: For other saving options, “File” > “Export As…” or “File” > “Save As…” allows you to choose formats and quality levels.
- GIMP (GNU Image Manipulation Program): A free and open-source alternative to Photoshop, GIMP also offers comprehensive compression tools.
- Open Image: Open your image in GIMP.
- Resize (Optional): Go to “Image” > “Scale Image…” to change dimensions.
- Export: Go to “File” > “Export As…”
- Format and Quality: Choose your desired format (JPEG, PNG, WebP, etc.). For JPEG, a “Quality” slider will appear, allowing you to control compression. For PNG, you can adjust compression levels and options for saving metadata.
- Save: Click “Export.”
These tools provide the granular control necessary to achieve precise file sizes while minimizing visible quality degradation, crucial for showcasing beautiful photography or intricate digital art.
Optimizing for Impact: Compression Across Tophinhanhdep.com’s Visual Categories
The diverse range of images found on Tophinhanhdep.com, from stunning wallpapers to inspirational mood boards, benefits immensely from tailored compression strategies. Each category has unique requirements that influence the ideal balance between file size and quality.
High-Resolution Images & Photography: Preserving Detail, Reducing Size
Photographers often start with incredibly high-resolution images, capturing every minute detail. While this is essential for editing and large-format printing, these files are far too large for web galleries, portfolios, or quick sharing.
- Strategy: For high-resolution photography, the primary goal is to resize to appropriate display dimensions (e.g., 1920px wide for desktop wallpapers, 1080px for full HD screens) and then apply lossy JPEG compression at a quality level that retains sharpness and color fidelity without creating noticeable artifacts. Tophinhanhdep.com ensures that stock photos and beautiful photography collections are optimized this way, allowing for quick browsing of extensive portfolios.
- Relevance to Tophinhanhdep.com: Our “Photography” section, featuring “High Resolution” images and diverse “Editing Styles,” relies on this careful optimization. We provide tools to help contributors compress their stunning captures while maintaining their artistic intent.
Visual Design & Creative Projects: Balancing Aesthetics and Performance
Graphic designers and digital artists manipulate images to create unique visual compositions, often incorporating transparency and sharp graphical elements. For “Digital Art” and “Photo Manipulation,” maintaining crispness and accurate colors is paramount.
- Strategy: For graphic design elements, “Digital Art,” and images with transparent backgrounds, lossless PNG compression is often preferred, or modern formats like WebP which supports both lossy and lossless with transparency. If the design features photographic elements, targeted JPEG compression can be used for those specific parts. Resizing should match the exact dimensions required for the layout or presentation.
- Relevance to Tophinhanhdep.com: The “Visual Design” category, encompassing “Graphic Design,” “Digital Art,” and “Photo Manipulation,” emphasizes striking visuals. Our tools help designers compress their “Creative Ideas” for online portfolios or project presentations, ensuring fast loading without sacrificing the integrity of their work.
Wallpapers & Backgrounds: Delivering Stunning Visuals Everywhere
Wallpapers and backgrounds are meant to be visually immersive, often covering entire screens. They need to load quickly regardless of the device they’re adorning.
- Strategy: For “Wallpapers” and “Backgrounds,” resizing to common screen resolutions (e.g., 1920x1080, 2560x1440, various mobile aspect ratios) is crucial. Then, apply lossy JPEG or WebP compression at a moderately high quality (e.g., 70-85% JPEG quality) to ensure fast download speeds while retaining the aesthetic appeal. Users browse countless options, so efficiency is key.
- Relevance to Tophinhanhdep.com: Our extensive collections of “Wallpapers,” “Backgrounds,” “Aesthetic,” and “Nature” images are pre-optimized to provide users with a seamless browsing and download experience. We understand that a stunning background should never come at the cost of device performance.
Common Pitfalls and Expert Tips for Flawless Compression
While image compression is a powerful tool, it’s not without its challenges. Being aware of common problems and adopting best practices can help you achieve optimal results every time.
Avoiding Quality Degradation: The Art of the ‘Sweet Spot’
The most common mistake in image compression is over-compressing. Pushing the quality slider too low with lossy compression can result in:
- Pixelation: Visible blocks of color, especially in areas of subtle gradients.
- Blurring: Loss of fine details, making the image appear soft or out of focus.
- Artifacts: Unwanted visual distortions, often appearing as wavy patterns or smudges around edges.
- Color Distortion: Shifts in color tones or washed-out appearance.
Expert Tip: Test Before Saving. Always preview your compressed image, preferably side-by-side with the original, to ensure the quality degradation is acceptable for its intended use. Many online and desktop tools on Tophinhanhdep.com offer this critical feature. Professional photographers like Stephen Cardone also advise to “check the resolution and file size the website is looking for. Then, size the image to those exact dimensions.” This prevents unwanted stretching or cropping.
Beyond Compression: Integrating with Other Image Tools
Compression is just one aspect of comprehensive image management. On Tophinhanhdep.com, we offer a suite of “Image Tools” that complement compression:
- Converters: Sometimes, converting a file from one format to another (e.g., PNG to JPG for photographic content, or any format to WebP for web optimization) can yield better file size reductions or compatibility, even before compression.
- Optimizers: Many tools on Tophinhanhdep.com labeled as “Optimizers” combine resizing, compression, and format conversion for an all-in-one solution.
- AI Upscalers: In a fascinating counterpoint to compression, “AI Upscalers” can intelligently increase the resolution of a small or lower-quality image. While compression reduces data, upscaling attempts to add it back, offering solutions if you find yourself with an image that was too compressed or started too small.
Best Practices for Long-Term Image Management
To maintain a high-quality, efficient visual library, consider these tips:
- Backup Your Originals: Always keep uncompressed, high-resolution versions of your original images. Once lossy compression is applied, the lost data cannot be recovered. Cloud storage or external drives are excellent for preserving these master files.
- Batch Process Large Volumes: If you’re dealing with hundreds of images (e.g., a new “Thematic Collection” or “Mood Board”), manually compressing each one is inefficient. Use tools on Tophinhanhdep.com or dedicated software that supports batch processing to optimize multiple images simultaneously.
- Optimize Regularly: For websites and actively managed image collections, optimization isn’t a one-time task. As new images are added and content evolves, regularly review and optimize your image assets to ensure consistent performance.
Conclusion: Empowering Your Visual Content Journey with Smart Compression
In the dynamic world of digital visuals, efficient image compression is no longer optional—it’s essential. For creators and enthusiasts alike, mastering the art of reducing image file size is key to enhancing user experience, improving website performance, and streamlining digital workflows.
On Tophinhanhdep.com, our mission is to empower you to explore, create, and share stunning visual content without compromise. By understanding the principles of lossy vs. lossless compression, the importance of resizing, the nuances of different file formats, and leveraging the right “Image Tools”—be it our online compressors, built-in desktop applications, or professional software like Photoshop—you can confidently manage your “Images” and “Photography” assets.
Embrace smart compression as an integral part of your “Visual Design” process. Let your “Wallpapers,” “Backgrounds,” “Aesthetic” visuals, and “Beautiful Photography” shine with optimal speed and clarity across all platforms. Tophinhanhdep.com is here to guide your journey toward a more efficient, visually impactful digital presence. Explore our collections, utilize our tools, and elevate your visual storytelling by mastering the power of image compression.