How to Convert Image to Vector: Unleashing the Power of Scalable Graphics

In the vast and vibrant world of digital imagery, where wallpapers, backgrounds, and beautiful photography captivate our screens, the distinction between different image formats often goes unnoticed. Yet, for anyone serious about visual design, graphic art, high-resolution photography, or simply ensuring their creative ideas look their best across all mediums, understanding the difference between raster and vector graphics is paramount. More importantly, knowing how to convert an image to vector unlocks a universe of possibilities, ensuring infinite scalability, pristine clarity, and unparalleled flexibility for your visual assets.
At Tophinhanhdep.com, we specialize in not just providing a curated collection of stunning images—from aesthetic nature scenes to captivating abstract art and sad/emotional expressions—but also in equipping our users with the tools and knowledge to master their digital content. This includes a comprehensive suite of image tools like converters, compressors, optimizers, and AI upscalers, all designed to enhance your creative workflow. This article will delve deep into the process of vectorization, explaining what vector images are, why they are indispensable, and how you can transform your raster images into sharp, scalable vector masterpieces, often leveraging Tophinhanhdep.com’s specialized services and resources.

Understanding the Core Difference: Raster vs. Vector Graphics
Before embarking on the conversion journey, it’s crucial to grasp the fundamental distinction between the two primary categories of digital images: raster and vector graphics. This understanding will illuminate why vector conversion is such a powerful technique for designers, photographers, and anyone who values visual quality.
The Pixelated World of Raster Images
Most of the images we encounter daily are raster graphics. These include common file types such as JPG, PNG, GIF, and BMP. Raster images are essentially grids of tiny colored squares known as pixels. Each pixel holds specific color information, and when millions of these pixels are arranged together, they form a complete picture. This pixel-based structure is ideal for capturing the intricate details and smooth color gradations found in photographs and complex digital art. Our vast collections of high-resolution stock photos, breathtaking nature shots, and beautiful photography on Tophinhanhdep.com are typically raster images, offering rich visual fidelity.

However, the pixel-dependent nature of raster graphics comes with a significant limitation: resolution dependency. When you zoom in on a raster image or try to enlarge it beyond its original dimensions, the individual pixels become visible, leading to a “pixelated” or blurry appearance. This loss of quality can be detrimental for applications requiring extreme scalability, such as printing on a billboard or engraving intricate designs. This is why, for many professional applications and for those aspiring to truly master their visual design, converting an image to vector becomes an essential skill.
The Mathematical Precision of Vector Graphics
In stark contrast, vector graphics are not composed of pixels. Instead, they are built from mathematical equations that define geometric objects like points, lines, curves, and polygons. These mathematical descriptions dictate the precise location, length, curvature, and color of each element within the image. Common vector file formats include AI (Adobe Illustrator), EPS (Encapsulated PostScript), SVG (Scalable Vector Graphics), PDF (Portable Document Format, often containing vector data), and CDR (CorelDRAW).
The most defining characteristic and unparalleled advantage of vector graphics is their infinite scalability. Because the image is defined by mathematical paths rather than fixed pixels, it can be resized to any dimension—from a tiny icon to a massive billboard—without any loss of quality or introduction of pixelation. The lines remain crisp, the colors smooth, and the details perfectly sharp, regardless of scale. This makes vector graphics the preferred format for logos, illustrations, graphic designs, and any visual asset that needs to maintain its integrity across diverse applications. For those creating digital art or focusing on specific editing styles, the ability to manipulate individual paths and shapes in a vector image offers a level of precision and control unmatched by raster formats.
When and Why You Need Vectorization
The decision to convert an image to vector isn’t merely a technical choice; it’s a strategic one that impacts the utility, flexibility, and longevity of your visual assets. Understanding the key scenarios where vectorization is beneficial will help you make informed decisions for your projects, from creating stunning wallpapers to designing a corporate logo.
Professional Printing and Large-Scale Applications
One of the most common and critical reasons to vectorize an image is for printing, especially large-format printing. Imagine designing a beautiful background or a captivating abstract piece from Tophinhanhdep.com for a poster, banner, or even a vehicle wrap. If your original image is a raster file, blowing it up to such a scale would inevitably result in a blurry, pixelated mess. Vectorization solves this problem entirely. The mathematical definitions of vector graphics ensure that every line and curve remains perfectly sharp and smooth, no matter how large the print.
This principle extends to various other applications:
- Signage and Billboards: For advertisements that need to be seen from a distance with absolute clarity.
- Apparel and Merchandise: T-shirt printing, embroidery digitizing, and other custom merchandise rely on vector art for clean lines and vibrant colors.
- Laser Engraving and CNC Cutting: Machines used for cutting materials like wood, metal, or vinyl require vector paths to accurately interpret shapes and produce precise results.
- Decals and Stickers: Ensuring sharp edges and perfect cut lines for small-scale applications.
For our users exploring image inspiration and collections for commercial use, or those creating high-resolution stock photos for various printing demands, vector conversion is an indispensable step to ensure maximum versatility and professional output.
Branding, Logos, and Digital Assets
In the realm of branding and visual identity, vector graphics are the undisputed standard. A company logo, for example, must appear flawless on a business card, a website, social media, and a colossal building sign. If a logo were designed as a raster image, it would quickly degrade in quality when scaled up or down, undermining brand consistency and professionalism.
Vectorizing a logo ensures that it retains its crispness and clarity across all platforms and sizes. This is crucial for:
- Brand Consistency: Maintaining a uniform visual identity wherever the logo appears.
- Web and Mobile Applications: Optimizing logos and icons for various screen resolutions without sacrificing quality or increasing file size excessively.
- Creative Marketing Materials: Ensuring brochures, presentations, and digital ads feature sharp, professional-looking graphics.
Tophinhanhdep.com assists many businesses and creatives in transforming their existing images or sketches into pristine vector logos, providing a solid foundation for their brand’s visual elements and enhancing their digital photography portfolio with perfectly scalable assets.
Flexibility in Editing and Future-Proofing
Beyond scalability and print quality, vector graphics offer unparalleled flexibility in editing. Because vector images are composed of independent mathematical paths, you can easily select, manipulate, and modify individual components without affecting the rest of the image. Want to change the color of a specific element in your design? Adjust its shape? Rotate a segment? With vector art, these tasks are straightforward and non-destructive.
This ease of modification is invaluable for:
- Graphic Design and Digital Art: Allowing for rapid iteration and refinement of creative ideas.
- Photo Manipulation: Converting a photo to a vector sketch or outline provides a clean base for further artistic embellishments or stylized effects.
- Future Adaptability: As design trends evolve or new applications emerge, vector assets can be easily adapted without starting from scratch, making them a future-proof investment.
For anyone pursuing visual design or digital art, the ability to maintain editable, high-quality files is a game-changer. It means your creative ideas, whether stemming from a sad/emotional photography piece or an abstract pattern, can be infinitely tweaked and reused without loss of original fidelity, a core philosophy championed by the tools and resources available on Tophinhanhdep.com.
Manual Image to Vector Conversion: A Step-by-Step Guide
While automated tools exist, the most precise and high-quality vector conversions often involve manual or semi-manual tracing using specialized graphic design software. For those looking to master digital photography and visual design, understanding these methods is invaluable. We’ll primarily focus on the widely used Adobe Illustrator due to its robust Image Trace feature, a staple for many professionals, while also touching upon the meticulous art of manual tracing.
Preparing Your Raster Image for Conversion
Before diving into the conversion process, a well-prepared raster image can significantly impact the quality of your vector output.
- Choose a High-Quality Source Image: While vectorization helps with scalability, starting with a clear, well-defined raster image (like the high-resolution photography you can find on Tophinhanhdep.com) will yield better results. Blurry or low-resolution originals will often result in vague vector shapes.
- Simplify if Possible: For detailed photographs, consider pre-processing in a photo editing tool to reduce noise, enhance contrast, or even simplify the color palette. For logos or line art, ensure sharp edges and distinct lines.
- Crop and Clean: Remove any unnecessary elements or backgrounds that you don’t want vectorized. This can be done using Tophinhanhdep.com’s image optimizers or basic photo editing software.
Utilizing Advanced Tracing Tools (e.g., Image Trace in Illustrator)
Adobe Illustrator’s “Image Trace” feature is a powerful tool that automatically converts raster images into editable vector graphics. It analyzes the pixels and generates vector paths based on the image’s colors and shapes.
Step-by-Step in Adobe Illustrator:
-
Open a New Document: In Illustrator, go to
File > Newto create a new artboard. You can specify dimensions, for example, 470px width and 350px height, then save your file. -
Place Your Raster Image: Go to
File > Place...and select the raster image you wish to convert. Click ‘Place’ and then click on your artboard to position the image. You can resize it using the “Free Transform Tool” if needed. -
Open the Image Trace Panel: With your image selected, navigate to
Window > Image Trace. This will open the Image Trace panel, giving you access to various presets and settings. -
Select a Preset: The Image Trace panel offers a dropdown menu with several presets designed for different types of images:
- High Fidelity Photo: Attempts to retain maximum detail and color from photographs.
- Low Fidelity Photo: Simplifies photographic details and colors, useful for stylized looks.
- 3 Colors / 6 Colors / 16 Colors: Reduces the image to a specified number of colors, ideal for illustrations or simplified logos.
- Sketched Art / Line Art: Excellent for converting drawings or outlines into clean vector paths.
- Silhouettes: Creates a single-color vector shape from the darkest areas of an image.
- Technical Drawing / Logo: Suited for precise, clean line work.
Experiment with these presets. For instance, selecting “Low Fidelity Photo” might convert a complex image into a vector with a limited color palette (e.g., 241 colors), providing a quick, stylized result. Trying “Line Art” or “Sketched Art” can yield completely different artistic interpretations, transforming your image inspiration into unique digital art.
-
Adjust Advanced Settings (Optional but Recommended): Click on the
Advancedarrow within the Image Trace panel to reveal more fine-tuning options.- Mode: Choose
Color,Grayscale, orBlack and Whitedepending on your desired output. - Palette: For Color mode, select
Automatic,Limited, orDocument Libraryto control the color selection. - Colors: If using a limited palette, adjust the number of colors.
- Paths: Controls the accuracy of the vector paths to the original pixels. Higher values create more detailed, complex paths; lower values result in smoother, simpler shapes. For intricate details, you might increase this (e.g., to 85%).
- Corners: Determines how sharp or rounded corners will be. Higher values produce sharper corners; lower values result in more rounded shapes.
- Noise: Controls the minimum area in pixels that can be vectorized. Lower noise values capture more fine details and small variations; higher values ignore minor imperfections, smoothing out the image. Keep this value low if you want to retain details.
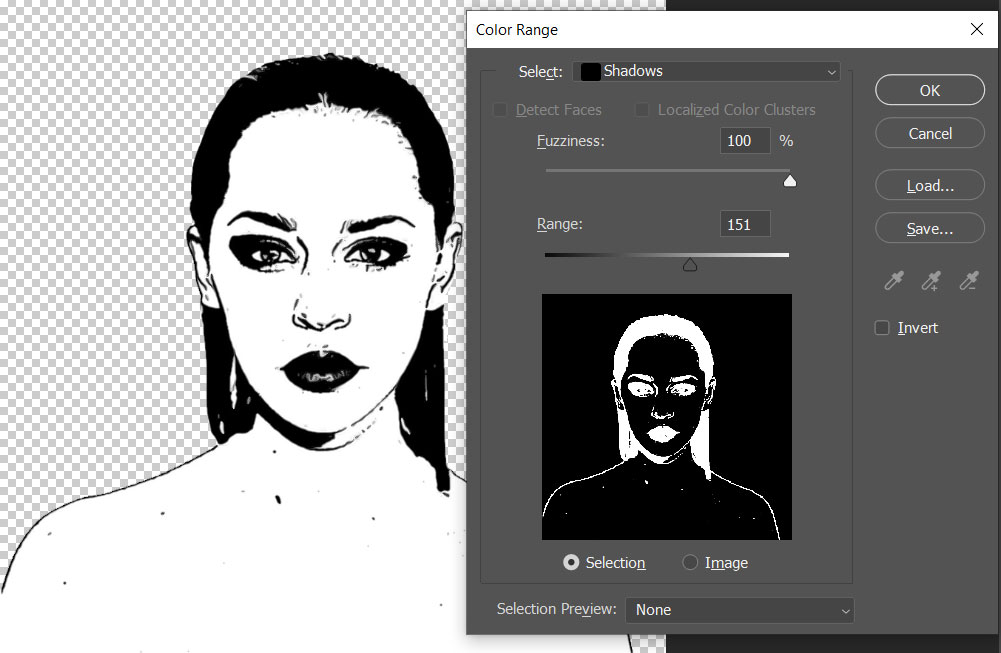
- Threshold: (For Black and White mode) Defines the pixel brightness level for conversion. Pixels darker than the threshold become black; lighter pixels become white. Increasing the threshold makes the image darker.
- Ignore White: Check this option to make the white areas of your trace transparent, which is often desirable for logos or designs that will be placed on colored backgrounds.
- Mode: Choose
-
Review and Refine: As you adjust settings, ensure the
Previewcheckbox is ticked to see the changes in real-time. This iterative process allows you to achieve the perfect balance between detail, simplicity, and artistic style. -
Expand the Trace: Once you are satisfied with the tracing result, the image is still technically a “live trace,” linked to the raster original. To convert it into fully editable vector objects (individual paths and shapes), click the
Expandbutton in the Image Trace panel or go toObject > Image Trace > Expand. This step is crucial; it converts the tracing into a series of anchor points and paths that you can manipulate. -
Final Touches: After expanding, you can use the
Direct Selection Tool(white arrow) to select and refine individual anchor points, smooth curves, or adjust colors as needed. You now have a truly editable vector object!
Note: You can always remove a trace by selecting the traced image and going to Object > Image Trace > Release, returning it to a raster image if you need to start over.
The Art of Manual Tracing with the Pen Tool
For highly precise vectorization, especially with complex or artistic images where automated tracing might not capture the nuances, manual tracing with the Pen tool in software like Adobe Illustrator is the gold standard. This method gives you complete control over every curve and corner, making it ideal for creating vector versions of intricate photography, detailed digital art, or unique photo manipulations.
The Process:
- Import and Lock: Place your raster image onto a new layer in Illustrator. Lock this layer to prevent accidental movement.
- Create a New Layer: Create a new layer above your raster image for your vector paths.
- Use the Pen Tool: Select the Pen tool. Carefully trace the outlines and distinct shapes of your image, creating anchor points and Bezier curves to accurately replicate the forms. Take your time, zooming in closely for precision.
- Fill and Stroke: Once a path is closed, you can fill it with a color sampled directly from the original raster image using the Eyedropper tool. You can also apply strokes (outlines) if desired.
- Layer by Layer: For images with multiple colors or overlapping elements, trace each distinct color area or object on its own to maintain separation and ease of editing.
- Hide or Delete Original: Once all elements are traced and colored, hide or delete the original raster image layer to reveal your complete vector artwork.
While more time-consuming, manual tracing ensures the highest level of accuracy and artistic control, perfectly aligning with the meticulous standards expected for high-resolution photography and professional visual design.
Exploring Other Software and Online Tools for Vectorization
While Adobe Illustrator remains a professional benchmark, a variety of other software and online platforms offer solutions for converting images to vectors, catering to different needs and skill levels. Tophinhanhdep.com, as a hub for image tools and creative ideas, recognizes the importance of accessible options and also provides expert services for those requiring professional-grade results.
Free and Open-Source Solutions
Several free software options provide robust vectorization capabilities, making vector art creation accessible to a broader audience:
- Inkscape: A popular open-source vector graphics editor, Inkscape offers a “Trace Bitmap” feature similar to Illustrator’s Image Trace. You can import JPG or PNG images and use various settings (like brightness threshold, edge detection, or multiple scans for color images) to generate vector paths. It’s a powerful tool for converting image inspiration into editable vector formats, though it requires installation.
- Vectr: An intuitive, free vector graphics editor available both online and as a desktop application. While it doesn’t have an automatic trace feature as advanced as Inkscape or Illustrator, it’s excellent for manually drawing and creating vector shapes from scratch or tracing simple images.
- Generic Online Converters: Numerous websites claim to convert flat images to vectors for free. While convenient, these often come with trade-offs. Many generate imprecise or “crooked” lines, include watermarks, produce unnecessary extra shapes, or are laden with advertisements that can sometimes lead to security risks. The resulting vector often requires significant manual cleanup in dedicated software, making them less ideal for professional visual design or high-quality output. While they can be a quick solution for basic, non-critical needs, they rarely match the accuracy and clarity achievable through more controlled methods or expert services.
For users exploring creative ideas or simple image-to-text conversion features, these tools might offer a quick start. However, when quality and precision are paramount, Tophinhanhdep.com encourages a more refined approach.
Leveraging Tophinhanhdep.com’s Expert Services
Understanding the complexities and potential pitfalls of automated or novice vector conversion, Tophinhanhdep.com offers premium, professional “Photo to Vector Art” services. We bridge the gap between quick, imperfect automated solutions and the demanding, time-consuming manual process, ensuring that your beautiful photography, aesthetic backgrounds, or critical branding elements are transformed into flawless vector art.
Why Choose Tophinhanhdep.com’s Vectorization Services?
- High Accuracy, Manual Tracing: Unlike simple auto-trace filters, our team of skilled graphic designers performs intricate, hand-crafted conversion. We redraw the image from scratch using anchor points and curves, guaranteeing the clarity, detail, and precision you desire. This method is critical for maintaining the artistic integrity of your digital art or the exact specifications of your logos.
- Versatile Conversion: Whether you need a cartoon-style portrait, a detailed vector illustration from a photo, a clean outline for T-shirt printing, or to vectorize a blurry business logo, we have the talent and tools. Our services include:
- Manual Vector Tracing: To guarantee clarity and detail.
- Vectorization of Logos: Recreating blurry logos into sharp vector formats.
- Portrait Vector Art: Transforming selfies, family photos, or pet images into elegant vector art.
- Cartoon Vector Art: Turning images into animated vector artwork.
- Outline and Silhouette Vector Art: Perfect for stencils, engraving, or minimal branding.
- Broad File Format Support: We deliver your vector art in all industry-standard formats, including AI, EPS, SVG, PDF, DXF, and CDR, ensuring compatibility for printing, embroidery, web use, signage, and various cutting machines.
- Fast Turnaround & Affordability: We pride ourselves on quick delivery, typically within 24-48 hours, while maintaining affordable prices and offering volume discounts.
- Unlimited Revisions: Your satisfaction is our priority. We offer unlimited revisions until you are completely happy with the final vectorized image.
- US-based Customer Support: Our dedicated support team is available to assist you throughout the process, ensuring a smooth and personalized experience.
The process is simple: Upload your picture, let us know your desired style (realistic, line art, cartoon, or custom), our professional designers begin the manual tracing, you approve the design (with revisions if needed), and then download your production-ready vector files. This service is ideal for brands in the fashion industry, artists digitizing their work, photographers creating digital art portfolios, or companies needing vector files for cutting machines.
Converting Specific File Types (PDF, JPG, PNG to Vector)
Our services at Tophinhanhdep.com are equipped to handle a wide array of raster inputs, primarily converting JPG, PNG, GIF, and BMP files to vector. We also efficiently convert PDF files to vector, recognizing that some PDFs may already contain vector data, simplifying the process. If a PDF contains only raster images, our manual tracing ensures the embedded images are converted to true vector paths, not just raster images within a vector container. This comprehensive approach ensures that whatever your starting material, Tophinhanhdep.com can deliver a high-quality vector output, ready for any application.
Optimizing Your Vector Assets and Beyond
The journey doesn’t end once your image is converted to vector. Optimizing your vector assets and understanding their broader applications within the creative ecosystem of Tophinhanhdep.com will empower you to maximize their potential.
Choosing the Right Vector File Format
Selecting the appropriate vector file format is crucial for compatibility and functionality across different platforms and uses.
- AI (Adobe Illustrator Artwork): The native format for Adobe Illustrator, offering full editing capabilities. Ideal for graphic designers and digital artists working within the Adobe ecosystem.
- EPS (Encapsulated PostScript): A versatile format widely supported by various design software and print houses. Excellent for logos and illustrations that need to be used in diverse applications.
- SVG (Scalable Vector Graphics): An XML-based vector image format specifically designed for the web. Supported by all modern web browsers, making it perfect for website illustrations, icons, and interactive graphics. Its small file size and scalability make it invaluable for web optimization.
- PDF (Portable Document Format): While often used for documents, PDFs can contain vector data, preserving resolution independence. They are great for sharing proofs and final designs for print.
- DXF (Drawing Exchange Format): A CAD data file format developed by Autodesk, primarily used for interoperability between CAD programs. Essential for engineers, architects, and those using CNC cutting or laser engraving machines.
- CDR (CorelDRAW File): The native format for CorelDRAW, popular in certain industries and regions.
Tophinhanhdep.com provides all these formats, ensuring your vectorized images are ready for any project, from digital art to professional signage.
Integrating Vector Art into Your Creative Workflow
Vector art seamlessly integrates into various aspects of digital and print media, enhancing the quality and versatility of your creative projects.
- Graphic Design: Core for creating logos, icons, infographics, and branding elements.
- Web Design: Essential for responsive designs, ensuring crisp graphics on all screen sizes, and for optimizing loading times with smaller file sizes (SVG).
- Print Design: Guarantees sharp, high-resolution output for everything from business cards and brochures to posters and billboards.
- Apparel Design: Provides clean lines for screen printing, heat transfers, and embroidery.
- Digital Art and Illustration: Offers precise control over shapes and colors, allowing for intricate detailing and easy modifications.
- Photo Manipulation: Converts photographic elements into stylized vector components, opening new avenues for artistic expression and hybrid image creation.
By incorporating vectorization into your workflow, you elevate the professional quality of your work, whether you’re a seasoned designer, a budding digital artist, or a photographer looking to expand the utility of your images.
The Broader Creative Potential with Tophinhanhdep.com
At Tophinhanhdep.com, we understand that “how to convert image to vector” is more than just a technical instruction; it’s a gateway to boundless creative possibilities. Our platform is dedicated to inspiring and equipping you with everything you need for your visual projects:
- Images & Photography: Imagine taking one of our high-resolution nature photos, converting it to a stylized vector line art, and using it for a unique T-shirt design. Or transforming an abstract image into a scalable vector wallpaper that looks perfect on any device.
- Image Tools: Beyond vector conversion, our suite of image tools—including compressors, optimizers, and AI upscalers—ensures that all your digital assets, whether raster or vector, are perfectly prepared for their intended use. Our image-to-text tools can even assist in extracting information from your visual assets, further enhancing productivity.
- Visual Design: From graphic design tutorials to photo manipulation techniques, Tophinhanhdep.com nurtures your creative ideas. Vector art provides the foundational clarity and flexibility needed to bring complex visual designs and digital art to life with precision.
- Image Inspiration & Collections: Our curated collections and mood boards offer trending styles and photo ideas. Vectorizing elements from these inspirations allows you to customize and adapt them without quality degradation, making them uniquely yours for any project. Whether it’s a sad/emotional theme translated into a compelling vector illustration or a vibrant aesthetic background re-imagined as a print-ready design, vectorization offers the ultimate creative freedom.
In essence, vectorization is not just about changing a file format; it’s about unlocking the true potential of your images, making them infinitely adaptable, professionally presentable, and ready for any future application.
Conclusion
The ability to convert an image to vector is a cornerstone skill for anyone involved in digital imaging, graphic design, and professional printing. It empowers creators to overcome the limitations of raster graphics, ensuring that their visual assets maintain pristine quality, infinite scalability, and ultimate flexibility across all mediums. From crafting stunning logos and large-format advertisements to producing unique digital art and merchandise, vector graphics are indispensable.
While various software and online tools offer conversion capabilities, the precision and quality delivered by expert, manual vectorization are unmatched. Tophinhanhdep.com stands as your premier partner in this journey, offering not only comprehensive guides and resources but also specialized, high-accuracy “Photo to Vector Art” services. We ensure your cherished photography, creative ideas, and essential branding elements are transformed into flawless, production-ready vector masterpieces.
Explore the vast resources on Tophinhanhdep.com for images, photography tips, image tools, visual design inspiration, and creative collections. Let us help you unlock the full potential of your visual assets and bring your most ambitious creative ideas to life, in perfect, scalable clarity. Whether you’re enhancing a wallpaper, preparing a background for print, or designing a new logo, knowing how to convert your images to vector, especially with the professional support from Tophinhanhdep.com, will undoubtedly elevate your visual design endeavors to new heights.