How to Create a Cinema Theater Place Image with Photoshop: From Concept to Cinematic Masterpiece

The allure of the cinema is undeniable – the vast screen, the immersive darkness, the anticipation of a story unfolding. For designers, photographers, and visual artists, recreating this magical atmosphere in a digital image presents a fascinating challenge and a powerful opportunity. Whether you’re aiming to showcase a film poster, craft a dramatic visual narrative, or simply capture the essence of the movie-going experience, learning “how to create a cinema theater place image with Photoshop” unlocks a world of creative possibilities. This comprehensive guide will walk you through various techniques, from leveraging convenient mockup generators to diving deep into advanced Photoshop manipulation, all while connecting to the core strengths of Tophinhanhdep.com in images, photography, image tools, visual design, and inspiration.
In today’s visually-driven world, a high-quality, impactful image can speak volumes. A well-crafted cinema theater image can be used for promotional materials, website backgrounds, social media campaigns, or even as a creative piece of digital art. The journey from a blank canvas or a basic photograph to a compelling cinematic scene requires a blend of artistic vision and technical proficiency. Photoshop, as the industry standard for image editing, provides the robust toolkit necessary to achieve professional-grade results. Tophinhanhdep.com, with its vast resources of Images (Wallpapers, Backgrounds, Aesthetic, Nature, Abstract, Sad/Emotional, Beautiful Photography), Photography (High Resolution, Stock Photos, Digital Photography, Editing Styles), Image Tools (Converters, Compressors, Optimizers, AI Upscalers, Image-to-Text), Visual Design (Graphic Design, Digital Art, Photo Manipulation, Creative Ideas), and Image Inspiration & Collections (Photo Ideas, Mood Boards, Thematic Collections, Trending Styles), serves as an invaluable partner in this creative endeavor.
The Foundation of Visual Storytelling: Sourcing and Preparing Your Images
Every great visual begins with strong source material. To create a convincing cinema theater place image, you need to think about the various elements that compose such a scene: the screen itself, the auditorium, the lighting, and any imagery projected onto the screen. Tophinhanhdep.com’s extensive categories for Images and Photography are your first stop.
Choosing the Right Visuals: Wallpapers, Backgrounds, and High-Resolution Stock Photos
The choice of your base images sets the tone for your entire project.
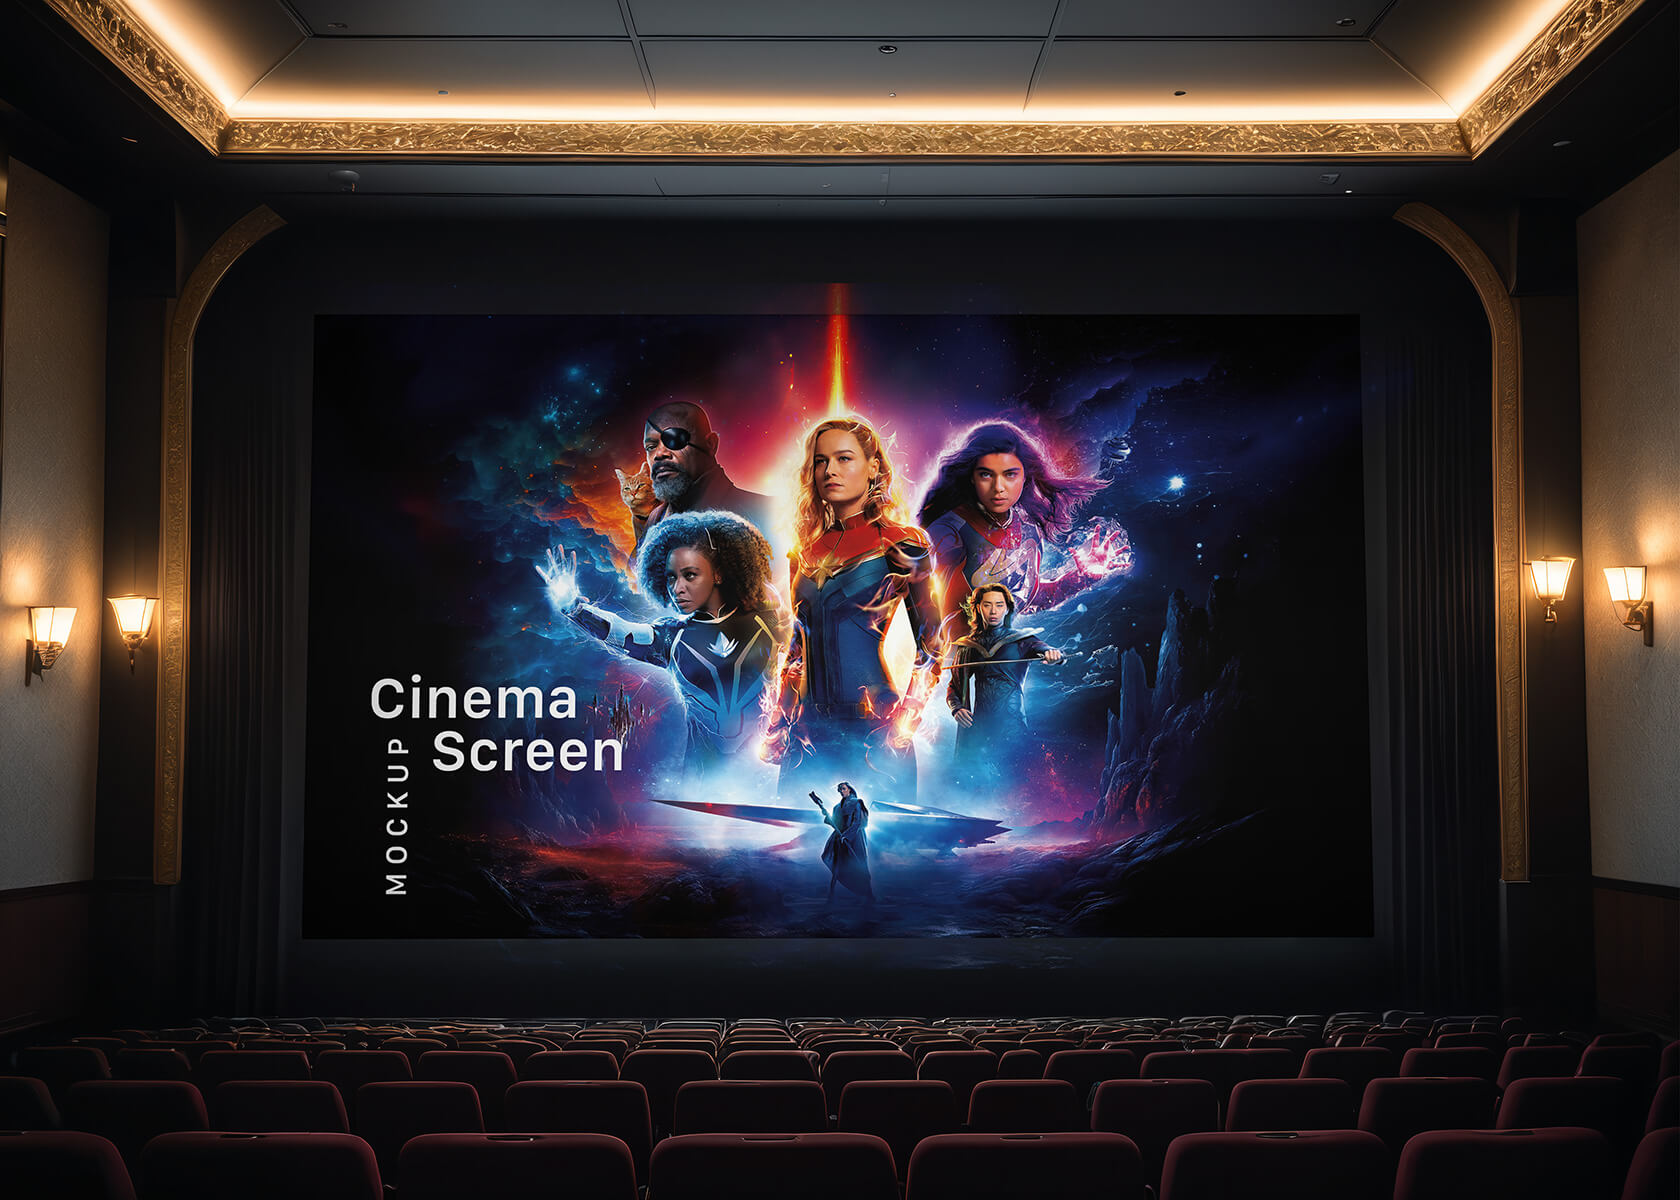
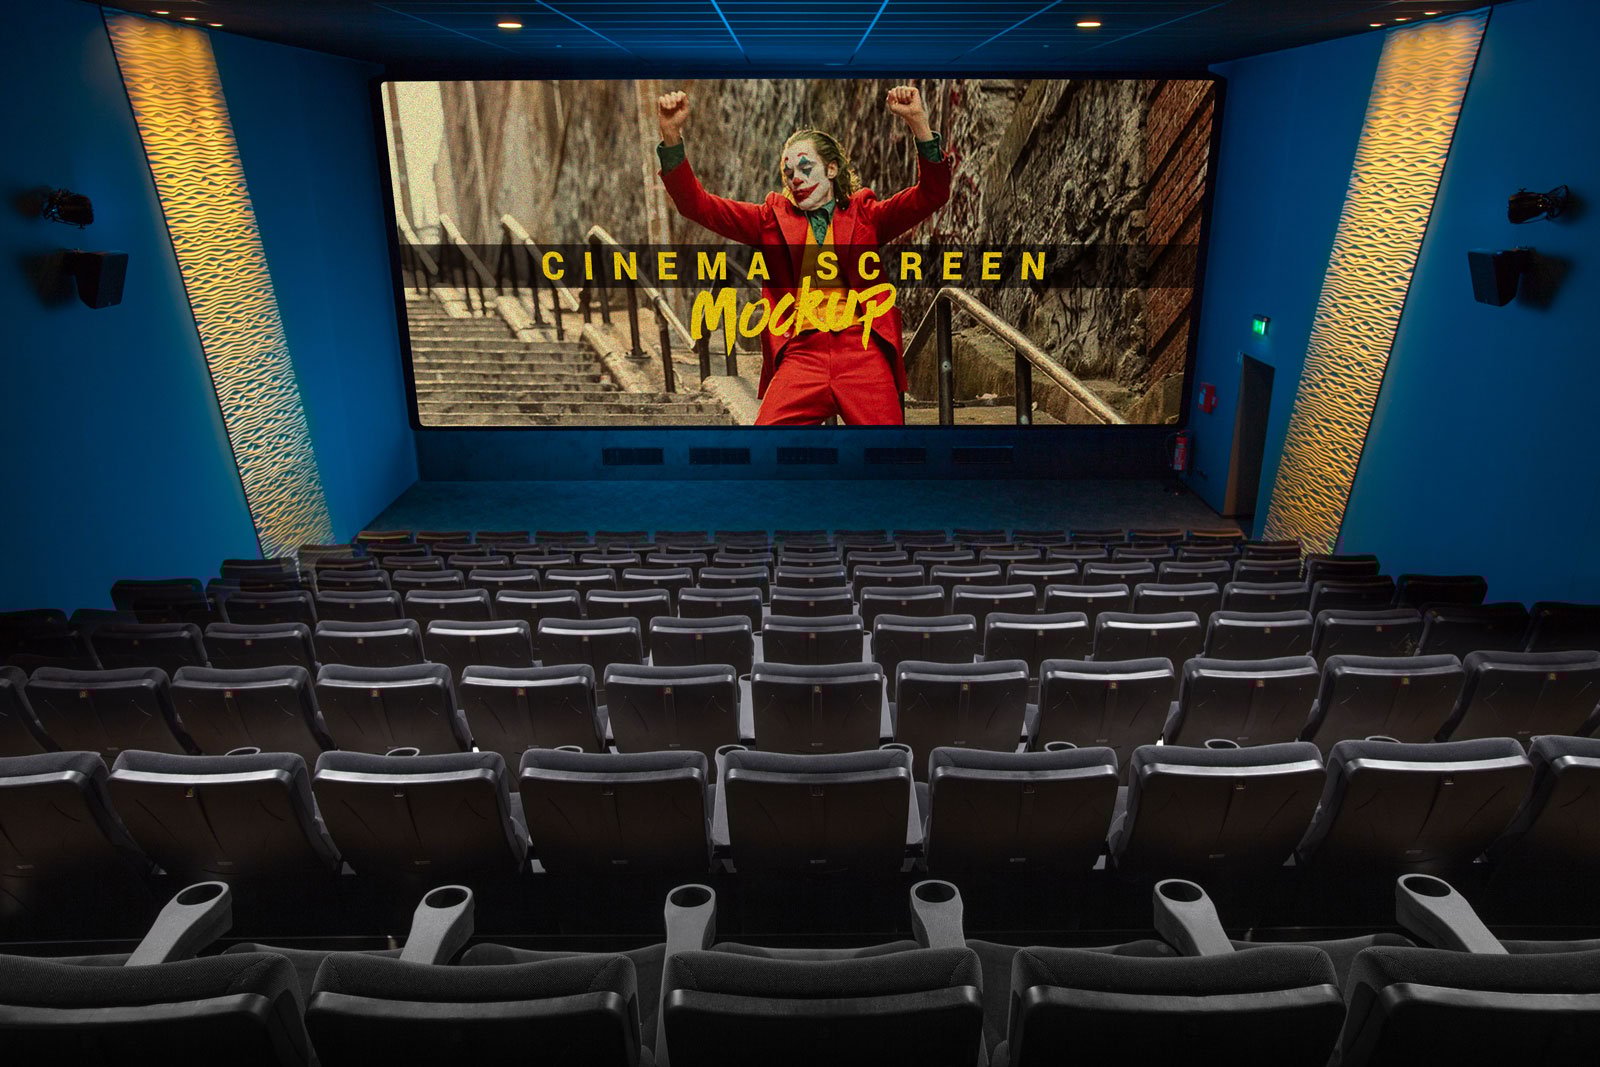
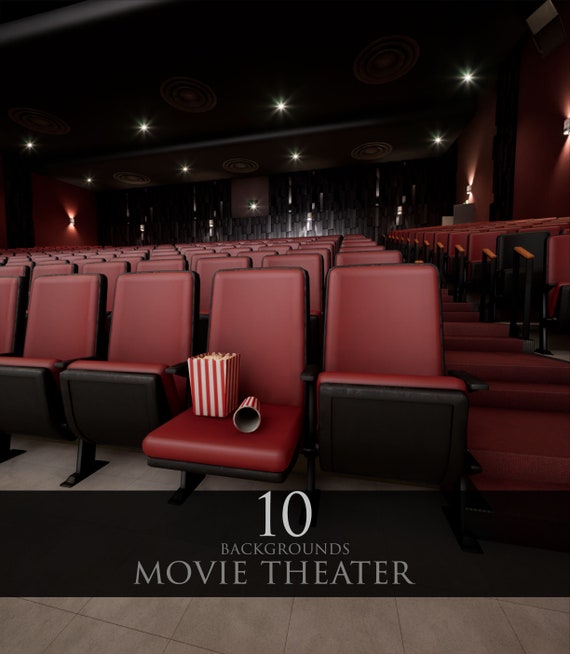
- For the Cinema Hall/Auditorium: Look for high-resolution images of movie theaters, concert halls, or auditoriums. Tophinhanhdep.com offers a rich selection of “Backgrounds” and “Beautiful Photography” that can serve this purpose. Consider the perspective – are you looking at the screen from the audience, or from behind the stage? The perspective will dictate the angle and distortion needed for your projected image. The presence of seats in the foreground or background can add realism, as seen in the “Image on Cinema/Movie Hall Screen Mockup” concept, providing a sense of depth and scale.
- For the Projected Image: This is where your chosen content shines. It could be a movie poster, a still from a film, a logo, or any custom design you wish to display. The “High Resolution” and “Stock Photos” sections on Tophinhanhdep.com are perfect for finding crisp, professional-grade images that will look good when magnified onto a large digital screen. If you’re creating a moody, abstract scene, “Abstract” images could be ideal. For a dramatic movie scene, “Nature” or “Sad/Emotional” photography might provide the perfect backdrop.
- Aesthetic Considerations: Think about the overall aesthetic you’re aiming for. Do you want a classic, grand theater look, or a more modern, minimalist cinema? The lighting conditions in your source image will heavily influence the final cinematic mood. Darker, more atmospheric images often provide a better canvas for projected light effects.
Digital Photography Principles for Cinematic Effects
Even if you’re using stock photos, understanding basic photography principles will help you select and manipulate them effectively.
- Composition: Pay attention to the rule of thirds or leading lines in your base image. These principles can help you naturally guide the viewer’s eye towards the cinema screen, which is your focal point.
- Lighting: Observe the existing light sources in your chosen cinema hall image. This will be crucial when adding your projected image, ensuring the light spill and reflections look natural. A darkened hall with subtle ambient lighting is usually preferred, allowing the brightness of the “screen” to stand out.
- Perspective and Distortion: The screen in a cinema hall is almost never perfectly flat or head-on. It’s usually seen at an angle, and often slightly curved. Understanding basic perspective will enable you to correctly place and distort your projected image to match the scene.
Essential Image Preparation: Cropping, Resizing, Initial Adjustments
Before diving into complex Photoshop work, ensure your base images are properly prepared.
- Cropping and Resizing: Make sure your base cinema hall image is of a suitable size and aspect ratio for your final output. Tophinhanhdep.com’s “Image Tools” can assist with “Converters” and “Compressors” if you need to adjust file types or sizes without losing quality.
- Initial Adjustments: Perform basic adjustments like levels, contrast, and color balance to ensure your background image looks its best before integrating other elements. This foundational work sets the stage for seamless blending. If your base image isn’t quite high-resolution enough, “AI Upscalers” from Tophinhanhdep.com’s toolkit can be a lifesaver, enhancing image quality without pixelation.
Instant Cinematic Impact: Harnessing Mockup Generators
For those seeking a quick, efficient, and professional way to display an image on a cinema screen, mockup generators are an indispensable tool. Tophinhanhdep.com, like similar platforms, offers powerful “cinema screen mockup” and “projector screen” generators that streamline the creative process, often bypassing the need for extensive Photoshop knowledge. These tools fall squarely under the “Visual Design” category, offering “Creative Ideas” through pre-designed templates.
What are Cinema Hall Mockups?
A cinema hall mockup is a pre-designed template, often available as a PSD file or an online generator, that features a realistic depiction of a cinema screen within an auditorium setting. The key feature is a designated “smart object” or placeholder area where you can easily insert your own image or design. The mockup then automatically applies the correct perspective, lighting, and distortions to make your inserted image appear seamlessly integrated into the cinema scene. These mockups are specifically designed to create “image on cinema screen effect” or “picture on cinema screen template” with minimal effort.
How Tophinhanhdep.com’s Mockup Generators Work
Tophinhanhdep.com provides user-friendly mockup generators that simplify the creation of compelling cinema visuals. Let’s take the “Large Cinema Hall Screen Mockup Generator” or the “Image on Cinema/Movie Hall Screen Mockup” as examples.
Step-by-Step Usage:
- Select Your Mockup: Browse Tophinhanhdep.com’s “Visual Design” or “Image Effects” categories for relevant cinema or projector screen mockups. You’ll find options like a “large cinema hall screen mockup generator” or a “movie hall screen mockup with seats.”
- Load the Template: Once you’ve chosen a template, click to “Load template” or “Edit this template.” This will typically open an online editor or prepare a downloadable PSD file.
- Insert Your Image/Design: The core functionality involves replacing a placeholder. You’ll usually see a layer labeled “Your Image” or “Add image/design.”
- Click “Add your image” to upload a file from your computer.
- Alternatively, you might have an option to “Create a design” directly within the editor, which could integrate with a basic design tool.
- The template specifications, such as “1535x690px” or “1131x657px,” indicate the optimal size for your input image to fit perfectly without requiring extensive resizing.
- Customize (Optional): Some mockups offer additional layers for customization, such as a “mask” layer that helps define the screen’s edges or interacts with lighting. You can “Enable or disable this layer” to see its effect.
- Review and Download: Once your image is placed, the generator processes it, rendering it realistically onto the cinema screen. Review the preview.
- If satisfied, choose your desired “Download formats” (typically JPEG, PNG) and click “Download Image.”
- You might also have options to “Save Mockup,” “Publish to Social Media,” or “Open in Design Editor” for further tweaks.
Benefits of Using Mockup Generators:
- Speed and Efficiency: Create a professional cinema scene in minutes, not hours. This is ideal for quick promotional needs or rapid prototyping.
- Professionalism: Mockups are typically designed by professionals, ensuring high quality, realistic lighting, and accurate perspective without requiring advanced Photoshop skills.
- Versatility: Tophinhanhdep.com offers a range of mockups, from simple “projector screen” displays to more elaborate “cinema scene” setups with audience seating. This allows you to choose the best fit for your visual narrative.
- Accessibility: Even users with limited graphic design experience can produce impressive results.
Exploring Different Cinema Mockup Scenarios
Tophinhanhdep.com provides a variety of “cinema mockup generator” templates to cater to different needs:
- Large Cinema Hall Screen Mockup: Ideal for showcasing a movie poster or a striking visual that needs to dominate the frame.
- Image on Cinema/Movie Hall Screen Mockup with Seats: Provides context and realism by including the audience perspective, making it feel like a live screening.
- Projector Screen Mockups: More versatile, these can represent corporate presentations, educational settings, or even a home cinema experience.
These tools are not just for cinema, but also for other display needs like “Big Screen Home Cinema Mockup Generator,” “Projector Display Screen Mockup Generator,” or “Projector Screen on Stage Mockup Template.”
Beyond Mockups: When to Opt for Deeper Photoshop Manipulation
While mockups are fantastic for speed and simplicity, they offer limited creative control. If you have a very specific vision, need to integrate complex elements, or want to create a truly unique effect (like the “Matrix movie effect” mentioned in the source material), then diving into Photoshop’s full capabilities is essential. This is where “Digital Art” and “Photo Manipulation” from Tophinhanhdep.com’s Visual Design category become paramount.
Mastering Photoshop: Creating a Custom Cinema Theater Place Image
For unparalleled creative control, a deeper dive into Photoshop’s advanced features is necessary. This section draws heavily from photo manipulation techniques, blending modes, and filter effects, allowing you to build a cinema scene from scratch or profoundly alter existing images.
Setting the Scene: Building Your Cinematic Base Image
The foundation of any complex photo manipulation project is the careful selection and preparation of your base images.
Starting with a Base: Cityscapes or Interior Shots
As demonstrated in tutorials like “Create a Movie Scene for a City” or the “Matrix movie effect,” starting with a strong background is crucial.
- Urban Cityscapes: A city scene with tall buildings provides a dramatic and versatile backdrop, especially for sci-fi or action-themed cinema scenes. Tophinhanhdep.com’s “Wallpapers” and “Beautiful Photography” sections can offer numerous high-resolution city photos.
- Empty Halls: If your focus is purely on the screen within an empty hall, find an image of an empty auditorium. Ensure it has good depth and perspective.
Establishing Mood: Black & White Conversions and Levels Adjustments
To create a truly cinematic mood, color and tone are paramount.
- Black and White Conversion: For a dramatic or stylized look, convert your base image to black and white using an adjustment layer (e.g., Black & White adjustment layer in Photoshop). This helps simplify the color palette and emphasize light and shadow. You can use layer masks to selectively apply this effect, as shown in the “Matrix movie effect” tutorial.
- Levels and Curves Adjustments: These are fundamental for controlling the image’s tonal range.
- Levels: Adjust the black, white, and mid-tone points to enhance contrast and deepen shadows. For a dark cinema, you’ll want to crush the blacks slightly to create that immersive darkness.
- Curves: Offers even finer control over specific tonal ranges, allowing you to sculpt the light and shadow more precisely.
- Apply these as adjustment layers with clipping masks to your base city layer (or hall layer) to maintain non-destructive editing. Use layer masks on these adjustment layers to refine where the effects are applied, preventing them from affecting areas that should remain bright.
Crafting the Environment: Sky Replacement and Atmospheric Elements
- Sky Replacement/Enhancement: Often, the existing sky in a cityscape isn’t dramatic enough. In the “Matrix movie effect” tutorial, the sky is filled with black color and faded at the bottom. This radical change instantly shifts the mood. You can also replace a mundane sky with a moody, stormy, or twilight sky from Tophinhanhdep.com’s “Nature” wallpapers, using selection tools (like Quick Selection or Select and Mask) and blending modes.
- Atmospheric Elements: Add elements like fog, mist, or rain to enhance realism and mood. These can be painted in using soft brushes on new layers with low opacity, or by overlaying textured images found in “Abstract” collections on Tophinhanhdep.com and using blending modes like Screen or Soft Light.
Applying Advanced Photoshop Effects and Blending Modes for Theatrical Impact
Once your base scene is established, the real magic of Photoshop begins as you integrate the “cinema screen” element and apply various effects.
Integrating the “Screen” Element: Projector Effects and Light Spill
- Placing the Screen Image: Copy and paste your chosen image (the one that will appear on the screen) onto your canvas. Use the Free Transform tool (Ctrl/Cmd + T) to scale, rotate, and distort it to match the perspective of the cinema screen or projector surface in your scene. This requires careful attention to the vanishing points of the room.
- Creating Light Spill: A projected image wouldn’t just sit flat; it would illuminate the surrounding area.
- Create a new layer above your screen image.
- Use a large, soft-edged brush with a color sampled from your screen image (e.g., a dominant color from the movie poster).
- Paint gently around the edges of the screen, extending onto the walls or floor.
- Change this layer’s blending mode to “Soft Light” or “Overlay” and reduce its opacity to create a subtle glow. This effect adds immense realism to your “image on cinema effect.”
Layer Blending Mastery (e.g., Color Dodge for Digital Effects)
Blending modes are crucial for seamlessly integrating different elements and creating unique effects. The “Matrix movie effect” tutorial highlights the power of “Color Dodge.”
- Color Dodge: This blending mode dramatically brightens colors, often creating a glowing, intense effect. In the Matrix example, it’s used to make the digital code appear to emit light, transforming a drab street into a sci-fi landscape. Apply a “Matrix” texture (perhaps from Tophinhanhdep.com’s “Abstract” images) over areas like the street or even the entire image, then set its blend mode to “Color Dodge.” Adjust opacity to control intensity.
- Other Blending Modes:
- Screen: Excellent for combining light elements, making darker areas transparent. Useful for subtle glow effects or integrating light textures.
- Overlay/Soft Light: Ideal for colorizing, enhancing contrast, and adding mood without overpowering the base image.
- Multiply: Good for deepening shadows or adding darker textures.
- Experiment with different blending modes to achieve various visual effects, from ghostly apparitions to vibrant digital overlays.
Color Grading and Tonal Adjustments (Selective Color)
Once all elements are in place, unifying the image with a consistent color grade is vital for a cinematic look.
- Selective Color Adjustment: This powerful adjustment layer (Image > Adjustments > Selective Color) allows you to modify the amount of cyan, magenta, yellow, and black in specific color ranges (reds, yellows, greens, cyans, blues, magentas, whites, neutrals, blacks).
- As shown in the “Matrix movie effect” tutorial, this can be used to further enhance specific color tones, like pushing greens for a sci-fi feel or warming up yellows for a nostalgic vibe.
- This is an advanced technique for precise color manipulation and mood setting.
- Color Balance/Hue/Saturation: Simpler adjustments can be made with Color Balance (to shift overall color temperature) or Hue/Saturation (to adjust specific color ranges’ hue, saturation, and lightness). For the “Matrix” aesthetic, a green hue shift is often central.
Adding Depth and Realism: Shadows, Highlights, and Perspective
- Shadows: Add subtle shadows beneath elements (like the man in the street in the “Matrix” tutorial) to ground them in the scene. Use a soft black brush on a new layer with low opacity, set to “Multiply” blend mode.
- Highlights: Use soft white brushes on new layers with “Screen” or “Overlay” blend modes to add glints of light, reflections on surfaces, or to emphasize areas hit by the “projected” light.
- Atmospheric Haze/Depth: Create a new layer filled with a dark color (e.g., dark blue/grey). Apply a Gaussian Blur to it, then set the blend mode to “Screen” or “Soft Light” with low opacity. This can simulate atmospheric haze, adding depth and making distant objects appear less sharp.
Mastering the Cinematic Aesthetic: Expert Tips and Creative Enhancements
Taking your cinema theater place image from good to spectacular involves attention to detail and creative experimentation. Tophinhanhdep.com’s “Image Inspiration & Collections” can provide countless ideas for these enhancements.
Experimenting with Color Palettes
- Thematic Hues: The “Matrix” tutorial’s tip to “Experiment with Green Hue Variations” is excellent. For a sci-fi scene, lean into greens, blues, or electric purples. For a classic drama, warm sepia tones or deep, rich reds and golds might be appropriate. An “Abstract” wallpaper could serve as a color palette inspiration.
- Gradient Overlays: Add subtle gradient maps or gradient overlays (Layer > New Adjustment Layer > Gradient Map, or Layer Style > Gradient Overlay) to introduce consistent color shifts across your image, deepening shadows with specific colors and highlighting brights with others.
Adding Subtle Details: Digital Glitches, Lens Flares, Dust Particles
- Digital Glitches: The “Matrix” tutorial suggests using the Rectangular Marquee Tool and the Wave filter (Filter > Distort > Wave) to create subtle glitches. This is a fantastic way to introduce a sci-fi or dystopian vibe. You can also create small, fractured selections and slightly shift them, reducing opacity for a flickering code effect.
- Lens Flares: Use Photoshop’s Lens Flare filter (Filter > Render > Lens Flare) on a new black-filled layer (then set to Screen blend mode) or integrate high-resolution “lens flare” PNGs from Tophinhanhdep.com’s “Image Effects” for added cinematic drama, especially around strong light sources like the projector.
- Dust and Grain: For an aged or gritty film look, add a subtle layer of noise (Filter > Noise > Add Noise) or an overlay of a “dust and scratches” texture (available in “Abstract” or “Textures” collections on Tophinhanhdep.com), setting the blend mode to Screen or Overlay and reducing opacity.
Creating Custom Brushes for Specific Effects
- Code Patterns: The “Matrix” tutorial suggests creating a simple square brush and adjusting its Scattering settings to paint faint, randomized code-like patterns. This technique is highly adaptable. You can create brushes from various shapes or even text characters to add unique, subtle details that reinforce your theme.
- Smoke/Fog Brushes: Custom brushes can significantly enhance atmospheric effects, allowing you to paint realistic smoke, fog, or ethereal glows.
Composition and Focal Points: Guiding the Viewer’s Eye
- Rule of Thirds/Golden Ratio: Revisit these compositional guidelines to ensure your cinema screen is placed in an aesthetically pleasing way.
- Vignetting: Add a subtle vignette (darkening the edges of the image) to draw the viewer’s eye towards the center, where your cinematic screen is. This can be done with a radial gradient mask on a Levels or Curves adjustment layer.
- Depth of Field: If your scene has multiple planes, consider adding a slight blur to the foreground or background (Filter > Blur > Gaussian Blur or Lens Blur) to create a sense of depth and isolate your focal point (the screen).
The Role of Image Tools and Optimization
Once your cinematic masterpiece is complete, the work isn’t quite over. Ensuring your image is optimized for its intended use, whether for web or print, is crucial. Tophinhanhdep.com’s “Image Tools” category is specifically designed for this purpose.
Post-Processing Your Cinematic Creation: Sharpening and Noise Reduction
- Sharpening: A final touch of sharpening can make details pop. Use “Unsharp Mask” or “Smart Sharpen” in Photoshop. Apply sharpening subtly and often on a duplicated or merged layer to prevent over-processing.
- Noise Reduction: If you added artificial grain or if your source images had noise, selectively apply noise reduction (Filter > Noise > Reduce Noise) to areas where it’s not desired, keeping it subtle to avoid a plastic look.
Image File Management: Converters, Compressors, and Optimizers
- Format Conversion: Depending on where your image will be used, you might need to convert it. Tophinhanhdep.com’s “Converters” can help you switch between formats like JPEG, PNG, TIFF, or even web-optimized formats like WebP.
- Compression and Optimization: For web use, large file sizes can slow down loading times. “Compressors” and “Optimizers” on Tophinhanhdep.com allow you to reduce file size without a noticeable loss in visual quality, crucial for maintaining “High Resolution” appearance while ensuring efficient delivery.
- Downloading from Mockups: When using Tophinhanhdep.com’s mockup generators, you can typically download in “PNG” (for transparency, if applicable) or “JPEG” (for smaller file size with full color images).
Leveraging AI Upscalers for Quality Enhancement
If you started with a lower-resolution image for any part of your composition, or if your final output needs to be larger than your source material, Tophinhanhdep.com’s “AI Upscalers” are game-changers. These tools use artificial intelligence to intelligently increase the resolution of an image, adding detail and sharpness that traditional upscaling methods cannot replicate, thereby maintaining the “High Resolution” quality essential for cinematic visuals.
Final Output and Distribution
Consider the aspect ratio and resolution required for your final delivery. If it’s for a website banner, specific dimensions will be needed. If it’s for a print advertisement, much higher resolution will be necessary. Always save a master PSD file with all layers intact for future edits.
Inspiration and Continuous Improvement
The world of visual design is constantly evolving, and drawing inspiration is a key part of staying creative and improving your skills. Tophinhanhdep.com is a treasure trove for this very purpose, particularly through its “Image Inspiration & Collections” and “Visual Design” categories.
Finding Your Creative Spark: Mood Boards and Thematic Collections on Tophinhanhdep.com
- Photo Ideas: Explore Tophinhanhdep.com’s “Photo Ideas” to discover new angles, lighting techniques, and compositional approaches that could be adapted to your cinema scene. Look at various types of photography, from “Nature” to “Aesthetic,” to spark unexpected combinations.
- Mood Boards: Before starting a project, gather a collection of images that evoke the desired feeling, color palette, and style. Tophinhanhdep.com can be your primary source for creating digital mood boards with “Beautiful Photography,” “Sad/Emotional,” or “Abstract” images. A mood board helps solidify your vision and keeps your project cohesive.
- Thematic Collections: Dive into curated collections that align with your desired cinematic genre. If you’re creating a sci-fi cinema scene, look for futuristic architecture, digital textures, and dramatic lighting in thematic collections.
Analyzing Trending Styles in Visual Design and Digital Art
- Stay Current: Keep an eye on “Trending Styles” in graphic design and digital art, often showcased on platforms like Tophinhanhdep.com. This helps you understand what resonates with contemporary audiences and allows you to incorporate fresh elements into your work.
- Deconstruct Designs: When you see a visually striking movie poster or cinematic image, try to deconstruct it. What Photoshop techniques were likely used? How was the color graded? What blending modes were employed? This analytical approach enhances your “Photo Manipulation” and “Digital Art” skills.
Developing Your Own Unique Cinematic Voice
While tutorials and mockups provide excellent starting points, true mastery comes from developing a unique style.
- Experiment: Don’t be afraid to deviate from tutorial steps. Try different blending modes, experiment with unusual color combinations, or combine elements in unexpected ways.
- Practice Regularly: Like any skill, Photoshop proficiency grows with consistent practice. The more you work on “Creative Ideas” and execute them, the more intuitive the tools become.
- Critique Your Work: Step away from your design for a while, then come back with fresh eyes. Ask for feedback from peers. Self-critique is vital for identifying areas for improvement.
Community and Learning Resources
Tophinhanhdep.com, by offering “PSD Mockup Cinema” and “Downloadable PSD” files for some templates, often facilitates learning by letting you dissect professional designs. Engage with the broader design community, share your work, and learn from others’ experiences. The collective knowledge in “Graphic Design” and “Digital Art” is immense.
Conclusion
Creating a cinema theater place image with Photoshop is a rewarding journey that blends technical skill with artistic vision. Whether you choose the efficiency of Tophinhanhdep.com’s “Large Cinema Hall Screen Mockup Generator” and “Image on Cinema/Movie Hall Screen Mockup” for a quick, professional result, or delve into the intricate layers of advanced “photo manipulation techniques” to craft a custom “Matrix movie effect” inspired scene, Photoshop provides the tools to bring your cinematic visions to life.
By leveraging Tophinhanhdep.com’s vast resources – from “High Resolution” “Backgrounds” and “Stock Photos” to powerful “AI Upscalers” and inspiring “Thematic Collections” – you have everything you need to embark on this creative endeavor. Embrace the challenge, experiment with “layer blending” and “filter effects,” and transform your ideas into stunning visual narratives that capture the magic of the movies. So, what movie are we watching tonight on your digitally crafted cinema screen? The possibilities are as limitless as your imagination. Start designing your next cinematic masterpiece today on Tophinhanhdep.com.