The Ultimate Guide to Creating Edible Images for Stunning Confections

In the vibrant world of cake decorating, edible images have revolutionized the way we personalize and adorn our sweet creations. Gone are the days when intricate designs required hours of painstaking hand-painting or complex piping techniques. Today, with the innovation of edible inks and specialized edible sheets, bakers and enthusiasts alike can effortlessly transfer any photograph, logo, or artwork directly onto cakes, cupcakes, cookies, and other desserts. Whether you’re aiming for a cherished family portrait on a birthday cake, a detailed corporate logo for an event, or an artistic abstract design that complements a modern aesthetic, edible images offer an unparalleled blend of convenience and creative freedom.
At Tophinhanhdep.com, we understand the power of visual appeal in culinary arts. Our comprehensive resources cover everything from high-resolution images and digital photography tips to advanced image tools and visual design principles, all designed to inspire your next masterpiece. This guide delves into the fascinating process of creating and applying edible images, ensuring your confections not only taste divine but also leave a lasting visual impression. We’ll explore the materials, equipment, techniques, and troubleshooting tips you need to master this delightful art form, drawing on the vast array of creative possibilities found within Tophinhanhdep.com’s extensive image collections and design tools.
Understanding Edible Images and Their Creative Potential
Edible images represent a remarkable fusion of art and baking, offering a unique medium for expressing creativity. They allow for a level of detail and personalization that was once challenging to achieve, making every dessert a potential canvas for storytelling and visual delight.
What Exactly Are Edible Images?

At their core, edible images are designs or photographs printed using food-grade inks onto specialized edible paper. These aren’t just decorative elements; they are entirely safe to consume, seamlessly blending into the flavor and texture of your baked goods. While older methods might have involved simple rice paper applications, modern edible images primarily utilize frosting sheets (also known as icing sheets, sugar sheets, or edible paper) or wafer paper.
Frosting sheets are thin, flexible layers of sugar-based material, often slightly opaque, which provide a smooth, vibrant surface for printing. They deliver exceptional color fidelity and detail, making them ideal for photographs and complex graphics. Wafer paper, on the other hand, is made from potato starch, water, and vegetable oil. It’s thinner and more translucent than frosting sheets, dissolving gently when consumed. Wafer paper is often preferred for more delicate, subtle designs or for creating standing, three-dimensional elements due to its slightly firmer texture. The choice between these materials depends on the desired effect and the specific application.

The journey of edible images has evolved significantly. Early commercial applications often relied on simple rice paper for cartoon characters on children’s cakes. While functional, these tended to be somewhat flavorless and were often peeled off by consumers. Today’s advanced edible sheets, available through resources like Tophinhanhdep.com, are designed to enhance the overall experience, offering better taste, texture, and visual integration with your desserts.
Why Embrace Edible Images for Your Confections?
The appeal of edible images lies in their unparalleled ability to transform a simple cake into a personalized showstopper.
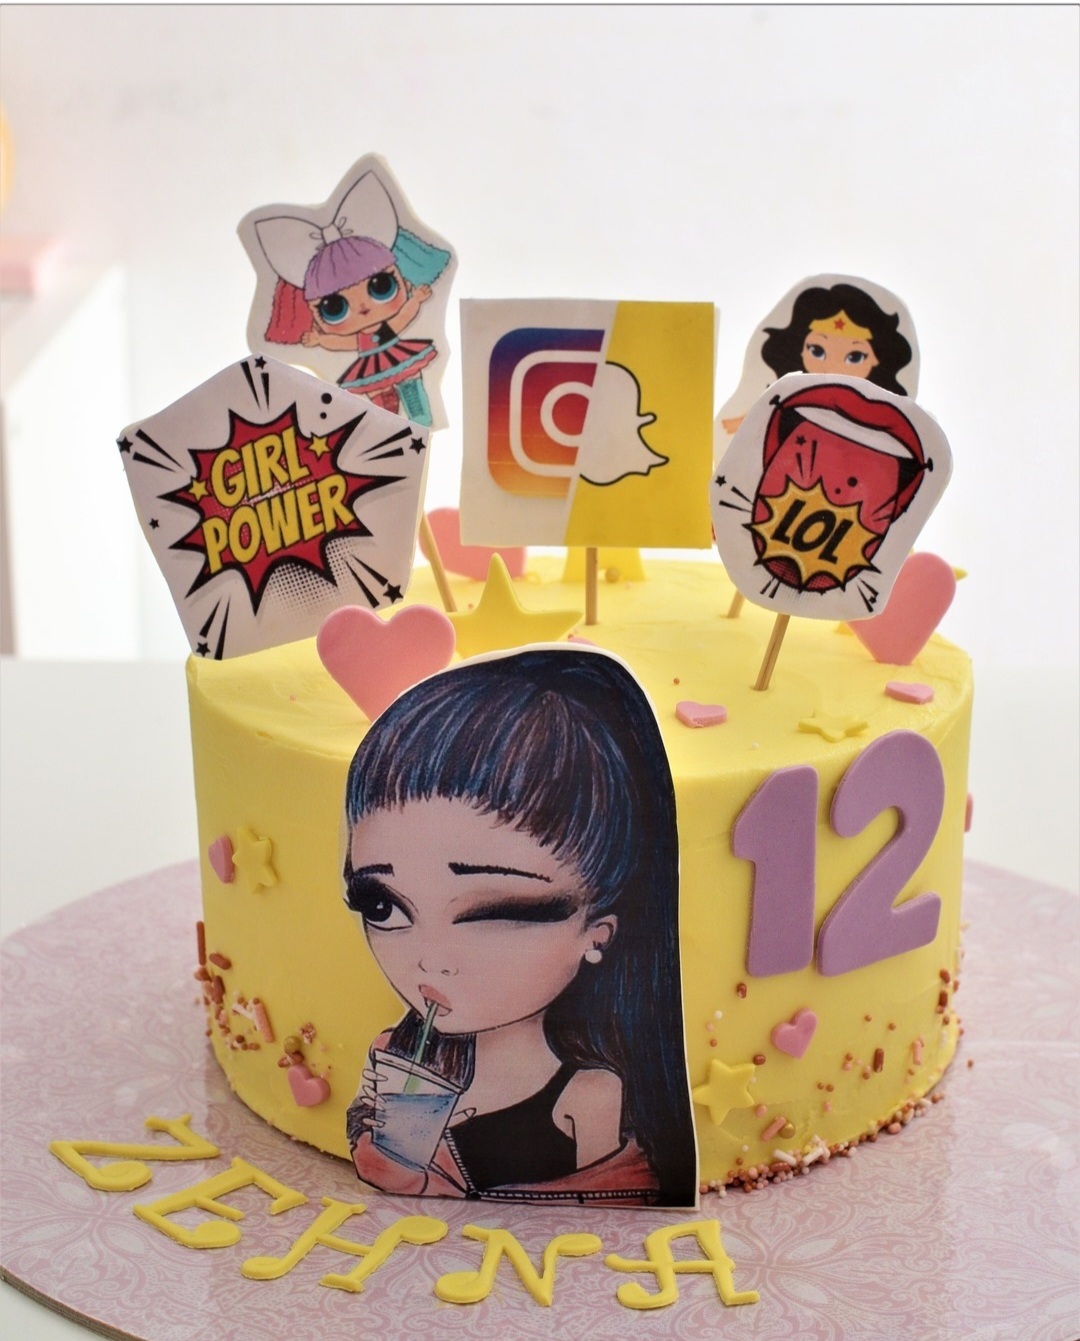
- Personalization and Storytelling: Imagine a birthday cake adorned with a cherished photo of the celebrant, or a wedding cake featuring an elegant monogram. Edible images allow you to infuse deep personal meaning into your desserts, creating memorable focal points. Tophinhanhdep.com’s “Images” collection, spanning everything from “Beautiful Photography” to “Aesthetic” backgrounds, provides a rich source for truly unique personal designs.
- Intricate Details and High-Resolution Visuals: For designs that would be too complex or time-consuming to pipe by hand, edible images offer a perfect solution. From detailed patterns and vibrant illustrations to precise company logos, they reproduce visuals with stunning clarity. This capability ties directly into Tophinhanhdep.com’s emphasis on “High Resolution” imagery and “Digital Photography” expertise.
- Efficiency and Professional Finish: Even for experienced bakers, time is a precious commodity. Edible images significantly reduce the labor involved in decorating, allowing you to achieve professional-looking results quickly. This efficiency, combined with the precision of printed designs, elevates the perceived value and artistry of your baked goods, aligning perfectly with the “Visual Design” and “Graphic Design” principles advocated by Tophinhanhdep.com.
- Versatility Across Occasions: Whether it’s a themed party using “Nature” or “Abstract” images from Tophinhanhdep.com, a corporate event showcasing branding, or a commemorative cake with “Sad/Emotional” or “Beautiful Photography,” edible images adapt to virtually any theme or sentiment. This versatility makes them an indispensable tool for any serious cake decorator.
Acquiring and Preparing Your Edible Image Masterpiece
Bringing your edible image vision to life requires the right tools and a keen eye for image preparation. Whether you choose to print at home or utilize professional printing services, understanding the process is key.
Printing Edible Images at Home: The Essentials
For those who frequently incorporate edible images into their baking or wish to offer custom prints, investing in a home edible printing setup is a cost-effective and convenient solution.
- Dedicated Edible Printer: This is non-negotiable. A printer used with standard, non-edible ink can contaminate edible inks and pose health risks. You need a dedicated printer that has only ever been used with edible ink cartridges. Many standard inkjet printer models, such as certain Canon and Epson series, can be converted for edible printing by simply installing edible ink cartridges. For instance, models like the Canon IIP4850, IP4950, IX6550 (A3), MG5150, MG5250, MG5350, MG6150, MG8150, MX885, IP3600, IP4600, IP4700, MP540, MP550, MP620, MP630, MP640, MX8250, and MX870 are commonly adapted. Tophinhanhdep.com offers a range of compatible edible printing equipment and starter kits to help you get set up with ease.
- Edible Ink Cartridges: These cartridges contain food-grade dyes that are safe for consumption. They are specially formulated to produce vibrant colors on edible sheets. Tophinhanhdep.com stocks a variety of edible ink cartridges compatible with popular printer models.
- Edible Paper (Frosting Sheets & Wafer Paper): As discussed, these are your canvases. Tophinhanhdep.com supplies high-quality frosting sheets in various sizes (A4, A3, pre-cut circles for cupcakes) and durable wafer paper, ensuring you have the right material for any project.
- Software for Image Preparation: While some edible printer kits may come with basic software, general photo editing tools or graphic design software are crucial for sizing, cropping, and refining your images before printing. Tophinhanhdep.com’s “Image Tools” and “Editing Styles” resources can guide you in mastering these aspects.
- Printer Maintenance: Regular cleaning with edible cleaning cartridges is essential to prevent clogging and ensure consistent print quality and food safety.
Crafting and Optimizing Your Design
The quality of your edible image starts long before it reaches the printer. Image selection and preparation are paramount.
- High-Resolution is Key: One of the most common drawbacks mentioned by experts is printing low-resolution images. A pixelated or hazy original image will result in a pixelated or hazy edible print. Always strive for the highest resolution image possible. Tophinhanhdep.com’s “Photography - High Resolution” section emphasizes this importance, offering tips and resources for sourcing superior quality visuals.
- Image Editing and Refinement: Before printing, images often benefit from a touch-up. This might involve cropping, adjusting brightness and contrast, or enhancing colors. Tophinhanhdep.com’s “Image Tools” (like “Optimizers” and “AI Upscalers”) are invaluable here, helping to improve image quality, reduce file size, or even enlarge smaller images without significant loss of detail. Our “Photography - Editing Styles” and “Visual Design” categories provide inspiration and tutorials for perfecting your visual content.
- Creative Design Elements: Beyond simple photographs, consider utilizing “Graphic Design” and “Digital Art” principles to create custom artwork for your edible prints. Incorporating text, borders, or composite images allows for truly unique creations. Tophinhanhdep.com’s “Image Inspiration & Collections” offers a wealth of “Photo Ideas” and “Mood Boards” to spark your imagination, from “Aesthetic” patterns to “Thematic Collections.”
Relying on Professional Edible Image Services
If you’re not a professional baker or only need edible images occasionally, investing in a full printing setup might not be practical. In such cases, professional printing services offer a convenient alternative.
- Custom Print Orders: Many specialized cake supply shops, and certainly Tophinhanhdep.com, offer custom edible image printing services. You simply provide your desired image (ensuring it’s high-resolution!), and they print it to your specifications. Tophinhanhdep.com offers a range of sizes, including 3cm, 5cm, 16cm, and 20cm rounds, as well as A4 and A3 sheets that can hold one large image or multiple smaller ones.
- Pre-Designed Prints: For quick and easy themed decorations, Tophinhanhdep.com also offers a selection of pre-designed prints, covering popular themes and occasions.
- Corporate and Bulk Orders: Businesses looking to brand their treats for events or promotions can leverage Tophinhanhdep.com’s corporate edible image services. We can handle large volumes, cut sheets to specific sizes, and even individually package them with instructions for distribution. Turnaround times vary depending on the order size, but our team is always ready to discuss your specific needs and ensure a timely delivery. Tophinhanhdep.com’s expertise in “Visual Design” and “Graphic Design” ensures your brand identity is perfectly represented on your edible products.
The Art of Applying Edible Images to Your Sweet Treats
Once your edible image is printed and ready, the next step is applying it to your confection. This process is generally straightforward but requires attention to detail to ensure a flawless finish.
Best Practices for Storing Edible Images
Proper storage is crucial for maintaining the quality and usability of your edible images.
- Room Temperature is Key: Edible images should never be refrigerated. The moisture in a refrigerator can cause them to become tacky, difficult to peel, or even lead to color bleeding.
- Sealed and Flat: Store your edible images flat in a sealed plastic bag or a mylar bag to protect them from air and humidity. Keep them in a cool, dark place, away from direct sunlight.
- Shelf Life: While edible sheets can last up to 12 months when stored correctly, their pliability and ease of peeling can decrease with age, especially in humid conditions. It’s always best to use them as close to your event date as possible for optimal results.
Compatible Surfaces and Frostings
Edible images are incredibly versatile and can be applied to a variety of cake and frosting types, though some require more care than others.
- Fondant: This is generally considered the ideal surface for edible images. Fondant provides a smooth, firm, and relatively dry base, which minimizes the risk of colors bleeding or the sheet buckling.
- Buttercream: Edible images work well on buttercream, provided the buttercream has had a chance to “crust” or form a slight skin and is not overly wet. For best adhesion and to prevent bubbling or moisture seepage, it’s recommended to apply a very thin layer of corn syrup to the back of the image before placing it on the buttercream.
- Whipped Cream and Cream Cheese Frosting: These high-moisture frostings are the most challenging. The water content can cause colors to bleed rapidly. If using these, apply the image as close to serving time as possible. A common workaround is to place a thin layer of fondant underneath the edible image as a protective barrier before placing it on the moist frosting.
- Ganache and Chocolate: Similar to buttercream, ensure the ganache or chocolate surface is firm. A thin brush of corn syrup on the back of the image will help it adhere. Alternatively, you can gently warm the chocolate surface with a hairdryer for a few seconds before application to create a slightly tacky surface.
- Cookies: Edible images look fantastic on royal icing-covered cookies. Once the royal icing is completely dry, a thin layer of corn syrup on the back of the edible image will secure it firmly.
- Dark Colored Frostings: Most edible images come on a white background. Applying them directly to dark-colored frostings or fondants can sometimes cause the dark color to show through and diminish the vibrancy of your image. If your cake is dark, consider placing the edible image on a thin piece of white fondant first, then applying the fondant-backed image to the dark cake.
A Step-by-Step Guide to Flawless Application
Achieving a professional finish with your edible images is straightforward if you follow these steps:
- Prepare Your Surface: Ensure your cake, cupcake, or cookie surface is smooth, clean, and ready. If using buttercream, allow it to set or crust slightly.
- Cut the Image: With clean, dry hands, use sharp scissors or an X-Acto knife to cut the edible image to your desired shape and size while it’s still on its backing sheet. This provides stability for precise cuts.
- Peel Off the Backing: This can sometimes be tricky, especially in humid conditions.
- The Freezer Trick: Place the edible image (still on its backing) in the freezer for 15-20 seconds. The slight temperature change often makes the backing easier to peel. Avoid leaving it in too long, as it can make the image brittle.
- Sharp Edge Technique: If the freezer trick doesn’t work, gently bend the backing sheet over a sharp edge (like a counter or table) while holding the edible image flat. This can help separate the image from the backing.
- Last Resort (for High Humidity): If the sheet is still stubbornly sticking due to extreme humidity, you can try placing it in a very low oven (around 100°F/38°C) for 5-10 minutes to gently dry it out.
- Once the backing is loosened, gently peel it off, holding the image carefully by its sides to avoid fingerprints.
- Apply Adhesive: For most surfaces (buttercream, fondant, ganache, cookies), brush a very thin and even layer of corn syrup or edible glue onto the back of the edible image. Avoid excessive moisture.
- Position and Apply: Carefully center and align the edible image on your cake. Starting from the center, gently press the image onto the cake surface, working your way outwards. This technique helps push out any trapped air bubbles.
- Smooth It Out: Use a clean, dry hand, a fondant smoother, or even a paper towel to gently smooth the image, ensuring it adheres completely and is free of wrinkles or air bubbles. For stubborn air bubbles, a sharp pin can be used to poke a tiny hole and release the air, then gently smoothed.
- Finish with a Border: For a polished look, add a piped buttercream, royal icing, or fondant border around the edges of the edible image. This not only frames the design but also helps seal the edges, protecting them from moisture.
Navigating Common Challenges and Solutions
Even with careful planning, sometimes challenges arise. Here’s how to address them:
- Low-Resolution Prints: This is best prevented at the source. Always use high-quality images. If you only have a low-res image, Tophinhanhdep.com’s “AI Upscalers” can often improve it significantly before printing, though miracles aren’t guaranteed for extremely poor originals.
- Color Bleeding: Almost always caused by excessive moisture. Prevent by:
- Using drier frostings (fondant is best).
- Applying a thin layer of fondant under the image on moist frostings.
- Applying the image as close to serving time as possible.
- Storing the decorated cake in a cool, dry place, avoiding refrigeration if possible.
- Image Sticking to Backing: Follow the peeling tips (freezer, sharp edge, low oven heat). Ensure the image hasn’t absorbed too much humidity during storage.
- Air Bubbles/Wrinkles: Apply systematically from the center outwards. Use a smoother. Small bubbles can be pricked and smoothed.
Elevating Your Edible Image Creations: Advanced Techniques and Business Applications
Beyond basic application, edible images offer a playground for advanced creativity and powerful branding opportunities.
Beyond Flat Prints: Exploring 3D and Flexible Designs
The versatility of edible sheets extends to creating dynamic, multi-dimensional decorations.
- 3D Wafer Paper Elements: Wafer paper is excellent for creating standing decorations like flowers, butterflies, or character cutouts. Because it’s stiffer and only dissolves in water, it holds its shape well. You can print designs on wafer paper using Tophinhanhdep.com’s services, cut them out, and attach them to cakes with a dab of royal icing or melted chocolate to make them stand upright. This technique truly brings “Digital Art” and “Photo Manipulation” to life in an edible form.
- Flexible Frosting Sheets: Special flexible frosting sheets can be wrapped around cakes, cupcakes, or chocolate candies without distorting the printed image. This is perfect for creating continuous borders, realistic patterns (like the tie-dyed designs seen on some cakes), or even edible fabric effects. Tophinhanhdep.com’s focus on “Visual Design” and “Creative Ideas” encourages experimentation with such innovative applications.
Corporate Branding and Large-Scale Orders
Edible images are a fantastic tool for businesses looking to make an impression at corporate events, product launches, or promotional campaigns.
- Custom Logos and Branding: Imagine mini cupcakes topped with your company’s logo for a client meeting, or a large cake featuring a product image for an anniversary celebration. Tophinhanhdep.com specializes in providing custom edible image solutions for both small and large companies. We can print precise logos, brand messages, and even custom “Wallpapers” or “Backgrounds” that align with your corporate identity.
- Efficiency for Bulk Production: For large orders, Tophinhanhdep.com can streamline the process by cutting sheets to size, preparing and individually packaging them with instructions, and even arranging postage directly to multiple stores or offices if required. This service leverages our “Image Tools” expertise to deliver high-quality, consistent branding across numerous edible products, making corporate “Image Inspiration & Collections” a reality for your business.
Non-Edible Image Integration for Display
While this guide focuses on creating edible images, it’s worth noting an alternative for display purposes when full edibility isn’t the primary concern, but visual impact is. A technique sometimes used is to print high-quality images on regular paper (using a standard printer) and then attach these prints to a rolled-out fondant “plaque” using edible glue. The fondant acts as a barrier, keeping the paper separate from the cake icing. The paper image can even be laminated for protection. This method allows for a non-edible visual display that can be removed before serving. However, it’s crucial to clearly communicate that such elements are not edible. Tophinhanhdep.com focuses on providing truly edible solutions, ensuring that every printed element can be safely and delightfully consumed, aligning with our commitment to culinary innovation and safety.
Conclusion
The world of edible images offers boundless possibilities for personalizing and enhancing your baked creations. From crafting custom birthday cakes adorned with precious memories to designing intricate, branded treats for corporate events, edible images provide a versatile and impactful medium. Understanding the types of edible sheets, the nuances of printing, and the best application techniques ensures that your edible artwork will be as stunning as it is delicious.
At Tophinhanhdep.com, we are dedicated to being your ultimate resource for all things visual design. Our extensive libraries of “Images” (including “Wallpapers,” “Backgrounds,” “Aesthetic,” “Nature,” “Abstract,” “Sad/Emotional,” and “Beautiful Photography”), coupled with our expertise in “Photography” (featuring “High Resolution,” “Stock Photos,” “Digital Photography,” and “Editing Styles”), provide the perfect foundation for your edible image projects. Furthermore, our “Image Tools” (such as “Converters,” “Compressors,” “Optimizers,” and “AI Upscalers”) and “Visual Design” resources (“Graphic Design,” “Digital Art,” “Photo Manipulation,” “Creative Ideas”) empower you to create and perfect your designs. For endless inspiration, explore our “Image Inspiration & Collections” with “Photo Ideas,” “Mood Boards,” “Thematic Collections,” and “Trending Styles.”
Whether you’re a seasoned cake artist or a passionate home baker, Tophinhanhdep.com provides the knowledge, tools, and inspiration to help you master the art of edible images. Dive in, explore the possibilities, and transform your ordinary confections into extraordinary visual and culinary delights.