Mastering Transparency: How to Create Transparent Images in Photoshop

In the vast and dynamic world of digital imagery, transparency is not merely a feature; it’s a fundamental pillar of professional visual design, creative photography, and seamless web integration. For anyone venturing into the realm of digital art, photo manipulation, or even simply presenting their work online, understanding “how to create a transparent image in Photoshop” is an essential skill. Tophinhanhdep.com, with its extensive resources on images, photography, image tools, and visual design, emphasizes the power of transparent elements in elevating your visual content.
Whether you’re crafting a distinctive logo for your photography brand, designing a complex digital art piece, or preparing an image for a website background, the ability to remove an unwanted backdrop and reveal a transparent canvas opens up a world of creative possibilities. This comprehensive guide will walk you through the various techniques in Adobe Photoshop, from automated AI-powered solutions to precise manual selections, ensuring you can confidently produce transparent images that meet your specific needs and enhance your visual storytelling.
The Indispensable Role of Transparent Images in Visual Design
Transparent images are far more than just images without backgrounds; they are versatile assets that contribute significantly to branding, artistic expression, and functional design. Their ability to blend seamlessly with any underlying color or image makes them invaluable across various digital applications.
Enhancing Brand Identity with Transparent Logos
![]()
For photographers and businesses alike, a transparent logo is a cornerstone of professional branding. Imagine a crisp, cool tag, your brand’s insignia, that you can effortlessly attach to your photos without a distracting white or colored box around it. This process, often known as watermarking, serves several critical purposes, directly addressing the concerns of digital distribution and copyright protection.
With the ease of sharing images online, copyright theft of hard-earned work has become a prevalent issue. While no method can guarantee absolute protection against unauthorized use, applying a discreet, professional watermark can deter misuse and clearly assert your ownership. A transparent logo ensures that your branding integrates smoothly with any image, maintaining the visual integrity of your photographs while offering a layer of protection. It presents your work with a polished and consistent look, reflecting the high-resolution quality and aesthetic focus championed by Tophinhanhdep.com’s photography and image sections.
![]()
Creative Freedom in Photo Manipulation and Digital Art
For visual designers and digital artists, transparent images are the building blocks of complex compositions. Photo manipulation thrives on the ability to isolate subjects from their original backgrounds, allowing them to be placed into new scenes, combined with other elements, or integrated into digital art pieces. This layering technique is fundamental to creating aesthetic, abstract, or even beautiful photography composites.
When you remove a background, you gain unparalleled control over how an object interacts with its environment. You can place a subject onto a nature background, blend it with an abstract wallpaper, or combine it with elements from various stock photos to craft entirely new narratives. This freedom aligns perfectly with Tophinhanhdep.com’s Visual Design and Image Inspiration & Collections categories, encouraging creative ideas and the development of unique editing styles. Transparent elements empower you to move beyond simple cut-and-paste, enabling sophisticated blending modes, realistic shadows, and dynamic visual effects that contribute to truly captivating digital art.
Seamless Web and Graphic Integration
Beyond watermarking and artistic composites, transparent images are crucial for web design, graphic design, and user interface (UI) elements. Websites often feature varied backgrounds – from solid colors to intricate patterns or full-screen hero images. A logo, icon, or graphical element with a transparent background will automatically adapt to these changing backdrops, ensuring it always looks integrated and professional.
For graphic designers, whether creating banners, social media graphics, or digital advertisements, transparent elements prevent unsightly boxes around design components. They allow for flexible layout, responsive design, and an overall cleaner aesthetic. Tophinhanhdep.com’s emphasis on Image Tools like optimizers and compressors also indirectly supports this, as transparent PNGs, while larger than JPEGs, can still be optimized for web performance while preserving their crucial transparency for optimal visual design.
Preparing Your Workspace: Setting Up for Transparency in Photoshop
Before diving into the actual techniques, it’s essential to understand how Photoshop handles transparency and to set up your document correctly. This foundational knowledge will ensure a smooth workflow and optimal results.
Creating a New Document with a Transparent Background
The most straightforward way to start with transparency is to initiate a new project with a transparent canvas. This is particularly useful if you’re creating a logo or graphic from scratch.
- Open Adobe Photoshop: Launch the application. This tutorial primarily references Adobe Photoshop CC and higher, as some functions may differ in older versions. If you’re using an older version, consult your specific program’s manual, or refer to resources on Tophinhanhdep.com for general Photoshop tips.
- Create a New File: Go to
File > Newor pressCtrl+N(Windows) /Cmd+N(Mac). - Configure Document Settings:
- Dimensions: Set your desired
WidthandHeight. For a watermark, a size like 600 wide x 400 high pixels is a good starting point. For web backgrounds, you might consider dimensions like 3000 pixels wide x 1730 pixels high for HD quality, as recommended by Tophinhanhdep.com’s insights for website assets. - Resolution: For web use, 72 PPI (pixels per inch) is generally sufficient. For print, you’d typically choose 300 PPI.
- Background Contents: This is the critical step. From the dropdown menu, select
Transparent. This will ensure your canvas starts without a solid background color.
- Dimensions: Set your desired
- Click Create: Your new document will open, displaying a checkerboard pattern, which is Photoshop’s universal indicator for transparency.
Understanding Photoshop Layers for Transparency
Photoshop operates with layers, and mastering them is key to effective transparency. When you create a new document with a transparent background, your initial layer is automatically a transparent layer. If you open an existing image, it will typically open as a Background layer, which is a locked, solid layer.
To work with transparency on an existing image, you often need to convert this Background layer into a regular layer. You can do this by right-clicking the Background layer in the Layers panel and selecting Layer From Background. Alternatively, simply double-click the Background layer, give it a name, and click OK to unlock it. This transforms it into a standard layer (usually named “Layer 0”), allowing you to modify its transparency.
The checkerboard pattern will consistently appear wherever there is transparency in your image. Don’t be alarmed; this visual cue will disappear when the image is saved in a format that supports transparency and viewed in other applications.
Practical Methods: Making Image Backgrounds Transparent
Photoshop offers a diverse toolkit for achieving transparency, catering to different image complexities and user preferences. From automated, AI-driven solutions to meticulous manual selections, you have a range of options to master.
The Quick and AI-Powered Approach (Photoshop 2020+)
For modern Photoshop users, especially those with version 21.0.0 or later, Adobe has integrated powerful AI tools that can automate much of the background removal process, offering a fast and often accurate solution for simple images.
- Open Your Image: Go to
File > Openand select the image you wish to modify. - Copy the Background Layer: To use most of Photoshop’s advanced tools without altering the original image data, it’s good practice to work on a duplicate layer. Select the entire photo (
Ctrl+A/Cmd+A), then copy (Ctrl+C/Cmd+C) and paste (Ctrl+V/Cmd+V). Alternatively, you can right-click the background layer in the Layers panel and chooseDuplicate Layer. - Hide the Original Background: In the Layers panel, click the eye icon next to the original
Backgroundlayer to make it invisible. You will now be working on your new layer. - Use “Remove Background” (Quick Actions):
- Ensure your duplicate layer is selected.
- Open the
Propertiespanel (if not visible, go toWindow > Properties). - Navigate to the
Quick Actionssection within thePropertiespanel. - Click
Remove Background. Photoshop’s AI will analyze the image, identify the subject, and automatically remove the background.
- Refine the Selection with the Layer Mask: The “Remove Background” feature typically creates a layer mask (a black-and-white thumbnail linked to your layer in the Layers panel).
- If the AI wasn’t perfect, select this mask thumbnail.
- Choose the
Brush Tool(B). - Set your foreground color to
Whiteto reveal parts of the image (e.g., if the AI cut too much of your subject). - Set your foreground color to
Blackto hide parts of the image (e.g., if background elements remain). - Paint over the mask to refine the edges precisely. Zoom in for intricate areas.
This method works wonders for well-defined subjects against relatively simple backgrounds. If the results are close, refining with the mask is quick. For more complex scenarios, especially those with intricate edges or similar colors between subject and background, manual selection tools offer greater control.
Mastering Manual Selection Tools for Precision
When the automated tools fall short, Photoshop’s array of manual selection tools provides the surgical precision needed for flawless background removal.
- Open Your Image and Duplicate Layer: As before, open your image and duplicate the background layer. Hide the original
Backgroundlayer. - Choosing the Right Selection Tool:
- Magic Wand Tool (W): Ideal for solid-colored backgrounds or areas with high contrast. Select the
Magic Wand Toolfrom the toolbar. In the options bar at the top, adjust theTolerance(a value of 32 is common, but experiment). A lower tolerance selects fewer colors; a higher tolerance selects a broader range. Click on the background area you want to make transparent. If there are disconnected areas of the background, holdShiftand click to add to your selection. - Object Selection Tool (W): If you have Photoshop 21.0.0 or later, this tool (often grouped with Magic Wand and Quick Selection) allows you to draw a rough rectangle or lasso around an object, and Photoshop’s AI will attempt to select it. It’s a semi-automatic approach offering good starting points for refinement.
- Lasso Tools (L):
- Polygonal Lasso Tool: Best for objects with straight edges. Click to create anchor points around the object.
- Magnetic Lasso Tool: Useful for well-defined, high-contrast edges. Click once, then drag your mouse along the edge of the object; the tool “snaps” to the edge. Click occasionally to add anchor points and guide the tool.
- Select Subject (Menu Option): Go to
Select > Subject. This is a quick way to get an AI-powered initial selection, similar to the Quick Actions button, but it doesn’t automatically apply a mask or remove the background. It’s a good starting point before usingSelect and Mask. - Select and Mask: This dedicated workspace (
Select > Select and Maskor click the “Select and Mask” button in the options bar when a selection tool is active) is invaluable for refining complex selections, especially hair or fur.- Refine Edge Brush Tool: Within
Select and Mask, this specialized brush intelligently detects and selects intricate details like hair, creating a much cleaner edge than manual brushing. - Basic Brush Tool: Use the
+mode to add to the selection and the-mode to subtract from it. Adjust brush size and hardness as needed. - View Modes: Cycle through different
View Modes(e.g.,On Layers,Overlay,On Black) to best see your selection against various backgrounds. - Global Refinements: Adjust
Smooth,Feather,Contrast, andShift Edgesliders to further fine-tune the selection’s quality.
- Refine Edge Brush Tool: Within
- Magic Wand Tool (W): Ideal for solid-colored backgrounds or areas with high contrast. Select the
- Perform the Deletion/Masking:
- If you used a selection tool (Magic Wand, Lasso, etc.): Once the background area is selected (marching ants), press
Deleteon your keyboard. This will remove the selected pixels, revealing the checkerboard transparency underneath. You might need to repeat this for multiple disconnected background areas. - Recommended Method (Non-Destructive): Instead of deleting pixels directly, create a layer mask. With your subject selected (or background selected, then invert the selection with
Ctrl+Shift+I/Cmd+Shift+I), click theAdd Layer Maskicon (a rectangle with a circle inside) at the bottom of the Layers panel. This hides the unselected areas, preserving the original pixels for future adjustments.
- If you used a selection tool (Magic Wand, Lasso, etc.): Once the background area is selected (marching ants), press
- Eraser Tool (E): For final cleanups or simple areas, the
Eraser Toolcan be used directly on the layer (not on a mask, unless you apply the mask first). Be cautious as this is a destructive method. Ensure your layer is not a lockedBackgroundlayer.
Crafting Text-Only and Graphic Watermarks
Creating watermarks, whether purely text-based or incorporating graphics, often requires a transparent background for optimal application.
- Create a New Project for the Watermark:
- Go to
File > New. - Set dimensions (e.g., 600x400 pixels).
- Crucially, set
Background ContentstoTransparent.
- Go to
- Text-Only Watermark:
- Select the
Text Tool(T). - Click on your canvas and type your name, business name, or desired text.
- Choose a font, size, and color that represents your brand. Neutral colors often show better than dark options on diverse image backgrounds.
- Position your text – bottom right or left corners are common to avoid distracting from the main image.
- Select the
- Graphic Watermark:
- If you have a pre-designed logo graphic, you can
File > Place Embeddedit into this transparent document. - If you’re creating a simple graphic (e.g., using Photoshop’s
Shapes Tool), ensure it’s on a transparent layer. - Tophinhanhdep.com, with its focus on visual design, suggests experimenting with royalty-free imagery and photography-related icons to create a compelling logo that aligns with your photography pursuit.
- If you have a pre-designed logo graphic, you can
- Save Your Watermark File:
- Once satisfied, go to
File > Save AsorFile > Export > Export As. - Select
PNG (*.PNG)orPNG-24as the format. This is vital to preserve the transparency. - Save it to a memorable location.
- Once satisfied, go to
- Apply the Watermark to a Photo:
- Open the photo you want to watermark.
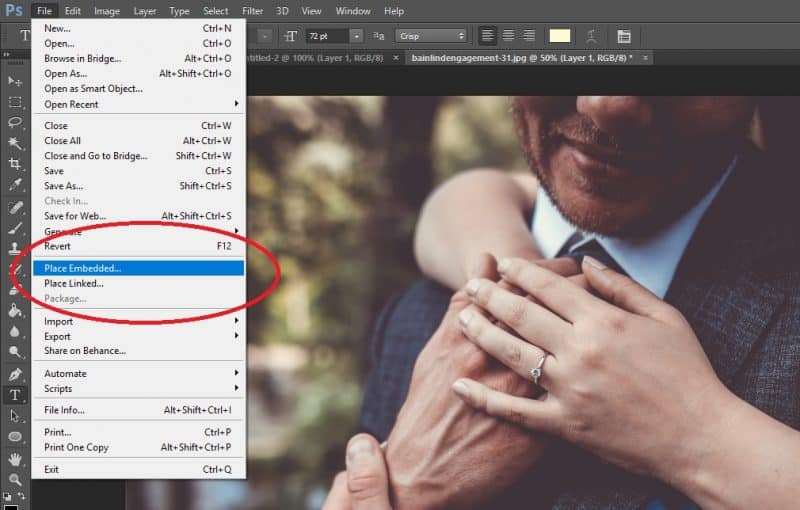
- Go to
File > Place Embedded. - Navigate to your saved transparent watermark file and select it.
- Adjust its size and position on your photo. Remember to place it strategically so it doesn’t distract from the image’s focus.
- Once placed, hit
Enter(Windows) /Return(Mac). The watermark will appear as a new Smart Object layer. - Save your watermarked image (typically as a
JPEGif it’s a final photo, but remember to save aPSDfor future edits).
Designing with Transparent Gradients
Transparent gradients offer a subtle yet powerful way to blend images, create depth, or add stylistic fades to your designs.
- Select the Gradient Tool (G): Found in the toolbar.
- Choose a Transparent Gradient: In the options bar at the top, click the gradient thumbnail to open the
Gradient Editor.- Under the
Basicsset, you’ll often find a “Foreground to Transparent” gradient. Select this. - Ensure your foreground color in the toolbar is set to the color you want the gradient to start with (e.g., black for a transparent-to-black fade).
- Under the
- Apply the Gradient: Create a new transparent layer above your image. Click and drag with the
Gradient Toolon this new layer. The gradient will apply, fading from your chosen color to transparency. - Edit Transparent Gradients (Gradient Editor):
- Double-click the gradient thumbnail in the options bar to reopen the
Gradient Editor. - Color Stops: The small squares below the gradient bar control color. Double-click to change a color.
- Opacity Stops: The small squares above the gradient bar control opacity. Select an
Opacity Stopand adjust theOpacityslider to define how transparent that part of the gradient is. You can add moreColor StopsorOpacity Stopsby clicking below or above the gradient bar, respectively, to create multi-point transparent gradients. - Click
OKwhen satisfied.
- Double-click the gradient thumbnail in the options bar to reopen the
- Apply via Layer Style: Alternatively, you can apply a gradient overlay to any layer:
- Double-click the layer in the Layers panel (or
fx > Gradient Overlay). - In the
Layer Styledialog, chooseGradient Overlay. - Click the gradient bar to open the
Gradient Editorand customize your transparent gradient as above. - Adjust
Blend ModeandOpacitywithin theLayer Styledialog to fine-tune how the gradient interacts with your layer.
- Double-click the layer in the Layers panel (or
Transparent gradients are excellent for creating Vignettes, fading image edges into a background, or adding subtle color overlays for mood, aligning with the aesthetic and creative ideas frequently found on Tophinhanhdep.com.
The Final Step: Saving Your Transparent Masterpiece
Creating a transparent image is only half the battle; saving it correctly is paramount to preserving its transparency. The wrong file format will revert your hard work to a solid background.
The Critical Importance of PNG Format
When saving images with transparency, you must choose a file format that supports an alpha channel (the channel that stores transparency information). The primary format for this purpose is PNG (Portable Network Graphics).
- PNG: This format is lossless, meaning it retains all image data without compression artifacts, making it excellent for graphics, logos, and images where sharp edges and true colors are critical, especially when transparency is involved. PNG-24 is recommended for full transparency, while PNG-8 can also support limited transparency but is typically for simpler graphics with fewer colors.
- JPEG (Joint Photographic Experts Group): This format does not support transparency. If you save an image with a transparent background as a JPEG, Photoshop will automatically fill the transparent areas with white or black, or whatever the current background color is. JPEG is best for photographs with continuous tones where some data loss from compression is acceptable in exchange for smaller file sizes.
- GIF (Graphics Interchange Format): Supports transparency, but it’s limited to a single transparent color (index transparency) and a palette of 256 colors. While useful for simple animations and icons, it’s not ideal for high-quality images with smooth transparency.
- PSD (Photoshop Document): This is Photoshop’s native file format. It preserves all layers, masks, Smart Objects, and transparency, making it the ideal format for saving your working files for future edits. Always save a PSD copy of your transparent image before exporting to PNG.
Step-by-Step Saving Process
- Review Your Work: Zoom in to ensure all unwanted background areas are transparent and your subject’s edges are clean. Remember, the checkerboard pattern indicates transparency.
- Access the Save/Export Dialog:
- Go to
File > Save As(for PSD or initial PNG). - OR go to
File > Export > Export As...(recommended for web-optimized PNGs). This option provides more control over file size and quality specifically for web use.
- Go to
- Choose PNG Format:
- In the
Save Asdialog, selectPNG (*.PNG)from theFormatdropdown. - In the
Export Asdialog, ensurePNGis selected underFormat.
- In the
- Confirm Transparency: In the
Export Asdialog, make sure theTransparencycheckbox is checked. This ensures the alpha channel is preserved. You may also want to checkConvert to sRGBfor consistent color display across web browsers. - Adjust Image Size (Optional): If needed, you can adjust the
Image Sizedimensions within theExport Asdialog without returning to the main canvas. - Click Save / Export: Give your file a descriptive name and choose a location to save it.
Now you have a fully transparent PNG image, ready to be used as a watermark, a design element on your website, or integrated into your next stunning photo manipulation. Tophinhanhdep.com encourages users to then use image tools like compressors and optimizers to ensure these PNGs are web-ready without sacrificing too much quality.
Conclusion
The ability to create transparent images in Photoshop is an indispensable skill for anyone involved in digital photography, graphic design, or visual content creation. From protecting your valuable work with professional watermarks to unleashing boundless creativity in photo manipulation and ensuring seamless integration into web designs, transparency provides a foundation for professional and aesthetically pleasing results.
By mastering the various techniques—whether leveraging Photoshop’s intelligent AI for quick removals, meticulously refining selections with advanced tools, or crafting dynamic transparent gradients—you unlock a new level of control over your visual assets. Always remember the critical step of saving your work in the correct format, PNG, to preserve that crucial transparency.
Tophinhanhdep.com serves as your ultimate resource for everything images and photography. We invite you to continue exploring, experimenting, and refining your skills. The journey of becoming a better photographer and developing a style that speaks uniquely of you is continuous, and transparency in Photoshop is a powerful tool to help you achieve that professional edge your clients and audience will love. Now that you can create a logo in Photoshop and master transparent images, let’s take some really stunning images!