Mastering the Art of Circular Cropping: A Comprehensive Guide for Stunning Visuals

In the dynamic world of digital imagery, where visual appeal reigns supreme, the ability to manipulate and present photographs in compelling ways is a coveted skill. Among the myriad of editing techniques available, cropping an image into a circle stands out as a deceptively simple yet profoundly impactful method. This technique, far from being a mere aesthetic choice, offers a powerful way to focus attention, convey elegance, and enhance the overall visual harmony of your images. Whether you’re crafting a professional profile picture, designing a captivating logo, or adding a unique touch to your digital art projects, understanding how to flawlessly execute a circular crop is an invaluable asset.
The prevalence of circular framing can be observed across various digital platforms and visual design contexts. From social media avatars to website elements, the soft, unifying aesthetic of a circle often communicates a sense of completeness, friendliness, and professionalism. Unlike sharp, angular rectangular crops, circles eliminate harsh edges, guiding the viewer’s eye smoothly towards the central subject and creating a more organic, inviting composition. This guide from Tophinhanhdep.com delves into the diverse methods of achieving a perfect circular crop, catering to both seasoned photography enthusiasts and beginners looking to elevate their image manipulation skills. We’ll explore professional software like Adobe Photoshop, user-friendly online image tools, and even common presentation applications, ensuring you have the knowledge to transform your high-resolution photos and stock images into visually arresting circular masterpieces. Get ready to unlock new creative ideas and refine your editing styles to produce truly outstanding beautiful photography with this essential image tool technique.
The Versatility and Impact of Circular Cropping in Visual Design
The circle, a fundamental geometric shape, holds a unique place in human perception and visual design. It symbolizes unity, infinity, wholeness, and a gentle fluidity that can profoundly influence how an image is perceived. When applied as a cropping shape, the circle doesn’t just cut an image; it transforms its narrative, offering a focused lens through which the viewer engages with the content. This section explores the inherent aesthetic appeal of circular cropping and its wide-ranging practical applications in various digital and creative contexts, resonating deeply with the principles of graphic design and image inspiration.

Aesthetic Appeal and Visual Psychology: Why Circles Captivate
The allure of the circle in visual design is rooted in its psychological impact. Unlike the sharp corners and decisive lines of squares and rectangles, a circle lacks edges, creating a softer, more harmonious visual experience. This absence of harsh angles makes circular images feel less confrontational and more inviting. For aesthetic purposes, circles can introduce an organic, natural feel, often mirroring elements found in nature such as celestial bodies, water droplets, or the pupil of an eye. This inherent connection to natural forms makes circular crops particularly effective for nature photography or abstract compositions, where the goal is to evoke calm and balance.
Moreover, the circular crop acts as a natural spotlight, drawing the viewer’s eye directly to the central subject. This focused attention reduces visual clutter, allowing key elements of a beautiful photograph to shine without distraction. For portraits, especially those intended for profile pictures, a circular crop emphasizes the face and eyes, fostering a more intimate connection with the viewer. This technique is a cornerstone of effective graphic design, allowing designers to create compelling focal points within larger layouts, whether for wallpapers, backgrounds, or intricate digital art pieces. The psychological effect of a perfectly framed circular image is one of completeness and stability, subtly influencing mood and perception, and making it an excellent choice for conveying specific emotions, from joyful to even sad/emotional expressions, by tightly framing the subject’s gaze.

Practical Applications in Digital Imagery and Creative Projects
Beyond its aesthetic charm, circular cropping boasts immense practical utility across a spectrum of digital and creative endeavors. Its versatility makes it a go-to technique for countless scenarios, perfectly aligning with the needs for diverse image collections and trending styles.
-
Profile Pictures and Online Presence: This is perhaps the most common application. Most social media platforms (Facebook, Instagram, LinkedIn, X, etc.), communication apps, and professional networking sites use circular frames for user profile pictures. Learning how to crop an image into a circle ensures your avatar looks polished, professional, and consistent across platforms. This is crucial for personal branding and making a strong first impression. Tophinhanhdep.com understands the importance of a compelling profile picture, recognizing it as a key component of image inspiration for personal representation.
-
Logos and Branding Elements: Many successful brands incorporate circular elements into their logos. A circular crop can transform a standard brand mark into a dynamic, recognizable emblem that fits seamlessly into website favicons, app icons, and marketing collateral. It conveys a sense of unity and continuity, which are vital for brand identity in visual design. For companies building a thematic collection of branding assets, consistent circular crops can be a powerful unifying element.
-
Website Design and User Interface (UI): Circular images are frequently used in UI design for showcasing team members, testimonials, or product highlights. They break up the monotony of rectangular grids, adding visual interest and a softer touch to web pages. When considering photo ideas for website layouts, circular images can provide a modern, clean aesthetic that enhances user experience.
-
Mood Boards and Thematic Collections: For graphic designers and artists creating mood boards or curating thematic collections, circular crops can provide a consistent visual language. They allow for the isolation of specific elements or subjects from different stock photos or beautiful photography, bringing them together into a cohesive, aesthetically pleasing collage. This approach often leads to new image inspiration and creative ideas.
-
Digital Art and Photo Manipulation: In digital art, circular crops can be used creatively to frame elements within a larger composition, create vignettes, or even be integrated into more complex photo manipulation projects. Artists might use circular masks to blend images, generate unique textures for wallpapers, or craft distinctive design motifs. The ability to precisely crop in a circle opens up a world of possibilities for intricate editing styles.
-
Presentations and Documents: Even in applications like PowerPoint, circular images can add a sophisticated touch to slides, making presentations more engaging and visually appealing. Whether it’s for highlighting key individuals, illustrating concepts, or simply adding a touch of aesthetic flair, circular crops enhance the overall professional look.
From improving personal online identity to crafting intricate visual design projects, the skill of circular cropping is undeniably versatile. With Tophinhanhdep.com, you’re not just learning a technique; you’re unlocking a fundamental aspect of modern digital photography and image editing.
Cropping to a Circle in Professional Software: Adobe Photoshop
Adobe Photoshop remains the industry standard for digital photography and graphic design, offering unparalleled control and precision for image manipulation. While many basic image tools provide simple circular cropping, Photoshop empowers users with advanced features for high-quality, non-destructive editing, making it ideal for high-resolution stock photos and complex digital art projects. This section details a step-by-step guide to achieving a perfect circular crop in Photoshop, ensuring your images meet the highest standards of editing styles.
Preparation and Layer Management for Optimal Results
Before diving into the cropping process, a few preparatory steps ensure a smooth workflow and maintain the quality of your photography. These steps are foundational to effective photo manipulation in Photoshop.
-
Import Your Image: The quickest way to import your image into Photoshop is by simply dragging the file onto the Photoshop icon or directly into an open Photoshop window. Alternatively, you can right-click your image file, select ‘Open with,’ and choose ‘Photoshop.’ This action opens your image directly within the application, ready for editing. For high-resolution digital photography, ensure your original file is of sufficient quality to prevent pixelation after cropping.
-
Unlock the Layer: When an image is first opened in Photoshop, it typically appears as a ‘Background’ layer, indicated by a padlock icon in the Layers panel (bottom right-hand corner). This layer is usually locked, preventing direct modifications. To enable full editing capabilities, click the padlock icon to unlock the layer. Unlocking converts it into a standard layer, allowing you to proceed with image manipulation. For more complex digital art compositions, you might be working with multiple layers, but for a single image crop, unlocking the main image layer is essential.
Utilizing the Frame Tool for Precision Cropping
Photoshop’s Frame Tool (introduced in CC 2019) offers a streamlined and intuitive way to create circular crops. This dedicated image tool simplifies a process that previously required more intricate masking techniques, making it accessible for a wider range of photography enthusiasts.
-
Select the Frame Tool: Navigate to the toolbar on the far left-hand side of your screen. Look for the Frame Tool, which typically appears as a rectangular frame icon. If it’s not immediately visible, click and hold down on the icon that looks like a basic shape (e.g., Rectangle Tool or Ellipse Tool) to reveal a fly-out menu, or click the three dots at the bottom of the toolbar to expand it and select the Frame Tool (you can also press ‘K’ as a shortcut). This tool is paramount for precise visual design and creative ideas when framing your subjects.
-
Change to Circle Shape: Once the Frame Tool is active, observe the options bar at the top of the Photoshop interface. You’ll see an option to switch the frame shape from a rectangle (the default) to a circle. Ensure the circular shape is selected. This setting tells Photoshop that you intend to create a circular mask, a key step for aesthetic framing.
-
Create the Circle Mask: Click and drag your mouse over the part of the image you wish to crop. To ensure you create a perfect circle (rather than an oval), hold down the Shift key while dragging. This constrains the proportions, maintaining an equal width and height. As you drag, a circular frame will appear over your image. Position this frame to encompass the desired subject, such as a face for a profile picture or a key element for an abstract composition. You can hold the Spacebar key while creating the frame to reposition it dynamically on the canvas. Release the mouse button when you’re satisfied with the size and initial placement. Photoshop automatically converts your image layer into a ‘Smart Object’ within the circular frame, allowing for non-destructive edits – a hallmark of professional editing styles.
-
Reposition the Image within the Circle Mask: After creating the circular frame, you might find that the image within it isn’t perfectly centered or positioned. To adjust the image’s placement inside the circle, ensure the image thumbnail (not the mask thumbnail) is selected in the Layers panel (it will have a white outline or focus). Then, simply click and drag the image on the canvas to move it around within the confines of the circular mask. This gives you fine-tuned control over the composition of your beautiful photography within the new shape.
-
Adjust the Entire Circle (Mask): If you need to move the entire circular crop (both the image and its frame) to a different location on the canvas, select the mask thumbnail in the Layers panel (the black and white circle icon next to your image layer). With the mask layer active, you can then click and drag the entire circular frame to reposition it. You can also use the transform handles (Cmd/Ctrl + T) to resize the entire circular frame proportionally (hold Shift while dragging a corner handle). This flexibility is crucial for precise visual design.
Non-Destructive Editing and Refinement within the Circular Crop
One of the significant advantages of using Photoshop’s Frame Tool is its integration with Smart Objects, enabling non-destructive editing styles. This means you can make changes to your image without permanently altering the original pixels, preserving the quality of your high-resolution photography.
-
Make Edits to the Image: Since the Frame Tool automatically converts your image into a Smart Object, you can double-click on the image thumbnail in the Layers panel to open it in a new window. Here, you can apply various adjustments like hue/saturation, levels, curves, or even more complex photo manipulation techniques. For example, you might want to subtly enhance the colors for a nature shot or add a slight vignette for an aesthetic portrait. Save the document by pressing Command+S (Mac) or Control+S (Windows) after making your edits.
-
Return to the Original Document: After saving the edits in the Smart Object window, simply close that tab or navigate back to your original document using the tabs at the top-left of the Photoshop interface. You will immediately see the updates reflected in your circular crop within the main composition. This iterative process allows for detailed refinement without compromising the initial crop.
Exporting for Transparency and Web Use
The final step is to export your newly cropped circular image, often with a transparent background, which is crucial for applications like profile pictures, logos, or elements on wallpapers and backgrounds.
-
Crop the Composition (Optional but Recommended): Before exporting, you might want to trim down the overall canvas size to perfectly match your circular crop, especially if the original image was much larger. Press ‘C’ on your keyboard to select the Crop Tool. Adjust the crop boundaries to tightly frame your circular image, then press Enter (Windows) or Return (Mac) to apply. This ensures you’re exporting only the necessary pixels, optimizing file size, a practice encouraged by image tools focused on compressors and optimizers.
-
Export as PNG with Transparency: Go to
File > Export > Export for Web (Legacy). In the export dialog window, select PNG-24 from the format dropdown menu. Crucially, ensure the “Transparency” checkbox is ticked. This setting instructs Photoshop to preserve the transparent pixels around your circular crop, creating the illusion that the image is perfectly circular, rather than a circle on a white background. This is vital for integrating your circular image seamlessly into visual designs, websites, or other digital art projects without a distracting rectangular background. If you accidentally chose ‘Quick Export As JPEG’ previously, it means your default settings were changed, as JPEG does not support transparency. For full control, ‘Export As’ or ‘Export for Web (Legacy)’ are your best bets for PNG. -
Save the File: Click the ‘Save’ button in the export window and choose your desired location. Your perfectly circular image, complete with a transparent background, is now ready for use in any project—from creating engaging mood boards to updating your trending styles profile picture. This final output is suitable for various image collections and applications, from wallpapers to digital art displays.
By mastering these steps in Adobe Photoshop, you gain professional-grade control over your circular crops, producing high-quality, versatile assets for any visual design or photography endeavor.
Effortless Circular Cropping with Online Image Tools
For those who may not have access to professional software like Photoshop, or who simply prefer a quicker, more intuitive approach, online image tools offer a powerful and accessible alternative. These platforms, often free and browser-based, democratize image editing, allowing anyone to achieve stunning circular crops with remarkable ease. Tophinhanhdep.com recognizes the value of such tools for rapid visual design and creating aesthetic content.
The Simplicity of One-Click Solutions
Online circular croppers are designed for efficiency and user-friendliness, making them perfect for beginners or anyone needing to quickly process images. The typical workflow is incredibly straightforward, distilling complex image manipulation into a few simple actions.
-
Upload Your Image: The process usually begins with a prominent “Upload Image” or “Open Image” button. You simply click this, navigate to your desired photograph on your computer, and upload it to the online tool. These tools often support various high-resolution formats, though they may optimize or compress them for web use.
-
Select the Circle Crop Feature: Once your image is loaded, look for a “Crop” tool or a dedicated “Circle Crop” option within the editing interface. Many tools will display various crop shapes (square, rectangle, circle, heart, etc.); you just need to select the circular option. This image tool intelligently applies a circular mask to your image, immediately giving you a preview of the result.
-
Adjust and Refine: The online cropper typically provides intuitive drag-and-drop controls. You can drag the edges or corners of the circular crop area to adjust its size, and drag the entire circle to reposition it over the most important part of your image. This allows you to fine-tune the composition and ensure your subject is perfectly framed. The goal is to make it super easy to crop image to circle, allowing users to create stunning aesthetic profile pictures or graphic elements without hassle.
-
Download Your Circular Image: Once you are satisfied with the crop, a “Download” or “Save” button will finalize the process. These tools generally offer downloads in high-resolution PNG and JPG formats. PNG is highly recommended if you require a transparent background, which is often the case for circular crops. This quick turnaround makes online tools invaluable for fast-paced graphic design projects and generating quick photo ideas.
Effortlessly Get Circle Profile Pictures with Transparent Background
One of the most popular uses for online circular croppers is creating profile pictures with transparent backgrounds. This capability dramatically enhances the versatility of your images for various platforms and visual design contexts.
-
Creating Transparent PFPs (Profile Pictures): Many online tools, including those found via Tophinhanhdep.com, allow you to crop an image to a circle and download it as a PNG. The PNG format supports transparency, meaning the area outside the circle will be clear, not filled with white. This is invaluable for profile pictures, as it allows your avatar to blend seamlessly with any background on social media, websites, or communication apps, giving it a much more professional and integrated look.
-
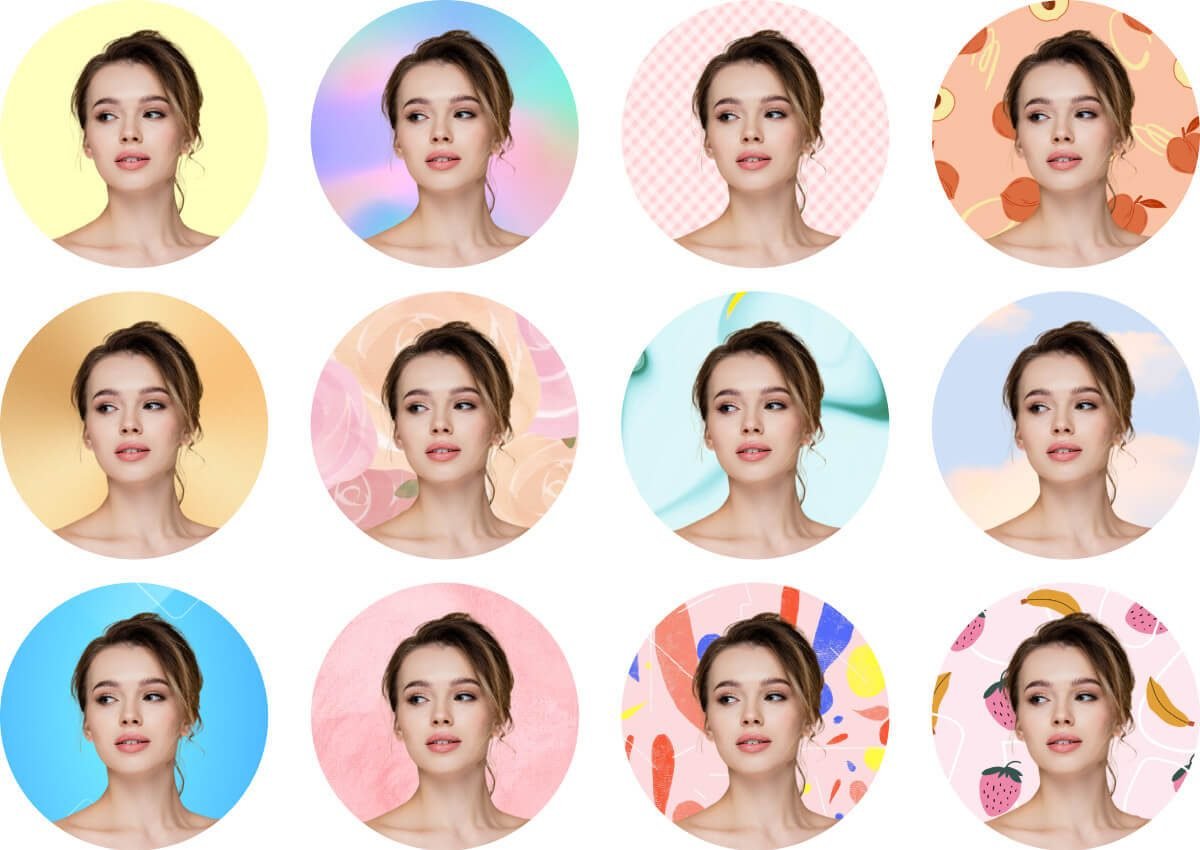
Customizing Backgrounds: With a transparent circular PFP, you gain the freedom to change its background to anything you desire. You can swap out the original background for solid colors that match your brand, incorporate stylish patterns, or even place your circular image over a custom background image that complements your current aesthetic. This level of customization allows for endless creative ideas and personal expression, ensuring your images truly represent your style or brand. Many tools also offer integrated features, like a “PFP maker,” to add more flair with stickers, text, or editing styles.
Batch Processing and Quality Preservation
For individuals or businesses dealing with large volumes of images, the idea of manually cropping each one can be daunting. Advanced online image tools often address this need with batch processing capabilities, further streamlining photography workflows.
-
Cropping Multiple Images Simultaneously: Imagine needing to create circular profile pictures for an entire team or convert a thematic collection of stock photos for a new website layout. Batch cropping features allow you to upload multiple images at once and apply the same circular crop parameters to all of them with a single click. This saves an enormous amount of time and ensures consistency across your image collections.
-
Preserving Original Quality: A common concern with online image tools is the potential for quality loss. Reputable platforms prioritize the preservation of your high-resolution photography. They employ intelligent algorithms to ensure that even after cropping and potential file compression (for faster web loading, aligning with image optimizers), the output images retain as much of their original clarity and detail as possible. This commitment to quality makes online croppers a viable solution for both casual users and those working on professional graphic design projects.
Beyond Circles: Exploring Other Crop Shapes
While the focus here is on circular cropping, many online photo crop tools extend their functionality to a variety of other shapes. This expands your arsenal of creative ideas for visual design.
-
Diverse Shape Options: Don’t limit your imagination to circles alone. Online croppers often allow you to cut out your images into squares, rectangles, heart shapes, stars, and many other custom forms. This versatility enables you to experiment with different visual effects and create unique elements for digital art, mood boards, or thematic collections. A heart-shaped crop, for instance, could be perfect for a romantic beautiful photography piece, while a star shape might add a playful touch to abstract images.
-
Enhancing Visual Storytelling: By experimenting with various shapes, you can bring a new look to your photos and enhance your visual storytelling. Different shapes evoke different feelings and draw attention in unique ways, allowing you to tailor your image manipulation to the specific message or aesthetic you want to convey. Tophinhanhdep.com encourages exploring these options to truly transform your image inspiration into tangible visual designs.
The accessibility and speed of online image tools make circular cropping, and indeed many other image editing tasks, available to everyone. From a quick profile picture update to batch processing a thematic collection of stock photos, these platforms provide efficient solutions for modern visual design needs.
Cropping to a Circle in Presentation Software: Microsoft PowerPoint
While professional image editing software and dedicated online image tools offer extensive control, the need to crop images into circles often arises within the context of presentation design. Microsoft PowerPoint, a widely used tool for creating visually engaging presentations, provides built-in capabilities to achieve circular crops. This section details how to transform your photography into striking circular elements directly within your PowerPoint slides, enhancing your visual design for impactful communication.
The “Crop to Shape” Method: Initializing the Circular Form
PowerPoint’s approach to cropping to a circle involves a clever two-step process that combines shaping and aspect ratio adjustment. This method is particularly useful for those primarily working on presentations and needing quick, integrated image manipulation without switching applications.
-
Select the Picture: Begin by inserting the image you wish to crop onto your PowerPoint slide. Once inserted, click on the picture to select it. Selection is indicated by handles appearing around the image. This action also activates the ‘Picture Format’ or ‘Picture Tools Format’ tab in the Ribbon, which contains all the necessary image tools.
-
Access Crop Options: With the picture selected, navigate to the ‘Picture Format’ or ‘Picture Tools Format’ tab in the Ribbon. In the ‘Size’ group, you’ll find the ‘Crop’ button. Click the down arrow located directly below the ‘Crop’ button. A drop-down menu will appear, offering various cropping functionalities.
-
Choose ‘Crop to Shape’: From the drop-down menu, select ‘Crop to Shape’. This will reveal a fly-out gallery filled with a variety of geometric and organic shapes. For our purpose, you will click on the oval shape. It’s important to note that PowerPoint initially offers an oval, not a perfect circle, because it adapts to the current aspect ratio of your image. This initial step is fundamental to gradually shaping your photography for a specific visual design.
Refining to a Perfect Circle with Aspect Ratio Adjustment
After cropping your image to an oval, the next crucial step is to transform that oval into a perfect circle. This is achieved by adjusting the aspect ratio, a key concept in photography and visual design for maintaining proportional integrity.
-
Ensure Picture is Selected: Make sure your now oval-cropped picture is still selected on the slide. This ensures the ‘Picture Format’ tab remains active.
-
Return to Crop Options: Click the down arrow below the ‘Crop’ button again within the ‘Size’ group on the ‘Picture Format’ tab.
-
Select ‘Aspect Ratio’: From the drop-down menu, hover over ‘Aspect Ratio’. A sub-menu will appear, presenting various common aspect ratio options (e.g., 16:9, 4:3).
-
Choose 1:1 for a Perfect Circle: To turn your oval into a perfect circle, select the ‘1:1’ (Square) aspect ratio. This action forces the width and height of the cropped area to be equal, thereby transforming the oval into a true circle. This step is critical for achieving the desired aesthetic and symmetrical balance in your images. The automatic adjustment simplifies what might otherwise be a complex photo manipulation task.
Adjusting Size and Position for Optimal Layout
Once your image has been cropped into a perfect circle, you’ll likely need to fine-tune its size and position on the slide to integrate it effectively into your overall visual design and presentation layout.
-
Select the Cropped Picture: Ensure the circular image is selected.
-
Activate Crop Mode: Click the main ‘Crop’ button (not the arrow below it) in the ‘Size’ group on the ‘Picture Format’ tab. This will activate crop mode, displaying black crop handles around the new circular boundary and white circular resizing handles at the corners and midpoints of the image itself.
-
Resize the Cropped Area (Circle Size): To change the size of the entire circular crop, drag one of the black crop handles. To maintain the perfect circular shape and resize proportionally, always hold down the Shift key while dragging a corner black crop handle. This ensures your circle remains a circle and doesn’t distort into an oval again.
-
Resize the Picture Within the Circle: To change the size of the image itself within the fixed circular frame, drag one of the white circular handles. Again, to ensure the image resizes proportionally (preventing distortion of the content), hold down the Shift key while dragging a corner white circular handle. This allows you to zoom in or out on the subject within the existing circular frame.
-
Move the Picture Within the Cropped Area: To reposition the image inside the circle (like panning across a larger photo to choose the best circular view), simply click and drag the image itself within the crop mode. The part of the image visible inside the black crop handles is what will appear in your final circle.
-
Exit Crop Mode: Once you are satisfied with the size, shape, and position of your circular image, click anywhere outside the picture on the slide, or click the ‘Crop’ button again, to exit crop mode.
By following these steps, you can create some really interesting effects in your PowerPoint decks, transforming standard images into dynamic circular elements. This capability allows for sophisticated visual design even within presentation software, enabling you to craft compelling mood boards, highlight beautiful photography, and integrate trending styles directly into your slides. This is a powerful technique for anyone looking to elevate their presentations with thoughtful image manipulation and creative ideas.
Conclusion: Elevating Your Visuals with Circular Cropping
The journey through various methods of circular cropping reveals its profound impact on visual design and photography. What might initially seem like a simple image tool technique is, in fact, a powerful means to enhance focus, convey emotion, and impart a sense of aesthetic harmony to your digital creations. From the precise, professional capabilities of Adobe Photoshop to the intuitive, swift solutions offered by online image tools, and even the integrated functionalities within presentation software like Microsoft PowerPoint, the accessibility of circular cropping has never been greater.
We’ve explored how a circular crop can transform a standard photograph into a captivating profile picture, a distinctive logo, or an integral element of digital art. The psychological appeal of the circle—its connotations of unity, softness, and completeness—makes it an ideal choice for a wide array of images, whether they are wallpapers, backgrounds, aesthetic portraits, nature scenes, or abstract compositions. The ability to maintain high resolution, perform non-destructive edits, and export with transparent backgrounds ensures that your circular images are versatile and ready for any platform or project.
At Tophinhanhdep.com, we understand that exceptional visual design goes beyond mere technical execution; it encompasses creative ideas and a keen eye for image inspiration. Mastering circular cropping is a fundamental step in developing sophisticated editing styles and expanding your photo manipulation repertoire. Whether you are curating mood boards, developing thematic collections, or simply aiming to make your beautiful photography stand out, the circular crop offers a fresh perspective and a refined finish.
We encourage you to experiment with these techniques and explore the vast potential of circular framing. Dive into Tophinhanhdep.com’s extensive resources, which cover everything from high-resolution stock photos and digital photography tips to advanced image tools like converters, compressors, optimizers, and AI upscalers. Unlock new possibilities for image-to-text applications and discover trending styles that will keep your visuals at the forefront of innovation. Elevate your images, inspire your audience, and redefine your visual design prowess with the art of circular cropping.