How to Crop an Image in Inkscape: Enhancing Your Visuals with Precision on Tophinhanhdep.com

In the dynamic world of digital imagery, the ability to precisely manipulate and refine visuals is paramount. Whether you’re crafting stunning Wallpapers, curating captivating Backgrounds, or perfecting your Beautiful Photography, cropping plays a fundamental role in achieving your desired aesthetic. For users of Tophinhanhdep.com seeking powerful yet accessible tools for Visual Design and Photo Manipulation, Inkscape stands out as a free and open-source vector graphics editor. While traditionally known for its vector capabilities, Inkscape also offers robust features for handling raster images, including a unique approach to what is commonly understood as “cropping.”
On Tophinhanhdep.com, where High Resolution images and diverse Image Collections are highly valued, understanding how to effectively crop in Inkscape can significantly elevate your creative projects. Unlike pixel-based editors that permanently delete unwanted areas, Inkscape employs a non-destructive method called “clipping.” This technique allows you to define a specific visible area of an image using another shape or path, without altering the original pixel data. This guide will walk you through various methods of cropping in Inkscape, tailored to help Tophinhanhdep.com users create perfectly framed images for Mood Boards, Thematic Collections, and enhancing any Digital Photography endeavor.
Understanding Inkscape’s Approach to Cropping: Beyond the Basics
Before diving into the practical steps, it’s essential to grasp how Inkscape handles the concept of “cropping.” In traditional raster image editors, cropping often implies the permanent removal of pixels outside a selected boundary. Inkscape, being a vector graphics editor, operates differently. When you “crop” an image in Inkscape, you are typically applying a clipping mask. This means you’re not actually deleting parts of the image; rather, you’re instructing Inkscape to only display the portions of the image that fall within a defined shape or “clip path.”
This non-destructive nature is a significant advantage, especially for Digital Art and Graphic Design projects on Tophinhanhdep.com. It means you can always adjust or release the clip later if you change your mind, offering immense flexibility in your Editing Styles. This approach is particularly useful for creating Aesthetic Images or complex Photo Manipulation where iterative adjustments are common.

What “Cropping” Means in a Vector Editor
When users inquire about cropping in Inkscape, they might be referring to a few distinct operations, depending on their specific needs:
- Clipping a Raster or Vector Object: This is the most common interpretation of “cropping” in Inkscape. It involves using a vector shape (like a rectangle, circle, or a custom-drawn path) to define the visible boundaries of an image or a group of objects. The area outside this shape is hidden, but not deleted. This is ideal for refining the composition of Stock Photos or preparing images for Creative Ideas on Tophinhanhdep.com.
- Boolean Operations for Vector Paths: If you’re working with purely vector objects (not imported raster images) and want to physically cut one shape with another, Inkscape’s Boolean operations (like “Path > Intersection”) are the tool of choice. This is a destructive operation that permanently modifies the vector paths. This technique is invaluable for intricate Visual Design projects.
- Adjusting Document Size for Export: Sometimes, “cropping” refers to simply exporting a specific portion of your Inkscape document (SVG) as a bitmap (like a PNG). In this scenario, you define an export area or resize the document page to encompass only the desired content. This is crucial for optimizing images for web use or specific Image Collections featured on Tophinhanhdep.com.
For the purpose of this guide, we will primarily focus on the first definition – clipping raster images – as it most closely aligns with the conventional understanding of cropping, while also exploring the other relevant techniques.
Method 1: Clipping an Object with Basic Shapes
This method is perhaps the most straightforward way to “crop” an image in Inkscape. It involves using a predefined geometric shape – such as a rectangle, circle, or polygon – to outline the portion of your image you wish to keep. This is perfect for quick adjustments to Wallpapers or refining the focal point of Nature Photography on Tophinhanhdep.com.
Step-by-Step: Cropping with Rectangles and Squares
Let’s begin with the most common rectangular crop, ideal for adjusting the aspect ratio or removing unwanted edges from your Backgrounds and Aesthetic images.
Quick Steps Overview:
- Open Inkscape.
- Import your image.
- Draw a rectangle or square over the desired area.
- Select both the shape and the image.
- Apply the “Set Clip” command.
Detailed Walkthrough:
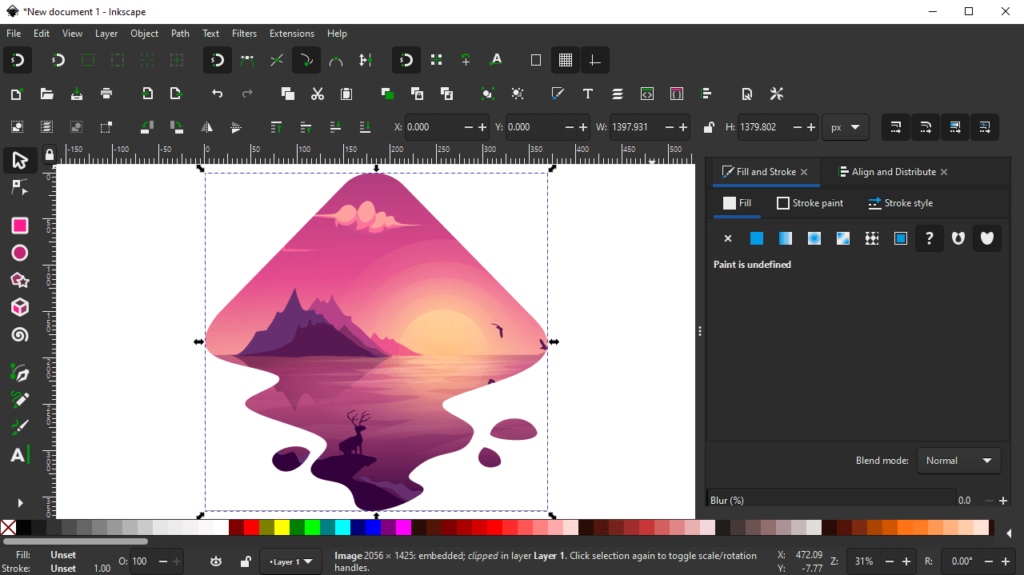
- Launch Inkscape: Open your Inkscape application. If you don’t have it installed, you can download it from the official Inkscape website and seamlessly integrate it into your Image Tools arsenal for Tophinhanhdep.com.
- Import Your Image: To bring your image into Inkscape, go to
File > Import...or use the convenient keyboard shortcutCTRL + I(Windows/Linux) orCMD + I(Mac). Browse your system and select the image you wish to crop. Once selected, click “Open” to load it onto your Inkscape canvas. This could be a High Resolution landscape from your Nature Photography collection or an Abstract image ready for refinement. - Draw Your Clipping Shape: From the toolbar on the left side of the Inkscape window, select the “Create rectangles and squares” tool (often represented by a square icon, or by pressing
F4). Click and drag your cursor over the imported image to draw a rectangular or square shape. This shape should completely cover the part of the image you want to preserve. Ensure this newly drawn shape is positioned above your image in the layer order. If it appears underneath, select the shape and press thePage Upkey (orObject > RaiseorObject > Raise to Top).- Tip for Tophinhanhdep.com users: To easily visualize the area being cropped, you might temporarily set the opacity of your clipping shape to around 50% (found in the Fill and Stroke dialog,
CTRL+SHIFT+F). This allows you to see the underlying image while positioning your crop.
- Tip for Tophinhanhdep.com users: To easily visualize the area being cropped, you might temporarily set the opacity of your clipping shape to around 50% (found in the Fill and Stroke dialog,
- Select Both Objects: Switch to the “Select and transform objects” tool (the mouse arrow icon in the toolbar, or press
SorF1). Now, hold down theShiftkey on your keyboard and click on both the newly drawn shape AND your imported image. Both should now be selected simultaneously (indicated by a dashed outline around both objects). - Apply the Clip: With both the shape and the image selected, navigate to the top menu bar and click
Object > Clip > Set. Alternatively, you can right-click on the selected objects and chooseSet Clipfrom the context menu. Instantly, the parts of your image outside the rectangular shape will disappear, leaving only the desired section visible.
Expanding Your Toolkit: Cropping with Circles, Stars, and Polygons
The beauty of Inkscape’s clipping mechanism is its versatility. You’re not limited to just rectangles. You can use any closed vector shape to define your crop. This opens up exciting possibilities for Creative Ideas and unique Visual Design elements on Tophinhanhdep.com.
Using Circles and Ellipses:
- Select the Circle/Ellipse Tool: From the toolbar, choose the “Create circles, ellipses and arcs” tool (often an oval icon, or press
F5). - Draw Your Shape: Click and drag to create a circular or elliptical shape over the area you want to crop. Hold
Ctrlwhile dragging to create a perfect circle. - Apply Clip: Follow steps 4 and 5 from the “Rectangles and Squares” method: select both the circle and the image (holding
Shift), then go toObject > Clip > Set. Your image will now be beautifully framed within the circular or elliptical shape, perfect for a striking Aesthetic profile picture or Sad/Emotional abstract art.
Using Stars and Polygons:
- Select the Stars and Polygons Tool: Locate the “Create stars and polygons” tool in the toolbar (it looks like a star or polygon, or press
Shift + F9). - Customize Your Shape: In the tool’s control bar at the top, you can adjust the number of corners (for polygons) or spokes (for stars), and other parameters like spoke ratio and roundedness.
- Draw and Apply Clip: Draw your desired star or polygon shape over the image, ensuring it covers the area to be kept. Again, select both the shape and the image (using
Shift+ click), then apply the clip viaObject > Clip > Set. This allows for highly stylized crops, ideal for Digital Art or specific Visual Design motifs you might showcase on Tophinhanhdep.com.
Releasing or Adjusting a Clip:
Remember, Inkscape’s clipping is non-destructive. If you’re not satisfied with the result, or if you need to adjust the clipped area, simply:
- Select the clipped image.
- Go to
Object > Clip > Release. This will bring back the original image and the clipping shape, allowing you to reposition, resize, or even change the shape before re-applying the clip. This flexibility is a huge advantage for refining your Image Inspiration & Collections.
Method 2: Clipping with Freeform Paths for Creative Control
While geometric shapes are excellent for structured crops, sometimes your Creative Ideas demand a more organic, freehand approach. This is where clipping with a custom-drawn path using the Bezier tool becomes indispensable. This method offers unparalleled control, allowing Tophinhanhdep.com users to extract complex forms for Photo Manipulation or intricate Graphic Design.
Precision Cropping with the Bezier Tool
The Bezier tool (also known as the Pen tool in other software) allows you to draw precise lines and curves, forming a custom shape for your clip.
Detailed Walkthrough:
- Open Inkscape and Import Image: As before, open Inkscape and import your chosen image (
File > Import...orCTRL + I / CMD + I). Perhaps it’s a Beautiful Photography piece where you want to isolate a specific element with an unconventional boundary. - Select the Bezier Tool: In the toolbar on the left, select the “Draw Bezier curves and straight lines” tool (it typically looks like a pen nib, or press
Shift + F6). - Draw Your Custom Path: Use the Bezier tool to trace around the area of the image you wish to keep.
- Click once to create a corner node for straight lines.
- Click and drag to create a smooth curve.
- Continue clicking (and dragging for curves) around your desired area.
- To close the path, click on your starting node. A closed path is crucial for a successful clip.
- Tip for Tophinhanhdep.com users: For very precise tracing, zoom in on your image (
+orCtrl+ mouse wheel) and use theZkey to temporarily switch to the zoom tool. You can also temporarily reduce the opacity of your drawn path to see the image underneath, aiding in accuracy.
- Select Both Objects: Switch to the “Select and transform objects” tool (the mouse arrow icon or
S/F1). Hold down theShiftkey and click both your custom-drawn path AND the imported image. - Apply the Clip: Go to the top menu bar and select
Object > Clip > Set(or right-click and chooseSet Clip). Your image will now be cropped according to the intricate shape you drew with the Bezier tool. This technique is especially powerful for extracting subjects from Stock Photos or creating unique Digital Art compositions.
Editing the Clip Path:
One of the most powerful features of Inkscape’s clipping is the ability to edit the clip path after it has been set. This means you don’t have to release and re-clip every time you want to make a minor adjustment to your custom crop.
- Select the clipped object (the image that now appears cropped).
- Select the “Edit paths by nodes” tool (the arrow with nodes icon, or press
N). - You will see the nodes and handles of your clipping path outlined (often in green). You can now click and drag these nodes, add new nodes, or delete existing ones to refine the shape of your crop, offering unparalleled Visual Design flexibility.
Advanced Techniques and Document Management
Beyond basic clipping, Inkscape offers other functionalities that can be considered “cropping” in certain contexts, particularly when dealing with purely vector content or preparing files for export.
Utilizing Boolean Operations for Vector Objects
If you’re working with vector shapes within Inkscape (rather than imported raster images) and need to perform a “hard” crop where parts of the vector data are permanently removed, Boolean Operations are your solution. This is essential for clean Graphic Design and creating precise cut-outs for logos or complex illustrations on Tophinhanhdep.com.
-
Create Your Vector Objects: Start with two or more vector objects that you want to interact. For example, a large shape and a smaller shape that will act as the “cutter.”
-
Position the Cutter: Place the “cutter” shape over the area of the larger object you want to keep (or remove, depending on the operation).
-
Select Both Shapes: Using the “Select and transform objects” tool (
S),Shift+click to select both vector shapes. -
Apply a Boolean Operation: Go to
Pathin the top menu. You’ll find several options:- Intersection: This is the closest equivalent to a “crop” for vector objects. It keeps only the overlapping area of the selected shapes.
- Difference: The top object cuts away from the bottom object.
- Union: Combines selected objects into a single new object.
- Exclusion: Creates a new object that is the sum of selected objects minus any overlapping areas.
- Division: Cuts the bottom object by the top object.
- Cut Path: The top path cuts the bottom path into segments.
For a direct vector “crop,”
Path > Intersectionis usually what you’re looking for. This immediately trims the vector object, permanently deleting the data outside the intersecting area. This is a powerful tool for crafting intricate Digital Art and refining elements for Thematic Collections on Tophinhanhdep.com.
Adjusting Document Size for Export and Final Output
Sometimes, “cropping” isn’t about modifying an image within the canvas, but about defining the output area when exporting your Inkscape project as a raster image. This is particularly relevant for Tophinhanhdep.com users who need to generate optimized PNGs or JPGs for web use or specific display sizes.
- Define Your Desired Export Area: If your image (or composition) is surrounded by empty space that you don’t want in your final export, you can define a specific output boundary.
- Open Document Properties: Go to
File > Document Properties...(orCTRL + SHIFT + D). - Resize to Content: In the “Document Properties” dialog box, navigate to the “Page” tab. Look for the “Resize page to drawing or selection” section. Click the button labeled “Resize page to drawing or selection.”
- Tip: If you have a specific object or group of objects that you want to define as your “cropped” output area, select those objects before opening Document Properties and clicking “Resize page to drawing or selection.” The page boundary will then snap to the bounding box of your selection.
- Export Your Bitmap: Now, when you go to
File > Export(orFile > Export PNGin older versions), you will have options for the “Export Area.”- Select “Page” as the export area. This ensures that only the content within your newly resized document boundary is exported.
- Choose your desired file format (e.g., PNG for transparency or JPG for smaller file size), set the resolution, and click “Export.”
This method ensures that your exported images are perfectly trimmed to your specifications, ready to be uploaded as Optimized Wallpapers or integrated into Image Inspiration & Collections on Tophinhanhdep.com.
The Tophinhanhdep.com Advantage: Why Mastering Cropping Matters
For the diverse community of Tophinhanhdep.com, proficiency in Inkscape’s cropping and clipping tools translates directly into enhanced visual quality and expanded creative possibilities across all main topics:
- Images (Wallpapers, Backgrounds, Aesthetic, Nature, Abstract, Sad/Emotional, Beautiful Photography): Precise cropping allows you to refine the composition of any image, focusing attention on key elements, eliminating distractions, and creating a stronger visual narrative. Imagine a Nature Photography shot where a distracting branch is perfectly clipped away, or an Abstract piece is reshaped to fit a specific Aesthetic layout. Cropping is the silent editor that elevates good images to great ones, making them ideal for Tophinhanhdep.com’s curated collections.
- Photography (High Resolution, Stock Photos, Digital Photography, Editing Styles): Mastering clipping in Inkscape is an essential part of the post-processing workflow for any Digital Photography enthusiast. It ensures that High Resolution images are framed to perfection, highlighting intricate details. For Stock Photos, judicious cropping can adapt a generic image to suit a specific editorial context or creative brief, aligning with contemporary Editing Styles.
- Image Tools (Converters, Compressors, Optimizers, AI Upscalers, Image-to-Text): Inkscape, as a powerful graphics editor, complements the broader suite of Image Tools offered or discussed on Tophinhanhdep.com. After using tools like AI Upscalers to enhance resolution, cropping in Inkscape becomes the next logical step to fine-tune the composition. The output can then be fed into Compressors and Optimizers for web-ready delivery, showcasing a complete workflow for maximum visual impact.
- Visual Design (Graphic Design, Digital Art, Photo Manipulation, Creative Ideas): Cropping is a foundational skill in Graphic Design and Digital Art. It’s not just about trimming; it’s about shaping, framing, and creating negative space. For Photo Manipulation, complex clipping paths can seamlessly integrate elements from various sources. The flexibility of Inkscape’s non-destructive clipping encourages experimentation and fuels Creative Ideas, allowing designers to iterate rapidly.
- Image Inspiration & Collections (Photo Ideas, Mood Boards, Thematic Collections, Trending Styles): When building Mood Boards or curating Thematic Collections, consistently well-cropped images are key to a professional and cohesive presentation. Learning these Inkscape techniques empowers Tophinhanhdep.com users to transform raw visuals into refined assets that contribute to Trending Styles and capture attention effectively.
In conclusion, while Inkscape’s nomenclature for “cropping” might differ slightly from traditional image editors, its powerful clipping and path manipulation tools offer comprehensive solutions for refining your digital images. By mastering these techniques, Tophinhanhdep.com users gain invaluable control over their visual content, ensuring every image is perfectly composed, aesthetically pleasing, and ready to inspire. Embrace Inkscape’s capabilities, and unlock new dimensions in your journey of Image and Visual Design on Tophinhanhdep.com.