Mastering Image Cropping in PowerPoint: A Comprehensive Guide by Tophinhanhdep.com

In the realm of visual communication, a well-crafted presentation can be the difference between captivating your audience and losing their attention. Microsoft PowerPoint stands as a ubiquitous tool for creating compelling visual narratives, and at the heart of effective slide design lies the strategic use of images. While simply inserting a picture is easy, the true power comes from refining and tailoring it to fit your message perfectly. This is where image cropping becomes an indispensable skill, allowing you to highlight key details, achieve specific aesthetic looks, and maintain a professional visual standard.
Tophinhanhdep.com, a leading resource for images, photography insights, and visual design tools, understands the profound impact of well-prepared visuals. Our extensive collections of high-resolution images – from breathtaking nature photography and abstract art to aesthetic backgrounds and thematic collections – are designed to inspire and elevate your projects. This guide, drawing upon expert insights and practical steps, will walk you through the various ways to crop images in PowerPoint, enabling you to transform ordinary pictures into extraordinary visual assets for your presentations.
Whether you’re looking to trim extraneous details, achieve a specific aspect ratio for a seamless background, or creatively reshape an image, mastering PowerPoint’s cropping features is a fundamental step in digital photography editing and graphic design. Tophinhanhdep.com is committed to empowering you with the knowledge and resources to make your presentations visually stunning and impactful.
Understanding the Fundamentals of Cropping in PowerPoint
Cropping is essentially the art of subtraction in visual design. It allows you to remove unwanted portions of an image, focusing the viewer’s attention on the most important elements. Think of it as framing a shot within your existing picture. This technique is crucial for achieving visual balance, enhancing composition, and ensuring your images complement your overall presentation design.
The Essential “Crop” Tool: Trimming for Precision
The most common and straightforward method of cropping in PowerPoint involves using the basic crop tool. This allows for freehand trimming of the horizontal and vertical sides of your picture, making it easy to isolate a subject or adjust the image’s boundaries.
Step-by-Step Guide to Basic Cropping:
- Insert Your Picture: Begin by inserting the image you wish to crop into your PowerPoint slide. You can find high-quality images suitable for any theme on Tophinhanhdep.com, from stunning wallpapers to evocative sad/emotional photography.
- Select the Picture: Click on the picture you’ve inserted. This action will automatically activate the “Picture Format” tab on the PowerPoint ribbon at the top of your screen.
- Activate the Crop Tool: Within the “Picture Format” tab, locate and click the “Crop” button.
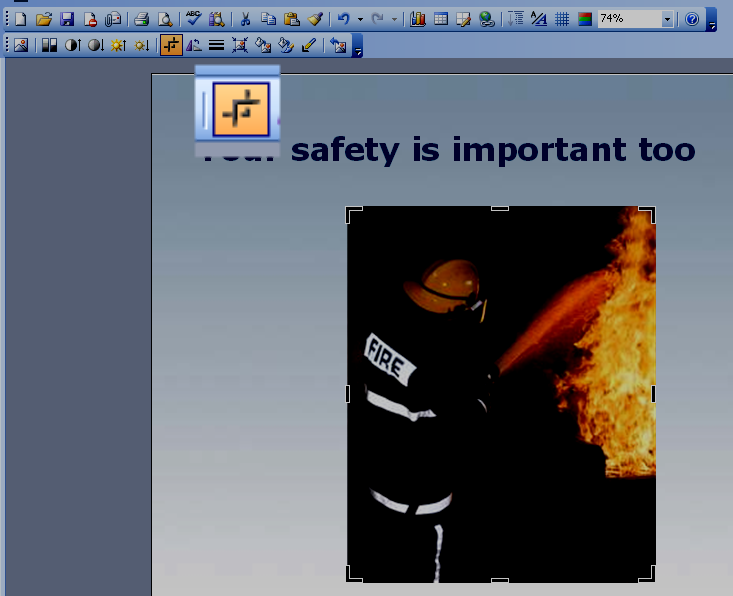
- Observation: Once clicked, black cropping handles will appear around the border of your picture. These handles are your primary tools for reshaping the image.
- Drag the Crop Handles: Click and drag these black handles inward from the edges of the picture. As you drag, you’ll see a darkened, faded area outside the handles, indicating the parts of the image that will be removed.
- Tip: To crop all four sides simultaneously while maintaining the picture’s original proportions, press and hold down the
Ctrlkey (orCmdon Mac) as you drag a corner handle.
- Tip: To crop all four sides simultaneously while maintaining the picture’s original proportions, press and hold down the
- Complete the Crop: Once you’ve achieved the desired crop, click the “Crop” button again, or simply click anywhere outside the picture on your slide. The faded areas will disappear, leaving you with your newly cropped image.

This basic method is perfect for quickly removing distracting backgrounds or focusing on a specific subject, transforming a busy image into a clean, aesthetic focal point, much like the precision desired in beautiful photography.
Mastering Aspect Ratios for Consistent Design
Consistency is key in professional visual design. When creating backgrounds or a series of images, maintaining a uniform aspect ratio (the ratio of an image’s width to its height) is paramount. PowerPoint offers built-in tools to crop images to predefined aspect ratios, ensuring your visuals perfectly fit your slide layout without distortion.
Step-by-Step Guide to Cropping by Aspect Ratio:
- Select Your Picture: As before, select the image you intend to modify.
- Access Aspect Ratio Options: Go to the “Picture Format” tab. Click the dropdown arrow located next to the “Crop” button.
- Choose “Aspect Ratio”: From the dropdown menu, hover over “Aspect Ratio.” A sub-menu will appear displaying common ratios such as 16:9 (widescreen for presentations), 4:3 (standard for older displays or print), 1:1 (square), or others like 2:3, 3:2, etc.
- Select Your Desired Ratio: Click on the aspect ratio that best suits your presentation’s needs. For instance, selecting 16:9 is ideal for creating full-screen visual backgrounds on modern displays, utilizing Tophinhanhdep.com’s high-resolution wallpapers.
- Adjust the Frame (Optional): After selecting an aspect ratio, the crop handles will adjust to that ratio. You can then drag the cropping frame or reposition the image within the frame to select the exact portion you want to keep.
- Finalize the Crop: Click the “Crop” button again or click outside the picture.
Cropping to an aspect ratio is particularly useful for crafting seamless backgrounds or creating consistent image layouts, especially when dealing with stock photos or images from diverse collections on Tophinhanhdep.com. It ensures that your images, whether nature scenes or abstract patterns, align perfectly with your slide dimensions.
Transforming Images with “Crop to Shape”
Beyond standard rectangles, PowerPoint allows you to crop images into a myriad of predefined shapes, adding a unique and creative flair to your presentations. This feature is a powerful tool for visual design, enabling you to break away from traditional rectangular boundaries and incorporate elements of digital art and creative ideas.
Step-by-Step Guide to Cropping to a Shape:
- Select the Picture: Click on the image you wish to crop.
- Access Shape Cropping Options: Navigate to the “Picture Format” tab. Click the dropdown arrow next to the “Crop” button.
- Select “Crop to Shape”: From the menu, hover over “Crop to Shape.” A gallery of various shapes (basic shapes, block arrows, flowcharts, stars, banners, callouts, etc.) will appear.
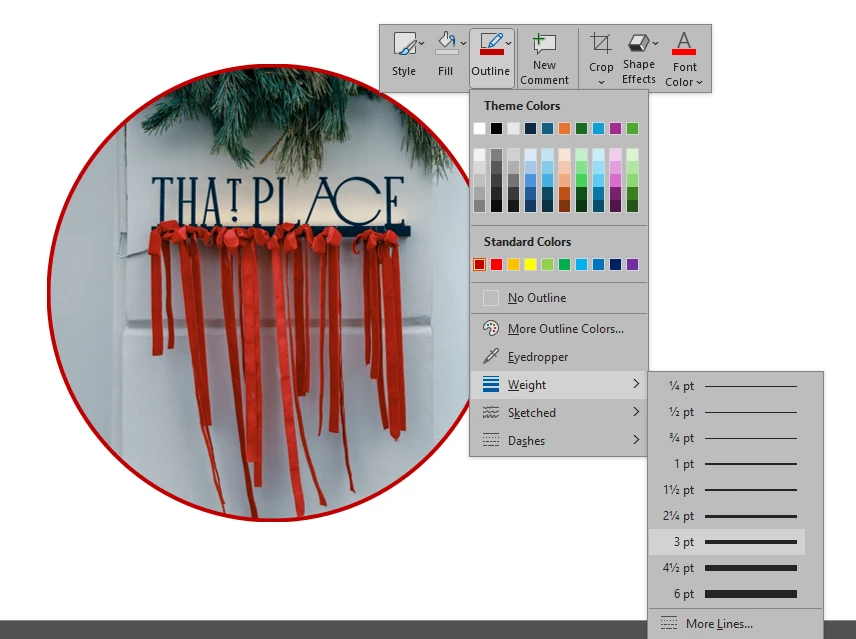
- Choose Your Shape: Select the desired shape from the gallery. For example, you might crop a profile picture into a circle for a team slide or use an arrow shape to indicate direction in a graphic.
- Note: When you crop a rectangular image into a non-square shape like a circle, it might initially appear as an oval. To achieve a perfect circle, start with a square image, or adjust the image within the circular crop area (see “Adjust the Image Inside the Shape” below).
- Adjust the Image Inside the Shape: After applying the shape, the image might not be perfectly centered. To adjust it, click the “Crop” button again. You’ll see the original full image underneath the shape. Drag the image within the shaped frame to reposition it, or drag the black crop handles to resize the shape itself relative to the image.
- Finalize: Click outside the picture or the “Crop” button to apply the changes.
Cropping to shape can enhance visual interest, reinforce themes (e.g., using a star shape for “key takeaways”), and create unique layouts. Tophinhanhdep.com’s aesthetic and thematic collections often inspire such creative applications, allowing you to integrate images into mood boards or trending styles seamlessly.
Beyond the Basics: Advanced Cropping Techniques for Visual Impact
While the fundamental cropping tools offer significant control, PowerPoint provides even more sophisticated methods to manipulate images, pushing the boundaries of what you can achieve directly within your presentation software. These advanced techniques delve deeper into photo manipulation and graphic design, offering creative ideas that can elevate your digital art.
Fine-Tuning Your Crop: Adjusting and Repositioning
Even after initial cropping, you might need to adjust the picture’s position or scale within the cropped frame. PowerPoint offers precise controls for this.
How to Adjust a Cropped Image in PowerPoint:
- Select the Cropped Picture: Click on the image you’ve already cropped.
- Enter Cropping Mode: Go to the “Picture Format” tab and click the “Crop” button.
- Manipulate the Image:
- Move the picture within the frame: Click and drag the image itself (not the handles). You’ll see the full image ghosted outside the crop area, allowing you to fine-tune what’s visible within your chosen frame.
- Resize the picture within the frame: Hold
Shiftand drag one of the corner sizing handles (the white circles, not the black crop handles) to scale the image larger or smaller without changing the crop area. This is useful if you want to zoom in or out on a specific part of the image within your defined shape.
- Use Offset Values for Precision: For absolute precision, especially with circular crops, right-click the cropped picture and select “Format Picture.” In the “Format Picture” pane, under the “Picture” icon, find the “Crop” section. Here, you can adjust “Offset X” and “Offset Y” values to move the picture horizontally and vertically within the cropped area. This is ideal for centering a subject perfectly within a circle.
- Exit Cropping Mode: Click the “Crop” button again or press
Esc.
This level of adjustment ensures that your high-resolution photography, even after extensive cropping, maintains its visual integrity and impact.
Unleashing Creativity with “Intersect to Shape”
For PowerPoint versions 2013 and later, the “Merge Shapes” feature introduces a powerful method called “Intersect,” which provides an even more intuitive way to crop pictures into custom shapes. This method offers greater flexibility because you can draw the shape directly over the exact part of the photo you want to keep.
Step-by-Step Guide to Intersecting a Picture to a Shape:
- Insert Your Picture: Add your desired image to the slide.
- Draw Your Desired Shape: Go to the “Insert” tab, click “Shapes,” and draw any shape directly on top of the part of your picture that you want to keep. For instance, if you want a star-shaped crop of a specific flower, draw a star over that flower.
- Select Both Elements (Order Matters!): This is crucial. First, select the picture. Then, while holding down the
Shiftkey, select the shape. - Access “Merge Shapes”: Go to the “Shape Format” tab (which appears after selecting both). In the “Insert Shapes” group, click the “Merge Shapes” dropdown.
- Select “Intersect”: Choose the “Intersect” command. PowerPoint will then crop the picture to the area where the picture and the shape overlap.
The “Intersect” command is a cornerstone of advanced photo manipulation within PowerPoint, allowing for complex and precise custom crops that are perfect for creating unique digital art elements in your presentations.
Streamlining Workflow with “Power Cropping” (Multiple Pictures at Once)
Managing multiple images can be time-consuming. For ambitious PowerPoint users, a “power cropping” trick using SmartArt graphics (available on PC versions of PowerPoint 2013 and later) allows you to crop and resize several pictures simultaneously. This is a game-changer for presentations featuring thematic collections or mood boards.
Step-by-Step Guide to Power Cropping with SmartArt:
- Select Your Images: Insert and select all the pictures you want to crop together.
- Convert to SmartArt: Go to the “Picture Format” tab. Click the “Picture Layout” dropdown.
- Choose a SmartArt Layout: Hover over different SmartArt layouts to see a live preview of how your pictures will be cropped and resized into various shapes and arrangements. Select a layout that gets you closest to your desired outcome. Many layouts offer circular, rectangular, or other geometric crops.
- Break Apart the SmartArt Graphic: Once you’ve chosen a layout, you need to convert it back into individual, editable shapes.
- Method 1 (Keyboard Shortcut): Select the SmartArt graphic, then press
Ctrl+Shift+Gtwice (orCmd+Shift+Gtwice on Mac) to “Ungroup” the object fully. - Method 2 (Convert to Shapes): Select the SmartArt graphic. Go to the “SmartArt Design” tab. Click the “Convert” dropdown and select “Convert to Shapes.” This turns your SmartArt into a group of cropped pictures.
- Method 1 (Keyboard Shortcut): Select the SmartArt graphic, then press
- Ungroup Further: If necessary, select the converted group of shapes and ungroup them again (using
Ctrl+Shift+GorArrange > Ungroup) so you can work with each cropped picture individually. - Adjust Individual Crops: Now you have multiple, pre-cropped images. You can further adjust each picture’s crop using the methods described in “How to Adjust a Cropped Image in PowerPoint” if needed.
This technique is incredibly efficient for creating uniform galleries of images, ideal for showcasing different aspects of your visual design or presenting diverse stock photos from Tophinhanhdep.com.
The Art of 3D Picture Cropping (Out-of-Bounds Effect)
For truly innovative visual effects, PowerPoint allows for “out-of-bounds” or 3D picture cropping. This trick creates an illusion where part of an object appears to pop out of the image frame, adding depth and dynamic visual interest. It’s an advanced form of photo manipulation that demands careful selection of high-resolution images.
The Concept for Creating a 3D Image:
The core idea involves using two copies of the same image, cropping them differently, and then overlaying them to create the illusion.
- Find the Right Image: Start with a high-quality image, preferably one with a clear subject that extends beyond its natural boundaries or has an element that can be easily isolated. Tophinhanhdep.com’s beautiful photography or high-resolution images are perfect for this.
- Duplicate the Image: Create two identical copies of your chosen picture on your slide.
- Crop the First Image (Background): Crop one image to serve as the background “frame.” This will be the main, perhaps smaller, framed version of your picture.
- Crop the Second Image (Foreground/Pop-Out): Crop the second image very carefully, removing all but the specific part you want to appear “out of bounds.” This usually involves using a freehand crop to isolate the popping-out element.
- Overlay and Align: Precisely overlay the second, cropped image (the “pop-out” element) exactly on top of the first, framed image.
- Refine and Shadow (Optional): Add subtle shadows to the “pop-out” element to enhance the 3D effect.
While the detailed step-by-step process for this trick is extensive, the fundamental cropping and layering are key. This technique transforms standard photography into captivating digital art, pushing the boundaries of presentation design.
Tophinhanhdep.com’s Role in Elevating Your Presentation Visuals
At Tophinhanhdep.com, we believe that powerful presentations begin with exceptional imagery. While PowerPoint provides robust cropping tools, the quality and type of images you start with are fundamental. Our platform serves as your ultimate resource for visual excellence, offering a vast array of collections and tools that perfectly complement your PowerPoint design efforts.
Selecting High-Quality Images for Optimal Results
The first rule of impactful cropping is to start with a high-resolution image. Low-resolution pictures become pixelated and blurry when cropped or resized, diminishing your presentation’s professionalism. Tophinhanhdep.com specializes in providing:
- High Resolution Photography: Our curated collections ensure every image, from stunning nature photography to intricate abstract patterns, retains its sharpness and clarity even after cropping and resizing.
- Diverse Thematic Collections: Whether you need aesthetic backgrounds, evocative wallpapers, or specific photo ideas for a mood board, our thematic collections offer images perfectly suited for various presentation contexts. Cropping these images allows you to extract the ideal segment that aligns with your message.
- Stock Photos for Professionalism: Our royalty-free stock photos are ideal for business presentations, ensuring you have professional-grade visuals that can be cropped to highlight key aspects without compromising quality.
Leveraging Tophinhanhdep.com’s Image Tools for Pre-PowerPoint Preparation
Beyond providing inspiring images, Tophinhanhdep.com offers a suite of image tools that can optimize your pictures before you even bring them into PowerPoint, further enhancing your cropping workflow:
- Image Compressors & Optimizers: After cropping in PowerPoint, consider that the original image data often remains hidden, contributing to larger file sizes. Tophinhanhdep.com’s compressors and optimizers can drastically reduce your presentation’s file size without noticeable loss of visual quality. This is crucial for easy sharing and faster load times.
- AI Upscalers: If you find a visually perfect image that is unfortunately low-resolution, our AI upscalers can intelligently enhance its quality, making it suitable for cropping and display in your high-definition presentations.
- Image Converters: Ensure your images are in the optimal format (e.g., JPEG for photos, PNG for images with transparency) using our image converters, facilitating a smoother workflow within PowerPoint.
By utilizing Tophinhanhdep.com’s resources, you’re not just cropping an image; you’re engaging in a complete visual design process, from initial image selection to final optimization.
Best Practices for Professional Image Cropping
Effective cropping goes beyond just knowing the tools; it involves applying design principles and considering the overall impact on your audience. Here are some best practices endorsed by Tophinhanhdep.com for elevating your presentations:
Designing with Purpose: Matching Crops to Content
Every crop should serve a deliberate purpose. Before you start dragging handles, ask yourself:
- What is the focal point? Crop to eliminate distractions and draw attention to the most important element of the picture.
- Does it align with your message? If your presentation is about minimalism, a tightly cropped, clean image from an abstract collection might be more effective than a wide, busy shot.
- How does it fit the slide layout? Cropping can create space for text, establish visual hierarchy, or contribute to a specific graphic design pattern. Use aspect ratios to ensure images fit backgrounds seamlessly. For example, a majestic landscape from our nature photography collection can become a striking background with a 16:9 crop, providing ample negative space for your content.
- Does the shape reinforce the theme? Cropping a team member’s portrait into a circle for a “Teams Slide” (as seen in Tophinhanhdep.com’s photo ideas) conveys approachability and professionalism.
Avoiding Common Cropping Pitfalls
- Don’t over-crop: While focusing is good, sometimes an image needs some surrounding context or “negative space” to breathe. Avoid cutting off essential parts of a subject, like the top of someone’s head.
- Mind the resolution: As mentioned, always start with high-resolution images. Cropping a low-resolution image will only make its flaws more apparent. Tophinhanhdep.com’s high-resolution stock photos are designed to prevent this issue.
- Maintain aspect ratio when resizing: After cropping, if you need to resize the image on the slide, always drag from the corner handles while holding
Shiftto maintain proportions. Otherwise, your beautifully cropped image might become stretched or squashed. - Check for image groups: If you can’t crop, ensure the image isn’t part of a group of objects. Ungroup them first. Similarly, images added via PowerPoint’s Photo Album feature or vector graphics often cannot be cropped directly. Consider re-inserting them or converting vector graphics to a raster format (like JPEG, PNG) using Tophinhanhdep.com’s image tools.
Integrating Cropped Images into a Cohesive Visual Narrative
Cropping is just one step in creating a powerful visual narrative. Combine skillfully cropped images with other elements of visual design:
- Balance with text: Ensure your cropped images leave enough clear space for text and don’t overwhelm the slide.
- Color harmony: Choose images that complement your presentation’s color scheme. Tophinhanhdep.com’s aesthetic and beautiful photography collections are often curated with color palettes in mind.
- Use visual effects sparingly: After cropping, PowerPoint offers options like borders, shadows, and reflections. Use these judiciously to enhance, not distract, from your cropped image.
- Think in collections: If you’re using multiple images, cropping them consistently (e.g., all to 1:1 ratio or into the same shape) creates a professional and cohesive look, much like a well-designed mood board or thematic collection.
Conclusion
Mastering how to crop an image in PowerPoint is more than just a technical skill; it’s an art form that empowers you to shape your visual story with precision and creativity. From basic trimming to advanced shape and 3D effects, PowerPoint’s robust tools offer a plethora of options to transform your pictures into compelling presentation assets.
At Tophinhanhdep.com, we are dedicated to providing the highest quality images, insightful photography guidance, and essential image tools to support your visual design journey. By combining PowerPoint’s cropping capabilities with Tophinhanhdep.com’s high-resolution images, diverse collections, and optimization tools, you can craft presentations that are not only informative but truly unforgettable.
Remember, every pixel you choose to include or exclude tells a part of your story. Crop with purpose, design with passion, and let your visuals from Tophinhanhdep.com speak volumes. We invite you to explore our vast resources and unlock the full potential of your presentations, turning every slide into a piece of digital art.