Mastering the Art of Circular Image Cropping: A Comprehensive Guide by Tophinhanhdep.com

In the vast and ever-evolving world of digital imagery, the way we present visuals can significantly impact their effectiveness and aesthetic appeal. While traditional rectangular or square images dominate, the elegant simplicity of a circular crop offers a unique visual flair that can draw the eye, soften harsh lines, and create a more intimate or focused presentation of your subject. Whether you’re crafting a captivating profile picture, designing a sleek logo, or simply adding a touch of artistic sophistication to your digital art, knowing how to crop an image into a circle is an invaluable skill.
At Tophinhanhdep.com, we are dedicated to empowering creators, photographers, and visual enthusiasts with the knowledge and tools needed to transform their images. Our platform is a comprehensive resource, spanning everything from breathtaking wallpapers and aesthetic backgrounds to advanced digital photography techniques and essential image manipulation tools like converters, compressors, and AI upscalers. This guide, curated by the experts at Tophinhanhdep.com, will walk you through various methods to achieve the perfect circular crop, ensuring your images stand out with professional polish.

The Enduring Allure of the Circle: Why Circular Images Captivate
Human perception is inherently drawn to curved shapes. Scientists and designers alike acknowledge that circles evoke feelings of completeness, unity, and timelessness. In a digital landscape saturated with sharp angles and rigid compositions, a circular image can provide a refreshing visual break, offering a softer, more organic, and often more engaging point of focus. This is why you frequently see circular profile pictures across social media platforms, round badges in graphic design, and artistic circular frames in stunning photography.

Elevating Visual Storytelling
A circle naturally frames its subject, drawing the viewer’s gaze directly to the core of the image. This focused presentation can enhance visual storytelling by eliminating distracting background elements and emphasizing the emotional or thematic essence of a photograph. Imagine a poignant portrait, a vibrant bloom from a nature collection, or an abstract pattern – when presented within a circle, these images can take on a heightened sense of importance and artistry. Tophinhanhdep.com encourages exploring these creative ideas to add depth and uniqueness to your thematic collections and mood boards.
Versatile Applications Across Digital Platforms
The practical applications of circular crops are as diverse as the images themselves. For personal branding, a circular profile picture is almost universally adopted, projecting a friendly and approachable persona. Businesses utilize circular logos and icons for their websites, apps, and marketing materials, leveraging the shape’s connotations of professionalism and inclusivity. Graphic designers frequently employ circular elements in their layouts for buttons, testimonials, or decorative accents, contributing to an overall sense of harmony and sophistication. Even for creating unique aesthetic wallpapers or backgrounds from Tophinhanhdep.com’s vast image collections, a circular crop can add a contemporary edge. Understanding these uses is fundamental to mastering visual design and creative ideas, areas Tophinhanhdep.com specializes in.
Precision Cropping: Tophinhanhdep.com’s Expert Guide for Desktop Software (e.g., Photoshop)
For those who demand granular control and professional-grade results, Tophinhanhdep.com provides detailed tutorials for advanced desktop software like Adobe Photoshop. This method, while involving a few more steps than online tools, offers unparalleled flexibility and non-destructive editing capabilities, aligning perfectly with Tophinhanhdep.com’s commitment to high-resolution digital photography and sophisticated editing styles.
Preparing Your Image for a Perfect Circle
Before diving into the cropping process, a few initial steps are crucial to ensure a smooth workflow and optimal results. Tophinhanhdep.com emphasizes these foundational practices for all digital photography and photo manipulation projects.
Step 1: Importing Your Image into Photoshop
The first action is to get your chosen image into Photoshop. Tophinhanhdep.com recommends the quickest method: simply drag your image file directly onto the Photoshop application icon or an open Photoshop window. Alternatively, you can right-click your image file, choose ‘Open with,’ and select ‘Adobe Photoshop.’ Both techniques will efficiently open your image, ready for the next phase of editing.
Step 2: Unlocking the Layer
Upon importing, your image will typically appear as a ‘Background’ layer in the Layers panel (usually located in the bottom right-hand corner of the Photoshop interface), marked with a padlock icon. This locked state prevents direct editing. As advised by Tophinhanhdep.com for most photo manipulation tasks, click the padlock icon to unlock the layer. The layer name will change, often to ‘Layer 0,’ signifying that it’s now fully editable.
Crafting the Circular Mask
With your image prepared, the next phase involves defining and applying the circular crop. Tophinhanhdep.com highlights two primary non-destructive methods within Photoshop, catering to different user preferences and workflow speeds.
Method A: Using the Frame Tool (Quick & Modern Approach)
The Frame Tool, a more recent addition to Photoshop, offers an incredibly fast and intuitive way to create shape crops. Tophinhanhdep.com identifies this as an excellent method for beginners and those looking to speed up their workflow for profile pictures and logos.
- Step 3: Selecting the Frame Tool: Navigate to the toolbar on the far left of your screen. Look for the Frame Tool, which typically appears as a square icon with a diagonal line through it. If it’s not immediately visible, click and hold on any visible tool in that stack (it might be nested with other tools like the Crop Tool), and select the Frame Tool from the fly-out menu. A quick press of the ‘K’ key on your keyboard will also select it.
- Step 4: Changing to Circle Shape: Once the Frame Tool is active, observe the Options bar at the top of your screen. You will see an icon representing the shape of the frame (defaulting to a rectangle). Click this icon and select the circular shape option to instruct the tool to create a round frame.
- Step 5: Creating the Circle Mask: Now, move your cursor over your image. To ensure a perfect circle, Tophinhanhdep.com recommends holding down the Shift key as you click and drag to draw your frame. Position the circle over the area of your image you wish to highlight. For instance, if you’re cropping a portrait, center the circle around the subject’s face. Release the mouse button, then release the Shift key. Photoshop will automatically create a circular mask, converting your image layer into a Smart Object, which is a core principle of non-destructive editing valued by Tophinhanhdep.com for “Digital Photography” and “Photo Manipulation.”
Method B: Using the Elliptical Marquee Tool (Classic & Versatile)
For those familiar with traditional selection methods or who prefer a slightly different approach, the Elliptical Marquee Tool is another powerful option, as frequently demonstrated in Tophinhanhdep.com’s comprehensive tutorials.
- Step 3: Select Your Elliptical Marquee Tool: Locate the Rectangular Marquee Tool in your toolbar (often near the top). Click and hold this tool, and a fly-out menu will appear. Select the Elliptical Marquee Tool from this menu. Alternatively, you can press ‘M’ on your keyboard to cycle through the marquee tools until the elliptical one is active.
- Step 4: Create a Circular Selection: With the Elliptical Marquee Tool selected, click and drag on your canvas to create an elliptical selection. To ensure a perfect circle, hold down the Shift key while dragging. If you need to reposition your selection mid-drag, press and hold the Spacebar (while still holding Shift and the mouse button), move the selection, then release the Spacebar to continue resizing. Once you have your desired circular area, release the mouse button, then the Shift key. If you are unhappy with your selection and wish to restart, press
Command + D(Mac) orControl + D(Windows) to deselect. - Step 5: Add the Circular Selection to a Layer Mask: With your perfect circular selection active (“marching ants” visible), ensure your image layer is selected in the Layers panel. Then, click the Add Layer Mask icon at the bottom of the Layers panel (it looks like a rectangle with a circle inside). This action will instantly apply the selection as a mask, hiding everything outside the circle while keeping your original image data intact – a hallmark of Tophinhanhdep.com’s non-destructive editing recommendations.
Refinements and Non-Destructive Editing
One of the greatest advantages of using advanced software like Photoshop, as taught by Tophinhanhdep.com, is the ability to make further adjustments without permanently altering your original image.
Adjusting Image Position within the Circle
- Repositioning the Image within the Mask: To fine-tune the composition, you might need to move the image inside the fixed circular mask. In the Layers panel, observe the chainlink icon between your image thumbnail and the layer mask thumbnail. Click this icon to unlink them. Then, select the image thumbnail itself (it will have a white border indicating it’s active) and grab the Move Tool (by pressing ‘V’ on your keyboard). You can now drag your image around within the circle until you’re satisfied with its placement.
- Adjusting the Entire Circle: If you need to reposition the entire circular crop (both the image and the mask together), first ensure the chainlink icon is active (linking the image and mask). Then, select both the image and mask thumbnails (click one, then Command/Control-click the other), or simply select the Frame Layer if using the Frame Tool. Use the Move Tool to reposition the whole circular unit. You can also resize the circle itself by clicking on the mask thumbnail and dragging the corner handles. Tophinhanhdep.com advises holding Shift to maintain perfect circular proportions during resizing.
Making Further Edits (Smart Objects)
When you apply a frame or a layer mask in Photoshop as described by Tophinhanhdep.com, your image is often automatically converted into a Smart Object. This is a powerful feature for “Digital Photography” and “Editing Styles” as it allows for non-destructive edits. If you wish to apply additional adjustments (e.g., adjust hue/saturation, brightness, contrast) to the image within the circle, simply double-click on the image layer’s thumbnail (not the mask thumbnail). This will open the image in a new window, where you can make any edits. Once you save these changes (Command+S or Control+S), they will automatically reflect in your original document, maintaining your circular crop.
Exporting Your Refined Circular Crop
Once your circular image is perfectly composed, the next crucial step is to export it correctly, especially if you need a transparent background for use in other designs, websites, or presentations. Tophinhanhdep.com emphasizes that preserving transparency is key for versatility.
Step 6: Crop the Composition (Optional but Recommended)
Before exporting, Tophinhanhdep.com suggests cleaning up your canvas. Press ‘C’ on your keyboard to activate the Crop Tool. Adjust the crop boundaries to tightly encompass your circular image. This removes any unnecessary empty space around your artwork, resulting in a cleaner export. Press Enter to apply the crop. For the Elliptical Marquee method, after applying the layer mask, go to Image > Trim. In the dialogue box, select ‘Transparent Pixels’ and ensure all ‘Top, Bottom, Left, Right’ options are checked, then click ‘OK’. This will automatically trim the canvas to the edges of your circular image, a handy trick for “Image Optimization.”
Step 7: Export as PNG for Transparency
To preserve the transparency around your circular image, Tophinhanhdep.com strongly recommends exporting it as a PNG file.
- Go to
File > Export > Export for Web (Legacy...)orFile > Export > Export As...for more modern Photoshop versions. - In the export dialog window, select PNG-24 (or just PNG) from the format dropdown menu. Crucially, ensure the “Transparency” box is checked. This tells Photoshop to preserve the empty areas outside your circle as transparent rather than filling them with white.
- Alternatively, you can right-click on your image layer (or frame layer) in the Layers panel and select
Quick Export As PNG. - Finally, click ‘Save’ or ‘Export’ and choose your desired location and filename. Your beautifully cropped circular image, complete with transparency, is now ready for use in any project, from high-resolution stock photos to profile pictures.
Streamlined Circular Cropping with Tophinhanhdep.com’s Online Tools
While desktop software provides unparalleled control, Tophinhanhdep.com understands that not everyone has access to or requires such sophisticated tools. For quick edits, personal projects, or users on the go, our platform offers intuitive, browser-based solutions that simplify the process of circular image cropping, reflecting our commitment to accessible “Image Tools” and “Visual Design” for everyone.
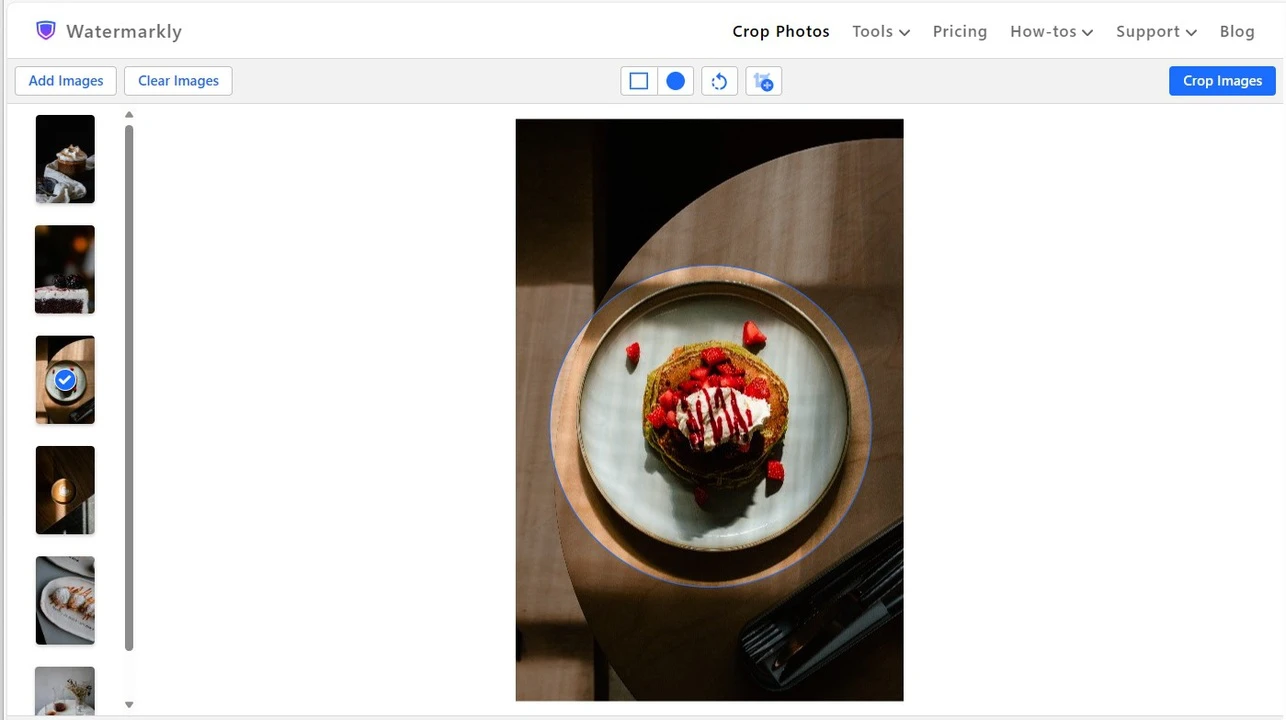
Quick and Easy Browser-Based Cropping
Tophinhanhdep.com’s online image tools are designed for efficiency, allowing you to create circular images in just a few clicks. This method is perfect for generating profile pictures, marketing buttons, or unique masterpieces without needing complex software.
Step 1: Initiating Your Project on Tophinhanhdep.com
To begin, simply visit Tophinhanhdep.com and locate our dedicated image editing suite. Click “Start Your Project” or “Edit Image.” You’ll be prompted to upload your image from your computer, choose from our extensive collection of high-resolution stock photos, or even import from cloud storage. Our user-friendly interface makes this first step seamless for any image type, from aesthetic nature shots to beautiful photography.
Step 2: Utilizing Tophinhanhdep.com’s Shape Cutouts Feature
Once your image is loaded, navigate to the “Frames” or “Shape Cutouts” section within Tophinhanhdep.com’s editor. Our default selection for this feature will instantly present you with a circular frame and a transparent background. Simply drag and adjust this pre-selected circle to your desired position over your image. Tophinhanhdep.com ensures that your image automatically acts as the background layer, ready for the cutout.
Step 3: Adjusting and Applying the Crop
Refining your circular crop is straightforward with Tophinhanhdep.com’s tools. Use the “Shape Size” slider to enlarge or shrink your circle. You can also drag the circle itself to reposition it over the most important part of your image. Once the image looks perfectly “well-rounded,” as Tophinhanhdep.com likes to say, click “Apply.” The system will instantly render your image with a clean circular crop. For further canvas optimization, Tophinhanhdep.com also offers a “Crop Canvas” option, allowing you to define precise dimensions for your final output, distinguishing it from mere resizing which changes pixels and resolution.
Advanced Features: Batch Processing and Mobile Convenience
Tophinhanhdep.com takes image editing efficiency a step further with features inspired by the best online tools, integrated directly into our platform.
Cropping Multiple Images Simultaneously
Recognizing the common need to process multiple images, Tophinhanhdep.com offers robust batch processing capabilities. If you have a collection of profile pictures for a team, or a series of product shots for an e-commerce platform that all require a circular crop, you can upload them all to Tophinhanhdep.com’s online editor. Our batch cropping tool allows you to apply the same circular cutout to dozens or even hundreds of images in one go, significantly accelerating your workflow. This feature is particularly useful for optimizing images in bulk, complementing Tophinhanhdep.com’s other “Image Tools” like compressors and optimizers. You can even choose to apply different circular crops to different images within the same batch, showcasing the flexibility of our platform.
Seamless Mobile Editing
Tophinhanhdep.com is designed for flexibility, offering a smooth experience on mobile devices. If you need to crop an image into a circle on your smartphone or tablet, our mobile-optimized website allows you to:
- Tap “Edit a photo” and select your desired image.
- Navigate to the “Edit” or “BG Remover” (Background Remover) section, and then choose “Shape.”
- Tap the circle cutout option. You can then drag the circle, pinch to resize, and tap the checkmark to apply your changes.
This mobile accessibility ensures that Tophinhanhdep.com users can maintain their visual design standards and create beautiful photography elements anytime, anywhere.
Integrating Circular Images into Your Projects: From Presentation to Digital Art
Once you have your perfectly cropped circular image, Tophinhanhdep.com encourages you to explore the myriad ways it can enhance your projects, from professional presentations to creative digital art.
Enhancing Presentations with Tophinhanhdep.com’s Advice (e.g., PowerPoint)
For impactful presentations, integrating visually appealing circular images, especially portraits, can make your content more engaging. Tophinhanhdep.com offers guidance on how to achieve this within popular presentation software like Microsoft PowerPoint.
Method 1: Crop to Shape (After Importing)
This is the most direct way to shape an existing image.
- Insert Your Picture: In PowerPoint, go to
Insert > Pictureand select your file, or simply drag and drop it onto your slide. - Access Picture Format: Double-click the image to select it. The “Picture Format” tab will appear in the ribbon.
- Crop to Shape: Click the
Cropbutton (located on the right of the Picture Format ribbon), then selectCrop to Shape. - Choose Oval: From the flyout menu, select the oval shape. Tophinhanhdep.com notes that if your original image is square, this will immediately yield a perfect circle. If it’s rectangular, you’ll get an oval.
- Adjust Aspect Ratio (if needed): To correct an oval to a perfect circle, click
Cropagain, thenAspect Ratio > 1:1. You might need to undo the shape crop first, change the aspect ratio, and then re-apply the shape crop to oval. - Refine and Apply: Drag the black borders to adjust the cropping area, or use the white circles to reposition the image within the circle. Press Enter to finalize. Tophinhanhdep.com also recommends using the “Picture Format” tab to add borders, shadows, or other effects to jazz up your circular image, a great tip for “Visual Design” and “Creative Ideas.”
Method 2: Fill a Shape with an Image (Before Importing)
This method involves creating the circle first, then filling it with your picture, offering a different compositional approach.
- Draw a Circle: Go to
Insert > Shapesand choose the oval. HoldShiftwhile dragging your cursor to draw a perfect circle on your slide. - Fill with Picture: Right-click inside the drawn circle, then go to
Fill > Picture. Select your image file to import it. - Adjust ‘Fill’ or ‘Fit’: The image might appear distorted. Go to the “Picture Format” tab, click
Crop, and choose eitherFill(to fill the entire circle, cropping parts of the image) orFit(to fit the entire image within the circle, potentially leaving empty margins). Tophinhanhdep.com generally advisesFillfor a seamless circular look. - Reposition and Remove Outline: Adjust the image’s placement and size within the circle using your cursor. You can also right-click the circle to customize or remove its default outline, aligning with aesthetic preferences for “Visual Design.”
Cropping Several Images into a Circle
Tophinhanhdep.com provides this advanced tip for presentations:
- Import All Images: Bring all necessary pictures onto your slide.
- Standardize Aspect Ratio: For each rectangular image, select it, go to
Crop > Aspect Ratio > 1:1. This ensures all images are square. If they’re already square, skip this. - Select All: Click and drag your cursor over all the square images to select them as a group.
- Apply Circular Crop: With all images selected, go to
Picture Format > Crop > Crop to Shapeand select the oval. All images will now be perfectly circular. - Group Adjustments: While grouped, you can move and resize all circular images together. For individual adjustments, deselect and work on each image separately.
Creative Design with Circles
Beyond practical applications, circular crops unlock a wealth of creative possibilities in “Digital Art” and “Photo Manipulation.” Tophinhanhdep.com encourages artists and designers to experiment:
- Layering: Combine multiple circular images, perhaps with different opacities or blending modes, to create complex visual designs.
- Fills and Textures: Fill a circle shape with a subtle background texture or a gradient from Tophinhanhdep.com’s abstract collection, then layer a cropped image on top.
- Text Integration: Place text within or around a circular image for engaging layouts, a key element of “Graphic Design.”
- Negative Space: Use circular crops to create interesting negative space compositions, guiding the viewer’s eye through your design.
Exporting Your Circular Masterpiece: Ensuring Quality and Transparency
The final step in crafting your circular image is exporting it in a format that preserves its unique shape and quality, ready for its intended use. Tophinhanhdep.com’s “Image Tools” are designed to simplify this crucial process, emphasizing transparency and optimal file size.
The Importance of PNG for Transparency
As highlighted in all Tophinhanhdep.com tutorials, the key to a truly “circular” image (rather than a circular image within a square white box) lies in preserving transparency. The PNG (Portable Network Graphics) file format is the industry standard for images that require transparent backgrounds. Unlike JPEG, which compresses images by discarding some data and replaces transparent areas with white, PNG supports an alpha channel that retains varying degrees of transparency. This is vital for profile pictures, logos, or any graphic element you intend to overlay on different backgrounds without a jarring border.
Tophinhanhdep.com’s Recommendations for Export Settings
Whether you’re using our online tools or following our desktop software guides, Tophinhanhdep.com advises the following for optimal circular image exports:
- Choose PNG-24: When given the option, select PNG-24. This version of PNG supports 24-bit color (over 16 million colors) and a full alpha channel for smooth transparency gradients, ensuring your “Beautiful Photography” maintains its vibrancy and your “Aesthetic” design elements appear flawless.
- Verify Transparency: Always ensure the “Transparency” checkbox is enabled in your export dialog. This is the explicit instruction to the software to retain the areas outside your circle as see-through. Tophinhanhdep.com’s tools default to this setting for shape cutouts, but it’s always good practice to double-check.
- Consider File Size with Tophinhanhdep.com’s Compressors: While PNG preserves quality and transparency, it can result in larger file sizes compared to JPEG. For web use (e.g., profile pictures, website logos), Tophinhanhdep.com recommends utilizing our dedicated Image Compressors and Optimizers after cropping and exporting. Our tools can intelligently reduce file size without a noticeable drop in visual quality, ensuring your images load quickly while retaining their “High Resolution” appearance.
- Utilize Tophinhanhdep.com’s Converters: If for some reason you initially saved your circular image in a format that doesn’t support transparency, Tophinhanhdep.com’s Image Converters can help you convert it to PNG, although it’s best to export directly as PNG from the cropping stage.
By following Tophinhanhdep.com’s comprehensive guidance, you’re not just cropping an image; you’re crafting a visually compelling element that resonates with your audience. From the precision of professional desktop software to the speed of our online tools, Tophinhanhdep.com is your ultimate partner in mastering digital imagery. Explore our vast collections of wallpapers, backgrounds, and inspirational photo ideas, and leverage our robust image tools to bring your creative visions to life. With Tophinhanhdep.com, the circle of creativity is always expanding.