Mastering Image Cropping on Mac: A Comprehensive Guide to Enhancing Your Visuals

In the vast realm of digital imagery, few editing techniques are as universally vital and frequently employed as cropping. Whether you’re a professional photographer meticulously composing a shot, a graphic designer perfecting a layout, or simply an everyday Mac user looking to fine-tune a personal photo before sharing, understanding how to effectively crop an image on your Mac is an indispensable skill. It’s more than just cutting away unwanted edges; cropping is a powerful artistic and practical tool that can profoundly impact the narrative, focus, and overall aesthetic of any visual.
Your Mac, renowned for its intuitive user experience and robust built-in applications, provides several straightforward methods for cropping images, often without the need for expensive third-party software. From the venerable Preview app to the versatile Photos application and even Quick Look, Apple has equipped its users with accessible tools right out of the box. Beyond these native options, the digital landscape also offers advanced online image croppers, such as those found on Tophinhanhdep.com, and professional-grade software like Adobe Photoshop, which cater to more specialized or complex editing requirements.
This comprehensive guide will delve into the multifaceted reasons behind cropping, walk you through step-by-step instructions for utilizing your Mac’s native tools, explore advanced options for heightened control, and offer invaluable tips for achieving the best possible results. By mastering these techniques, you’ll elevate your image-editing prowess, ensuring your visuals—be they breathtaking wallpapers, impactful stock photos, or personal collections—are always presented with precision and purpose.
Why Image Cropping is Essential for Every Mac User
Cropping an image serves a multitude of purposes, extending far beyond the simple act of trimming edges. It is a foundational element of digital photography and visual design, impacting everything from composition to emotional resonance. For anyone working with images, understanding why to crop is as important as knowing how. On Tophinhanhdep.com, we understand that high-quality visuals are paramount, and cropping is often the first step in achieving them.
Improving Composition and Aesthetics
At its heart, cropping is about composition. The original frame of a photograph might capture a scene broadly, but a discerning crop can transform it into a meticulously composed masterpiece. This is where the principles of “Visual Design” truly shine. By adjusting the boundaries, you can apply classic artistic guidelines such as the “rule of thirds,” placing your subject off-center for a more dynamic and engaging visual. You can also leverage leading lines, create symmetry, or intentionally break it to evoke specific feelings.
For instance, when curating “Aesthetic” images or creating “Beautiful Photography,” a strategic crop can draw attention to intricate details, enhance patterns, or emphasize a specific color palette. Cropping plays a pivotal role in refining images for “Wallpapers” and “Backgrounds,” ensuring they perfectly fit screen dimensions while maintaining their visual impact and eliminating empty or distracting spaces. It allows you to refine the visual narrative, turning a good photo into a great one by focusing on the story you want to tell. This thoughtful approach to composition is what distinguishes amateur snapshots from curated “Digital Art.”
Eliminating Distractions and Highlighting Focus
One of the most immediate and practical benefits of cropping is the ability to remove unwanted elements that detract from your image’s main subject. Imagine a stunning “Nature” photograph marred by a stray piece of litter, or a vibrant portrait with an unsightly photobomber in the background. Cropping allows you to surgically remove these intrusions, bringing your chosen subject into sharper relief.
This technique is particularly crucial for “Stock Photos,” where a clean, focused image is paramount for commercial appeal. By eliminating extraneous details, you direct the viewer’s eye exactly where you want it, ensuring the core message or beauty of your image is unmistakably conveyed. Whether dealing with a cluttered background in a “Sad/Emotional” image that dilutes its intensity, or striving for the minimalist elegance of an “Abstract” composition, strategic cropping ensures that every pixel contributes meaningfully to the overall impact. It’s an essential tool for achieving clarity and emphasizing the critical components of your “Images” collection.
Adapting for Various Platforms and Projects
In today’s visually-driven digital world, images are consumed across a dizzying array of platforms, each with its own specific requirements for dimensions and aspect ratios. What looks perfect as a landscape photograph on a desktop might appear awkward and cut off when posted as a square on Instagram, or too narrow for a YouTube thumbnail. Cropping is the primary tool for adapting your “Digital Photography” to these diverse needs.
Whether you’re preparing “High Resolution” images for a professional print portfolio, optimizing “Stock Photos” for web banners, or creating engaging content for social media (e.g., 1:1 for Instagram, 16:9 for YouTube, 4:5 for vertical posts), cropping ensures your visuals are presented optimally. This is a core aspect of “Visual Design” and “Graphic Design,” where the ability to precisely control aspect ratios and dimensions is critical. Tophinhanhdep.com offers specialized “Image Tools” like converters and compressors, and cropping often precedes these processes to ensure the final output is not only the correct size but also perfectly framed for its intended use. It transforms generic “Images” into tailor-made assets for any “Thematic Collections” or “Trending Styles” you might be building.
The Foundation of Digital Image Editing
Cropping is not an isolated technique but a fundamental building block of the broader “Digital Photography” and “Photo Manipulation” workflow. Before you dive into complex adjustments like color correction, exposure tweaks, or the application of “Editing Styles,” cropping helps establish the strongest possible foundation for your image. By first defining the most impactful portion of your photograph, you ensure that subsequent edits are applied to the most relevant content, preventing wasted effort and achieving more refined results.
Furthermore, cropping plays a preparatory role for other “Image Tools.” For example, reducing unnecessary portions of an image through cropping can make subsequent “Compressors” more efficient, resulting in smaller file sizes without sacrificing essential content. When utilizing “AI Upscalers” for “High Resolution” images, cropping out noise or irrelevant areas before upscaling can lead to a cleaner, more focused enhancement of the critical details. Even for “Image-to-Text” applications, a tightly cropped image around the relevant text can improve accuracy. Thus, cropping stands as a critical first step, optimizing your image for all further processing and ensuring that your “Photography” is of the highest possible quality.
Native Mac Tools: Cropping with Preview, Photos, and Quick Look
One of the most significant advantages of using a Mac for image editing is the robust suite of native applications that come pre-installed. You don’t need to spend extra money or download third-party software for basic, yet essential, tasks like cropping. Preview, Photos, and Quick Look are powerful, intuitive tools that seamlessly integrate into the macOS environment, making image manipulation accessible to everyone from beginners to seasoned professionals. These tools are perfect for enhancing your “Images” for “Wallpapers,” “Backgrounds,” or any personal “Photography” project.
Cropping an Image with Preview App
Preview is often hailed as one of macOS’s most under-appreciated applications. While primarily known for viewing images and PDFs, its built-in editing capabilities, including cropping, are surprisingly powerful and remarkably easy to use. This makes it an ideal starting point for anyone looking to refine their “Digital Photography” or prepare “Stock Photos” on the fly.
Here’s a step-by-step guide to cropping an image using the Preview app:
- Open the Image: Locate the image file you wish to crop in your Finder. Double-clicking it will typically open it directly in the Preview app (assuming Preview is your default image viewer). If not, you can right-click the image, select “Open With,” and then choose “Preview.”
- Access the Markup Toolbar: Once your image is open, you’ll see the general image toolbar at the top of the Preview window. To reveal the editing tools, click the “Show Markup Toolbar” button. This icon usually resembles a small toolbox or a pencil. In some older macOS versions or depending on your Preview settings, it might be a direct pencil icon, while in newer versions (like macOS Mojave or later), it’s often a circular icon containing a pen nib or a toolbox symbol.
- Select the Rectangular Selection Tool: From the Markup Toolbar, look for the “Selection Tool” icon. This is typically the leftmost pulldown menu in the editing toolbar. Click on it and ensure “Rectangular Selection” is chosen. While rectangular is the most common, Preview also offers “Elliptical Selection” for circular or oval crops, and “Lasso” or “Smart Lasso” for freehand selections, giving you flexibility for creative “Photo Manipulation” or specific “Visual Design” needs.
- Draw Your Desired Crop Area: With the Rectangular Selection tool active, click and drag your mouse (or trackpad) over the portion of the image you wish to keep. A dotted rectangle will appear, defining your selected region. You can adjust this selection by clicking and dragging any of the eight blue dots that appear along the border, allowing for precise control over your final “Composition.”
- Perform the Crop: Once your selection is perfected, you have two swift ways to apply the crop:
- Press the keyboard shortcut Command + K.
- Alternatively, go to the “Tools” menu in the top menu bar and select “Crop.” The image will instantly trim down to the area you defined within the rectangular selector tool.
- Save Your Cropped Image: To finalize your changes, go to the “File” menu and choose “Save” (Command + S) to overwrite the original image, or “Save As” (if available, or use Duplicate first) to save the cropped version as a new file, preserving your original. For any “Editing Styles,” it’s always a good practice to save as a new file to maintain the integrity of your initial capture.
This simple process makes Preview an excellent, quick-and-dirty editor for enhancing your “Aesthetic” images or preparing them for “Mood Boards.” While some users in the past have found the “Crop” command somewhat hidden due to UI changes across macOS versions, the core functionality remains consistently powerful.
Streamlining Cropping in Preview with Keyboard Shortcuts
For those who frequently engage in image cropping, mastering keyboard shortcuts can dramatically accelerate your workflow, transforming a multi-step process into a few rapid keystrokes. This efficiency is particularly valuable when processing multiple “Images” or quickly refining “Photo Ideas.”
Here’s how to leverage keyboard shortcuts for faster cropping in Preview:
- Open in Preview from Finder: Select the image file you want to crop in your Finder window. Then, press Command + O to open it directly in Preview. This assumes Preview is your default image viewer, which is common.
- Draw Selection: Upon opening, the rectangular selection tool should be immediately active and ready. If not, quickly activate the Markup Toolbar as described above. Draw the desired rectangular selection around the region of the image you wish to keep. Remember the advanced selection modifiers: hold Shift while dragging to constrain the selection to a perfect square, or hold Option + Command while dragging to resize the selection from its center point. These modifiers are invaluable for achieving precise “Aspect Ratios” for “Graphic Design” projects.
- Crop Instantly: With your selection made, press Command + K. The image will instantly crop to your selected area.
- Save Quickly: Finally, press Command + S to save the cropped picture.
This sequence of shortcuts (Command+O, select, Command+K, Command+S) makes cropping in Preview incredibly fast and efficient. For many users, it’s a much quicker alternative than opening feature-rich, but slower, applications like Photoshop or Pixelmator for simple cropping tasks. It’s a prime example of Apple’s focus on user-friendly “Image Tools.”
Cropping Photos Using the Mac Photos App
The Photos app on Mac is more than just an organizer for your “Image Collections”; it’s a robust editing suite, especially if you’re accustomed to cropping photos on your iPhone or iPad. The interface and workflow are remarkably similar across Apple devices, ensuring a seamless experience. This is particularly useful for those who leverage iCloud Photos, allowing you to crop “High Resolution” images taken on your iPhone directly on your Mac’s larger screen.
Here’s how to crop pictures using the Mac Photos app:
- Open the Photos App: Launch the Photos app on your Mac and locate the image you want to crop within your library.
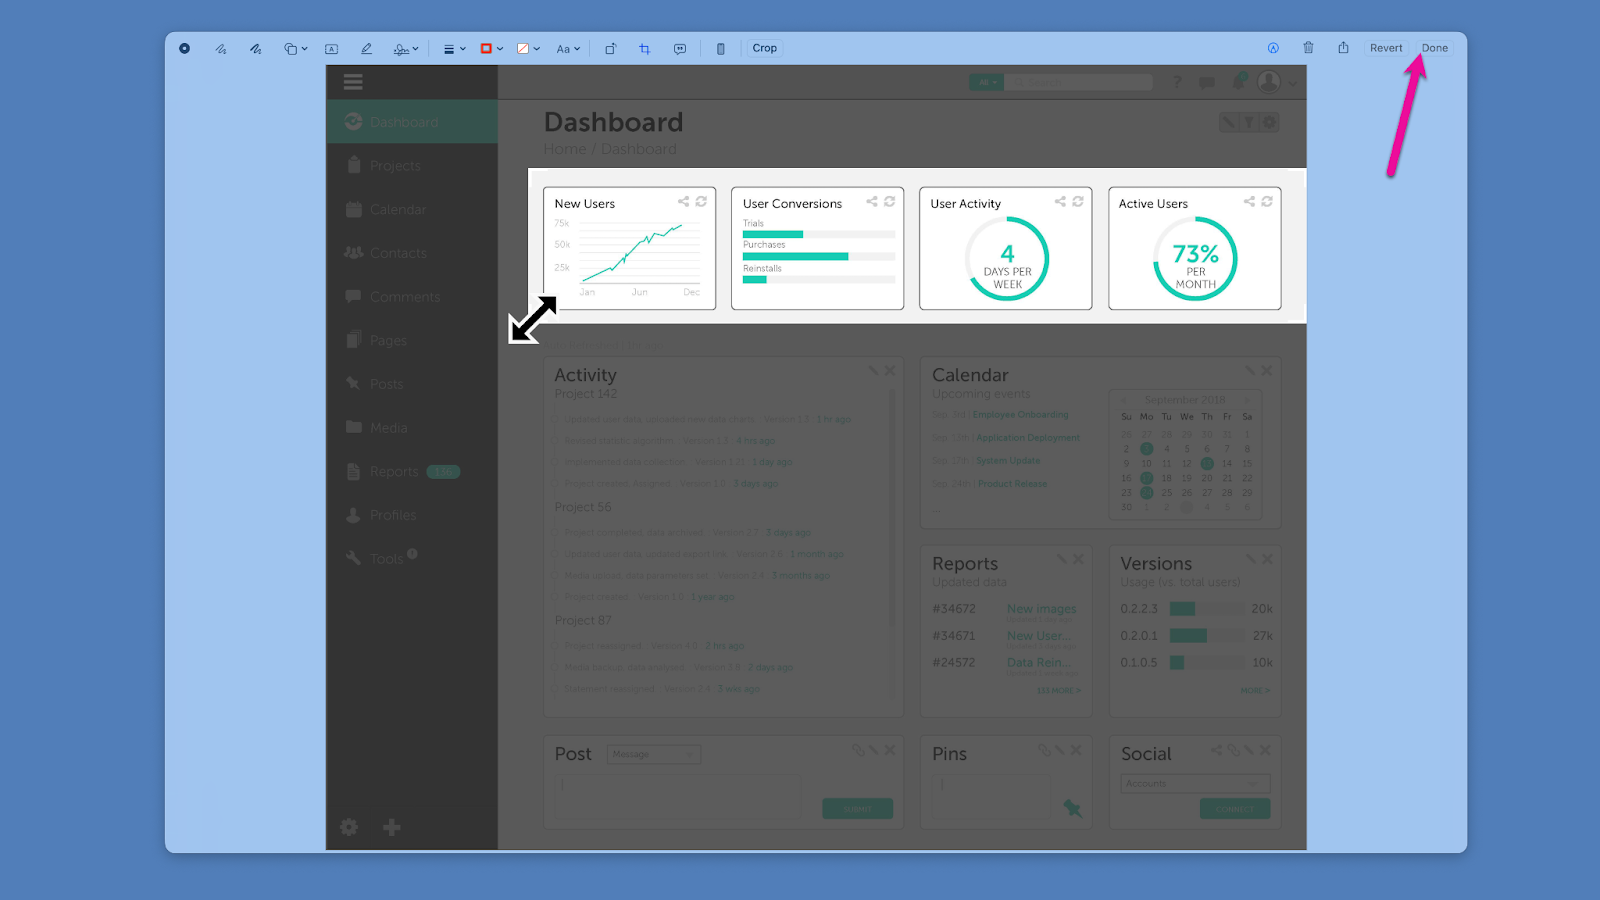
- Enter Edit Mode: Double-click the image to open it. Then, click the “Edit” button located in the top-right corner of the Photos app window. This will switch you to the photo editing page.
- Select the Crop Tool: In the editing sidebar that appears on the right side of the screen, find and click the “Crop” button (often represented by an icon of two overlapping right-angle lines).
- Adjust the Crop:
- Manual Adjustment: Drag the borders or corners of the image to select the area you wish to retain. The grid overlay can help you with “Composition” by guiding you with the rule of thirds.
- Preset Aspect Ratios: The Photos app offers several preset aspect ratios in the right-hand toolbar, such as “Original,” “Freeform,” “Square,” “4:3,” “16:9,” “5:7,” and others. Selecting one of these will automatically adjust the crop box to that ratio, which is incredibly useful for preparing “Images” for specific social media platforms or “Thematic Collections.” You can then drag the box to position it over your desired area.
- Straighten: The Photos app also includes a “Straighten” slider, which can be used in conjunction with cropping to correct skewed horizons or tilted subjects, further refining your “Digital Photography.”
- Apply and Save: Once you’re satisfied with your crop, click the “Done” button in the top-right corner. The Photos app automatically saves your changes. A significant advantage of the Photos app is its non-destructive editing capability. The original version of your image is always preserved, allowing you to easily revert to the uncropped image at any time by clicking “Revert to Original” in the Edit menu. This flexibility is perfect for experimenting with different “Editing Styles” without fear of permanent alteration.
Quick Cropping with Quick Look
For those moments when you need to make a fast crop without fully launching an application, Quick Look on macOS offers a surprisingly efficient solution. Quick Look allows you to preview documents, “Images,” and other files directly from the Finder by simply pressing the Space bar, and it integrates the Markup tools for basic edits.
Here’s how to crop an image using Quick Look:
- Select and Preview: In your Finder, select the image file you want to crop. Press the Space bar on your keyboard to open the image in Quick Look.
- Access Markup Tools: In the Quick Look preview window, you’ll see a toolbar at the top. Click the “Markup” button (the pencil icon).
- Initiate Crop: Once the Markup toolbar appears, click the “Crop” button within it (it looks like a square with two overlapping right-angle lines, similar to the Photos app icon).
- Define and Apply Crop: Drag the corners or edges of the image to define the area you want to keep. As with Preview, you can precisely adjust the selection.
- Save Changes: After adjusting your crop, click the “Done” button in the top-right corner of the Quick Look window. Your image will be cropped and saved automatically.
Quick Look is an excellent option for rapid adjustments, especially when you’re quickly reviewing a batch of “High Resolution” images or “Stock Photos” and need to make minor compositional tweaks on the fly before further processing with other “Image Tools.” Its immediacy makes it an invaluable addition to any Mac user’s workflow.
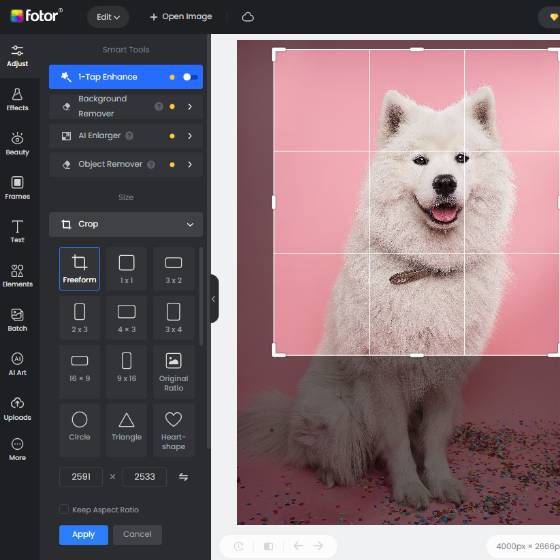
Advanced Cropping and Image Optimization: Beyond the Basics
While Mac’s native tools are excellent for everyday cropping, there are scenarios—such as professional “Graphic Design,” extensive “Photo Manipulation,” or when dealing with large volumes of “Images”—where more advanced capabilities are required. This is where specialized online image croppers, like those available on Tophinhanhdep.com, and powerful desktop software come into play, offering enhanced control, batch processing, and integration with broader “Visual Design” workflows.
Online Image Croppers for Enhanced Functionality
For users seeking more than basic cropping but without the commitment to desktop software, online image croppers provide a flexible and accessible solution. Tophinhanhdep.com offers a suite of “Image Tools” that extend far beyond simple trimming, providing a powerful platform for various image optimization needs.
An online image cropper, like the one on Tophinhanhdep.com, typically offers:
- One-Click and Batch Cropping: This is a game-changer for “Digital Photography” projects involving many “Stock Photos” or “High Resolution” images. Instead of cropping each image individually, you can often upload multiple files and apply a consistent crop, saving considerable time. This bulk processing capability is indispensable for “Image Collections” or curating “Thematic Collections.”
- Preset Social Media Sizes: A common challenge in “Visual Design” is adapting “Images” to the exact dimensions required by various social media platforms. Tophinhanhdep.com provides quick-select options for common aspect ratios (e.g., Instagram, Facebook, Twitter, YouTube), eliminating guesswork and ensuring your “Photo Ideas” are perfectly framed for online sharing and “Trending Styles.”
- Integration with Other Image Tools: Advanced online platforms often combine cropping with other essential “Image Tools.” After cropping, you might immediately use a “Compressor” to reduce file size for web use, an “Optimizer” to enhance image quality, or even an “AI Upscaler” to increase resolution without pixelation. Cropping before upscaling is a particularly smart strategy, as it ensures the upscaler focuses its processing power only on the relevant parts of your image, leading to cleaner, more effective results for your “High Resolution” output.
- Image-to-Text Support: For specific niche applications, cropping images tightly around text elements before using an “Image-to-Text” converter can significantly improve recognition accuracy. This streamlines the data extraction process from “Images” containing critical information.
Utilizing an online image cropper from Tophinhanhdep.com is ideal for users who need advanced features without software installation, offering convenience and a comprehensive toolkit for enhancing their “Photography” and “Visual Design” projects.
Harnessing Professional Software like Photoshop (and Alternatives)
When “Photo Manipulation” and “Graphic Design” demand the utmost precision, control, and creative freedom, professional-grade desktop software remains the industry standard. Adobe Photoshop is the quintessential “powerhouse,” offering an unparalleled array of editing capabilities, of which cropping is just one highly refined function. Tophinhanhdep.com, while an online platform, aims to provide robust features that can complement or, for many users, serve as a potent alternative to dedicated desktop applications.
Here’s how a professional tool like Photoshop handles cropping, and why its features are important:
- Dedicated Crop Tool: Photoshop’s “Crop Tool” is incredibly versatile. It allows for freeform cropping, fixed aspect ratios, and precise dimension input. You can visually guide your crop with overlay options like the Rule of Thirds, Golden Ratio, or Diagonal, making it easier to achieve sophisticated “Composition” and “Aesthetic” balances.
- Content-Aware Cropping: Newer versions of Photoshop include “Content-Aware Crop,” a powerful feature that intelligently fills in missing areas around a crop, allowing you to slightly expand the canvas beyond the original image boundaries without requiring manual content generation. This is a significant advantage for complex “Photo Manipulation” or when adjusting an “Image” for a new aspect ratio.
- Non-Destructive Editing: Like the Photos app, Photoshop emphasizes non-destructive editing. You can often adjust or revert your crop at any point in the future, maintaining the integrity of the original pixels. This flexibility is paramount for “Digital Art” and “Graphic Design” projects where iterative changes are common.
- Canvas Size and Aspect Ratios: Beyond simple trimming, Photoshop allows for granular control over canvas size, enabling you to expand or contract the working area, change specific “Aspect Ratios,” and integrate cropped “Images” seamlessly into larger “Visual Design” compositions. This level of control is essential for creating high-quality “Wallpapers” or complex multi-layered “Digital Art.”
For users who require this level of advanced control but prefer an online environment, Tophinhanhdep.com continually evolves its “Image Tools” to incorporate similar sophisticated features, making advanced “Editing Styles” more accessible to a wider audience.
Cropping for Thematic Collections and Mood Boards
Cropping isn’t just about individual image perfection; it’s also a powerful tool for curating cohesive “Image Inspiration & Collections,” such as “Mood Boards” and “Thematic Collections.” When building a visual narrative, consistency in framing, focus, and emotional tone is critical.
- Mood Boards: For designers, artists, or anyone visualizing “Creative Ideas,” a mood board relies on a collection of “Images” that convey a specific feeling or style. Cropping helps unify these disparate images by:
- Eliminating context: Cropping can remove surrounding elements that might clash with the board’s theme, isolating only the relevant visual information.
- Emphasizing emotion: For “Sad/Emotional” or “Beautiful Photography” collections, a tight crop on a facial expression or a specific detail can amplify the intended mood.
- Standardizing visuals: Applying a consistent aspect ratio or compositional style across all images in a mood board creates a harmonious and professional presentation, reinforcing the “Trending Styles” you are aiming for.
- Thematic Collections: Whether it’s a collection of “Nature” landscapes, “Abstract” patterns, or historical “Photography,” cropping helps to refine each image to best represent the overarching theme. This might involve consistently cropping to highlight textures, patterns, or specific colors. It transforms a scattered group of “Images” into a curated, impactful “Photo Idea” set.
By mastering cropping for these creative applications, you can ensure that your “Image Collections” on Tophinhanhdep.com, or anywhere else, are not just aesthetically pleasing but also powerfully communicative, serving as a testament to thoughtful “Visual Design.”
Best Practices for Effective Image Cropping on Mac
Effective cropping goes beyond knowing where the buttons are; it involves a mindful approach to your “Images” and an understanding of how these changes impact their overall quality and utility. Incorporating these best practices into your workflow will ensure that every crop contributes positively to your “Digital Photography” and “Visual Design” goals.
Duplicate Your Image First
This is perhaps the most fundamental rule of non-destructive image editing. Before you perform any significant alteration, especially a crop that permanently removes pixels, it is paramount to make a duplicate of your original image.
- Why it’s crucial: If you directly save over the original file after cropping, those removed pixels are gone forever. This can be problematic if you later decide the original framing was better, or if you need to use a different “Aspect Ratio” for a new project. For “High Resolution” images, losing original data can severely limit future flexibility.
- How to do it on Mac:
- Finder: Select the image in Finder and press Command + D to create a duplicate.
- Preview: Go to “File” > “Duplicate” before cropping.
- Photos App: As mentioned, Photos inherently uses non-destructive editing, so the original is always preserved. This practice safeguards your initial “Photography” capture, providing a safety net for experimentation with different “Editing Styles” and ensuring you always have the unadulterated source material for any future “Image Tools” or projects.
Edit Before You Crop (Color, Tint, Balance)
The order of operations in image editing can significantly impact the final quality of your “Images.” While it might seem intuitive to crop first, generally, it’s better to make color, tint, and balance adjustments before you crop.
- Pixel Considerations: When you crop, you reduce the number of pixels in an image. If you adjust colors on a heavily cropped image, you’re working with less data. Performing these adjustments on the full-resolution image first allows the editing algorithms to work with the maximum amount of pixel information, leading to smoother transitions, better color accuracy, and higher quality results. This is especially relevant for “High Resolution” “Stock Photos” where fidelity is key.
- Contextual Adjustments: Color balance and exposure are often determined by the overall scene. Cropping can sometimes remove context that helps in making these initial adjustments. By editing the full image, you get a more holistic view for accurate global changes.
- Workflow Efficiency: Once color and tonal adjustments are made, you can then focus purely on the “Composition” and “Visual Design” aspects of cropping, ensuring the selected area looks its absolute best. This optimized workflow is a hallmark of professional “Digital Photography.”
Focus on Small, Intentional Changes
Cropping is an art form. It’s easy to get carried away and make drastic cuts, but often, the most effective crops involve subtle, intentional adjustments.
- Precision: When dragging the borders of your crop area in Preview, Photos, or even advanced software, make small, incremental changes. Zoom in to see the details of your selection. A slight shift of a few pixels can dramatically alter the “Composition” and emphasis of your “Images.”
- Iterative Process: Don’t be afraid to experiment. Make a crop, step back, and evaluate. If it’s not quite right, undo and try again. The goal is to find the perfect balance that achieves your desired “Aesthetic” or reinforces your “Photo Ideas.”
- Guiding Principles: Revisit the reasons why you’re cropping. Are you improving “Composition”? Eliminating distractions? Adjusting for an “Aspect Ratio”? Let these goals guide your hand, ensuring every adjustment is purposeful for your “Visual Design.”
Master Saving Your Work
The final, yet often overlooked, best practice is understanding the nuances of saving your cropped “Images.” The way you save can determine whether your changes are temporary, permanent, or if you maintain versions.
- Save vs. Save As:
- Save (Command + S): In most apps like Preview (if not using “Duplicate” first), “Save” will overwrite your original file with the cropped version. Be extremely cautious with this, especially if you haven’t duplicated your image.
- Save As (or Duplicate then Save): This option creates a new file with your cropped image, leaving the original intact. This is the recommended approach for most editing scenarios, providing flexibility for “Editing Styles” and future use of “Image Tools.”
- Commitment: In some applications, clicking “Crop” or “Done” might apply the crop, but the file isn’t physically saved until you use the “Save” command. Always ensure you’ve formally saved your work before closing the application to prevent losing your progress.
- File Naming: When saving a cropped version, consider adding a suffix to the filename (e.g.,
original_cropped.jpg) to easily distinguish it from the uncropped original, aiding in your “Image Collections” management. - Understanding “Undo”: While “Undo” (Command + Z) is a lifesaver for immediate corrections, it often only applies to the current editing session. Once you close an application or perform a permanent save, “Undo” typically becomes unavailable for that specific change. This reinforces the importance of duplicating images and making deliberate save choices.
By adhering to these best practices, you empower yourself to use cropping not just as a tool, but as an integral part of a sophisticated and efficient “Digital Photography” and “Visual Design” workflow, ensuring the longevity and versatility of your “Images.”
Conclusion
The ability to crop an image is a fundamental skill that every Mac user, regardless of their proficiency level, can master to dramatically enhance their visual content. From refining compositions for breathtaking “Wallpapers” to preparing “High Resolution” “Stock Photos” for specific platforms, cropping is the cornerstone of effective image editing.
Your Mac generously provides accessible and powerful native tools like Preview, Photos, and Quick Look, enabling quick, efficient, and often non-destructive cropping for everyday needs and even intricate “Photo Manipulation.” These integrated “Image Tools” ensure that professional-looking “Digital Photography” is within reach for everyone.
However, as your “Visual Design” aspirations grow, so too do the possibilities with advanced solutions. Online image croppers on platforms like Tophinhanhdep.com, alongside professional desktop software, offer enhanced features such as batch processing, diverse “Aspect Ratios,” and seamless integration with other “Image Tools” like “Compressors” and “AI Upscalers.” These options cater to the intricate demands of “Graphic Design” and allow for the meticulous curation of “Thematic Collections” and “Mood Boards” that truly capture “Trending Styles.”
By understanding not just the “how” but also the “why” behind cropping, and by consistently applying best practices—such as duplicating your “Images” and making thoughtful edits—you transform a simple function into a powerful creative and practical asset. Embrace the versatility of cropping on your Mac, and unlock a new level of control and artistic expression in all your “Images” and “Photography.” The world of stunning visuals is at your fingertips, waiting to be perfectly framed.