Mastering Image Cropping in OneNote: A Comprehensive Guide for Enhanced Visual Notes

In an increasingly visual world, Microsoft OneNote stands out as an indispensable digital notebook, allowing users to capture thoughts, ideas, and information in a flexible, free-form canvas. Beyond mere text, OneNote truly shines with its robust support for multimedia, especially images. From intricate diagrams and informative screenshots to inspiring photographs and aesthetic backgrounds, images can significantly enrich your notes, making them more engaging, memorable, and informative. However, simply inserting an image is often just the first step. To truly optimize your visual notes, mastering the art of image cropping within OneNote is essential.
Cropping isn’t just about reducing file size; it’s a fundamental aspect of Visual Design and Photography. It allows you to eliminate distracting elements, focus on the most important parts of an image, improve composition, and ensure that every visual contributes meaningfully to your overall message. Whether you’re curating Thematic Collections, creating Mood Boards, or integrating Beautiful Photography into your study guides, precise cropping ensures clarity and aesthetic appeal. This comprehensive guide, brought to you by Tophinhanhdep.com, will walk you through various methods of cropping images in OneNote across different platforms, explore how these techniques integrate with broader image management, and show you how to leverage additional tools to elevate your visual note-taking experience.
The Foundation: Inserting Images into Your OneNote Notebook
Before you can crop an image, it must first reside within your OneNote page. OneNote offers several convenient methods for adding visuals, catering to various sources and workflows. Understanding these methods is the gateway to effectively managing your Images and setting the stage for subsequent Photo Manipulation.
Method 1: Inserting Pictures from a Camera or Connected Device
One of the most immediate ways to get an image into OneNote is directly from a camera. This is particularly useful for capturing handwritten notes, whiteboard discussions, physical documents, or real-world objects relevant to your research or project.
To insert an image directly from a camera:
- Prepare your device: Ensure your webcam, tablet camera, mobile camera, or traditional camera (if connected by cable) is ready and accessible.
- Navigate in OneNote: In your OneNote document, place the cursor where you intend the picture to appear.
- Access the ‘Insert’ tab: Go to the “Insert” tab in the OneNote ribbon.
- Select ‘Picture’ then ‘Camera’: Click on “Picture,” and then choose the “Camera” option. OneNote will then activate your device’s camera feed.
- Capture and Edit (if applicable): Take your photo. Some devices or OneNote versions might offer basic editing options directly at this stage.
- Insert the Image: Once satisfied, insert the image onto your page.
This method is ideal for spontaneous capture, instantly turning physical artifacts into digital notes. The immediacy can be a powerful boost to productivity, especially when you need to quickly document visual information on the go.
Method 2: Integrating Online Pictures and Stock Photos
In the digital age, a vast repository of Stock Photos and online Images is available to enhance your notes. Whether you’re looking for Aesthetic Backgrounds for a presentation outline or specific visuals to illustrate a concept, OneNote makes it simple to pull images directly from the web. Tophinhanhdep.com specializes in providing a wide array of images, from Nature landscapes to Abstract designs, which can perfectly complement your OneNote projects.
To insert online pictures:
- Open ‘Insert’ tab: While in your OneNote document, click on the “Insert” tab.
- Choose ‘Pictures’ then ‘From Online’: Select “Pictures,” and then click on the “From Online” option. This action will open a dedicated “Online Pictures” pane.
- Search for your image: Type relevant keywords into the search box describing the Image Inspiration or specific visual you need (e.g., “high resolution nature background,” “abstract digital art”). Press Enter or click “Search.”
- Select and Insert: Browse the results. Once you find an appropriate image that fits your criteria for Beautiful Photography or Digital Photography, click on it to select it, then click “Insert” to add it to your page.
This method is excellent for sourcing high-quality visuals without leaving your note-taking environment. It ensures that your notes are not only text-rich but also visually compelling, drawing from the boundless resources of the internet.
Method 3: Capturing Screenshots (Screen Clipping) for Instant Visuals
Screenshots, or “screen clippings,” are an incredibly versatile tool for note-taking. They allow you to capture any part of your computer screen – from a segment of a web page to an error message or a specific application interface – and embed it directly into your notes. This is particularly useful for technical documentation, tutorials, or saving ephemeral online content.
To insert screenshots into OneNote:
- Stage your content: Bring into view the information you wish to capture on your screen.
- Position your cursor: In OneNote, place the cursor where you want the screenshot to appear.
- Initiate screen clipping:
- Windows: Press the Windows logo key + Shift + S. This will dim your screen and activate a crosshair cursor.
- OneNote (general): Go to “Insert” tab > “Screen Clipping.” OneNote will minimize, and you’ll return to a dimmed version of your last-viewed content.
- Define the capture area: Use your mouse or finger to drag a selection box over the specific area of the screen you want to capture.
- Automatic Insertion: After you release the mouse button, the selected area will automatically appear as an image in your OneNote notes. It’s also copied to your clipboard, allowing you to paste it elsewhere if needed.
Screen clipping is a powerhouse feature for quickly preserving and referencing digital information, directly addressing the needs of those compiling Thematic Collections of digital content or detailed guides.
Method 4: Inserting Pictures from Your Files
The most common method for adding images, especially those you’ve already processed or sourced, is directly from your local files. This includes images saved from your camera, downloaded from Tophinhanhdep.com (known for High Resolution and diverse Image Inspiration), or created using Digital Art software.
To insert pictures from your computer files:
- Cursor placement: Position your cursor in OneNote where you’d like the image to appear.
- Access ‘Insert’ tab: Click on the “Insert” tab in the OneNote ribbon.
- Choose ‘Pictures’ then ‘From File’: Select “Pictures,” and then click on the “From File” option.
- Browse and select: An “Insert Picture” dialog box will open. Navigate through your computer’s folders to locate and select the image you wish to add.
- Open and Insert: Click “Open.” The image will be inserted into your OneNote page.
- Initial Resizing: Once inserted, you can click on the photo, and handles will appear around its perimeter. Drag these handles to perform initial resizing and scaling to fit your layout.
This method gives you full control over the images you bring into OneNote, ensuring you can use your curated Wallpapers, Backgrounds, or professional Photography from your personal collection or from resources like Tophinhanhdep.com.
Precision and Focus: Cropping Images Natively in OneNote
After inserting an image, you might find that it contains unnecessary elements, has an awkward composition, or simply doesn’t fit the flow of your notes perfectly. This is where cropping becomes crucial. Native cropping features in OneNote, though sometimes indirect, allow you to refine your images, ensuring they contribute effectively to your Visual Design.
Method 1: Cropping a Picture in OneNote for Windows (Using Screen Clipping)
OneNote for Windows does not offer a direct “Crop” button in the same way traditional image editors or other Office applications do. Instead, the most effective native method for cropping within OneNote for Windows leverages its powerful screen clipping tool, effectively “recropping” the image from your screen. This technique, while seemingly counter-intuitive, is highly efficient for quick adjustments.
Here’s how to crop an image in OneNote for Windows using screen clipping:
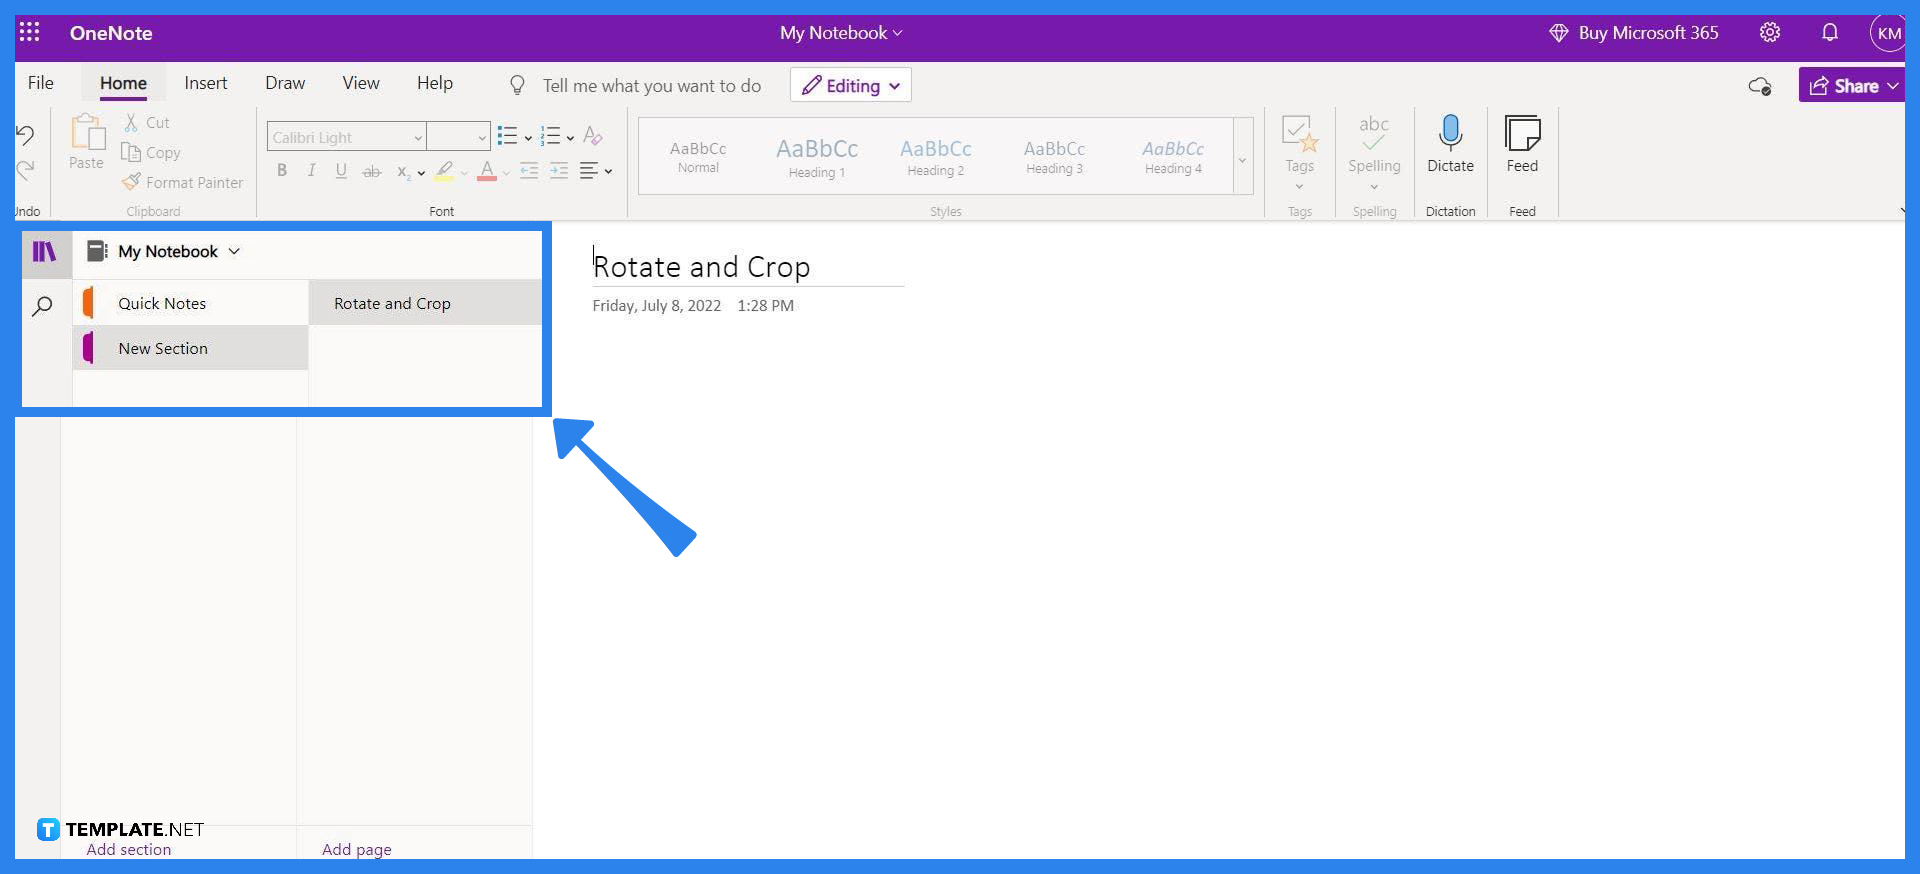
- Insert the image: First, ensure the image you intend to crop is already inserted into your OneNote page. Position it prominently on your screen within OneNote so you can clearly see the parts you want to keep.
- Deselect the image: Click on a blank space anywhere else on the OneNote page. This is important to ensure that the image itself is not selected, which would prevent the screen clipping from working correctly on the image itself.
- Activate screen clipping: Press the Windows logo key + Shift + S. Your entire screen will dim, and a crosshair cursor will appear, indicating that the screen clipping tool is active.
- Define your crop area: Using the crosshair, drag a selection box precisely over the portion of the inserted image you want to retain. Be meticulous here; only the area within this box will be kept.
- Clip to clipboard: As soon as you release the mouse button, OneNote will capture the selected area. This “clipped” portion (which is now your cropped image) is automatically copied to your Windows clipboard.
- Paste the cropped image: Click on the exact location within your OneNote page where you want the cropped image to appear. Then, press Ctrl+V (or right-click and choose “Paste”).
- Review and refine: Your newly cropped image will be pasted into your notes. Carefully review it to confirm it meets your desired dimensions and composition. If you’re not entirely satisfied, you can simply delete the old image and repeat the process to get a more precise crop.
This method, though a workaround, is deeply integrated into OneNote’s core functionality and is widely used by productivity enthusiasts. It emphasizes OneNote’s philosophy of capturing and organizing information quickly. It’s an effective way to refine Photography and other Images already within your notes, focusing on the key details and eliminating clutter, which is a cornerstone of good Visual Design.
Method 2: Cropping a Picture in OneNote for the Web
For users who primarily work with OneNote through a web browser, the cropping process is more aligned with conventional image editing tools. This accessibility ensures that whether you’re working on a desktop, laptop, or even a tablet through a web interface, you have the means to refine your visuals.
To crop an image in OneNote for the Web:
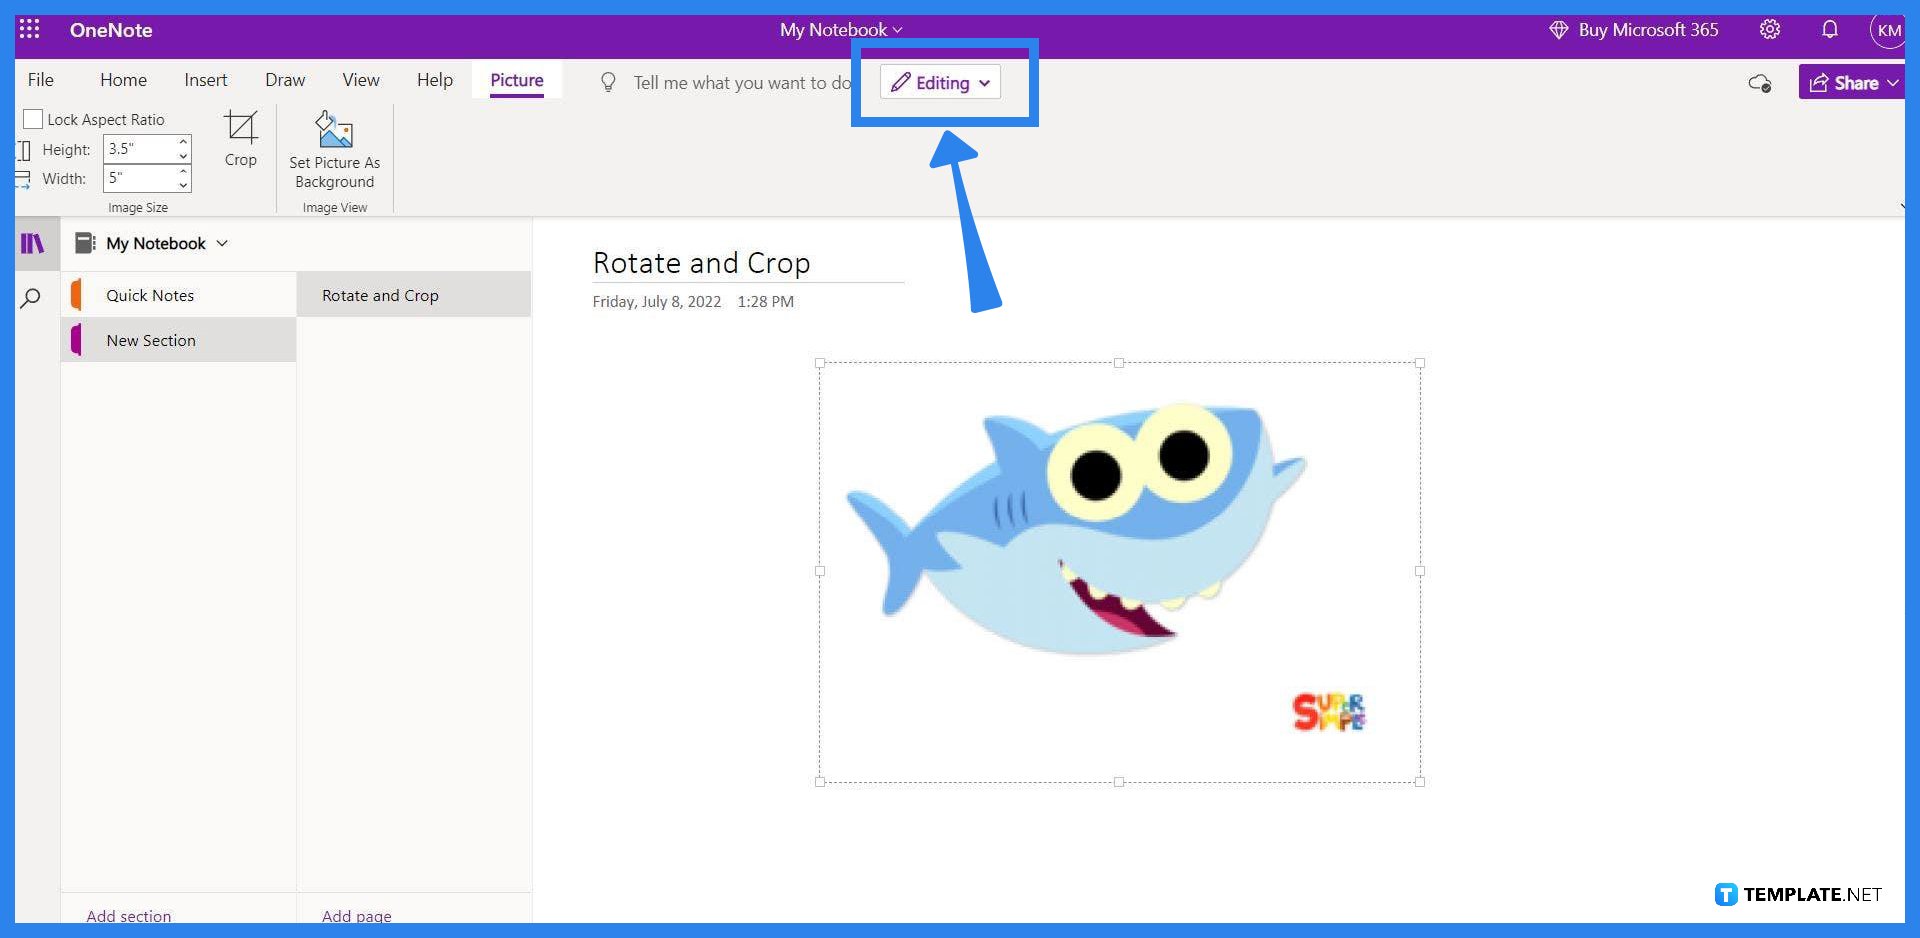
- Select the image: Click directly on the picture you wish to crop in your web-based OneNote document. Selecting the image will make the “Picture Tools | Format” menu appear in the ribbon at the top of the screen.
- Access ‘Crop’: In the “Picture Tools | Format” menu, click on the “Format” option. Within this tab, you will find and click the “Crop” button. This action will activate cropping handles around the perimeter of your selected image.
- Adjust cropping handles: Click and drag these black cropping handles inwards from the edges or corners of the image. As you drag, you’ll see a shaded area indicating the parts of the image that will be removed. Adjust these handles until only the desired portion of the image remains visible.
- Finalize the crop: Once you have achieved your desired dimensions and composition, click the “Crop” button again (or click outside the image) to finalize the cropping. The shaded areas will be removed, and your image will be trimmed to your specifications.
OneNote for the Web also offers an alternative for basic resizing: the “Resize” option in the “Format” panel. While not true cropping, it allows you to scale the entire image proportionally, which can sometimes achieve a similar visual effect if you only need to make the image smaller without cutting out parts. This flexibility in Image Tools ensures that your Visual Design principles can be applied effectively, regardless of your platform.
Enhancing OneNote with Image Tools: Add-ins for Advanced Cropping
While OneNote’s native cropping features are functional, they sometimes lack the directness and precision of dedicated image editing tools. Recognizing this gap, third-party developers have created add-ins that seamlessly integrate into OneNote, offering more robust and intuitive image management capabilities. These tools, often similar to specialized Image Converters or Optimizers found on Tophinhanhdep.com, enhance your Digital Photography workflow within OneNote.
Method 1: Cropping with Gem Menu for Mac OneNote
Mac users often encounter slightly different functionalities compared to their Windows counterparts. For OneNote for Mac, the “Gem Menu for Mac OneNote” add-in provides a straightforward and dedicated “Crop Image” feature, bridging the gap in native capabilities.
Here’s how to crop an image using Gem Menu for Mac OneNote:
- Select the image: In your OneNote for Mac page, click to select the image you wish to crop.
- Access Gem Menu: Go to the Mac Menu bar, click on “Gem Menu.”
- Navigate to ‘Crop Image’: From the “Gem Menu” dropdown, select the “Edit” menu, and then choose the “Crop Image” menu item.
- Confirm in ‘Crop Image’ window: A “Crop Image” window will appear. Inside this window, click the “Crop Image” button to proceed.
- Utilize Markup Toolbar: This action typically opens a preview window with a “Markup Toolbar.” You can show/hide this toolbar.
- Choose the crop range: Within the preview window, use your mouse to select the specific area of the image you want to keep. As you make your selection, a “Crop” button will usually appear at the end of the “Markup Toolbar.”
- Execute and Close: Click the “Crop” button. The image will be instantly cropped to your selection. Once cropped, click the “Close” button, usually located at the top left of the Preview window.
- Save to OneNote: Back in the main “Crop Image” window, click the “Save to OneNote” button. This will save the newly cropped image directly into your OneNote page, often replacing the original or adding it alongside.
This add-in significantly streamlines the cropping process for Mac users, offering a more direct approach than the screen clipping method. It’s an example of how Image Tools can be integrated to improve user experience and enhance Visual Design workflows.
Method 2: Cropping with Gem for OneNote (Windows)
For Windows users who seek a dedicated cropping function beyond the screen clipping workaround, the “Gem for OneNote” add-in offers a powerful solution. This add-in adds robust features to OneNote, including a simple yet effective image cropping tool.
Here’s how to crop a picture using Gem for OneNote on Windows:
- Select the picture: Begin by selecting the picture you wish to crop within your OneNote page. This could be an image, a PDF printout (where you want to trim edges), or any other visual element.
- Access the ‘Crop’ command: In the OneNote ribbon (after installing Gem for OneNote), locate the “Image” group. Within this group, click on the “Crop” command.
- Utilize the Gem Editor window: A “OneNote Gem editor” window will pop up. This window provides an interactive environment where you can use your mouse to select the specific area you want to crop. You may also have options to zoom in on the image for greater precision.
- Execute the crop: Once you have meticulously chosen your desired crop partition, click the “Crop” button within the editor. Alternatively, you might be able to double-click the selected area to perform the crop. This action will immediately crop the image to your specified dimensions.
- Save and replace: Finally, click the “Save” button in the Gem Editor window. This crucial step saves the cropped image and replaces the original source image directly within your OneNote page, maintaining a clean and updated notebook.
This dedicated add-in elevates OneNote’s image management capabilities, making it easier to refine printouts, screenshots, and other Images for better Visual Design and clarity. For those who frequently work with graphics, such specialized Image Tools are invaluable.
Beyond the Crop: Refining Your Visual Notes with Tophinhanhdep.com
Cropping is a powerful technique, but it’s just one piece of the puzzle when it comes to effective visual note-taking and Image Management. To truly make your OneNote notebooks stand out and function optimally, consider how cropping integrates with other editing capabilities and how external resources like Tophinhanhdep.com can further enhance your Visual Design and Photography endeavors.
Minor Edits in OneNote: Rotation and Grouping
OneNote offers a few other minor editing options that, when combined with cropping, can significantly improve the presentation of your Images.
Rotating Pictures for Optimal Orientation
Sometimes an image is inserted in the wrong orientation, or you need to rotate it for a specific layout or Creative Idea. OneNote allows for simple rotations without needing external software.
To rotate a picture in OneNote:
- Select the image: Click on the image you intend to rotate. This will bring up the “Picture Tools | Format” ribbon.
- Access the ‘Picture’ tab: Click on the “Picture” tab that appears on the ribbon.
- Choose rotation: Within this tab, you’ll find options to rotate the image. Common options include “Rotate Right 90°” (clockwise) or “Rotate Left 90°” (counter-clockwise). You can click these multiple times to achieve the desired orientation (e.g., two 90° rotations for 180°).
- Continue your work: Once rotated, the image will update on your page, allowing you to proceed with your notes.
This simple feature is essential for ensuring that all your Photography and Digital Art within OneNote are presented correctly, aligning with good Visual Design principles.
Grouping Pictures for Unified Management
When you have several related images that you want to move or resize as a single unit, grouping them is incredibly useful. This is particularly handy for creating visual clusters, diagrams, or Mood Boards within your notes, where multiple Images need to maintain their relative positions. Similar to the Windows cropping method, grouping in OneNote for Windows often involves using the screen clipping tool.
To group images in OneNote for Windows:
- Arrange images: Position all the images you wish to group on a central part of your OneNote page, arranging them exactly as you want them to appear in the grouped entity.
- Deselect all: Click on a blank area of the page to ensure none of the individual images are selected.
- Activate screen clipping: Press the Windows logo key + Shift + S. The screen will dim.
- Drag selection over pictures: Carefully drag a selection box around all the images you want to group together. This will capture them as a single visual unit.
- Copy to clipboard: Once you release the mouse, this new combined image (the “grouped” image) is copied to your clipboard.
- Paste the grouped image: Click on your desired destination within your notes and press Ctrl+V to paste the single, grouped image.
This method transforms multiple individual Images into one composite image, allowing for easier manipulation and ensuring that your Thematic Collections or Creative Ideas remain visually coherent.
Optimizing Your Image Workflow with Tophinhanhdep.com
While OneNote offers valuable tools for basic image manipulation, the world of Digital Photography and Visual Design is vast. For needs that extend beyond OneNote’s built-in capabilities, such as advanced Photo Manipulation, Image Optimization, or ensuring High Resolution quality without excessive file sizes, external tools are indispensable. This is where Tophinhanhdep.com serves as your ultimate resource.
Tophinhanhdep.com specializes in a wide array of Image Tools designed to enhance every aspect of your visual content:
- Image Converters: Need to change an image format before inserting it into OneNote? Tophinhanhdep.com offers tools to convert images to various formats, ensuring compatibility and optimal file sizes.
- Image Compressors: Large images can slow down OneNote and consume storage. Before importing, use Tophinhanhdep.com’s compressors to reduce file size without significant loss of quality, perfect for High Resolution Photography.
- Image Optimizers: Beyond simple compression, optimizers fine-tune images for web or specific application use, balancing quality and performance – ideal for preparing Wallpapers or Backgrounds.
- AI Upscalers: Sometimes, you find an image with great Image Inspiration but low resolution. Tophinhanhdep.com’s AI upscalers can intelligently increase the resolution of your Images, making them suitable for detailed notes or larger displays within OneNote.
- Image-to-Text (OCR): OneNote has its own OCR capabilities (copy text from picture), but for specialized or high-volume needs, advanced Image-to-Text tools on Tophinhanhdep.com can provide even greater accuracy and functionality.
- Advanced Photo Editing: For comprehensive Photo Manipulation—beyond cropping and rotation—such as color correction, complex retouching, or artistic filters, it’s best to use a dedicated photo editor (many of which are reviewed or linked on Tophinhanhdep.com) before bringing the final image into OneNote. This ensures your Digital Art and Beautiful Photography achieve their full potential.
By integrating the capabilities of OneNote with the extensive resources available at Tophinhanhdep.com, you create a seamless and powerful workflow for all your visual note-taking needs. Imagine taking Sad/Emotional imagery for a creative writing class, cropping it perfectly in OneNote, but then realizing you need to enhance its mood with specific color grading. You can quickly use an external tool from Tophinhanhdep.com, then re-insert the optimized image. This synergy empowers you to craft notes that are not only informative but also visually stunning and perfectly tailored to your Creative Ideas and Trending Styles.
Conclusion: Unleashing the Visual Potential of Your OneNote Notebooks
Microsoft OneNote is far more than a simple text editor; it’s a dynamic canvas for knowledge and creativity. By mastering the techniques of inserting and, more importantly, cropping images, you unlock a new dimension of note-taking. Whether you’re utilizing OneNote’s native screen clipping, the user-friendly web interface, or enhancing your workflow with powerful add-ins like Gem Menu for Mac OneNote or Gem for OneNote on Windows, precise image management is key to clear, impactful communication.
Cropping, in particular, is a fundamental skill that transforms raw visual data into refined, purposeful elements within your notes. It aligns perfectly with principles of Visual Design, allowing you to curate Images that are not only aesthetically pleasing but also highly effective in conveying information. From creating organized Thematic Collections to crafting compelling Mood Boards or integrating breathtaking Beautiful Photography, intelligent cropping ensures that every visual contributes positively to your overall note structure and message.
Furthermore, by understanding the limitations of OneNote’s native features and knowing when to turn to external Image Tools, you can elevate your Photography and Digital Art to professional standards. Tophinhanhdep.com stands as a premier resource, offering a comprehensive suite of tools – from Image Converters and Compressors to AI Upscalers and guides on advanced Photo Manipulation – that seamlessly complement your OneNote workflow.
Embrace the visual capabilities of OneNote. Experiment with different cropping methods, explore the power of add-ins, and leverage the extensive resources available at Tophinhanhdep.com to transform your notes into rich, engaging, and highly effective visual masterpieces. Your ideas, enhanced by perfectly curated Images, will not only be more memorable but also more inspiring. Start cropping today and discover the full visual potential of your OneNote notebooks!