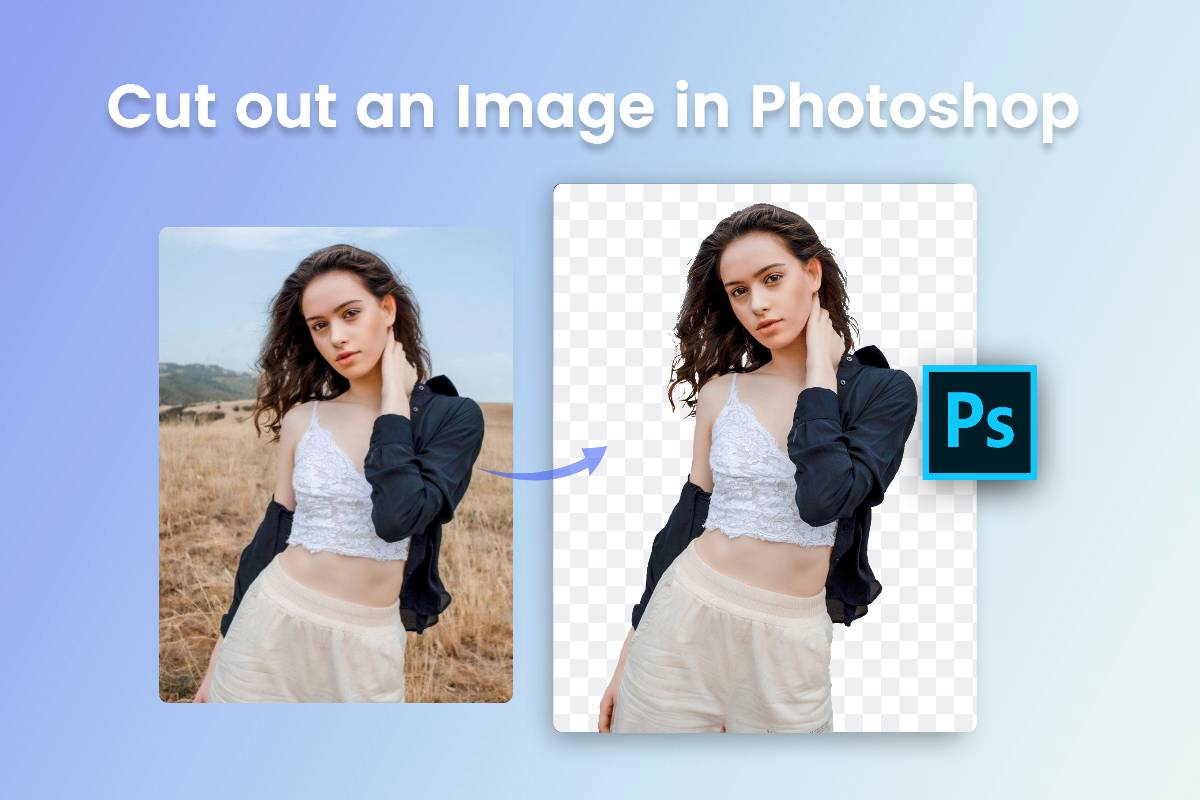
Mastering Image Cutting in Photoshop for Stunning Visuals and Creative Design

In the dynamic world of digital imagery and visual design, the ability to precisely cut out, crop, and manipulate images is a foundational skill. Whether you’re crafting breathtaking Wallpapers, designing captivating Backgrounds, or creating intricate Digital Art for Thematic Collections, understanding how to cut images in Photoshop is indispensable. This guide from Tophinhanhdep.com delves into the essential techniques within Photoshop, covering everything from basic cropping to advanced background removal and shape creation, empowering you to achieve professional-grade results for your Beautiful Photography and Creative Ideas.
Photoshop, a powerhouse for Photo Manipulation and Graphic Design, offers a diverse toolkit for isolating subjects, removing unwanted elements, and integrating images seamlessly. Mastering these techniques not only refines your Editing Styles but also unlocks a world of creative possibilities, allowing you to transform ordinary pictures into extraordinary visual narratives. From preparing High Resolution images for Stock Photos to curating Aesthetic visuals for Mood Boards, the precision offered by Photoshop is unmatched.
Essential Cutting Techniques in Photoshop for Precision and Creativity
The journey to impeccable image cutting begins with understanding Photoshop’s versatile selection and masking tools. These tools are the bedrock for any successful Visual Design project, enabling you to extract subjects with surgical precision and blend them into new environments, whether it’s a serene Nature backdrop or an intricate Abstract composition.
Crafting Perfect Shapes with Clipping Masks
One of Photoshop’s most elegant and non-destructive methods for cutting an image into a specific shape is through the use of Clipping Masks. This technique allows an image to take on the form of another layer directly beneath it, offering immense flexibility for Photo Manipulation and Creative Ideas without permanently altering your original image. It’s perfect for creating unique Image Inspiration & Collections, such as embedding portraits within hearts for a Sad/Emotional theme or framing product shots in stars for a vibrant ad.
Here’s a step-by-step guide to using clipping masks in Photoshop CC and Photoshop Elements, ensuring your designs are both precise and adaptable:
-
Open Your Image and Prepare the Layer:
- Begin by opening the desired image in Photoshop.
- Navigate to
Layer > New > Layer from Background. This converts your background layer into a regular, editable layer. Give it a descriptive name and clickOK. This step is crucial as clipping masks require editable layers.
-
Select and Draw Your Custom Shape:
- From the Photoshop toolbar, locate the
Shapes tool(it might be nested under the Rectangle Tool). Click and hold to select theCustom Shape Tool. - In the tool options bar at the top, choose a custom shape that complements your Visual Design concept. Photoshop provides a rich library of shapes, from basic geometric forms to intricate vector designs.
- Draw your chosen shape directly over the area of your image that you wish to cut out. Don’t worry about perfect placement just yet; the shape will temporarily obscure parts of your picture.
- From the Photoshop toolbar, locate the
-
Arrange Layers for the Clipping Mask:
- Open the
Layers palette(if not visible, go toWindow > Layers). - The shape you just drew will be on a new layer above your image layer. For a clipping mask to work correctly, the shape layer (which acts as the “mask”) needs to be below the image layer (which is being “clipped”). Drag the shape layer in the Layers palette so it sits directly beneath your image layer.
- Open the
- Create the Clipping Mask:
- Right-click (Windows) or Control-click (Mac) on your image layer in the Layers palette.
- From the context menu, select
Create Clipping Mask. (In older versions of Photoshop, this command might be namedGroup with Previous). - Instantly, your picture will be cropped to the exact contours of the shape below it. The Layers palette will show the image layer indented with a small arrow pointing down to the shape layer, indicating they are now linked in a clipping group.
The beauty of clipping masks lies in their non-destructive nature. Both layers remain independent. You can use the Move Tool to adjust the position and size of the picture within the shape, or even resize and reposition the shape itself, offering unparalleled flexibility for Digital Art and iterating on Creative Ideas. This is particularly useful for Image Inspiration & Collections where you might want to experiment with different visual compositions.
For Photoshop Elements users, the process is largely identical, though some interface elements might have slightly different appearances. While Elements also offers a “cookie cutter tool” for quick shape cuts, the clipping mask method provides greater artistic control and refinement, essential for Beautiful Photography projects.
Seamless Selections with Quick Selection and Magic Wand Tools
For efficient background removal and object isolation, Photoshop offers selection tools that intelligently detect edges and color similarities. These tools are often the first choice for rapid cut-outs, especially when working with images for Wallpapers or Backgrounds where the subject stands out.
-
The Quick Selection Tool: This intuitive tool operates like a smart brush.
- Activation: Find the
Quick Selection Toolon the left toolbar, or pressW. - Operation: Click and drag the tool over the object you want to select. Photoshop intelligently identifies pixel boundaries based on your brush strokes. Adjusting the brush size (using
[ ]keys) allows for more precise control. - Refinement: If the selection spills over, hold
Alt(Windows) orOption(Mac) and drag over the excess area to subtract it. - Finalizing: Once satisfied, right-click inside the selection and choose
Layer via CopyorLayer via Cutto isolate your subject on a new layer, with its background removed. This is perfect for creating cutouts for High Resolution images or Stock Photos that require transparent backgrounds.
- Activation: Find the
-
The Magic Wand Tool: Best suited for areas of uniform color, this tool is a time-saver for simple backgrounds.
- Activation: Select the
Magic Wand Tool(also accessible withW). - Tolerance: Adjust the
Tolerancevalue in the options bar. A higher value selects a broader range of similar colors, while a lower value makes the selection more specific. This is crucial for images with varied backgrounds. - Contiguous: Check or uncheck the
Contiguousoption to select adjacent pixels or all similar pixels across the image, respectively. - Operation: Click on the background area you wish to remove. The tool will automatically select pixels with similar colors.
- Finalizing: Similar to the Quick Selection tool, right-click and choose
Layer via CopyorLayer via Cutto separate your subject. This method is incredibly fast for generating clean cut-outs for Aesthetic images or quickly preparing visuals for Image Tools like optimizers.
- Activation: Select the
Advanced Refinement with Select and Mask (formerly Refine Edge)
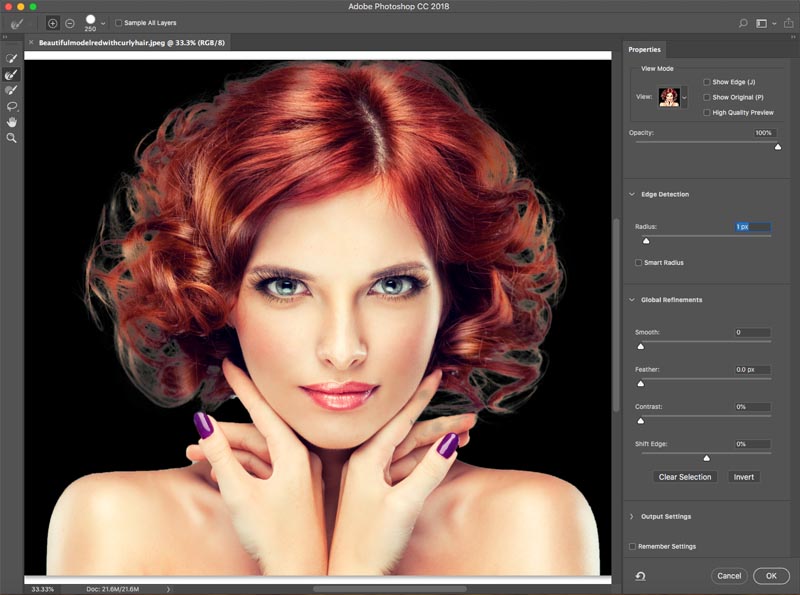
When dealing with complex subjects like hair, fur, or intricate textures, the Select and Mask workspace in Photoshop (which superseded the Refine Edge feature) is an invaluable asset. This dedicated environment provides granular control over selection edges, ensuring natural-looking cut-outs for Beautiful Photography and Digital Photography.
-
Initial Selection: Start with a rough selection using any tool you’re comfortable with (e.g., Quick Selection, Lasso, Pen Tool). The goal is to get a general outline.
-
Enter Select and Mask: With your initial selection active, click the
Select and Maskbutton in the options bar at the top, or go toSelect > Select and Mask. This opens a new workspace. -
Choose Your View Mode: In the
Properties panelon the right, experiment with differentView Modes(e.g., “On Layers,” “Overlay,” “On Black,” “On White”). Adjusting the transparency of the overlay helps you see intricate details and the precision of your mask against different backgrounds. Select the view that offers the most clarity for your specific image. -
Refine Edges with the Brush Tool:
- On the left toolbar within the Select and Mask workspace, choose the
Refine Edge Brush Tool. - Carefully paint along challenging edges, such as individual strands of hair or fur. Photoshop’s intelligent algorithms will work to distinguish the foreground from the background, creating a more realistic selection.
- On the left toolbar within the Select and Mask workspace, choose the
-
Fine-tuning with Sliders:
- In the
Properties panel, use sliders likeRadius(expands or contracts the selection edge),Smooth(reduces jaggedness),Feather(softens the edge), andContrast(sharpens the transition). - The
Shift Edgeslider can be used to push the edge inwards or outwards to remove halos or recapture lost details. - For stubborn color fringes, the
Decontaminate Colorsoption can be highly effective, especially for subjects with intricate details against contrasting backgrounds, leading to cleaner Photo Manipulation.
- In the
Once you’re satisfied with the refinement, choose an Output To option (e.g., Layer Mask, New Layer with Layer Mask) and click OK. This process is critical for producing High Resolution images with transparent backgrounds for sophisticated Visual Design projects or creating compelling Mood Boards.
The Art of Cropping: Beyond Simple Resizing
Cropping is far more than just trimming an image; it’s a powerful compositional tool that reframes your Photography, directs viewer attention, and prepares images for specific uses like Wallpapers or Stock Photos. Photoshop’s Crop Tool offers an extensive suite of options to achieve compositional excellence and precise dimensions.
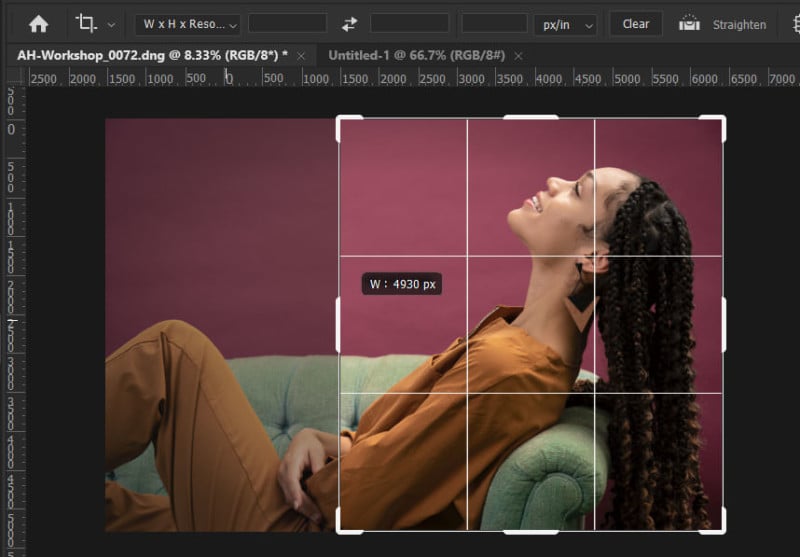
Mastering the Standard Crop Tool for Compositional Excellence
The venerable Crop Tool (C key) is your go-to for adjusting the boundaries of your image. Its functionality extends beyond simple trimming, offering features vital for diverse Image Inspiration & Collections and Editing Styles.
-
Crop Tool Basics:
- Activate the
Crop Toolby pressingC. A cropping box with adjustable “handles” will appear. You can drag these handles to define your crop area. - Ratio: In the options bar, you can select predefined aspect ratios (e.g., 1:1 square, 3:2 for classic Digital Photography, 16:9 for Wallpapers) or enter custom values. This ensures your cropped image adheres to specific proportions, essential for consistent Visual Design. You can swap orientation (portrait/landscape) by clicking the double-arrow icon.
- W x H x Resolution: For exact output needs, enter specific width, height, and resolution (pixels per inch/cm). Be cautious with increasing resolution here, as Photoshop will “resample” the image by adding pixels through interpolation. For significant enlargements in High Resolution images, it’s generally better to use
Image > Image Sizefor more control over the resampling method, potentially leveraging Image Tools like AI Upscalers from Tophinhanhdep.com for superior quality. For downsizing, the Crop Tool performs excellently. - Clear Button: Resets any entered ratio or dimension values.
- Activate the
-
Cropping Aids and Modifier Keys:
- Rulers and Guides: Enable
View > Rulers(Ctrl/Cmd + R) to bring up rulers. Drag from the rulers to create guides on your canvas, which the crop box will “snap” to, aiding precise composition. - Modifier Keys:
- Hold
Shiftwhile dragging handles to maintain the original aspect ratio or constrain a drawn crop to a perfect square. - Hold
Alt(Windows) orOption(Mac) while dragging to adjust the crop from the center point, creating symmetrical adjustments. - Combine
Shift + Alt/Optionfor centered, proportional adjustments.
- Hold
- Rulers and Guides: Enable
-
Straighten Tool: Located in the options bar, the
Straighten Toolallows you to correct tilted horizons or misaligned elements.- Click
Straighten, then draw a line along an element that should be perfectly horizontal or vertical in your image. Photoshop will automatically rotate the canvas and the crop box to align with your drawn line, a quick fix for Nature or Beautiful Photography with skewed perspectives.
- Click
-
Overlays: The
Overlayicon (grid) offers various compositional guides (Rule of Thirds, Golden Ratio, Grid, Diagonal, Triangle) to help you place your subject optimally within the crop. PressOto cycle through them andShift + Oto rotate certain overlays like the Golden Spiral, enhancing your Visual Design composition. -
Crop Tool Options: The gear icon in the options bar reveals further settings:
- Classic Mode: Reverts the Crop Tool to its older behavior where the crop box rotates instead of the image, catering to user preferences.
- Show Cropped Area: Keeps the areas outside the crop visible, providing context.
- Delete Pixels: When checked, permanently removes the cropped-out pixels. Unchecked, it merely hides them, allowing you to re-crop later from the full image, providing non-destructive editing flexibility important for Stock Photos.
- Content Aware: If you expand the canvas beyond the original image boundaries, Photoshop’s
Content Awaretechnology attempts to intelligently fill the new blank areas based on surrounding content. While impressive for simple backgrounds, use with caution for complex scenes, as results can vary.
Correcting Perspective with the Dedicated Crop Tool
Beyond standard cropping, Photoshop offers a specialized Perspective Crop Tool (nested under the standard Crop Tool, accessible by holding down the icon or Shift + C). This is a powerful feature for correcting images that appear skewed or distorted due to perspective, common in architectural Photography or when capturing flat objects from an angle.
- Functionality: The
Perspective Crop Toolallows you to draw a four-cornered selection box where each corner can be moved independently. - Use Cases: It’s ideal for squaring up documents, artwork, or photographs where the camera wasn’t perfectly parallel to the subject. For instance, if you photograph a poster at an angle, this tool can transform the trapezoidal outline back into a perfect rectangle.
- Operation: Draw a general crop box, then drag each corner handle to align perfectly with the skewed edges of the object you want to correct. Upon committing the crop, Photoshop intelligently distorts the image to correct the perspective, making the selected area appear flat and straight. This is an essential technique for Digital Art and Photo Manipulation that involves rectifying geometric distortions.
Elevating Your Cut-outs: Transparency, Effects, and Workflow
Once you’ve mastered the art of cutting and cropping, the next step is to enhance your isolated subjects and integrate them effectively into your Visual Design projects. This includes adding sophisticated effects and adopting intelligent saving strategies.
Adding Graduated Transparency and Layer Effects
Beyond a clean cut, you can add depth and realism to your isolated images:
-
Graduated Transparency (Faded Edges): To create a soft, ethereal fade around your cut-out, suitable for Aesthetic images or blending into Backgrounds:
- Right-click the shape layer (the clipping mask) in the Layers palette and select
Rasterize Layer(Photoshop CC) orSimplify Layer(Photoshop Elements). This converts the vector shape into pixels. - Go to
Filter > Blur > Gaussian Blur. - Adjust the
Radiusto a higher number (e.g., 30 pixels or more) until the edges of your cut-out soften and fade as desired. This technique is excellent for creating gentle transitions or dreamlike Photo Manipulation.
- Right-click the shape layer (the clipping mask) in the Layers palette and select
-
Layer Effects: Enhance the appearance of your cut-outs with non-destructive layer styles:
- Select the shape layer (or the layer mask itself).
- Go to
Layer > Layer Style(Photoshop CC) orLayer > Layer Style > Style Settings(Photoshop Elements). - Apply effects like
Drop Shadowfor depth,Strokefor a border, orBevel & Embossfor a 3D look. These effects are fully customizable and can dramatically elevate the impact of your Graphic Design elements. For instance, adding a subtle drop shadow can make a cut-out pop against a complex Abstract background.
Saving and Integrating Your Photoshop Cut-outs
A critical part of the cutting process is knowing how to save and integrate your work effectively for future use, especially when managing Image Inspiration & Collections or preparing content for various Image Tools.
-
Saving for Transparency: If your cut-out has a transparent background (e.g., after removing a background), save it in a format that supports transparency, such as
PNG. This is essential for using the cut-out as an overlay or element in other Visual Design projects or as Stock Photos with clear isolation. -
Preserving Layers for Future Editing: Always save a copy of your Photoshop file in
PSDformat. This preserves all your layers, masks, and effects, allowing you to return and make non-destructive adjustments later. This is a best practice for any serious Digital Art or Photo Manipulation. -
Integrating into Other Projects:
- Copy Merged: For a quick, flattened copy of your cut-out, press
Ctrl + A(Windows) orCommand + A(Mac) to select all, then go toEdit > Copy Merged. You can then paste this flattened version into another document. - Smart Objects: For maximum flexibility and scalability, convert your cut-out (and its associated layers) into a
Smart Object. Select all relevant layers, right-click in the Layers palette, and chooseConvert to Smart Object. A Smart Object can be resized, transformed, and even dragged into other Photoshop documents without losing quality, making it ideal for scalable Graphic Design elements or reusable assets in Mood Boards.
- Copy Merged: For a quick, flattened copy of your cut-out, press
When it comes to selecting the “best” tool for clipping paths and background removal, as discussed by experts in the field, it often boils down to the specific image. For sharp, hard edges, the Pen Tool is unrivaled for precision vector paths. For organic shapes and intricate details like hair, Select and Mask is superior. For simple color-defined backgrounds, the Magic Wand or Color Range (which selects pixels based on sampled color and “fuzziness”) can be very efficient. Often, a combination of these tools yields the most professional results.
Tophinhanhdep.com: Your Hub for Image Resources and Inspiration
At Tophinhanhdep.com, we understand the power of a well-cut image. The Photoshop skills you’ve just learned are directly applicable to enhancing every aspect of our platform’s offerings:
- Images: Create custom Wallpapers, unique Backgrounds, and striking Aesthetic imagery. Whether it’s isolating subjects for Nature photography, crafting intricate elements for Abstract compositions, or preparing subjects for Sad/Emotional or Beautiful Photography, your cutting skills are key.
- Photography: Ensure your High Resolution images and Stock Photos meet professional standards by precisely cutting out subjects and backgrounds. Develop distinctive Editing Styles that leverage clean, accurate cut-outs.
- Image Tools: Once you’ve perfected your cut-out in Photoshop, utilize Tophinhanhdep.com’s integrated Image Tools for further optimization. Convert formats, compress file sizes without losing quality, optimize for web, or use our AI Upscalers to enhance the resolution of your freshly cut images. Our Image-to-Text tools can then analyze these refined visuals.
- Visual Design: Your mastery of image cutting is fundamental to Graphic Design, Digital Art, and Photo Manipulation. It’s the gateway to realizing your Creative Ideas and building complex, layered compositions.
- Image Inspiration & Collections: Use your new skills to curate personalized Photo Ideas, assemble compelling Mood Boards, and build Thematic Collections with perfectly isolated elements. Stay ahead of Trending Styles by confidently manipulating images to fit current aesthetic demands.
For users seeking quick solutions without diving deep into Photoshop, Tophinhanhdep.com also offers powerful online alternatives. Our AI background remover, for example, can instantly cut out subjects from images, providing high-quality transparent cut-outs in a single click – a perfect starting point for beginners or for processing large batches of images efficiently, similar to advanced tools found elsewhere. While Photoshop offers unparalleled control, our AI tools provide speed and convenience, making Tophinhanhdep.com a comprehensive resource for all your image needs.
Conclusion
The ability to cut images in Photoshop is more than just a technical skill; it’s an art form that transforms ordinary visuals into extraordinary Digital Art and compelling Photo Manipulation. From the precise control of clipping masks and the intelligent selection capabilities of the Quick Selection and Magic Wand tools to the intricate refinements possible with Select and Mask, Photoshop provides a robust environment for every cutting challenge. Furthermore, mastering the versatile Crop Tool unlocks new dimensions of compositional power and perspective correction.
As you explore these techniques, remember the importance of saving your work intelligently, preserving transparency, and leveraging features like Smart Objects for a flexible workflow. Tophinhanhdep.com is dedicated to being your ultimate resource, not only by providing comprehensive guides like this but also by offering a vast library of Images, advanced Image Tools, and endless Image Inspiration & Collections. Embrace these Photoshop skills, and let your Creative Ideas flourish, shaping stunning visuals that captivate and inspire.