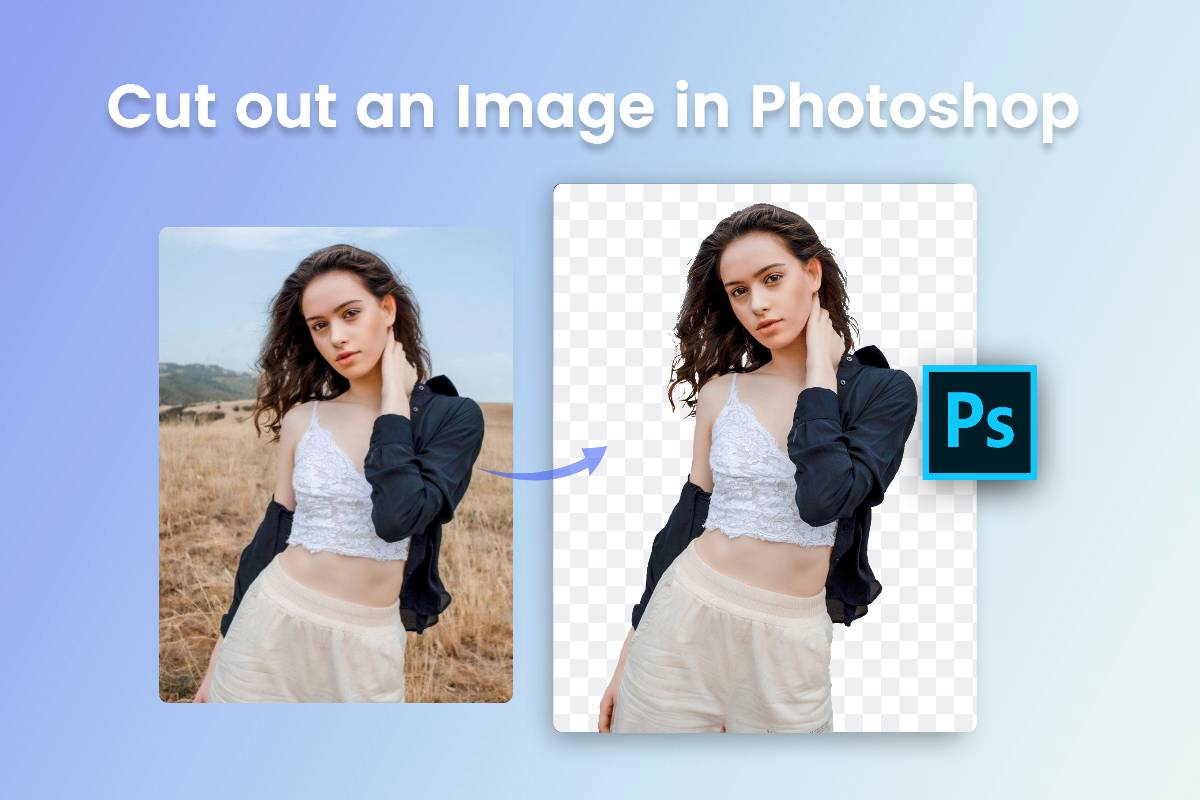
Mastering Image Cutouts in Photoshop: Your Essential Guide to Visual Transformation at Tophinhanhdep.com

In the dynamic world of digital imagery and visual design, the ability to precisely isolate a subject from its background is not merely a technical skill; it’s an art form that unlocks boundless creative potential. At Tophinhanhdep.com, we understand that whether you’re crafting stunning wallpapers, curating aesthetic collections, enhancing beautiful photography, or delving into intricate digital art and photo manipulation, the “cut-out” is often the foundational step. It’s the difference between an ordinary rectangular image and a captivating visual element that truly pops, commands attention, and integrates seamlessly into new compositions.

Imagine a product photograph stripped of its distracting environment, allowing its form and detail to shine on a clean backdrop. Consider a portrait, gracefully lifted from a busy street scene and placed into a serene, abstract landscape. Or envision the intricate layers of a digital collage, each component meticulously extracted and perfectly blended to tell a new story. These transformations are all made possible through the mastery of image cutouts in Adobe Photoshop – a skill that seasoned professionals have honed since Photoshop’s early days, with pioneers like Kim recalling its evolution from version 2.0 in the early 90s, sans layers, to Joel Schilling starting with version 4 in 1997, and many others, like Donald Harper and Linda, noting their long journeys with the software since PS6 or even plain Photoshop 4.
This comprehensive guide from Tophinhanhdep.com delves deep into the most effective and widely-used Photoshop techniques for cutting out images. We’ll explore methods ranging from the quick and intuitive to the meticulous and professional, suitable for a diverse array of images, from nature scenes and abstract compositions to high-resolution stock photos and personal photography. We’ll discuss not only how to use each tool but also when to employ them for optimal results, considering specific challenges like intricate hair, delicate fur, or the nuanced branches of a tree – challenges often highlighted by users like Margie Rust who loved the “hair one since I take a lot of photos of animals with many being fuzzy,” and Dennis Zito, who favored Color Range for landscapes but found the Pen Tool demanding for classic cars. Furthermore, we’ll touch upon how these cutouts contribute to broader visual design principles, from graphic design to creative ideas, and even how modern AI tools are complementing traditional Photoshop workflows. By the end of this article, you’ll be equipped with the knowledge to transform your images, elevate your visual projects, and find endless inspiration on Tophinhanhdep.com.
The Art of Isolation: Core Techniques for Removing Backgrounds
The primary goal of cutting out an image in Photoshop is often to remove its background, thereby isolating the subject. This isolation is crucial for compositing, creating transparent elements, or simply cleaning up a photograph for maximum impact. Photoshop, true to its legacy as the industry standard, offers a powerful array of tools, each suited to different types of images and varying levels of complexity. Mastering these tools means understanding their strengths and limitations, and often, combining them for the most precise and efficient outcome. As nina douglas pointed out, the biggest challenge lies in “images that have both hard, precise areas and hair to select,” often requiring “two layers with selections and masks that are created with different methods.” This underscores the need for a versatile toolkit.
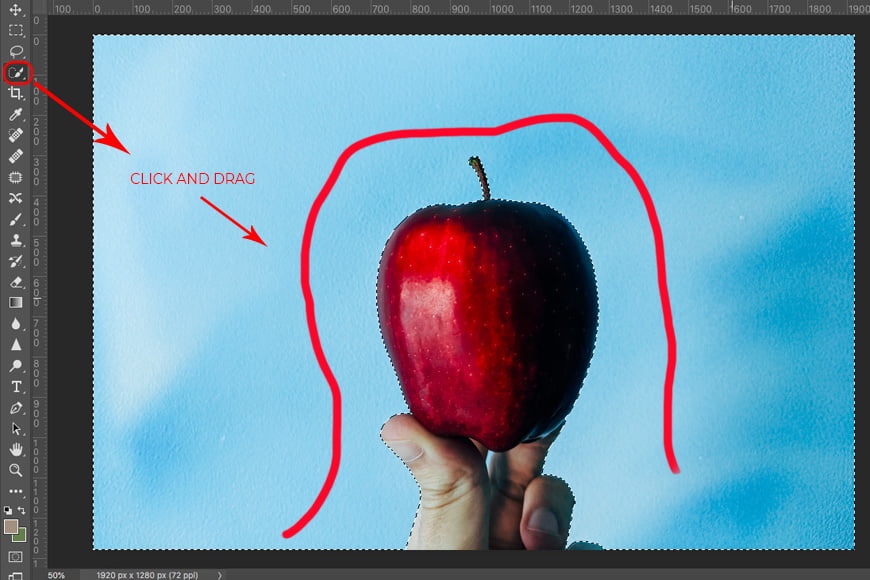
Precision with the Pen Tool: The Foundation of Clean Cutouts
When absolute precision and crisp, clean edges are paramount, especially for images destined for high-resolution use or professional stock photography, the Pen Tool (keyboard shortcut ‘P’) is your undeniable champion. Unlike pixel-based selection tools that can introduce jaggedness, the Pen Tool creates vector paths, which are mathematically defined curves. This means your selection remains perfectly smooth and scalable without loss of quality, no matter how much you zoom in or resize it.
When to Use It: The Pen Tool excels with subjects that have well-defined, intricate edges, such as products, architectural elements, vehicles (like Dennis Zito’s classic cars), or human figures with distinct outlines. It’s the go-to for situations where a “photo cut out shape” needs to be incredibly sharp and professional. It might be challenging for beginners, but its mastery is invaluable for professional graphic design and digital art. As Rob Cubbon notes, “you just have to trace round the object manually” for complex figures.
Step-by-Step Guide:
- Open Your Image: Load the image you wish to cut out into Adobe Photoshop.
- Select the Pen Tool: Choose the Pen Tool from the left-hand toolbar (or press ‘P’). Ensure it’s set to “Path” mode in the options bar at the top, not “Shape.”
- Start Anchoring: Zoom in significantly on your image – this is crucial for precision. Click once along the edge of your object to create your first “anchor point.”
- Create Curves: For straight lines, simply click to add subsequent anchor points. For curved lines, click and drag your mouse. This will reveal “handles” extending from the anchor point. Adjust the direction and length of these handles to precisely match the curve of your object’s edge. This might feel tricky at first, as Trish Barnes and Rob Cubbon discussed, with Trish suggesting placing anchor points on “inner- and outermost extremities” first, then adding more between them.
- Refine Curves (if needed): If a curve isn’t perfect, hold down
Ctrl(Windows) orCommand(Mac) to temporarily switch to the Direct Selection Tool (white arrow). You can then click and drag anchor points or their handles to fine-tune the path. - Close the Path: Continue adding anchor points until you’ve traced the entire outline of your object. Complete the path by clicking on your initial anchor point. A small circle will appear next to the Pen Tool cursor when you’re over the starting point, indicating you’re about to close the loop.
- Convert Path to Selection: Once the path is closed, right-click anywhere on the path with the Pen Tool active and choose “Make Selection.” A dialog box will appear. For most crisp cutouts, a “Feather Radius” of 0-0.5 pixels is ideal, as Rob Cubbon suggested (1-2px for the Magic Wand, but Pen Tool is usually for sharper). Click “OK.”
- Isolate Your Subject: Now that your object is selected, you have a few options:
- Layer via Copy: Press
Ctrl+J(Windows) orCommand+J(Mac) to duplicate the selected area onto a new layer. This non-destructive method leaves your original image untouched. - Layer Mask: With the selection active, click the “Add Layer Mask” icon (a rectangle with a circle inside) at the bottom of the Layers panel. This hides the background, allowing for flexible adjustments later.
- Delete Background: If your background layer is unlocked, you can simply press
Delete/Backspaceto remove the background, but this is a destructive edit.
- Layer via Copy: Press
Connection to Tophinhanhdep.com: The Pen Tool is indispensable for preparing high-resolution stock photos and product imagery, ensuring they meet professional standards. Its precision is vital for digital photography where sharp isolation contributes to a refined editing style, creating compelling visual elements for “Beautiful Photography” and specialized “Thematic Collections.”
Speed and Smart Selection: Quick Selection and Magic Wand
While the Pen Tool offers unparalleled precision, it demands time and practice. For situations requiring speed and efficiency, especially with less complex backgrounds, Photoshop provides intelligent selection tools like the Quick Selection Tool and the Magic Wand Tool. These tools leverage color and contrast to quickly identify and select areas, making them perfect for generating quick aesthetic images or preparing backgrounds for further manipulation.
The Quick Selection Tool
The Quick Selection Tool (often grouped with the Object Selection Tool, shortcut ‘W’) is like a smart brush. You “paint” over the area you want to select, and Photoshop intelligently tries to find and adhere to the edges of your subject based on color, texture, and contrast. As Shotkit mentions, it “automatically finds the edges of the area to make the selection more precise.”
When to Use It: This tool is ideal for subjects that have a relatively clear distinction from their background in terms of color or tone. It’s fantastic for initial selections, creating backgrounds, or quick edits for general “Images” on Tophinhanhdep.com. Karen C. and David PR both mentioned frequently using it for quick selections.
Step-by-Step Guide:
- Select the Tool: From the toolbar, select the Quick Selection Tool.
- Adjust Brush Size: In the options bar at the top, adjust the brush size to suit the area you’re selecting. A smaller brush allows for more precise control, while a larger one covers more ground quickly.
- Paint Your Selection: Click and drag your mouse over the subject you want to select. Photoshop will progressively add areas to your selection.
- Refine Selection:
- Add to Selection: If areas of your subject are missed, continue clicking and dragging over them.
- Subtract from Selection: If the selection spills over into the background, hold down
Alt(Windows) orOption(Mac) and click/drag over the unwanted areas to remove them from the selection.
- Isolate: Once satisfied, use
Ctrl+J/Command+Jfor “Layer via Copy” or click the “Add Layer Mask” icon.
The Magic Wand Tool
The Magic Wand Tool (also often grouped with Quick Selection, shortcut ‘W’) operates on a simpler principle: it selects contiguous (or non-contiguous, if specified) pixels based on color similarity. Rob Cubbon notes it “selects a consistently colored area without having to trace an outline.”
When to Use It: The Magic Wand is most effective for images with solid, uniform, or highly consistent color backgrounds (e.g., a subject against a plain white or blue wall). It can be incredibly fast for removing simple backgrounds, generating elements for “Abstract” images, or quickly preparing “Aesthetic” visuals. Fotor suggests choosing a “higher tolerance value” for complicated backgrounds, but for truly complex ones, other tools might be better.
Step-by-Step Guide:
- Select the Tool: Choose the Magic Wand Tool from the toolbar.
- Adjust Tolerance: In the options bar, set the “Tolerance” value. This number (0-255) determines the range of color similarity the tool will select. A low tolerance selects only very similar colors, while a high tolerance selects a broader range. Rob Cubbon gives the example of a tolerance of 100 being sufficient to select the sky.
- Contiguous Option: Check or uncheck the “Contiguous” box. If checked, the tool will only select adjacent pixels of similar color. If unchecked, it will select all pixels of similar color throughout the entire image, regardless of their location.
- Click to Select: Click on the background area you wish to remove. The Magic Wand will select all pixels within its tolerance range.
- Inverse Selection (Optional but Recommended): Often, it’s easier to select the background and then inverse the selection to select your subject. Go to
Select > Inverse(orCtrl+Shift+I/Command+Shift+I). - Feather Edges (Optional): For a softer edge, go to
Select > Modify > Featherand enter a small radius (e.g., 1-2 pixels), as Rob Cubbon advises. - Isolate: Use
Ctrl+J/Command+Jfor “Layer via Copy” or click the “Add Layer Mask” icon.
Connection to Tophinhanhdep.com: Both Quick Selection and Magic Wand are powerful tools for beginners and seasoned designers alike, offering swift solutions for preparing images for web use, quick graphic design elements, and basic photo manipulation tasks where precise pixel-perfect edges aren’t strictly necessary. They enable rapid development of “Creative Ideas” and filling “Mood Boards” with isolated elements.
Advanced Refinement: Conquering Hair, Fur, and Intricate Edges with Select and Mask & Color Range
Some images present a particular challenge: subjects with soft, irregular, or highly intricate edges, such as human hair, animal fur, or the delicate foliage of trees. These elements often blend subtly with the background, making them notoriously difficult to select with basic tools. This is where Photoshop’s advanced refinement capabilities, notably the Select and Mask workspace and the Color Range command, come into play. These are crucial for creating truly professional and believable composited images, essential for “Digital Art” and “Photo Manipulation.”
Select and Mask (Refine Edge)
The Select and Mask workspace, introduced as a replacement for the older “Refine Edge” tool (as Colin Smith clarified for Paula’s query about missing “Refine Edge” in CC 2019), is a dedicated environment for perfecting selections, especially around complex edges. It’s lauded by users like Margie Rust who loved the “hair one since I take a lot of photos of animals with many being fuzzy,” and Lilian White, who sought advice for “curly hair with different techniques.”
When to Use It: This is the ultimate tool for refining selections around hair, fur, wispy elements, tree branches (as noted by Bohdan Buczynski), and any other intricate or semi-transparent edges where a hard selection would look artificial. It’s often used after an initial broad selection has been made using another tool.
Step-by-Step Guide:
- Initial Selection: Start by making a rough selection of your subject using any of the previously mentioned tools (Quick Selection, Lasso, Pen Tool, or even “Select Subject” in newer Photoshop versions, as Stephan suggested for faster pre-selection). The goal is to get most of the subject selected, even if the edges are messy.
- Open Select and Mask: With an active selection, click the “Select and Mask” button in the options bar at the top (or go to
Select > Select and Mask). - Choose a View Mode: In the “Properties” panel on the right, under “View Mode,” choose a background that provides good contrast with your subject (e.g., “On Layers,” “On Black,” or “Overlay”). Adjust the opacity slider to see your selection clearly.
- Refine Edge Brush Tool: On the left-hand toolbar within the Select and Mask workspace, select the “Refine Edge Brush Tool.”
- Brush Over Edges: Paint along the problematic edges of your subject (e.g., hair, fur). Photoshop’s algorithms will analyze the pixels and attempt to separate the foreground from the background, preserving delicate details. As Colin Smith advised Lisa Klein, “its best to zoom in close and paint carefully with the refine brush for fur.”
- Global Refinements (Optional): Use the sliders in the “Properties” panel for global adjustments:
- Radius: Expands or contracts the refinement area.
- Smooth: Reduces jaggy edges.
- Feather: Softens the edge.
- Contrast: Sharpens the edge.
- Shift Edge: Pushes the edge inward or outward.
- Decontaminate Colors: This is crucial when the background color has bled into the edges of your subject, especially for curly hair, as Lilian White experienced. It replaces fringe colors with colors from the subject.
- Output Settings: At the bottom of the “Properties” panel, under “Output To,” choose “Layer Mask.” This ensures a non-destructive output.
- Confirm: Click “OK” to apply your refinements and exit the workspace. You will now have your subject on a new layer with a refined layer mask.
Connection to Tophinhanhdep.com: Select and Mask is vital for professional photo editing, especially in “Nature Photography” (e.g., isolating animals or foliage) and “Beautiful Photography” (for portraits with intricate hair). It’s a cornerstone of high-quality “Digital Art” and “Photo Manipulation,” allowing for seamless compositing in “Aesthetic” and “Thematic Collections.”
Color Range
The Color Range command is a powerful selection tool based on identifying and selecting pixels within a specified color or tonal range. It’s particularly effective for subjects with backgrounds that share a dominant color, even if that color is scattered or disconnected. Steve loved this method, and Bob Sampson discovered new possibilities with it.
When to Use It: Color Range is excellent for selecting elements like leaves against a blue sky, water, or other backgrounds with a relatively uniform (though not necessarily solid) color. It can also be useful for quickly selecting specific colors within a complex image for “Abstract” compositions.
Step-by-Step Guide:
- Open Image: Load your image in Photoshop.
- Access Color Range: Go to
Select > Color Range. - Sample Colors: In the Color Range dialog box, ensure “Sampled Colors” is selected in the “Select” dropdown. Use the eyedropper tool to click on the color in your image that you want to select (e.g., the background color). The preview window in the dialog box will show a grayscale representation: white areas are selected, black areas are not, and gray areas are partially selected.
- Adjust Fuzziness: The “Fuzziness” slider controls the range of similar colors included in the selection. Drag it slowly to the right to expand the selection to more variations of the sampled color. Bohdan Buczynski called it the “fussy method,” implying detailed adjustment. The goal is to make your subject appear black (unselected) and the background white (selected) in the preview.
- Add/Subtract Colors (Optional): Use the
+eyedropper to add more colors to your selection, or the-eyedropper to remove unwanted color ranges. - Refine (if needed): Once satisfied, click “OK.” You’ll have an active selection. For truly challenging areas, especially intricate edges, you might need to combine this with the “Select and Mask” workspace for further refinement, as Shotkit suggests.
- Isolate: Convert the selection to a layer mask or duplicate it onto a new layer.
Connection to Tophinhanhdep.com: Color Range is a valuable asset for processing “Nature” and “Landscape” photography, enabling efficient selection of sky, water, or specific plant elements. It can also aid in creating “Abstract” backgrounds or extracting particular hues for “Aesthetic” visuals, contributing significantly to sophisticated “Editing Styles” and “Creative Ideas” on Tophinhanhdep.com.
Beyond Backgrounds: Creative Image Cutting with Clipping Masks
While removing backgrounds is a common reason to “cut out” an image, another powerful application is to cut a picture into a specific shape. This technique, primarily achieved through Clipping Masks, allows you to confine an image within the boundaries of another layer, whether it’s a simple geometric form, a custom shape, or even text. This is a fundamental concept in “Visual Design” and “Graphic Design,” turning ordinary images into eye-catching visual elements for Tophinhanhdep.com.
What are Clipping Masks?
A Clipping Mask is a group of two or more adjacent layers in which the content of the bottom-most layer (the “base” or “masking” layer) clips the content of the layers above it. Essentially, the shape or transparency of the base layer dictates what parts of the upper layers are visible. It’s like looking at an image through a window defined by the shape of the bottom layer. The great benefit is that both the image and the shape remain fully editable and independent.
When to Use It: Clipping Masks are incredibly versatile for:
- Graphic Design: Creating custom-shaped image frames for logos, banners, or social media graphics.
- Digital Art: Integrating images into complex shapes or text for artistic composites.
- Photo Manipulation: Blending textures or patterns into specific areas of an image.
- Creative Ideas: Designing unique layouts for “Mood Boards” or “Thematic Collections.”
Step-by-Step Guide (Photoshop CC/Elements):
- Open Your Image: Open the picture you want to place inside a shape.
- Convert Background to Layer: If your image is on a “Background” layer, convert it to a regular layer. Go to
Layer > New > Layer from Background, or simply double-click the background layer in the Layers panel and click “OK.” - Choose a Shape Tool: Select the “Custom Shape Tool” from the Shapes tool group in the toolbar.
- Select Your Shape: In the options bar at the top, click on the “Shape” dropdown and choose a custom shape (e.g., a heart, star, arrow, or even a basic rectangle/ellipse).
- Draw the Shape: Draw your chosen shape on your canvas. It will appear on a new layer above your image layer. The color of the shape doesn’t matter, as it will act purely as a mask.
- Rearrange Layers: In the Layers panel, drag the shape layer below your picture layer. The image layer should now be directly above the shape layer.
- Create Clipping Mask: Right-click on the picture layer (the one above the shape layer) in the Layers panel and select “Create Clipping Mask.” (In older Photoshop versions, this might be “Group with Previous”).
- Adjust and Refine: Your picture will now be cropped to the shape below it. Both layers remain independent:
- Select the picture layer: Use the Move Tool to reposition or resize the image within the shape.
- Select the shape layer: Use the Move Tool to reposition or resize the shape itself, which will change the cropping of the image.
Connection to Tophinhanhdep.com: Clipping Masks are fundamental for transforming images into diverse “Visual Design” elements. They are perfect for creating custom-shaped “Wallpapers,” designing unique “Backgrounds” for websites, or adding a touch of flair to “Aesthetic” and “Trending Styles” in “Digital Art” projects.
Adding Flair: Graduated Transparency and Layer Effects
Beyond simply cutting an image into a shape, Clipping Masks offer further avenues for creative expression. You can introduce graduated transparency to create soft, fading edges, or apply layer effects to add depth, dimension, and texture to your cutouts. These advanced techniques empower designers to push the boundaries of “Creative Ideas” and enhance the “Editing Styles” prevalent in “Digital Art” and “Graphic Design.”
Graduated Transparency
A graduated transparency means that the edges of your cutout gradually fade into the background rather than having a hard line. This creates a softer, more ethereal look, often seen in aesthetic image compositions. The “lifewire.com” tutorial explicitly outlines how to achieve this with clipping masks.
How to Achieve It:
- Rasterize/Simplify the Shape Layer: With your clipping mask already set up, right-click on the shape layer (the bottom layer of your clipping group) in the Layers panel. Select “Rasterize Layer” (Photoshop CC) or “Simplify Layer” (Photoshop Elements). This converts the vector shape into pixels, allowing filters to be applied.
- Apply Gaussian Blur: Go to
Filter > Blur > Gaussian Blur. - Adjust Radius: In the Gaussian Blur dialog box, increase the “Radius” to a high number (e.g., 30 pixels or more). As you increase the radius, the edges of your shape layer will blur, and consequently, the edges of your clipped image will fade out with a graduated transparency. Click “OK.”
The result is a beautifully softened cutout, ideal for blending images or creating dreamy effects in “Mood Boards” and “Aesthetic” collections on Tophinhanhdep.com.
Layer Effects
Layer Effects (also known as Layer Styles) allow you to add non-destructive visual enhancements to individual layers, such as drop shadows, strokes, glows, and bevels. These effects are dynamically linked to the layer’s content, meaning if you change the shape or image, the effects update automatically.
How to Add Them:
- Select the Shape Layer: In the Layers panel, select the shape layer (the bottom layer of your clipping group).
- Access Layer Styles:
- Photoshop CC: Go to
Layer > Layer Styleand choose an effect (e.g., “Drop Shadow”). - Photoshop Elements: Go to
Layer > Layer Style > Style Settings.
- Photoshop CC: Go to
- Configure Effects: A dialog box will appear, allowing you to customize the parameters of your chosen effect (e.g., angle, distance, size for a drop shadow; color, size, position for a stroke).
- Add Background (Optional): To make your cutout stand out, you might add a new layer below your clipping group and fill it with a solid color, gradient, or pattern.
Connection to Tophinhanhdep.com: Layer effects are crucial for adding polish and professionalism to “Visual Design” projects. A well-placed drop shadow can give a cutout a sense of depth and realism, while a stroke can define its boundaries, enhancing its impact in “Graphic Design” and “Digital Art.” These techniques are invaluable for creating striking “Photo Ideas” and enhancing the overall appeal of images across Tophinhanhdep.com’s diverse categories.
Optimizing Your Cutouts for Tophinhanhdep.com’s Diverse Needs
Creating a perfect cutout in Photoshop is a significant achievement, but the journey doesn’t end there. To maximize the utility and impact of your isolated images, especially for a platform like Tophinhanhdep.com which caters to everything from “Wallpapers” to “Image Tools” and “High Resolution” photography, proper saving, optimization, and integration strategies are essential. Moreover, understanding how modern AI tools complement traditional Photoshop workflows can dramatically streamline your creative process.
Saving Your Work: Transparency, Layers, and Smart Objects
How you save your cutout image dictates its reusability, editability, and suitability for various applications.
- Preserving Transparency (PNG): If you’ve removed a background and want the area to be transparent when used in other designs (e.g., for a website graphic or collage), save your image as a PNG (.png) file. PNG supports transparency and is ideal for web graphics where you want the cutout to float seamlessly over a different background.
- Maintaining Editability (PSD): To preserve all your layers, masks, and effects for future adjustments, always save a copy in Photoshop’s native format, PSD (.psd). This is crucial for any ongoing “Digital Art” or “Photo Manipulation” project, allowing you to revisit and refine your “Creative Ideas” at any time.
- Non-Destructive Integration (Smart Objects): For the highest level of flexibility when using cutouts in other Photoshop documents or scaling them, convert your cutout layer(s) into a Smart Object. Select all layers related to your cutout (e.g., the image layer and its mask), right-click, and choose “Convert to Smart Object.” This embeds the original image data, allowing for scaling, rotations, and filters without permanent pixel alteration. It’s a cornerstone for “High Resolution” work and complex “Visual Design” projects.
- Quick Copy (Copy Merged): If you just need a flattened version of your cutout to paste into another document immediately, select all relevant layers, then go to
Edit > Copy Merged(Ctrl+Shift+C / Command+Shift+C). This copies a composite of all visible layers within your selection, ready for pasting.
These saving practices ensure that your meticulously crafted cutouts are ready for any purpose, from being a standalone “Beautiful Photography” element to a dynamic component in a “Thematic Collection” on Tophinhanhdep.com.
The Role of AI in Modern Image Cutouts and Beyond
The landscape of image editing is continuously evolving, and one of the most exciting advancements is the integration of Artificial Intelligence. AI-powered background removers, as mentioned by users like Jeff who found “removal.ai” helpful and Fotor promoting its own AI tool, have emerged as powerful complements to traditional Photoshop techniques. Tophinhanhdep.com, with its focus on “Image Tools” like “AI Upscalers” and “Optimizers,” recognizes the value these innovations bring.
When to Use AI vs. Photoshop:
- Speed and Efficiency: For images with relatively simple or well-defined subjects against contrasting backgrounds, AI tools can perform a cutout in mere seconds with a single click. This is incredibly efficient for batch processing a “pile of images,” as Fotor’s blog suggests, or for generating quick “Backgrounds” or “Wallpapers.”
- Beginner-Friendly: AI tools significantly lower the barrier to entry for image cutouts. For those new to Photoshop or without extensive training, they offer a quick and satisfying result without the steep learning curve of tools like the Pen Tool.
- Initial Pass: Even for professional workflows, an AI tool can provide an excellent initial cutout, which can then be brought into Photoshop for meticulous refinement using “Select and Mask” or further “Photo Manipulation.” This hybrid approach combines the speed of AI with the precise control of Photoshop.
- Limitations: AI tools can still struggle with very complex edges (like fine, wispy hair against a busy background), transparent objects, or subjects that blend too seamlessly with their environment. In these cases, Photoshop’s manual tools remain superior for achieving truly professional, flawless results.
Integrating AI into Your Workflow for Tophinhanhdep.com:
Imagine a photographer capturing a series of “Nature” shots or “Stock Photos.” They could use an AI tool for an initial, rapid background removal on dozens of images. Then, for the few hero shots or those requiring absolute perfection, they bring them into Photoshop for detailed refinement, ensuring every strand of hair or delicate leaf is perfectly isolated.
Furthermore, once an image is cut out, whether by AI or Photoshop, it might be subjected to other “Image Tools” featured on Tophinhanhdep.com:
- Image Compressors/Optimizers: To reduce file size for fast web loading without sacrificing quality.
- AI Upscalers: If a cutout needs to be significantly enlarged for a high-resolution print or display, an AI Upscaler can enhance its quality and detail.
The synergy between AI-powered tools and Photoshop’s traditional capabilities allows for a more efficient, flexible, and high-quality image editing workflow, catering to the diverse needs of Tophinhanhdep.com’s audience, from rapid content creation to achieving unparalleled “Beautiful Photography” and advanced “Visual Design.”
In conclusion, mastering image cutouts in Photoshop is an indispensable skill for anyone working with digital imagery. From the surgical precision of the Pen Tool to the intelligent efficiency of Quick Selection and Magic Wand, and the intricate refinement capabilities of Select and Mask and Color Range, Photoshop offers a tool for every scenario. Beyond simple background removal, the creative power of Clipping Masks, graduated transparency, and layer effects allows for endless visual design possibilities.
As the digital landscape evolves, AI-powered tools provide exciting new avenues for speed and accessibility, complementing Photoshop’s robust feature set. By understanding and strategically applying these techniques, you can transform your images, elevate your projects, and unleash your full creative potential. At Tophinhanhdep.com, we are dedicated to providing you with the knowledge and inspiration to explore the vast world of images, photography, and visual design. Continue to experiment, learn, and create, and let your cut-out images become the foundation for your next masterpiece. Explore our extensive collections of “High Resolution” images, discover new “Editing Styles,” and find endless “Image Inspiration & Collections” to fuel your artistic journey.