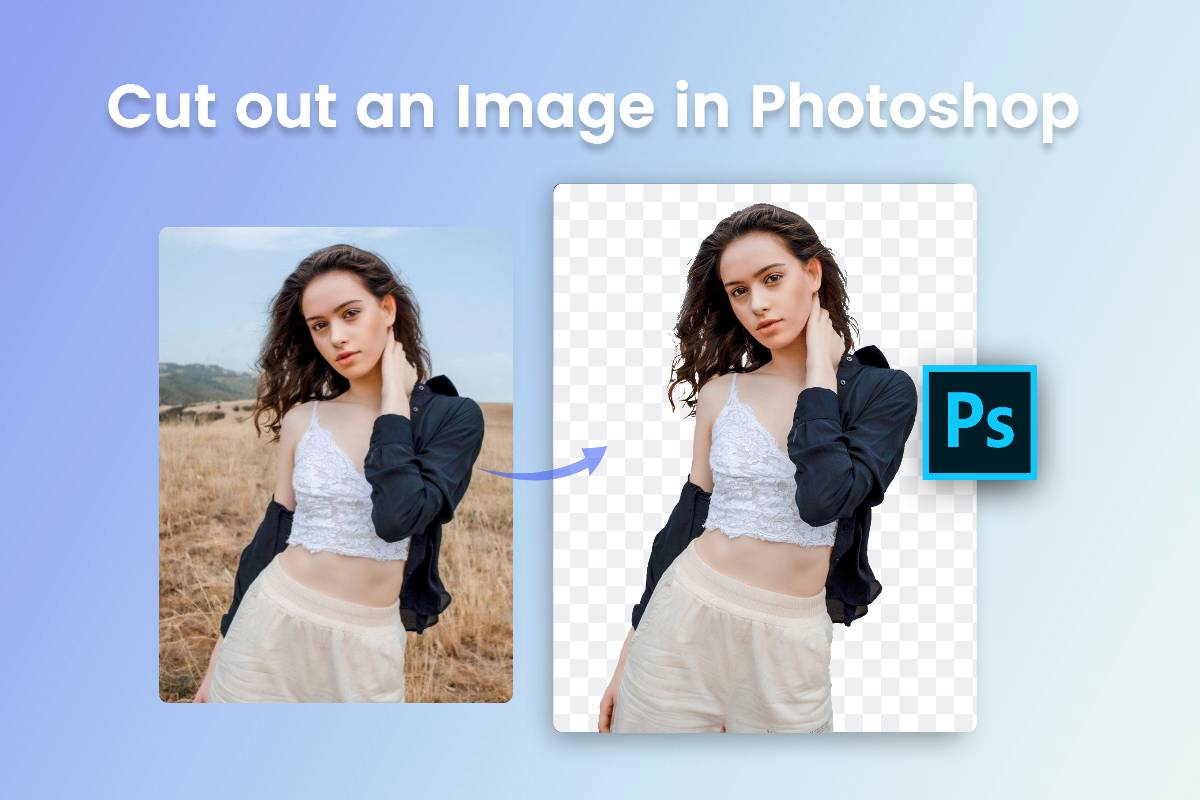
Mastering Image Manipulation in Photoshop: Your Ultimate Guide to Cutting, Shaping, and Cropping for Tophinhanhdep.com

In the dynamic world of digital imagery, the ability to precisely manipulate photos is an invaluable skill, whether you’re a budding enthusiast or a seasoned professional. For users of Tophinhanhdep.com, a platform dedicated to stunning visuals, wallpapers, high-resolution photography, and creative design, mastering foundational techniques like cutting, shaping, and cropping images in Adobe Photoshop is paramount. These skills are not just about removing unwanted elements; they are about transforming ordinary pictures into extraordinary pieces of digital art, crafting bespoke backgrounds, isolating subjects for striking aesthetic compositions, and preparing images for sophisticated graphic design projects.
Photoshop offers a versatile suite of tools to achieve these results, from isolating intricate subjects to shaping images into custom forms and perfectly framing your shots. This comprehensive guide will delve into the various methods available in Photoshop CC and Photoshop Elements, equipping you with the knowledge to elevate your digital photography and visual design endeavors. By understanding these techniques, you’ll unlock new possibilities for image manipulation, enhance your thematic collections, and contribute to trending visual styles that resonate with the Tophinhanhdep.com community.
Essential Cutting Techniques: Beyond Basic Cropping
While often used interchangeably, “cropping” and “cutting out” an image serve distinct purposes. Cropping typically involves trimming the outer edges of a photo to improve composition or fit specific dimensions, keeping the image rectangular or square. “Cutting out” an image, however, refers to isolating a specific subject or region from its background, often resulting in a transparent background or a unique, non-rectangular shape. This distinction is crucial for advanced photo manipulation and digital art, allowing you to create compelling collages, superimpose elements onto new backgrounds, or even design abstract pieces.

For Tophinhanhdep.com users focused on creating captivating wallpapers, detailed aesthetic images, or preparing stock photos, precise cutting techniques are fundamental. They enable you to highlight the most beautiful photography, separate elements from nature shots, or refine figures for artistic digital photography projects.
Precision Selection for Flawless Cut-Outs
The foundation of any successful image cut-out lies in accurate selection. Photoshop provides several powerful selection tools, each suited to different types of image content and levels of detail. Choosing the right tool for the job can dramatically impact the quality and efficiency of your workflow.
The Quick Selection Tool: Speed and Efficiency for Clear Boundaries
The Quick Selection Tool is a fantastic starting point for isolating subjects with well-defined edges and contrasting backgrounds. It works much like a smart brush, intelligently detecting and selecting pixels based on color, tone, and texture as you “paint” over your desired area. This makes it ideal for rapidly selecting large blocks of color or clearly separated elements within your images, perfect for quickly preparing aesthetic images or simple backgrounds.
How it Works: The tool automatically expands its selection to visually similar areas, trying to “snap” to edges. You can adjust the brush size for broader strokes or finer detailing.
Step-by-Step Guide:
- Open Your Image: Launch Photoshop and open the image you wish to work on.
- Select the Tool: From the left toolbar, locate and select the “Quick Selection Tool” (it’s often grouped with the Object Selection Tool or Magic Wand Tool, accessible by clicking and holding). Alternatively, press
Won your keyboard. - Paint Your Selection: Adjust your brush size in the options bar at the top. Click and drag the tool over the object you want to cut out. Photoshop will automatically expand the selection to encompass similar pixels and detect edges.
- Refine Your Selection: Zoom in closely to inspect the edges. If the selection extends beyond your object, hold
Alt(Windows) orOption(Mac) and drag over the unwanted areas to subtract them. If you missed parts of your object, simply drag over them again without holdingAlt/Option. - Finalize the Cut-Out: Once satisfied, right-click within the selected area and choose “Layer via Copy” to create a new layer containing only your cut-out, leaving the background untouched, or “Layer via Cut” to move the selection to a new layer and remove it from the original. This non-destructive approach is crucial for maintaining the integrity of your original high-resolution photography.
The Magic Wand Tool: Isolating Uniform Backgrounds with a Click
For images featuring solid or relatively uniform backgrounds, the Magic Wand Tool is a classic choice. It selects contiguous or non-contiguous pixels of similar color and tone based on a tolerance level you define. This makes it incredibly efficient for removing simple backgrounds, common in many stock photos or when isolating specific items for product photography on Tophinhanhdep.com.
How it Works: The “Tolerance” setting determines the range of colors the tool will select around the clicked pixel. A higher tolerance selects a broader range of similar colors, while a lower tolerance is more selective. The “Contiguous” option dictates whether the selection is limited to adjacent pixels or includes all similar pixels throughout the image.
Step-by-Step Guide:
- Load Your Image: Open your image in Adobe Photoshop.
- Activate the Tool: Select the “Magic Wand Tool” from the left toolbar (often grouped with Quick Selection) or press
W. - Adjust Tolerance: In the options bar, set the “Tolerance” value. For complicated backgrounds, a higher value might be needed; for simple, solid backgrounds, a lower value is often better. Decide whether to check “Contiguous” based on whether you want to select only connected areas of similar color.
- Click to Select: Click on the area you want to delete (e.g., the background). The tool will automatically select pixels with similar colors.
- Refine (if needed): If the selection isn’t perfect, you can add to it by holding
Shiftand clicking on unselected areas, or subtract by holdingAlt/Optionand clicking on unwanted selections. - Create Cut-Out: Right-click inside the selection and choose “Layer via Copy” or “Layer via Cut” to create your new layer with the object isolated. This method is especially useful for quickly processing large batches of images for thematic collections or aesthetic purposes.
The Pen Tool: Ultimate Control for Complex Edges and Professional Finishes
When unparalleled precision is required, especially for intricate outlines, curves, or subjects like people with flowing hair, the Pen Tool is the professional’s choice. It creates vector paths that can be meticulously adjusted, offering the highest degree of control over your selection edges. While it demands a bit more practice, the results are flawlessly crisp and perfect for high-resolution photography and advanced photo manipulation.
How it Works: The Pen Tool creates anchor points connected by paths. By clicking, you create straight segments. By clicking and dragging, you create Bezier curves, allowing you to sculpt highly accurate outlines.
Step-by-Step Guide:
- Open Your Image: Load the image you want to cut out into Photoshop.
- Select the Pen Tool: Choose the “Pen Tool” from the left toolbar or press
P. Ensure it’s set to “Path” mode in the options bar. - Zoom In: Zoom significantly into your image to see the edges clearly.
- Create Anchor Points: Click along the edge of your object to create the first anchor point. Continue clicking to add more points. For straight lines, simply click.
- Create Curves: For curved sections, click and drag the mouse. This will reveal handles (Bezier handles) that allow you to control the direction and curvature of the path. You can adjust these handles later by holding
Ctrl(Windows) orCommand(Mac) and dragging them. - Complete the Path: Once you have traced the entire object, click on your initial anchor point to close the path.
- Convert Path to Selection: Right-click anywhere on the path and choose “Make Selection.” A “Feather Radius” dialog box will appear. A small feather radius (e.g., 0.5-1.0 pixels) can soften the edge slightly for a more natural blend. Click “OK.”
- Finalize the Cut-Out: With the selection active, right-click and select “Layer via Copy” or “Layer via Cut.” The Pen Tool is indispensable for detailed graphic design, digital art, and extracting subjects for creative ideas.
Creative Cut-Outs: Shaping Your Vision with Clipping Masks
Beyond simply removing backgrounds, Photoshop allows you to cut images into unique, predefined, or custom shapes using a powerful feature called Clipping Masks. This non-destructive technique uses one layer (the shape or “masking” layer) to define the visible boundaries of another layer (the “clipped” layer). It’s a fundamental concept in visual design and photo manipulation, perfect for creating aesthetic visuals, innovative graphic design elements, or stylish frames for your beautiful photography on Tophinhanhdep.com.
Step-by-Step: Cutting Pictures into Custom Shapes (Photoshop CC & Elements)
The process of creating a clipping mask is straightforward in both Photoshop CC and Photoshop Elements, offering immense creative flexibility.
Preparing Your Image
- Open Your Image: Start by opening the picture you want to shape in Photoshop.
- Convert Background Layer: If your image is currently a “Background” layer (indicated by a padlock icon in the Layers palette), convert it to a regular layer. Go to
Layer > New > Layer from Background. Give it a name and clickOK. This allows for greater manipulation.
Defining Your Shape
- Select the Shapes Tool: In the left toolbar, locate and click on the “Shapes Tool” (often represented by a rectangle icon). From the fly-out menu, select the “Custom Shape Tool.”
- Choose Your Custom Shape: In the options bar at the top of your screen, you’ll see a “Shape” dropdown. Click this to open the custom shape picker. You can choose from a wide variety of built-in shapes (e.g., hearts, stars, arrows, speech bubbles) or load additional shape libraries.
- Draw Your Shape: Click and drag on your canvas to draw the chosen shape. Place it roughly where you want the picture to be cropped. This shape will act as the “window” through which your image will be visible.
Creating the Clipping Mask
- Arrange Layers: Open your
Layerspalette (Window > Layersif it’s not visible). You should now have two layers: your image layer and your newly drawn shape layer. Crucially, drag the shape layer below the picture layer. The shape must be directly underneath the image it will clip. - Create Clipping Mask: Right-click on the picture layer in the Layers palette. From the context menu, select “Create Clipping Mask” (in older versions of Photoshop, this might be called “Group with Previous”).
- Observe the Result: Your picture will instantly be “clipped” or “cut” into the contours of the shape below it. The Layers palette will show the picture layer slightly indented with a down-pointing arrow, indicating it’s clipped to the shape layer. Both layers remain independent, allowing you to use the Move Tool (
V) to reposition or resize either the picture within the shape or the shape itself, offering incredible flexibility for photo manipulation and creative ideas.
Advanced Clipping Mask Techniques
Clipping masks are not limited to static cut-outs; they can be enhanced with transparency and layer effects to create truly unique visual designs, from subtle fades to dynamic, embossed elements.
Graduated Transparency: Softening Edges for Aesthetic Appeal
Applying graduated transparency to a clipping mask can create beautiful, soft-edged cut-outs, ideal for dreamy or emotional aesthetic images, or abstract backgrounds. This technique makes your image fade subtly into the background rather than having a hard edge.
Step-by-Step Guide:
- Rasterize/Simplify the Shape Layer: After creating your clipping mask, select the shape layer in the Layers palette. Right-click on it and choose “Rasterize Layer” (in Photoshop Elements, this command is “Simplify Layer”). This converts the vector shape into pixels, allowing it to be blurred.
- Apply Gaussian Blur: With the now rasterized shape layer still selected, go to
Filter > Blur > Gaussian Blur. - Adjust the Radius: In the Gaussian Blur dialog box, increase the “Radius” value significantly (e.g., 30 pixels or more, depending on your image size and desired effect). You’ll notice the edges of your original picture (now clipped to this blurred shape) begin to fade out, creating a smooth transition. Click
OK. This technique is excellent for creating soft focus effects or blending subjects into a new environment for digital art.
Adding Layer Effects to Cut-Outs: Enhancing Visual Impact
Layer effects (or Layer Styles) can add depth, dimension, and professional polish to your shaped cut-outs, transforming them into more integrated components of your visual design or making them pop for a graphic design project.
Step-by-Step Guide:
- Select the Shape Layer: Choose the shape layer (the clipping mask) in your Layers palette.
- Apply Layer Styles (Photoshop CC): Go to
Layer > Layer Styleand select an effect like “Drop Shadow,” “Stroke,” or “Bevel & Emboss.” A dialog box will appear where you can customize the settings of your chosen effect. For example, adding a subtle drop shadow can make the cut-out appear as if it’s lifting off the background. - Apply Layer Styles (Photoshop Elements): Go to
Layer > Layer Style > Style Settings. This will open a dialog box where you can adjust various effects like drop shadow, inner glow, bevel, and stroke settings. - Experiment with Backgrounds: For further creative impact, you can add a new background layer below your shape layer (the clipping mask group). This could be a solid color, a gradient, or even a pattern fill layer, allowing your newly shaped image to stand out, perfect for creating unique wallpapers or thematic collections.
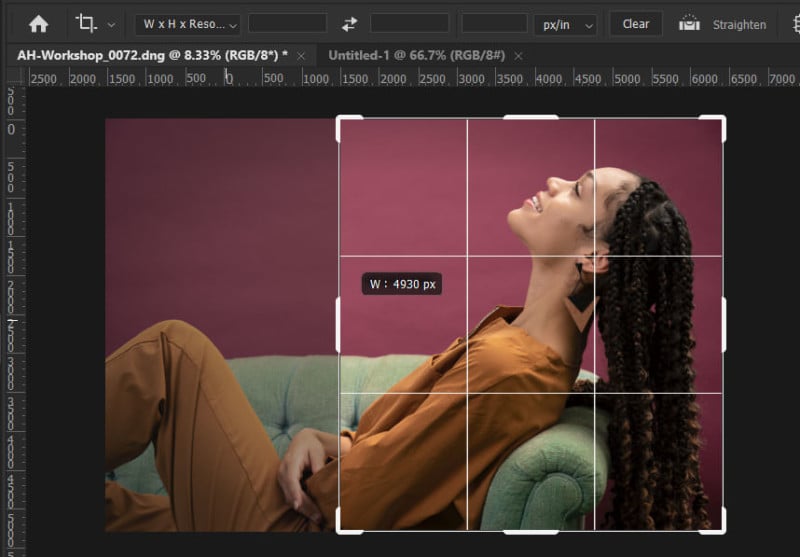
Mastering the Crop Tool: Framing Your Perfect Shot
While “cutting out” focuses on isolating subjects, the Crop Tool remains an indispensable part of any image editing workflow. It’s about refining the composition, removing distracting elements, and adjusting the dimensions of your image to fit specific requirements, whether for printing, web display, or Tophinhanhdep.com’s beautiful photography collections. A well-executed crop can dramatically improve the visual impact and storytelling of your digital photography.
Fundamental Cropping for Optimal Composition
The Crop Tool is more sophisticated than it first appears, offering numerous options for precise control over your image’s frame.
Crop Tool Basics: Your Gateway to Better Composition
- Accessing the Tool: Select the “Crop Tool” from the toolbar (it looks like two overlapping right angles) or simply press
Con your keyboard. - Adjusting the Crop Box: Upon selection, a crop box with handles will appear around your image. You can click and drag these handles (corners and midpoints) to adjust the cropping area. Alternatively, click and drag anywhere on the image to define a new crop area.
- Confirming the Crop: Once satisfied, press
Enter/Returnor click the checkmark icon in the options bar to apply the crop.
Ratio, Width, Height & Resolution: Tailoring Dimensions for Any Purpose
The Crop Tool allows you to define precise dimensions and aspect ratios, essential for creating consistent image collections, designing digital art, or preparing high-resolution stock photos.
- Preset Ratios: In the options bar at the top, you’ll find a dropdown menu for aspect ratios. It includes common photographic ratios (e.g., 1:1 for square, 3:2 for DSLR/mirrorless, 16:9 for widescreen) and standard print sizes (e.g., 8x10 inches). Selecting one of these will constrain your crop box to that proportion.
- Custom Dimensions: You can input specific width and height values (e.g., “1920px” for width and “1080px” for height for a Full HD wallpaper) directly into the fields next to the ratio dropdown. You can also specify a resolution (e.g., “300 ppi” for print) which will resample the image.
- Understanding Resampling: Be cautious when increasing image size (upsampling) with resolution set in the Crop Tool, as it can lead to a loss of quality through interpolation. For significant enlargements in high-resolution photography, it’s generally better to use
Image > Image Sizefor more control over the resampling method. Downsampling (reducing size) usually maintains good quality.
- Understanding Resampling: Be cautious when increasing image size (upsampling) with resolution set in the Crop Tool, as it can lead to a loss of quality through interpolation. For significant enlargements in high-resolution photography, it’s generally better to use
- Swapping Orientation: Click the double-arrow icon between the width and height fields to quickly swap between portrait and landscape orientations for your chosen ratio.
Utilizing Cropping Aids: Precision and Compositional Guidance
Photoshop offers several visual aids and shortcuts to help you achieve perfect crops.
- Rulers and Guides: Enable rulers (
View > RulersorCtrl/Cmd + R). You can then drag guides from the rulers onto your image to mark specific areas for cropping. The crop box will “snap” to these guides, ensuring accuracy for graphic design and precise image layouts. - Modifier Keys:
- Hold
Shiftwhile dragging a corner handle to constrain the crop to the original aspect ratio or to a perfect square if no ratio is set. - Hold
Alt(Windows) orOption(Mac) while dragging to adjust the crop box from its center point. - Combine
Shift + Alt/Optionto maintain proportions and adjust from the center simultaneously.
- Hold
- Overlays: The Crop Tool features various compositional overlays (like Rule of Thirds, Golden Ratio, Grid, Diagonal, Triangle, Golden Spiral) that appear within the crop box. These are invaluable for achieving balanced and visually appealing compositions, especially in beautiful photography. Cycle through these overlays by pressing
Orepeatedly, and rotate some (like Golden Spiral) withShift + O.
The Straighten Tool: Aligning Your Horizons
A crooked horizon or an off-kilter element can detract from an otherwise perfect photo. The Straighten Tool, integrated into the Crop Tool, allows for quick and accurate correction.
How it Works: You draw a line along an element that should be perfectly horizontal or vertical, and Photoshop automatically rotates the image to align it.
Step-by-Step Guide:
- Activate Straighten: With the Crop Tool active, click the “Straighten” icon in the options bar (looks like a small level) or hold
Ctrl(Windows) /Command(Mac) to temporarily activate it. - Draw Your Line: Click and drag your cursor along an element that should be straight (e.g., a horizon line in a nature photo, a building edge in urban photography).
- Release: Photoshop will automatically rotate the image and adjust the crop box to correct the alignment. You can then fine-tune the crop if needed.
Advanced Cropping with Perspective Correction and Content-Aware Fill
The Crop Tool’s capabilities extend beyond simple rectangular frames to correct perspective distortions and intelligently fill in missing areas.
Perspective Crop Tool: Fixing Skewed Images
Sometimes, photos of documents, artwork, or architectural elements appear skewed due to camera angle. The Perspective Crop Tool is designed to correct these distortions.
How it Works: It allows you to define a four-sided cropping area where each corner can be moved independently. When applied, Photoshop transforms the image within that area to straighten the perspective, making the chosen boundaries perfectly rectangular.
Step-by-Step Guide:
- Access the Tool: Click and hold on the Crop Tool icon in the toolbar, then select “Perspective Crop Tool,” or press
Shift + Crepeatedly until it’s active. - Define the Perspective: Click on each of the four corners of the skewed object in your image. You’ll see a grid form. Carefully drag each corner handle to align precisely with the actual corners of the object.
- Apply Crop: Press
Enter/Returnto apply the crop. Photoshop will straighten the image within your defined perspective, ideal for digital photography of flat objects or for correcting slight distortions in stock photos.
Delete Pixels vs. Preserving Data and Content-Aware Fill
These options determine how Photoshop handles the pixels outside your crop selection.
- Delete Pixels (Checked): If this checkbox in the options bar is
checked, Photoshop permanently deletes all pixels outside the crop area when you apply the crop. This makes your file size smaller but means you cannot recover or re-crop the original image data later. Use this when you are absolutely sure of your crop for final output (e.g., optimizing images for web). - Delete Pixels (Unchecked): If this checkbox is
unchecked, Photoshop hides the pixels outside the crop area but retains them within the image file. This allows for non-destructive cropping; you can go back and readjust your crop later, effectively revealing more of the original image. This is highly recommended for ongoing graphic design projects, photo manipulation, or when experimenting with creative ideas, as it preserves flexibility. - Content-Aware Fill with Crop Tool: When “Delete Pixels” is unchecked, and you expand the canvas beyond the original image boundaries using the Crop Tool, new transparent areas are created. If you check the “Content-Aware” option (next to “Delete Pixels”) before applying the crop, Photoshop will attempt to intelligently fill these new empty spaces based on the surrounding image content. This can be a useful shortcut for expanding backgrounds in nature photography or abstract compositions, but it’s important to preview the results, as complex areas can sometimes produce unnatural-looking fills.
Saving and Optimizing Your Cut-Outs and Cropped Images
Once you’ve meticulously cut, shaped, or cropped your images, the next critical step for Tophinhanhdep.com users is saving them in appropriate formats for their intended use, be it as stunning wallpapers, elements for digital art, or optimized stock photos.
- File Formats for Transparency: If your cut-out has a transparent background (e.g., a subject isolated from its original background), you must save it in a format that supports transparency. PNG is the most common and widely supported format for web use and general transparency. For high-quality, print-ready images with transparency, TIFF is another excellent choice.
- Preserving Editable Layers (PSD): To maintain all your layers, clipping masks, and layer effects for future editing, always save a copy in Photoshop’s native PSD format. This is crucial for complex graphic design projects, extensive photo manipulation, and retaining the flexibility to iterate on creative ideas.
- Workflow Integration (Copy Merged & Smart Objects):
- Copy Merged: If you want to quickly paste your finished cut-out (with all visible layers merged) into another Photoshop document without saving a separate file, select all (
Ctrl/Cmd + A), then go toEdit > Copy Merged. You can then paste it into your target document. - Convert to Smart Object: For a more flexible workflow, especially when reusing cut-outs in multiple projects or scaling them without quality loss, select all relevant layers (e.g., your image and its clipping mask), right-click in the Layers palette, and choose “Convert to Smart Object.” This bundles your layers into a single, non-destructively editable object that can be dragged into other Photoshop documents. It’s excellent for maintaining high-resolution detail in digital photography compositions.
- Copy Merged: If you want to quickly paste your finished cut-out (with all visible layers merged) into another Photoshop document without saving a separate file, select all (
Streamlining Your Workflow: AI-Powered Alternatives for Tophinhanhdep.com Users
While Photoshop provides unparalleled control and precision, its learning curve can be steep, and complex cut-outs can be time-consuming. For Tophinhanhdep.com users, especially beginners or those with high volumes of images (like stock photos or backgrounds), AI-powered background removers offer a remarkably efficient alternative.
Many platforms now integrate sophisticated Artificial Intelligence that can automatically detect subjects and remove backgrounds with impressive accuracy, often in a single click and within seconds. These tools are perfect for:
- Rapid Batch Processing: Quickly preparing large collections of images for thematic collections or aesthetic compilation.
- Beginner-Friendly: Offering an accessible entry point for users without extensive Photoshop experience.
- Simple Cut-Outs: Effectively handling images with relatively clear subject-background separation.
Look for tools that offer high-quality image cut-outs with transparent backgrounds, and robust features like “magic brushes” to fine-tune selections or restore small areas. While they might not replace Photoshop’s granular control for every intricate task in professional graphic design or digital art, they serve as powerful complementary tools for enhancing your efficiency and expanding your creative possibilities on Tophinhanhdep.com.
Conclusion
The art of cutting, shaping, and cropping images in Photoshop is more than a technical skill; it’s a gateway to boundless creative expression. From isolating subjects with pixel-perfect precision using the Pen Tool, crafting visually captivating forms with Clipping Masks and graduated transparency, to perfecting your compositions with the versatile Crop Tool, these techniques are fundamental for any Tophinhanhdep.com user looking to excel in digital photography, graphic design, and image manipulation.
Whether you’re creating stunning wallpapers, curating aesthetic collections, or producing high-resolution stock photos, the mastery of these tools will allow you to transform your visual ideas into reality. Embrace these methods, experiment with different approaches, and leverage both Photoshop’s in-depth capabilities and emerging AI alternatives to streamline your workflow. By continuously refining your skills, you’ll contribute to the rich tapestry of beautiful photography and trending visual styles that define Tophinhanhdep.com, inspiring others and elevating your own artistic journey.