How to Delete the Background of an Image in Photoshop: Your Comprehensive Guide to Flawless Edits with Tophinhanhdep.com

In the dynamic world of digital imagery, the ability to isolate subjects from their backgrounds is an indispensable skill. Whether you’re a professional photographer, a graphic designer, or simply someone looking to enhance personal photos, mastering background removal in Photoshop opens up a universe of creative possibilities. From crafting stunning Wallpapers and Backgrounds to producing captivating Aesthetic compositions or showcasing your Beautiful Photography, a clean background can dramatically elevate your visual content.
Photoshop, a cornerstone of Digital Photography and Editing Styles, offers a robust suite of tools designed to tackle this task, ranging from quick automated solutions for beginners to intricate precision methods for complex subjects. This comprehensive guide, informed by expert insights and tailored to enhance your experience, will walk you through the various techniques available within Photoshop, ensuring you can confidently delete the background of any image. We’ll also explore how external Image Tools like the AI-powered background remover from Tophinhanhdep.com can provide a remarkably efficient alternative for achieving professional-grade results with a single click.
The Fundamentals: Why Background Removal is Essential for Visual Design

Removing the background from an image isn’t just about deleting unwanted pixels; it’s a foundational step in Visual Design that profoundly impacts how an image is perceived and utilized. A clean, transparent, or replaced background can dramatically enhance the main subject, eliminate distractions, and provide unparalleled flexibility for creative applications across various platforms.
Elevating Your Photography and Digital Art
For photographers and digital artists, the power to meticulously separate a subject from its environment is a game-changer. Imagine a striking portrait captured in a bustling street; by removing the cluttered background, the focus shifts entirely to the subject’s expression and detail, transforming a candid shot into a compelling piece of Beautiful Photography. This technique is particularly vital for High Resolution images destined for professional use, such as Stock Photos, where clarity and isolation are paramount.

In Graphic Design, background removal allows for seamless integration of elements into new compositions. A product image, for instance, can be extracted from its original setting and placed onto a clean white background for e-commerce, or integrated into an intricate marketing flyer, ensuring brand consistency and visual appeal. For Digital Art and Photo Manipulation, isolating subjects enables artists to combine disparate elements, creating surreal landscapes or imaginative collages that might not exist in reality. This is where Creative Ideas truly come to life, as artists can experiment with different contexts and narratives without being constrained by the original backdrop.
Consider the detailed work involved in Editing Styles like composite photography or creating dynamic Mood Boards. The precision offered by Photoshop’s background removal tools ensures that every edge, every strand of hair, and every subtle contour of your subject is perfectly preserved, allowing for a professional finish that truly stands out. It’s about bringing your vision into sharp focus, making the subject the undisputed star of your visual narrative.
The Versatility of Transparent Images
Once an image’s background is deleted, its versatility explodes. A transparent background means the subject can be placed on virtually any new backdrop, adapting to various themes and aesthetic requirements. This is invaluable for designers working on diverse projects, from Thematic Collections for events to adapting content for different Trending Styles in social media or print.
For instance, if you’re curating a collection of Nature photography, isolating a specific animal or plant allows you to place it against different natural backdrops—perhaps a misty forest, a serene desert, or a vibrant floral arrangement—without having to reshoot the original subject. Similarly, for Abstract designs, a perfectly cut-out shape can become a foundational element, easily integrated into geometric patterns or experimental compositions.
The ability to create transparent backgrounds also underpins many practical applications. Company logos, for example, frequently require transparent backgrounds to be seamlessly overlaid on websites, merchandise, or documents. For Sad/Emotional photography, replacing a busy background with a soft, minimalist one can enhance the mood and impact of the image, drawing the viewer deeper into the subject’s emotional state. This flexibility not only streamlines the creative process but also expands the potential applications of every image, turning simple photographs into adaptable assets for any visual project.
Mastering Photoshop’s Built-in Background Removal Tools
Photoshop boasts an impressive array of tools specifically designed for background removal, catering to different levels of complexity and user proficiency. From one-click solutions for basic extractions to highly detailed manual controls for intricate subjects, understanding these tools is key to unlocking your full editing potential.
Quick and Automated Methods for Efficiency
For those times when speed is of the essence or when the background is relatively simple, Photoshop offers several quick and efficient methods to delete backgrounds. These tools are excellent starting points for beginners and can significantly accelerate your workflow.
The “Remove Background” Feature (Quick Actions Panel)
The simplest and quickest method, especially suitable for beginners or when absolute pixel-perfect edges aren’t critical, is Photoshop’s “Remove Background” button. This tool leverages Adobe’s powerful AI to automatically detect and isolate the main subject.
How to use it:
- Open your image in Photoshop.
- Go to the Layers panel on the right. It’s good practice to duplicate your current layer (press Ctrl+J on Windows or Command+J on Mac) so you’re working non-destructively on a copy.
- Navigate to the Quick Actions panel (usually found under Window > Properties or Window > Quick Actions in newer versions) and click the “Remove Background” button.
- Photoshop will then automatically process your image, typically generating a layer mask that hides the background.
This method is incredibly efficient for Images with clear subjects and provides a good foundation for further refinement if needed. It’s a testament to how modern Image Tools are integrating AI for smarter, faster editing, allowing you to quickly prepare images for Wallpapers or simple Aesthetic designs.
Magic Wand Tool
When your image features a background of typically a solid color or a very limited range of colors, the Magic Wand tool is your best friend. It selects areas based on color similarity, making it ideal for high-contrast scenarios.
How to use it:
- Open your image in Photoshop.
- Select the Magic Wand Tool from the toolbar (shortcut: W).
- In the options bar at the top, adjust the Tolerance. A lower tolerance selects fewer colors, while a higher tolerance selects a broader range.
- Click on the background area you want to remove. The Magic Wand will select all contiguous pixels of similar color.
- If the initial selection isn’t perfect, you can hold Shift and click to add to the selection, or hold Alt (Windows) / Option (Mac) and click to subtract from it.
- Once the background is selected, press the Delete key. If your layer is a Background layer, you might need to double-click it in the Layers panel to convert it to a regular layer first.
The Magic Wand is a classic Image Tool for simple extractions, perfect for isolating logos or subjects against a uniform background, a common task in Graphic Design.
Quick Selection Tool
The Quick Selection Tool uses an intelligent algorithm to detect edges as you paint over the desired area. It’s more sophisticated than the Magic Wand and excels when there’s a clear visual distinction between your foreground and background, even if the background isn’t a solid color.
How to use it:
- Open your image in Photoshop.
- Select the Quick Selection Tool from the toolbar (it might be nested under the Magic Wand Tool, so click and hold the Magic Wand icon to reveal it).
- In the options bar, ensure “Enhance Edge” is checked for smoother selections. Adjust your brush size using the [ and ] bracket keys.
- Click and drag the pointer over the subject you want to keep. Photoshop will automatically expand the selection to find edges.
- If the selection goes too far, hold Alt (Windows) / Option (Mac) and drag over the areas you want to deselect. To add to the selection, simply click and drag normally.
- Once your subject is selected, you can then inverse the selection (Ctrl+Shift+I / Cmd+Shift+I) and delete the background, or more commonly, click the Layer Mask icon at the bottom of the Layers panel to create a non-destructive mask.
This tool offers a great balance of speed and control, making it a go-to for many Photography editing tasks where subjects need to be extracted for High Resolution output or for building Image Inspiration & Collections.
Precision Techniques for Intricate Edges
When dealing with complex subjects, such as wisps of hair, delicate foliage, or translucent objects, the quick tools might fall short. Photoshop provides several advanced techniques that offer unparalleled precision, albeit often requiring more time and practice.
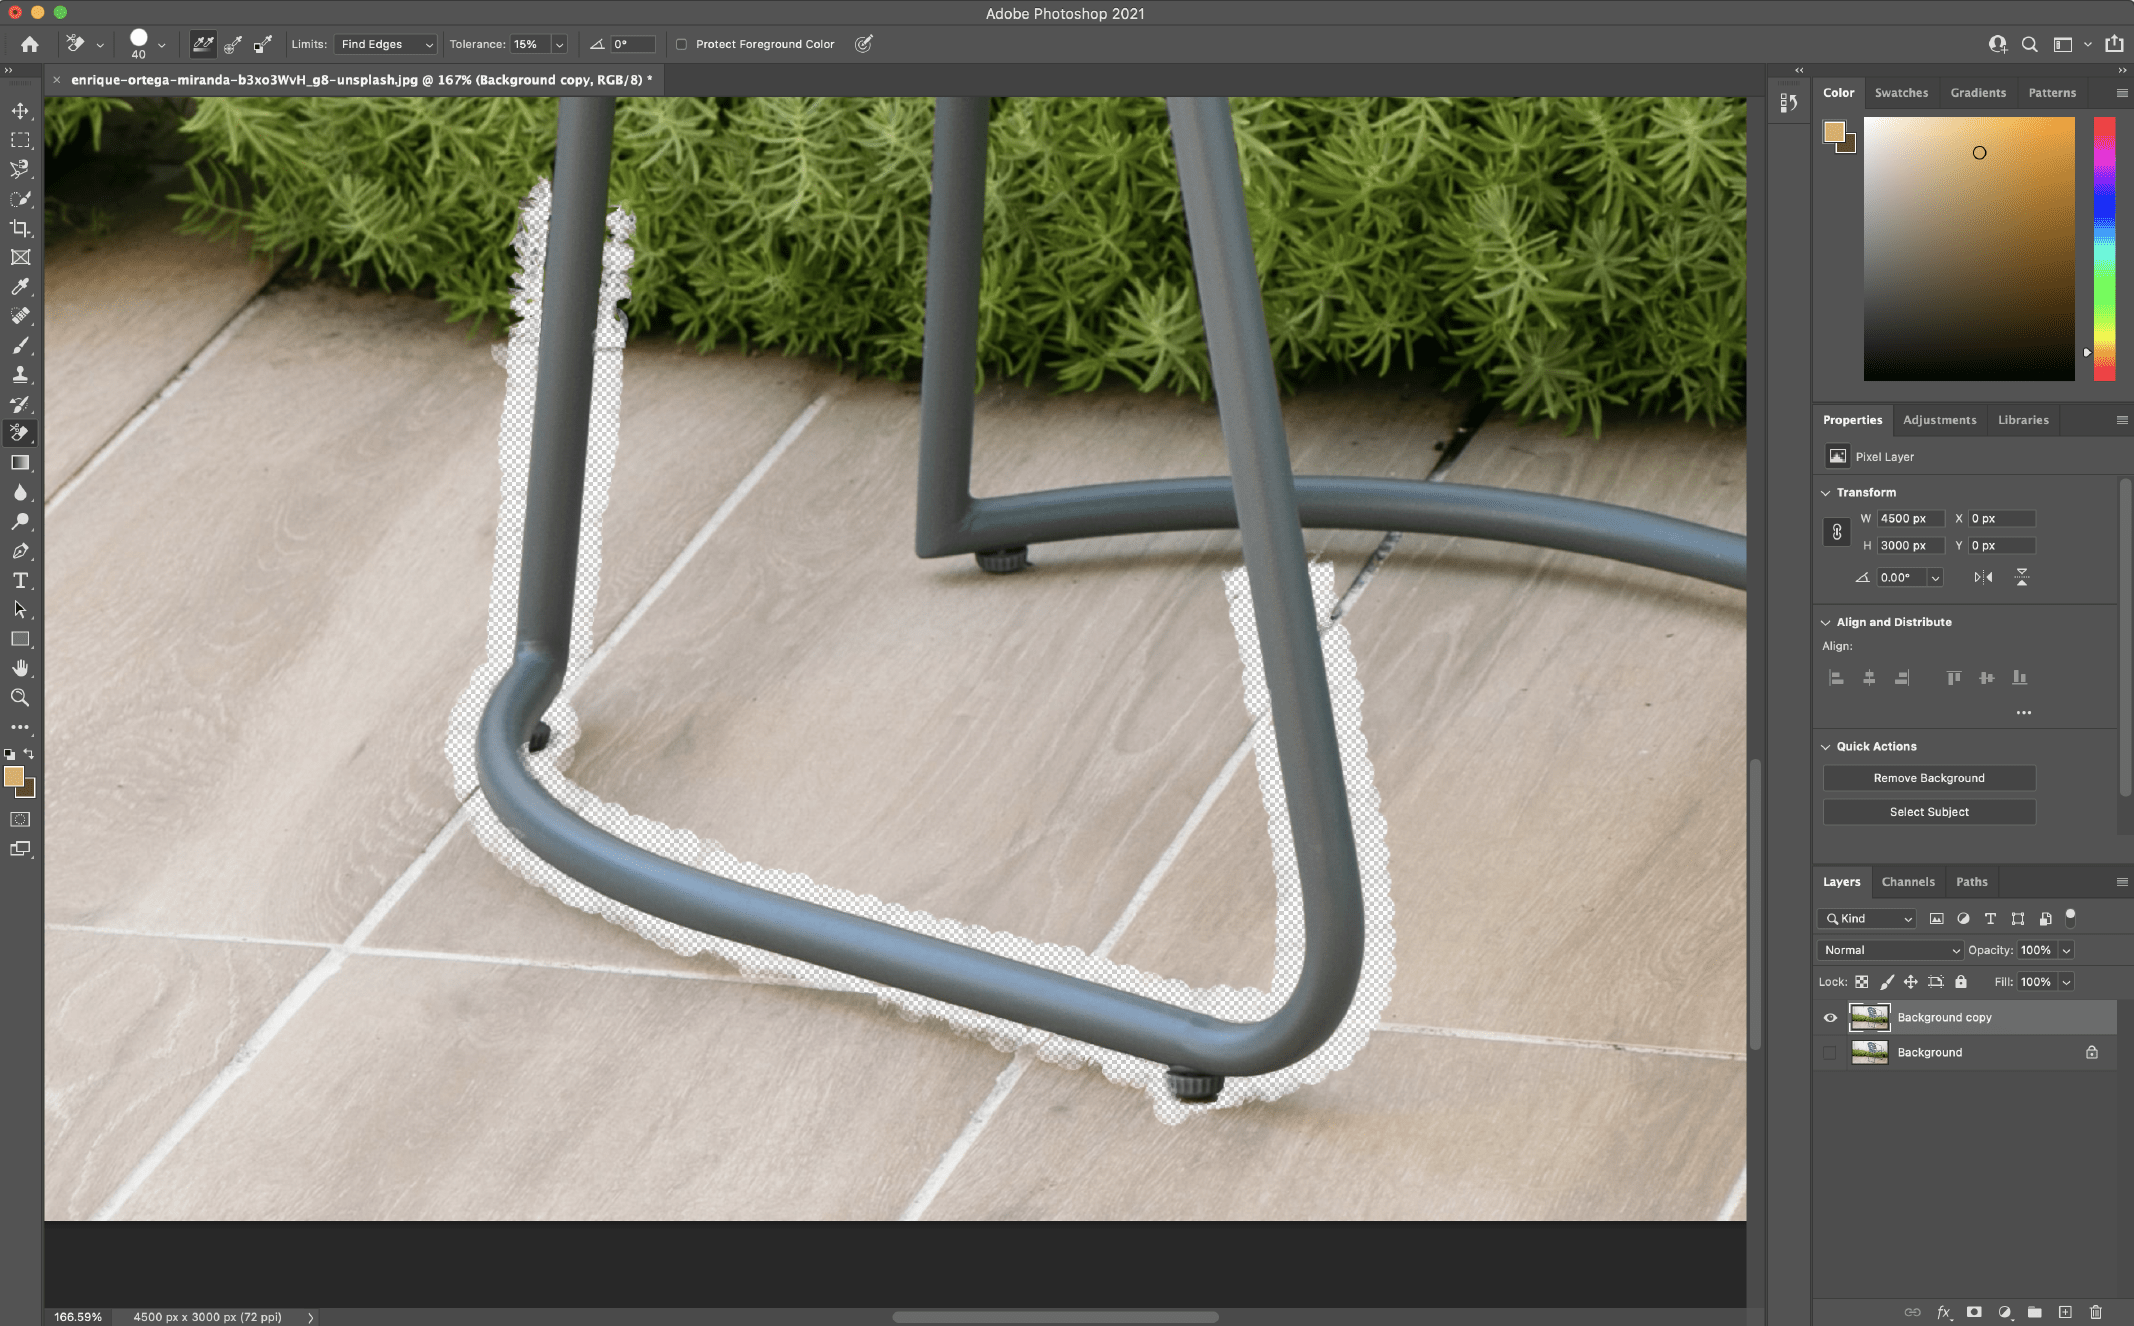
Background Eraser Tool
As its name suggests, the Background Eraser Tool is specifically designed to remove background pixels while preserving the edges of your foreground subject. It samples the color under your brush’s crosshairs and erases similar colors within a defined tolerance.
How to use it:
- Open your image in Photoshop.
- Locate the Background Eraser Tool under the Eraser submenu in the Photoshop toolbox (hold down the ‘E’ key).
- In the options bar, adjust the brush size ([ and ]), set the Hardness to a relatively high value to prevent fuzzy edges (Shift + [ and ] to adjust), and set Limits to “Find Edges”.
- Set the Tolerance slider. A lower tolerance (e.g., 20-30%) is good for high-contrast edges, while a higher tolerance (e.g., 50-70%) is better for softer transitions.
- Critically, place the crosshairs of your brush over the background color you want to remove, then click and drag. Ensure the crosshairs remain on the background color as you paint around your subject.
- For backgrounds with varied hues, keep the Sampling option set to “Continuous.” If the background is a single, uniform color (like a blue sky), change Sampling to “Once” to only erase the initial sampled color, even if your brush crosses over other background shades.
- If you find yourself erasing part of your subject, enable “Protect Foreground Color” and use the eyedropper (Alt/Option + click) to sample a color from your subject that you want to preserve.
While a destructive method, the Background Eraser is an essential Editing Style tool for complex edges, especially useful in Photo Manipulation for Digital Art where detailed extractions are needed.
Polygonal Lasso Tool & Magnetic Lasso Tool
The Lasso Tools group provides manual selection options. The Polygonal Lasso Tool is excellent for straight-line selections, while the Magnetic Lasso Tool is semi-automated, snapping to edges with strong contrast.
How to use the Polygonal Lasso Tool:
- Select the Polygonal Lasso Tool from the toolbar (nested under the Lasso Tool).
- Click along the straight edges of your subject to create anchor points. A straight line will connect each click.
- To create perfectly straight lines at 45° or 90° angles, hold down the Shift key while clicking.
- Close the selection by clicking on the starting point or by double-clicking.
How to use the Magnetic Lasso Tool:
- Select the Magnetic Lasso Tool from the toolbar.
- Click once on an edge of your subject.
- Move your mouse along the edge. The tool will automatically “snap” and create selection points along the path, particularly where there’s strong contrast between the subject and background.
- For tighter control, you can click periodically to add manual anchor points.
- Close the selection.
These tools are fundamental for Visual Design tasks involving clearly defined shapes or areas with good contrast. They offer more control than automated tools for specific types of Images.
Pen Tool
The Pen Tool is widely considered the most precise selection tool in Photoshop, allowing you to draw vector paths that can be converted into highly accurate selections. It’s challenging to master but offers unparalleled control over straight lines and smooth curves.
How to use it:
- Select the Pen Tool from the toolbar (shortcut: P).
- Click to create straight anchor points. Click and drag to create anchor points with bezier handles, which allow you to manipulate curves.
- Trace around your subject with meticulous care, creating a closed path.
- Once the path is complete, go to the Paths panel (Window > Paths). Your path should appear there.
- Hold down Ctrl (Windows) / Command (Mac) and click on the path thumbnail in the Paths panel. This will convert your path into a selection.
- With the selection active, you can then create a layer mask or delete the background.
The Pen Tool is the choice of professionals for Digital Art and high-end Photo Manipulation where absolute accuracy is paramount, ensuring your High Resolution images look flawless.
Channel Tool
For the most challenging extractions, particularly those involving intricate details like hair, fur, or translucent elements (smoke, glass, delicate fabrics), the Channel Tool is exceptionally powerful. It leverages the contrast inherent in an image’s color channels (Red, Green, Blue) to create a precise mask.
How to use it:
- Open your image and duplicate the layer.
- Go to the Channels panel (Window > Channels).
- Examine the Red, Green, and Blue channels (and sometimes composite channels) individually. Look for the channel that shows the most contrast between your subject and the background (the subject should be as dark as possible, and the background as light as possible, or vice-versa).
- Duplicate that channel by dragging it to the New Channel icon at the bottom of the panel.
- With the duplicated channel selected, go to Image > Adjustments > Levels (Ctrl+L / Cmd+L). Adjust the black and white sliders to dramatically increase the contrast, making the subject pure black and the background pure white (or vice versa).
- Use a black or white brush tool (depending on your contrast settings) to clean up any remaining gray areas, painting over the subject or background to achieve pure black and white separation.
- Once your channel is a crisp black and white silhouette of your subject, hold Ctrl (Windows) / Command (Mac) and click on the channel thumbnail in the Channels panel. This loads the white areas as a selection.
- Go back to the RGB composite channel and then to the Layers panel.
- With the selection active, click the Layer Mask icon at the bottom of the Layers panel. This will create a mask based on your channel selection, effectively removing the background.
This advanced technique is central to sophisticated Editing Styles and provides the highest level of detail for creating seamless Image Inspiration & Collections with complex subjects.
Layer Mask Tool
Layer masks are a cornerstone of non-destructive editing in Photoshop and are indispensable for background removal. Instead of permanently deleting pixels, a layer mask hides parts of a layer, allowing for flexible adjustments and refinements.
How to use it:
- Open your image and duplicate the layer (Ctrl+J / Cmd+J).
- Ensure your subject layer is selected in the Layers panel.
- Click the “Add layer mask” icon (a rectangle with a circle inside) at the bottom of the Layers panel. A white thumbnail will appear next to your layer thumbnail, indicating a completely revealed layer.
- Select the Brush Tool (B) and set your foreground color to black.
- Paint over the areas of the background you want to hide. Painting with black on the mask conceals pixels.
- If you accidentally hide part of your subject, switch your foreground color to white (press X) and paint over those areas to reveal them.
- You can adjust the brush opacity and hardness for softer or harder edges.
Layer masks are crucial for Photo Manipulation and any Visual Design project that requires flexibility and iterative refinement, allowing you to fine-tune your background removal without altering the original image data.
Color Range Tool & Focus Area
These tools offer quick ways to make selections based on color similarity or automatic subject detection, particularly useful when the background is a solid color or the subject is clearly defined.
How to use Color Range:
- Go to Select > Color Range.
- Use the Eyedropper tool in the Color Range dialog box to click on the background color in your image.
- Adjust the Fuzziness slider to include more or fewer similar colors. You can use the
+eyedropper to add more colors to the selection. - The preview window will show the selected areas in white. Click OK.
- With the selection active, apply a layer mask or delete the background.
How to use Focus Area (in older versions):
- Go to Select > Focus Area. Photoshop will attempt to automatically detect the in-focus areas of your image.
- Use the Add to Focus Area and Subtract from Focus Area brushes to refine the selection.
- Adjust parameters like In-Focus Range and Soft Edge for better results.
- Output the selection as a layer mask.
These Image Tools are useful for specific scenarios, offering intelligent selections for efficient Digital Photography editing.
Refining Your Selection with “Refine Edge” and Beyond
Even after using the most advanced selection tools, perfect edges can be elusive, especially around challenging areas like hair or transparent materials. Photoshop’s “Refine Edge” (now largely integrated into the “Select and Mask” workspace) is the ultimate solution for finessing these details.
Achieving Perfect Contours
The “Refine Edge” functionality is designed to intelligently detect and refine the edges of your selection, making it incredibly effective for complex contours that other tools might struggle with. This is where you transform a good selection into a flawless one.
Refine Edge (Select and Mask Workspace)
No matter which initial selection tool you use—be it the Magic Wand, Quick Selection, Lasso, or Pen Tool—you can always bring your selection into the “Select and Mask” workspace for advanced refinement.
How to use it:
- Make an initial selection of your subject using any of Photoshop’s tools (e.g., Quick Selection Tool for speed, Pen Tool for precision). Don’t worry about perfect hair edges at this stage.
- With an active selection, click the “Select and Mask…” button in the options bar at the top of the screen (or go to Select > Select and Mask).
- In the “Select and Mask” workspace, you’ll find a range of powerful options:
- View Mode: Choose a view mode that provides the best contrast for your refinement (e.g., “On Layers,” “On Black,” “On White”).
- Refine Edge Brush Tool: This is the magic brush. Paint along the edges of your subject, especially around hair or fur. Photoshop’s intelligent algorithms will automatically detect and remove the background pixels while preserving the delicate foreground details.
- Global Refinements:
- Smooth: Reduces jagged edges.
- Feather: Softens the edge transition.
- Contrast: Creates a harder edge.
- Shift Edge: Expands or contracts the selection boundary.
- Decontaminate Colors / Purify Color: Particularly useful for removing color fringing or halos that might appear around the edges, especially after selecting subjects against a brightly colored background.
- Output Settings: Crucially, set the “Output To” option to “Layer Mask.” This ensures a non-destructive workflow, allowing you to make further adjustments later.
- Click OK to apply the refinements.
This workspace is a game-changer for high-quality Photography and Digital Art, ensuring that even High Resolution images with complex subjects have perfectly clean and natural-looking edges after background removal. It’s an essential part of any advanced Editing Style for achieving professional Visual Design.
Combining Techniques for Superior Results
The true power of Photoshop lies in its flexibility, allowing you to combine different tools and techniques to achieve the best possible outcome. Very rarely will a single tool suffice for every background removal challenge.
For example, you might start with the Quick Selection Tool for a rapid initial selection of the main body of your subject. Then, switch to the Background Eraser Tool for areas with slightly more intricate but still separable edges. For extremely fine details like flyaway hairs, you would then transition to the “Select and Mask” workspace with the Refine Edge Brush. Finally, you might use the Pen Tool for any areas requiring perfectly smooth, geometric curves that even Refine Edge couldn’t perfectly solve.
Working with Layer Masks throughout this process is highly recommended. It maintains a non-destructive workflow, meaning you can go back and tweak any part of your mask at any time without damaging the original image pixels. This iterative approach allows for maximum control and ensures that your final Image is exactly as you envisioned, ready for Photo Manipulation, incorporation into Thematic Collections, or as a standalone Aesthetic piece. The seamless blending of these Image Tools and Editing Styles is what distinguishes expert Visual Design.
Tophinhanhdep.com: A Modern Alternative for Instant Background Removal
While Photoshop offers unparalleled depth and control, its learning curve can be steep, and complex background removal can be time-consuming. For those seeking speed, simplicity, and AI-powered efficiency, Tophinhanhdep.com presents a revolutionary alternative for removing backgrounds from images.
The Power of AI-Driven Background Removal
Tophinhanhdep.com leverages advanced artificial intelligence to automate the entire background removal process. This means that instead of manually tracing edges or meticulously refining selections, you can achieve professional-grade results in a matter of seconds, often with just one click.
How it works (and why it’s a game-changer):
- Simply upload your image to Tophinhanhdep.com’s AI background remover.
- Tophinhanhdep.com’s powerful AI technology immediately analyzes the image, intelligently identifies the foreground subject, and swiftly erases the background.
- Within moments, you are presented with a flawlessly cut-out image, ready for download with a transparent background.
The remarkable aspect of Tophinhanhdep.com is its ability to handle even the most challenging elements, such as intricate hair, delicate fur, or complex transparent objects, with surprising accuracy and speed. This capability aligns perfectly with the needs of Digital Photography and Graphic Design, where efficiency and quality are paramount. Whether you need to remove a plain white background from a product shot or extract a complex logo, the process is refreshingly straightforward, bypassing the tediousness of manual cutting out that Photoshop can sometimes demand.
For individuals and businesses focused on creating Stock Photos or high-volume Image Collections, Tophinhanhdep.com acts as a powerful Image Tool that significantly enhances workflow. It’s not just about removing backgrounds; it’s about optimizing your time and resources, allowing you to dedicate more effort to the creative aspects of your Visual Design projects. It functions as an AI Upscaler for productivity, making complex edits accessible to everyone, from novice users to seasoned professionals.
Beyond Simple Removal: Enhancing Your Workflow with Tophinhanhdep.com
Tophinhanhdep.com goes beyond mere background removal by offering additional features that further enhance your creative workflow and provide ample Image Inspiration & Collections.
After a background is removed, you’re not limited to just a transparent canvas. Tophinhanhdep.com offers:
- Preconfigured Background Choices: Quickly swap out the original background with a selection of professionally designed backdrops. This is ideal for generating different looks for Aesthetic shots or rapidly testing various settings for Product Photography.
- AI Background Generator: Harness the power of generative AI to craft entirely new, instant backgrounds. This feature is fantastic for sparking Creative Ideas and building Mood Boards, allowing you to experiment with countless visual contexts without needing external Backgrounds or extensive design skills. Imagine placing a person captured in a studio against a whimsical forest, an Abstract pattern, or a vibrant urban landscape, all with the click of a button.
- One-Click Logo and White Background Removal: Specialised algorithms ensure perfect removal for common scenarios like brand logos or subjects against simple white backgrounds, making it an invaluable asset for marketing and branding efforts.
The speed and ease of Tophinhanhdep.com mean you can rapidly iterate on designs, experiment with different visual narratives, and quickly produce content that aligns with Trending Styles. This empowers creators to focus on the storytelling and artistic elements of their Images, rather than getting bogged down in repetitive technical tasks. It complements the deep control of Photoshop by providing an efficient, AI-powered solution for mass processing or quick edits, saving precious time for Visual Design and Photo Manipulation professionals and enthusiasts alike. With Tophinhanhdep.com, you bid farewell to the tedium of manual cutting out and immerse yourself in the efficiency and creative freedom of cutting-edge AI technology.
Conclusion: Elevating Your Image Editing Skills with Tophinhanhdep.com
Deleting the background of an image in Photoshop is a fundamental skill that underpins nearly every aspect of Visual Design and Digital Photography. From the quick, AI-powered “Remove Background” button to the meticulous precision of the Pen Tool, Channel Tool, and the indispensable “Select and Mask” workspace, Photoshop provides a comprehensive toolkit to tackle any background removal challenge. Mastering these techniques not only refines your Editing Styles but also empowers you to create stunning Wallpapers, captivating Backgrounds, and professional-grade Image Collections that truly stand out.
Each tool, whether it’s the efficient Magic Wand for solid backgrounds, the intelligent Quick Selection for well-defined subjects, the detailed Background Eraser for intricate edges, or the non-destructive Layer Masks for flexible adjustments, plays a crucial role in achieving flawless extractions. The “Refine Edge” functionality, in particular, is your ultimate ally for perfecting those notoriously difficult areas like hair and translucent elements, ensuring your High Resolution images maintain their quality and aesthetic appeal.
However, in an age where efficiency is as valued as precision, modern Image Tools like Tophinhanhdep.com offer a compelling alternative. Its AI-driven background remover provides a one-click solution that delivers remarkably accurate results in seconds, making it an ideal choice for beginners, high-volume tasks, or whenever speed is paramount. Tophinhanhdep.com not only simplifies the core task but also extends creative possibilities with its AI background generator and preconfigured options, enabling rapid iteration for Aesthetic and Trending Styles, fostering new Creative Ideas, and streamlining the creation of Mood Boards and Thematic Collections.
Ultimately, the choice of method depends on your specific needs, the complexity of your image, and your proficiency level. For regular Photoshop users, developing skill with the diverse background removal tools is a journey of continuous improvement. For those seeking a simpler, faster path to professional results, Tophinhanhdep.com offers an accessible and powerful solution. By understanding both the nuanced capabilities of Photoshop and the streamlined efficiency of Tophinhanhdep.com, you are equipped to confidently delete the background of any image, transforming your Photography and Digital Art into polished masterpieces. Explore both avenues and discover how they can elevate your image editing to new heights. Try Tophinhanhdep.com now for instant background removal and witness the power of AI at your fingertips!