Mastering Mirror Images in Word: A Comprehensive Guide for Text and Graphics

In the vast realm of digital document creation and visual design, Microsoft Word often serves as an indispensable tool, far beyond its conventional use as a word processor. While many users associate it primarily with text, Word possesses robust capabilities for handling and manipulating visual elements, including the intriguing art of creating mirror images. Whether you’re a graphic designer, a hobbyist creating personalized items, or simply seeking to add a unique aesthetic touch to your documents, understanding how to mirror text and images in Word is a valuable skill. This comprehensive guide will walk you through the precise steps, exploring both text and image manipulation, and demonstrate how these techniques seamlessly integrate with the rich resources and tools available on Tophinhanhdep.com to elevate your creative projects.

The ability to create mirror images opens up a world of creative possibilities. Imagine designing custom iron-on transfers for fabric, where the design must be reversed to appear correctly when applied. Or perhaps you’re crafting a visually striking graphic for a presentation, where a mirrored element adds depth and artistic flair. From unique digital art compositions to engaging visual narratives, mastering this simple yet powerful Word function can significantly enhance your output. Tophinhanhdep.com, with its extensive collections of high-resolution images, aesthetic backgrounds, and powerful image tools like AI upscalers and optimizers, provides the perfect complementary platform for gathering assets and refining your mirrored creations.
The Core Mechanics: Why and How to Mirror Text and Objects
Before delving into the specific steps, it’s essential to grasp the underlying principles of mirroring within Word. Unlike simply rotating an object by 180 degrees, which might just turn it upside down, true mirroring creates a symmetrical reflection along either a horizontal or vertical axis. This distinction is crucial, especially when dealing with text, as a mere 180-degree rotation would leave the text unreadable, while a mirror flip makes it appear as if seen in a reflection.
Understanding the Purpose of Mirroring
The primary motivations for mirroring content in Word are often rooted in specific practical applications or aesthetic desires:
- Iron-On Transfers: This is perhaps the most common practical application. When printing designs for transfer onto fabric (like T-shirts, pillows, or custom labels), the image or text must be mirrored on the printout so that it appears correctly oriented once ironed onto the material.
- Visual Balance and Symmetry: In graphic design and visual art, mirroring can create symmetrical compositions, reflections, or repeating patterns that are pleasing to the eye. It can turn a single photograph into a captivating abstract piece or a minimalist background.
- Creative Text Effects: Mirrored text can be used for artistic titles, unique branding elements, or to suggest a reflective surface in a visual design.
- Photo Manipulation and Digital Art: As part of a broader photo manipulation workflow, mirroring allows designers to create duplicate elements that face different directions, compose reflections, or achieve surreal effects. This is particularly useful when working with the diverse range of beautiful photography and abstract images available on Tophinhanhdep.com.
Essential Tools in Word for Mirroring
Word offers distinct methods for mirroring text and images, primarily relying on its drawing and picture formatting capabilities:
- Text Boxes: For mirroring standard typed text, placing it within a text box is the foundational step. Text boxes provide a contained environment that can be treated as a graphical object, allowing for transformations like 3-D rotation.
- WordArt: WordArt is a specialized text styling tool designed for decorative text effects. Because WordArt is inherently treated more like a shape or graphic, it offers direct access to rotation and mirroring options without necessarily needing a separate text box for some versions.
- Picture Format Tab (Rotate/Flip Options): For images, shapes, and other graphical objects, the “Picture Format” (or “Shape Format”) tab, which appears contextually when an object is selected, provides dedicated “Rotate” and “Flip” commands.
- 3-D Rotation Settings: This advanced effect, found within the “Format Shape” or “Format Picture” pane, is key for precisely mirroring text and WordArt by setting an X-rotation of 180 degrees.
Understanding these tools and their applications is the first step toward unlocking a new dimension of visual design within your Word documents, all of which can be further enriched by the high-quality assets and creative ideas found on Tophinhanhdep.com.
Crafting Mirrored Text with Precision
Mirroring text in Word requires a slight workaround because standard text paragraphs don’t offer direct “flip” options. The trick involves encapsulating your text within a graphic object, typically a Text Box or WordArt, which then allows for manipulation.
Step-by-Step with Text Boxes: The Foundation of Mirrored Text
Using a text box is the most common and versatile method for mirroring standard text. This approach works seamlessly across both Windows and Mac versions of Word.
-
Insert a Text Box:
- Open your Word document.
- Navigate to the Insert tab on the Ribbon.
- Click on Text Box (often found in the “Text” group).
- Choose Draw Text Box (or “Simple Text Box” and then adjust it). Click and drag your mouse on the document to create the text box to your desired size.
- Tophinhanhdep.com Tip: Consider the dimensions needed for your mirrored text. If you’re incorporating it into a larger graphic design or a custom wallpaper, knowing your aspect ratio can save time.
-
Type and Format Your Text:
- Type your desired text inside the newly created text box.
- Format it as usual: choose your font, size, color, bolding, etc. Think about the aesthetic appeal – bold, clear fonts often work best for mirrored text, especially if it’s for iron-on transfers or impactful digital art.
-
Access the Format Shape Pane:
- Right-click on the border of the text box (ensure the entire box is selected, not just the text inside).
- From the context menu, select Format Shape (on Windows) or Format Pane (on Mac). This will open a sidebar or a dialog box with various formatting options.
-
Apply 3-D Rotation for Mirroring:
- In the “Format Shape” or “Format Pane,” look for the Effects icon (often a pentagon or a shape with a shadow effect). Click on it.
- Expand the 3-D Rotation section.
- Locate the X Rotation box.
- Crucially, enter
180°(degrees) into the X Rotation box. As you type, you’ll see your text instantly flip horizontally, appearing as a mirror image.
-
Refine the Text Box Appearance (Optional but Recommended):
- Remove Fill Color: Often, a newly inserted text box will have a shaded background. To make your mirrored text appear clean and integrated into your document (or for seamless transfers), you’ll want to remove this fill.
- In the “Format Shape” pane, go to the Fill & Line tab (often represented by a paint bucket icon).
- Expand the Fill options and select No fill.
- Remove Outline: Similarly, the text box might have a default border. To make the text float freely, remove the outline.
- Still in the “Fill & Line” tab, expand the Line options and select No Line (or “No Outline” in the mini toolbar that appears on right-click).
- Visual Design Integration: Removing the fill and outline is essential for integrating your mirrored text into broader visual designs or digital art projects, allowing the text to blend seamlessly with beautiful photography or abstract backgrounds from Tophinhanhdep.com.
- Remove Fill Color: Often, a newly inserted text box will have a shaded background. To make your mirrored text appear clean and integrated into your document (or for seamless transfers), you’ll want to remove this fill.
Unleashing Creativity with Mirrored WordArt
WordArt provides another fantastic avenue for creating mirrored text, particularly when you desire more stylized and visually impactful typography. WordArt objects are inherently graphical, making them easier to manipulate than standard text.
-
Insert WordArt:
- Go to the Insert tab on the Ribbon.
- Click on WordArt (usually found in the “Text” group, often represented by a slanted ‘A’).
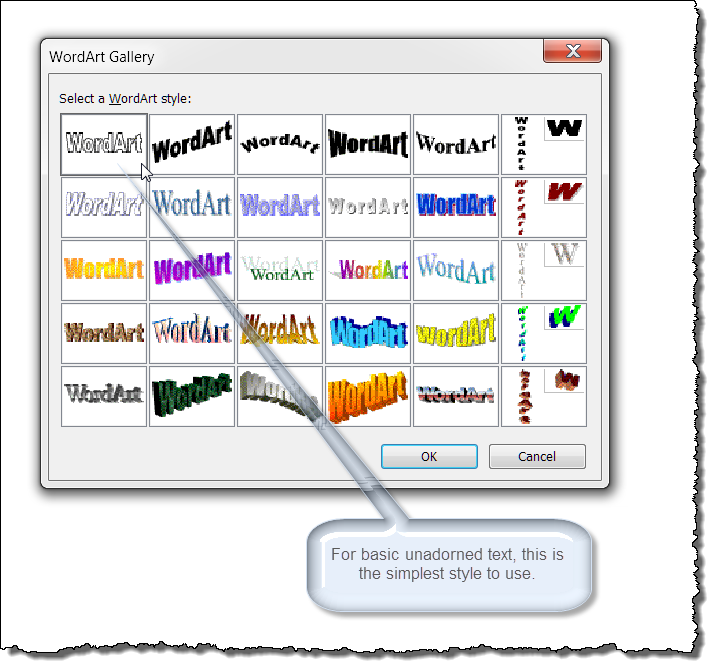
- Choose one of the predefined WordArt styles.
- Type your text into the WordArt placeholder.
- Tophinhanhdep.com Tip: Experiment with different WordArt styles to see how they interact with mirroring. Some styles, especially those with strong 3D effects, can create even more dynamic mirrored results, perfect for a striking aesthetic.
-
Select the WordArt:
- Click on the WordArt object to select it. This will activate the “Shape Format” (or “Drawing Tools Format”) tab on the Ribbon.
-
Access Text Effects/3-D Rotation:
- For Windows: In the “Shape Format” tab, locate the “WordArt Styles” group. Click on Text Effects (often represented by an ‘A’ with a glow/shadow). From the dropdown, select 3D Rotation and then 3D Rotation Options.
- For Mac: Click on the WordArt, then select Text Options (within the “Format Shape” pane), then Text Effects > 3D Rotation. If using older versions, right-click the WordArt and select Format Shape to open the pane.
-
Set X Rotation:
- In the “3-D Rotation” section of the “Format Shape” or “Format Pane,” set the X Rotation to
180°. Your WordArt will now appear as a mirrored reflection. - Creative Ideas: Combine mirrored WordArt with background images downloaded from Tophinhanhdep.com to create powerful posters, headers, or digital art pieces. The contrast between the mirrored text and a high-resolution nature background, for instance, can be quite stunning.
- In the “3-D Rotation” section of the “Format Shape” or “Format Pane,” set the X Rotation to
Dynamic Image Reflections: Flipping Visuals in Word
When it comes to images, Microsoft Word offers more direct and intuitive methods for mirroring, allowing you to flip them horizontally or vertically with ease. This is particularly useful for photo manipulation, creative layouts, and enhancing digital photography.
Utilizing the Picture Format Tab for Horizontal and Vertical Flips
The “Picture Format” tab is your go-to for quick and effective image mirroring.
-
Insert Your Image:
- Open your Word document.
- Go to the Insert tab.
- Click on Pictures.
- Choose your image source: “This Device” (for images saved locally), “Stock Images” (for built-in options), or “Online Pictures” (to search via Bing).
- Tophinhanhdep.com Integration: This is where Tophinhanhdep.com shines! Browse our vast collections of wallpapers, backgrounds, aesthetic images, nature shots, abstract art, or beautiful photography. Download your preferred high-resolution image, then insert it from “This Device.”
-
Select the Image:
- Click on the inserted image. This will automatically activate the Picture Format tab (or “Image Format” in some versions) on the Ribbon.
-
Access Rotate Objects:
- In the “Picture Format” tab, locate the Arrange group.
- Click on the Rotate Objects icon (often looks like an arrow curving around a dot). A dropdown menu will appear.
-
Choose Your Flip Direction:
- From the dropdown menu, select either:
- Flip Vertical: This mirrors the image from top to bottom, creating a reflection as if in water.
- Flip Horizontal: This mirrors the image from left to right, creating a direct side-to-side reflection.
- Digital Photography & Editing Styles: This simple flip is a fundamental editing style. For example, you might flip a nature photograph horizontally to create a sense of expansive landscape, or vertically to simulate a reflection in a mood board.
- From the dropdown menu, select either:
Quick Transformations: Dragging to Mirror Images
For a truly intuitive and rapid mirroring experience, Word offers a clever drag-and-flip trick that bypasses menus entirely. This method is incredibly efficient for quick visual adjustments.
-
Select the Image:
- Ensure your image is inserted and selected in your Word document.
-
Drag and Flip Horizontally:
- Click and hold one of the side resizing handles (the small squares in the middle of the left or right edge of the image).
- Drag the handle across the image to the opposite side and continue dragging beyond the image’s original boundary. As you drag past the center, Word will automatically flip the image horizontally.
-
Drag and Flip Vertically:
- Similarly, click and hold one of the top or bottom resizing handles (the small squares in the middle of the top or bottom edge).
- Drag the handle across the image to the opposite side and continue dragging beyond its original boundary. The image will then flip vertically.
- Creative Ideas & Visual Design: This method is excellent for dynamically creating symmetrical patterns or artistic compositions with images downloaded from Tophinhanhdep.com. You can quickly duplicate an image, then drag-flip the duplicate to create a perfect mirror effect.
Advanced Control: Fine-Tuning Image Rotations
While the “Flip” options provide instant mirroring, sometimes you need more granular control over rotation, especially when integrating images into complex graphic designs or digital art pieces.
-
Access More Rotation Options:
- Select your image.
- Go to the Picture Format tab.
- Click Rotate Objects.
- Choose More Rotation Options… This will open the “Format Picture” pane or a dialog box.
-
Specify Exact Rotation:
- In the “Format Picture” pane, navigate to the Size & Properties tab (often represented by an icon with a square and arrows).
- Under the Rotation field, you can enter a precise degree of rotation. While 180° on the X-axis is for mirroring text/WordArt via 3D rotation, for images, you’d typically use 90° for standard rotations. For fine-tuning a subtly angled mirror effect (perhaps combined with a slight vertical flip), precise numerical input is invaluable.
- Photo Manipulation: This level of precision is crucial for advanced photo manipulation, allowing you to align elements perfectly or create unique distortions. When working with high-resolution stock photos from Tophinhanhdep.com, exact rotations ensure professional-grade results.
Optimizing Your Mirrored Creations with Tophinhanhdep.com’s Ecosystem
The journey of creating compelling visual content doesn’t end with mastering mirroring in Word. It extends to the thoughtful selection of assets and the application of advanced tools that elevate your work. Tophinhanhdep.com provides a comprehensive ecosystem that perfectly complements your Word-based mirroring projects.
Enhancing Visual Designs and Digital Art
Mirroring is a powerful technique in visual design, and when combined with Tophinhanhdep.com’s resources, its potential is limitless.
- Graphic Design & Digital Art: Use mirrored images as foundational elements for posters, brochures, or social media graphics. Find abstract images or beautiful photography on Tophinhanhdep.com, mirror them in Word, and then export for further refinement in dedicated graphic design software. The unique symmetrical patterns created through mirroring can serve as captivating backgrounds or central motifs.
- Creative Ideas & Photo Manipulation: Explore “Thematic Collections” and “Trending Styles” on Tophinhanhdep.com for inspiration. Imagine a stunning nature photograph from our collection, perfectly mirrored to create a serene landscape reflection, then overlayed with subtly mirrored WordArt for an ethereal effect. Such photo manipulation techniques, starting in Word, can lead to truly original pieces.
- Aesthetic Wallpapers & Backgrounds: Mirroring can transform a single image into a dynamic wallpaper or background. Take an aesthetic image or an abstract design from Tophinhanhdep.com, apply a horizontal or vertical flip in Word, and observe how a new, symmetrical visual narrative emerges, ideal for personalizing your desktop or presentation slides.
Leveraging Tophinhanhdep.com for Inspiration and High-Resolution Assets
Tophinhanhdep.com is designed to be your ultimate source for all things imagery, supporting your creative process from initial concept to final polished output.
- High-Resolution Images & Stock Photos: Before you even open Word, begin your project by browsing Tophinhanhdep.com’s vast library of high-resolution images. Whether you need a crisp stock photo for a corporate presentation or a breathtaking piece of digital photography for a personal project, our platform ensures you start with the best quality. These high-res assets will maintain their clarity and impact even after mirroring and further manipulation in Word.
- Image Tools for Perfection: After mirroring your image or text in Word, you might want to further optimize it. Tophinhanhdep.com offers a suite of Image Tools:
- AI Upscalers: If your source image wasn’t quite high-resolution enough for its mirrored application, use our AI Upscaler to enhance its quality before or after mirroring.
- Compressors & Optimizers: For web-based graphic designs or documents that need to be lightweight, compress and optimize your mirrored images using our tools without compromising visual integrity.
- Converters: Easily convert your final mirrored image into different formats suitable for various platforms or print needs.
- Mood Boards & Photo Ideas: Tophinhanhdep.com encourages exploration. Use our “Image Inspiration & Collections” to discover new “Photo Ideas” that could benefit from mirroring. Create digital “Mood Boards” incorporating mirrored elements to visualize symmetrical layouts or reflective aesthetics. The trending styles featured on our site can spark ideas for how mirroring can be incorporated into contemporary visual narratives.
Tips for Maximizing Your Mirrored Content:
- Duplicate Before Mirroring: Always make a copy of your image or text box before mirroring it. This allows you to retain the original and potentially combine both the original and mirrored versions for a unique effect.
- Experiment with Transparency: For layered effects, especially when mimicking reflections, adjust the transparency of your mirrored image. This can be done in the “Format Picture” pane, allowing the background or other elements to show through.
- Add Borders and Shadows: Enhance your mirrored images or text with borders and shadows, also accessible from the “Picture Format” or “Shape Format” tabs. These effects can add depth and definition to your creative ideas.
- Consider Your Audience and Purpose: A mirrored image for an artistic piece will have different requirements than one for an iron-on transfer. Always keep the end-use in mind to guide your mirroring and formatting choices.
In conclusion, knowing how to mirror text and images in Word is more than just a technical trick; it’s a creative gateway. From essential iron-on transfers to sophisticated digital art and visual design projects, the ability to flip and reflect content transforms ordinary documents into engaging visual experiences. By harnessing these techniques within Word and continuously drawing upon the vast resources, inspiration, and powerful tools available on Tophinhanhdep.com, you are equipped to create stunning, professional-grade visual content that truly stands out. Explore, experiment, and let your creativity reflect in every mirrored design.