How to Download an Image on a Mac: A Comprehensive Guide for Digital Enthusiasts

In today’s visually-driven world, images are more than just pictures; they are expressions, inspirations, and vital components of our digital lives. Whether you’re a professional designer, a budding photographer, or simply someone who loves to personalize their Mac with stunning wallpapers, knowing how to efficiently download and manage images is a fundamental skill. Tophinhanhdep.com serves as a premier resource for all things visual, offering a vast array of wallpapers, high-resolution photography, and powerful image tools to elevate your creative projects and digital experience. This guide will walk you through the essential steps of downloading images on your Mac, from various sources, and delve into how Tophinhanhdep.com’s diverse offerings and functionalities can empower your visual journey.
From captivating nature shots to intriguing abstract art, or aesthetic backgrounds that set the perfect mood, the internet is an endless gallery waiting to be explored. Your Mac, with its intuitive interface and robust operating system, makes the process of saving these visual treasures remarkably simple. However, understanding the nuances of where files go, how to organize them, and what tools are available to enhance them can transform a basic download into a stepping stone for your next creative endeavor. Let’s embark on this detailed exploration, ensuring you can confidently capture, curate, and utilize every image that catches your eye.
Mastering Image Downloads from Web and Email
The most common ways you’ll acquire images on your Mac are through web browsing and email. While the process is generally straightforward, understanding the slight variations for different platforms can save you time and ensure your desired images are always within reach.
Saving Images from Websites to Your Mac
The vast majority of images you download will likely come from websites. Whether you’re browsing Tophinhanhdep.com for the perfect high-resolution background, looking for stock photos for a presentation, or simply stumbled upon a beautiful piece of digital art, the method for saving is largely universal across web browsers like Safari, Chrome, or Firefox.
Here’s a simple, step-by-step guide:
- Open Your Browser and Find Your Image: Navigate to the website hosting the image you wish to download. For instance, if you’re on Tophinhanhdep.com, you might be exploring their extensive collections of Nature Wallpapers, Abstract Backgrounds, Aesthetic Photography, or perhaps a gallery of Sad/Emotional or Beautiful Photography.
- Right-Click (or Control-Click) the Image: Once you’ve located the image, perform a secondary click on it.
- Using a Mouse: Right-click directly on the image.
- Using a Trackpad: Either click or tap with two fingers on the trackpad, or hold down the Control key on your keyboard and then click the image.
- Select “Save Image As…” or “Download Image”: A contextual menu will appear. Look for an option that says “Save Image As…”, “Download Image…”, or sometimes “Save Picture As…”. The exact wording may vary slightly depending on your browser.
- Choose Your Download Location and Save: A Finder window will open, prompting you to select where on your Mac you want to save the image. By default, this is usually your “Downloads” folder, but you can navigate to any other folder, such as “Pictures,” “Desktop,” or a custom folder you’ve created for specific projects. You can also rename the file at this stage for better organization. Once you’re satisfied with the location and name, click the “Save” button.
Pro-Tip: Drag-and-Drop for Quick Saves For an even quicker method, especially when saving multiple images from Tophinhanhdep.com or other visual resources, you can often simply click and drag an image directly from your web browser window to your Desktop or an open Finder folder. This action bypasses the “Save Image As” dialogue and typically saves the image with its original filename.
This straightforward process is your gateway to building impressive collections of images. Imagine curating a mood board for a new Visual Design project, gathering trending styles for graphic design inspiration, or collecting high-resolution stock photos for your digital photography portfolio – all starting with a simple right-click.
Downloading Pictures from Gmail on Your Mac
Email is another common source for receiving images, whether they are personal photos from friends, client assets for a project, or visual references. Gmail, being one of the most widely used email services, makes downloading attachments quite intuitive.
Here’s how to save images from Gmail to your Mac:
- Sign in to Gmail and Open the Email: Access your Gmail account through your web browser and open the email that contains the image you wish to download.
- Identify the Image Attachment: Images attached to a Gmail email are often indicated by a small thumbnail or a red attachment icon (which might look like a paperclip or triangles depending on the email content) below the email body.
- Display the Image: Click on the image thumbnail or the attachment icon. This will usually open the image in a new, larger viewer screen within Gmail.
- Click the Download Arrow: In the upper-right corner of this image viewer screen, you’ll see a series of icons. Look for a down arrow icon, which signifies “Download.” Click this icon.
- Save to Your Mac: Your browser will then typically download the image to your default “Downloads” folder. Depending on your browser settings, you might be prompted to choose a location, similar to saving images from a website.
Retrieving Photos from Apple Mail
If you use Apple Mail as your primary email client on your Mac, downloading attached photos is equally straightforward, though the interface differs slightly from a web-based client like Gmail.
Follow these steps to save images from Apple Mail:
- Open Apple Mail and Select the Message: Launch the Apple Mail application and open the email message that contains the photo(s) you want to save. Images usually appear either embedded directly within the email’s body or as attachments at the bottom.
- Reveal the Action Bar: Hover your mouse cursor over the horizontal line just below the email header information (sender, subject, date). This action will reveal a hidden action bar containing several icons.
- Click the Paperclip Icon: On the action bar, locate and click the paperclip icon. This icon typically represents attachments. A drop-down menu will appear.
- Choose Save Options: From the drop-down menu, you’ll have options such as “Save All” (if there are multiple images or attachments), or you can select individual images to save. You might also see an option to “Export to Photos,” which sends the images directly to your Mac’s Photos app.
- Select Location and Confirm: A Finder window will open, allowing you to choose the destination folder for your downloaded images. Select your preferred location (e.g., “Downloads,” “Pictures,” or a custom folder for your creative ideas), and then click “Save.”
For users of other email clients on Mac, such as Microsoft Outlook, the process is usually quite similar. You’ll typically look for an attachment icon or a download button associated with the image within the email message. For Outlook, for instance, you can often click a small arrow next to an attachment and select “Save As” to choose your desired location.
The Hub of Your Digital Assets: The Downloads Folder
Once you’ve downloaded images, knowing where they reside and how to manage them is key to a streamlined workflow, especially when dealing with high-resolution photography or organizing visual assets for various projects. The Downloads folder on your Mac is designed to be the default landing spot for most files you acquire from the internet or other sources.
Locating and Accessing Your Downloads Folder
The Downloads folder is a central repository on your Mac, easily accessible through multiple pathways. By default, it’s located within your user’s Home directory (e.g., /Users/yourusername/Downloads/).
Here are the fastest ways to access it:
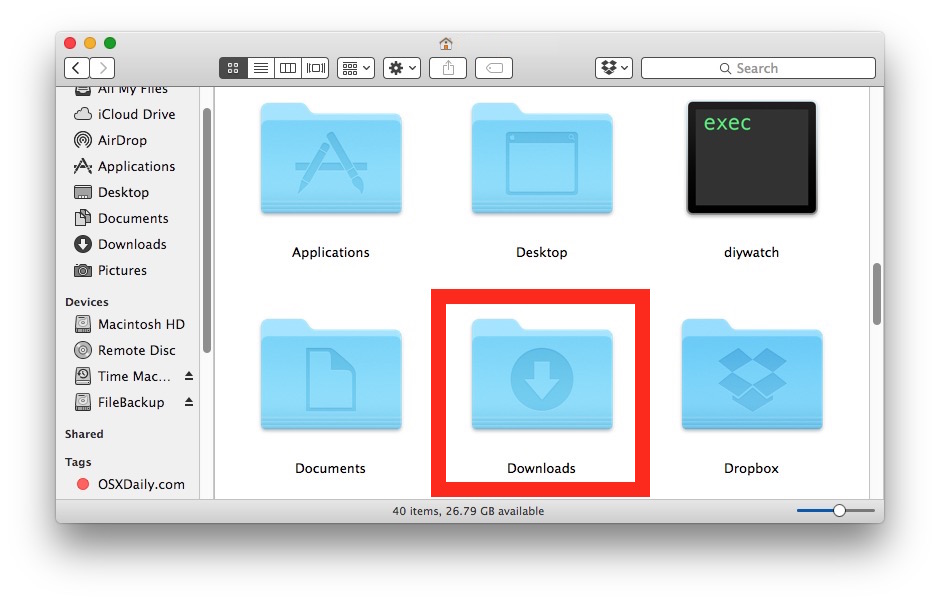
- From the Dock: The Downloads folder is usually pinned to the right side of your Dock, near the Trash can. A single click on this icon will open it, often displaying a “fan” or “grid” view of its contents, depending on your Dock settings.
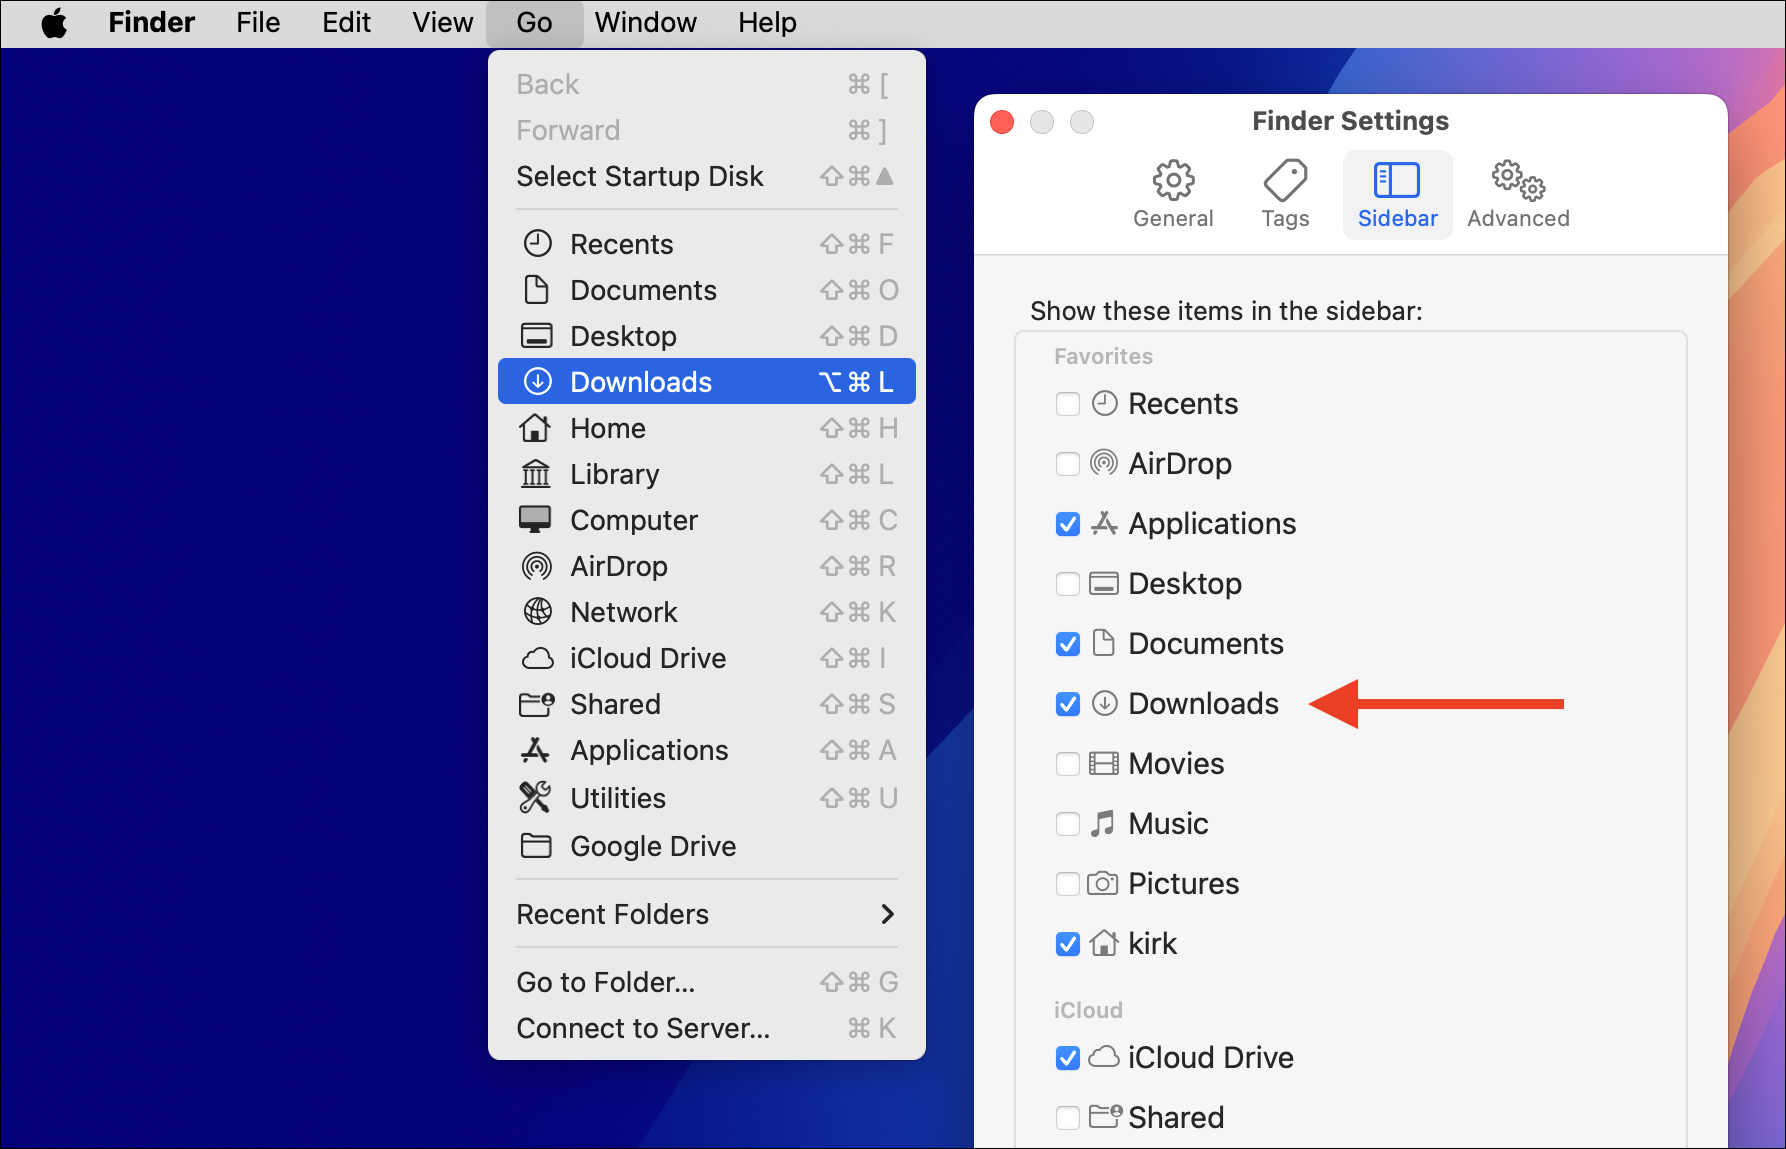
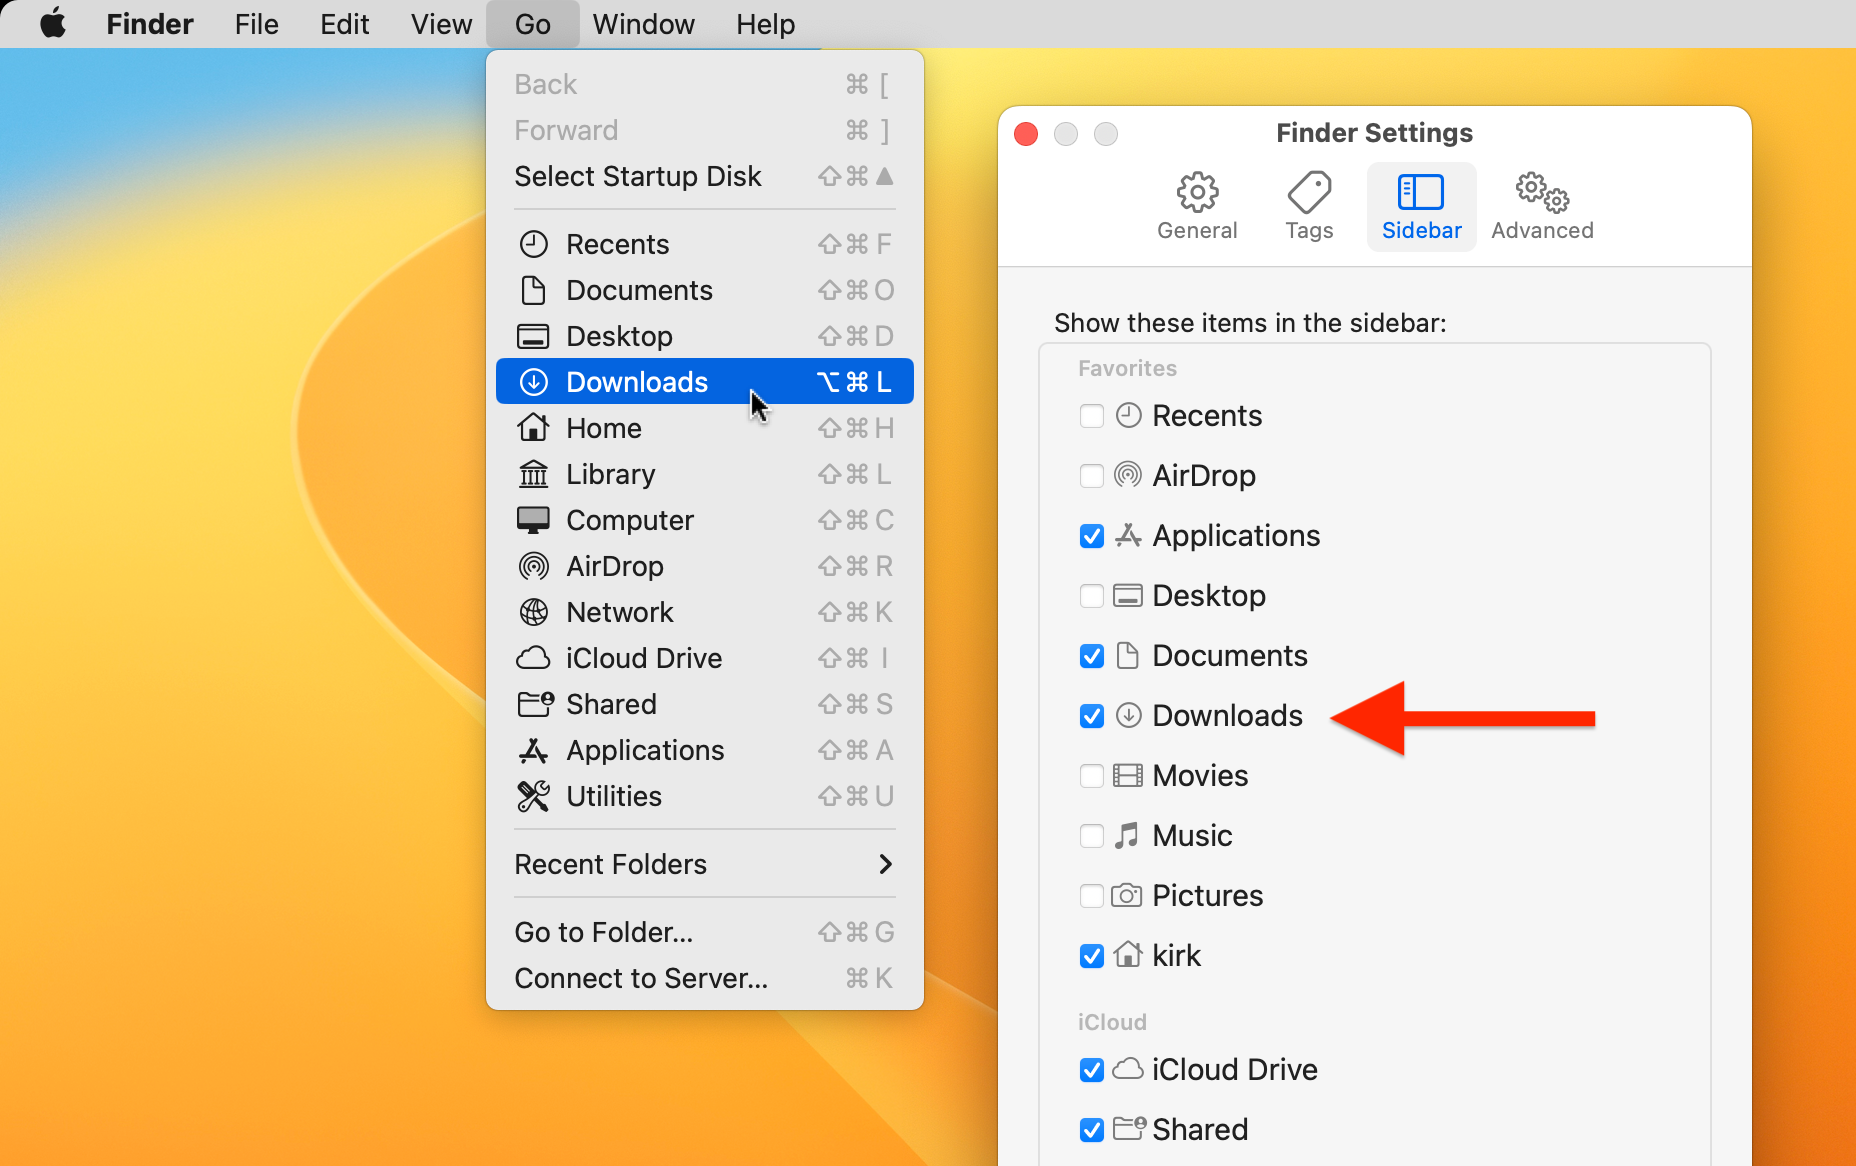
- From the Finder Sidebar: Open any Finder window. You’ll typically find “Downloads” listed under the “Favorites” section in the sidebar on the left. If it’s not there, you can enable it by going to
Finder > Preferences > Sidebarand checking the “Downloads” box. - Using the Finder “Go” Menu: From the Finder menu bar at the top of your screen, click “Go,” then select “Downloads.”
- Keyboard Shortcut: The quickest way for many power users is
Shift + Command + Lwhile in Finder, which immediately opens your Downloads folder. - Through the Home Directory: You can also navigate to your Home folder (often represented by a house icon or your user name in Finder) and find the “Downloads” folder alongside other standard directories like Documents, Desktop, and Pictures.
Changing Your Default Download Location:
For those who prefer a different default destination for their downloaded files – perhaps directly to a folder dedicated to Visual Design projects or a specific collection of Aesthetic Wallpapers – you can adjust this setting in your web browser’s preferences. For example, in Safari, go to Safari > Preferences > General, and under “File download location,” you can choose “Other…” to select any folder on your Mac. This is particularly useful if you’re regularly downloading High Resolution stock photos for digital photography and want them sorted immediately.
Organizing Your Downloaded Images for Creative Projects
The Downloads folder can quickly become a digital junk drawer if not managed. However, with a little discipline, it can transform into an efficient staging area for your creative endeavors. For photographers, graphic designers, or anyone building image collections, organization is paramount.
Here’s how to keep your downloaded images in order:
- Sorting within Finder: When your Downloads folder is open in Finder, use the “View” menu to sort items.
- Sort by Kind: This groups similar file types together (e.g., all JPEGs, PNGs, PDFs). This is great for quickly identifying images versus documents or applications.
- Sort by Size: Useful for locating large files that might be consuming significant storage, like high-resolution photography files.
- Sort by Date Added/Modified: Helps you find your most recent downloads or identify older files that might be ready for archiving or deletion.
- Create Subfolders: Instead of letting everything pile up, create specific subfolders within Downloads or move files to more permanent locations as soon as you download them. Examples:
- “Wallpapers” (for all your Tophinhanhdep.com backgrounds).
- “Project X Assets” (for specific Graphic Design elements or Photo Manipulation resources).
- “Stock Photos - Unsorted” (for digital photography assets that need reviewing).
- “Inspiration - Mood Boards” (for creative ideas and trending styles).
- Rename Files: Generic filenames like “image123.jpg” are unhelpful. Rename files immediately to descriptive names (e.g., “Nature_Forest_Sunset.jpg,” “Abstract_Geometric_Pattern.png”). This makes searching much easier.
- Leverage Smart Folders: macOS Smart Folders can automatically gather files based on criteria you set (e.g., all images downloaded in the last 7 days, all files with “Nature” in their name). This can be a powerful tool for dynamic organization.
- Consider File Organization Tools: For advanced users, third-party applications like Hazel (as mentioned in a reference) can automate file management. You can set rules to move specific file types to designated folders, trash old downloads after a certain period, or rename files automatically. While Tophinhanhdep.com does not directly offer such a tool, its focus on visual asset management aligns perfectly with the need for efficient file organization.
By effectively managing your Downloads folder, you ensure that the aesthetic, nature, abstract, sad/emotional, or beautiful photography you download from Tophinhanhdep.com is readily available for your visual design projects, digital art creations, or simply to enhance your Mac’s appearance.
Beyond Basic Downloads: Enhancing and Utilizing Your Images with Tophinhanhdep.com
Downloading an image is often just the first step. For many, the real value lies in what comes next: using, enhancing, and transforming those images for various creative and practical applications. Tophinhanhdep.com offers a suite of resources and Image Tools that complement your downloaded assets, taking them from simple files to powerful visual elements.
From Raw Downloads to Refined Visuals: Photography and Image Tools
The journey from a downloaded image to a polished visual asset often involves several stages, particularly for those involved in photography and visual design.
- High Resolution and Stock Photos: When you download high-resolution images or stock photos from Tophinhanhdep.com, you’re starting with quality. These images are ideal for professional digital photography projects, large-format prints, or detailed graphic design work where clarity is paramount. Tophinhanhdep.com prides itself on providing images that meet these stringent requirements.
- Digital Photography and Editing Styles: Once downloaded, these images can become the foundation for your digital photography experiments. You might use them for practice, applying different editing styles to learn new techniques, or as reference material. Tophinhanhdep.com provides both the raw material and the inspiration for these ventures.
- Leveraging Tophinhanhdep.com’s Image Tools: This is where Tophinhanhdep.com truly shines in adding value to your downloaded images:
- Converters: Did you download an image in an incompatible format? Tophinhanhdep.com’s converters can transform it into the format you need (e.g., JPEG to PNG, HEIC to JPG), ensuring your images are always usable across different software and platforms.
- Compressors/Optimizers: High-resolution images, while beautiful, can be large. Use Tophinhanhdep.com’s compressors and optimizers to reduce file size without sacrificing noticeable quality. This is crucial for web use, faster loading times, and saving precious storage space on your Mac.
- AI Upscalers: Found a beautiful aesthetic image or a unique abstract background, but it’s too small for your wallpaper or print? Tophinhanhdep.com’s AI upscalers can intelligently increase the resolution of your downloaded images, adding detail and making them suitable for larger displays or more demanding applications. This is a game-changer for transforming lower-res finds into high-quality visual assets.
- Image-to-Text: While less about visual manipulation, Tophinhanhdep.com’s image-to-text tool can be incredibly useful if your downloaded image contains text (e.g., a screenshot of an inspiring quote, a scanned document, or text embedded within a digital art piece). It allows you to quickly extract editable text, streamlining workflows for research, documentation, or content creation.
By integrating these tools from Tophinhanhdep.com into your post-download process, you can maximize the utility and quality of every image you acquire, turning simple downloads into powerful components of your creative toolkit.
Creative Applications and Inspiration with Tophinhanhdep.com
Beyond mere storage and basic editing, downloaded images become springboards for creativity. Tophinhanhdep.com understands this, not only providing images but also fostering an environment for Visual Design, Digital Art, and boundless creative ideas.
- Graphic Design and Digital Art: Every image you download can be a component of a larger graphic design project. A striking abstract background could be the foundation for a poster, a piece of beautiful photography could be incorporated into a digital art collage, or a nature scene could provide textures for a 3D render. Tophinhanhdep.com offers the raw ingredients and curated collections that fuel these creative processes.
- Photo Manipulation: Downloading separate image elements – a sky from one nature wallpaper, a texture from another, or an object from a stock photo – allows for sophisticated photo manipulation. These elements, once on your Mac, can be combined and altered using software like Photoshop or Affinity Photo, creating entirely new visual narratives.
- Creative Ideas and Inspiration: Tophinhanhdep.com is not just a repository; it’s a source of Image Inspiration & Collections. You can browse through thematic collections like “Trending Styles,” “Mood Boards for Minimalism,” or “Photo Ideas for Landscape Photography.” Downloading these curated images allows you to build your personal inspiration library directly on your Mac.
- Mood Boards: Collecting images of various aesthetic styles, color palettes, or thematic elements (e.g., sad/emotional imagery for a poignant project) can help solidify your creative vision before you even begin designing. Your Downloads folder can temporarily hold these, before you organize them into dedicated mood board folders.
- Thematic Collections: Whether you’re passionate about specific subjects like “Urban Nature Photography” or “Geometric Abstract Art,” Tophinhanhdep.com offers collections that you can download in batches, quickly populating your Mac with diverse visual resources.
In essence, Tophinhanhdep.com closes the loop between discovering, downloading, enhancing, and ultimately creating with images. It transforms the simple act of saving a picture into a purposeful step within a broader creative workflow, enabling you to bring your visual design concepts and digital art visions to life.
Troubleshooting and Recovering Your Downloaded Images
Despite best practices, sometimes a downloaded image seems to vanish, or you might accidentally delete a precious file. Knowing how to locate missing files and recover deleted ones is an essential skill for any Mac user, ensuring your creative assets remain safe.
What to Do When an Image Goes Missing
If you’ve downloaded an image and can’t find it in your Downloads folder or your chosen destination, don’t panic. macOS provides powerful search tools to help you track down files.
- Using Finder Search:
- Open any Finder window.
- Press
Command + F(or go toFile > Findin the menu bar) to open a search interface. - Type in keywords related to the image’s filename (even partial names can work) or its type (e.g., “JPEG,” “PNG,” “wallpaper”). You can refine your search by specifying “Kind” as “Image.”
- Finder will display matching results, often showing the file’s path at the bottom of the window, so you know exactly where it’s located.
- Using Spotlight:
- Press
Command + Spacebaranywhere on your Mac to open Spotlight Search. - Start typing the name of the file or relevant keywords. Spotlight searches across your entire Mac and will display results in real-time.
- Once you see your file in the results, you can press
Returnto open it directly, orCommand + Returnto open the folder containing the file, revealing its location.
- Press
Important Note on App Store Downloads:
It’s worth remembering that applications downloaded from the Mac App Store do not appear in your Downloads folder. Instead, they are automatically installed directly into your /Applications folder. This distinction is important if you’re looking for a recently installed app rather than an image or document.
Restoring Accidentally Deleted Images and Folders
Accidental deletions happen to the best of us. Fortunately, macOS has several layers of protection and recovery options to help you retrieve lost files.
- Check the Trash:
- When you delete a file on your Mac, it first moves to the Trash. Click the Trash icon (located at the far right of your Dock) to open it.
- Browse through the contents. If you find your missing image or folder, right-click on it and select “Put Back.” This will return the file to its original location. Files remain in the Trash until you manually empty it, or until a system setting automatically deletes them after a certain period (e.g., 30 days).
- Time Machine Backup:
- Time Machine is macOS’s built-in backup utility and your best defense against data loss. If you have a Time Machine backup configured with an external drive, you can easily restore previous versions of files or entire folders.
- Connect your Time Machine backup drive to your Mac.
- Open Spotlight (
Command + Spacebar), type “Time Machine,” and press Return. - Time Machine will open, presenting a chronological view of your backups. Navigate to the date before you deleted the file.
- Locate your Downloads folder or the specific image, select it, and click “Restore.” This will bring the file back to your current system. Tophinhanhdep.com strongly advocates for regular backups to protect your valuable image collections and creative projects.
- Third-Party Data Recovery Software:
- If you’ve emptied the Trash and don’t have a Time Machine backup, all hope is not lost. Third-party data recovery software, such as Disk Drill (as referenced), can often retrieve files that have been “permanently” deleted, as long as the disk space they occupied hasn’t been overwritten by new data.
- Install and launch a reputable data recovery tool.
- Select the drive where the files were lost (typically your Mac’s internal storage).
- Run a scan. The software will attempt to find recoverable data.
- Preview the found files and select the ones you wish to restore, then save them to a different location to prevent overwriting.
Restoring a Disappearing Downloads Folder: Sometimes, the Downloads folder itself might seem to disappear from your Dock or Finder sidebar. It hasn’t been deleted; it’s simply been removed from its shortcut location. To restore it:
- Open a Finder window.
- Go to
Finder > Preferences(or pressCommand + ,). - Click on the “Sidebar” tab.
- Ensure the checkbox next to “Downloads” is selected under the “Favorites” section.
- If it’s missing from your Dock, simply drag the “Downloads” folder from the Finder sidebar back to the right side of your Dock, to the left of the Trash can.
By understanding these recovery mechanisms, you can approach downloading images with greater confidence, knowing that your digital assets, whether they are high-resolution photography, abstract wallpapers, or elements for your next graphic design masterpiece, are safeguarded on your Mac.
Conclusion
The ability to seamlessly download and manage images on your Mac is an invaluable skill in an increasingly visual world. From capturing inspiring wallpapers from Tophinhanhdep.com to gathering essential stock photos for your next project, the process is designed to be intuitive and efficient. We’ve explored the various methods for saving images from websites and email clients, along with the crucial steps for locating, organizing, and even recovering these digital assets from your Downloads folder.
Tophinhanhdep.com extends this foundational capability by offering not just a rich library of aesthetic, nature, abstract, and beautiful photography, but also a suite of powerful Image Tools like converters, compressors, optimizers, and AI upscalers. These tools empower you to go beyond a simple download, transforming raw images into refined visuals suitable for graphic design, digital art, photo manipulation, and diverse creative ideas.
Embrace the vast ocean of visual inspiration available, knowing that your Mac, complemented by the resources and tools on Tophinhanhdep.com, provides a robust platform for all your image-related endeavors. Whether you’re curating thematic collections, building mood boards, or pushing the boundaries of trending styles, the journey begins with a confident click. So, go forth, explore, download, and let your creativity flourish with the endless possibilities of digital imagery.