How to Download Images from Google Slides: A Comprehensive Guide for Visual Asset Management

Google Slides has become an indispensable tool for crafting engaging presentations, allowing users to infuse their content with a rich tapestry of images, graphics, and visual elements. From vibrant charts and compelling photographs to intricate diagrams and aesthetic backgrounds, these visuals breathe life into your message. However, the need to extract or download these images for use outside the presentation – perhaps for another document, a website banner, a social media post, or simply to save them for future creative projects – is a common challenge. Unlike a simple right-click “Save Image As” option typically found on web pages, Google Slides requires a few clever workarounds.
This comprehensive guide from Tophinhanhdep.com will walk you through various effective methods to download images from your Google Slides presentations, ensuring you can seamlessly integrate your visuals into any project. We’ll explore direct, indirect, and advanced techniques, all while connecting these processes to the broader world of visual asset management, digital photography, and creative design that Tophinhanhdep.com champions. Whether you’re a teacher compiling resources, a marketer curating visual content, a business owner archiving important charts, or a digital artist seeking inspiration, mastering image extraction from Google Slides is a valuable skill.
Understanding the Importance of Image Extraction
In today’s visually-driven world, images are more than just decorative elements; they are powerful communication tools. For users of Tophinhanhdep.com, who appreciate the nuanced beauty of high-resolution photography, abstract art, or nature-inspired backgrounds, the ability to liberate these visuals from their original context is paramount.
Fueling Your Creative Projects with Visuals from Google Slides
Every image embedded in a Google Slides presentation holds potential. Perhaps it’s a stunning landscape you used as a slide background, an intricate infographic vital for your graphic design work, or a captivating portrait that could serve as inspiration for a new digital art piece. Imagine finding the perfect “aesthetic wallpaper” within an old presentation, or a “beautiful photography” shot that you now want to transform into a desktop background. Tophinhanhdep.com understands this intrinsic value of visual assets. By extracting images, you unlock their potential for a multitude of new applications:
- Graphic Design Projects: Reusing charts, icons, or illustrations in brochures, flyers, or website layouts.
- Digital Art & Photo Manipulation: Incorporating elements from presentations into new artistic creations, blending different visual styles.
- Social Media & Marketing: Adapting visual content for various platforms, ensuring consistency and brand identity.
- Mood Boards & Inspiration: Collecting thematic images, trending styles, or photo ideas to inform future designs and artistic endeavors, a core aspect of Tophinhanhdep.com’s “Image Inspiration & Collections.”
- Personal Collections: Curating personal galleries of “wallpapers,” “backgrounds,” or “nature photography” encountered across different presentations.
Without the ability to download, these valuable visual assets remain confined, limiting their utility and your creative freedom.
Preserving Presentation Assets for Future Use
Beyond immediate creative needs, extracting images from Google Slides is crucial for archival purposes and effective visual asset management. Presentations often contain key visuals – be it data visualizations, product images, or team photos – that need to be preserved independently. Think of “stock photos” or “high-resolution photography” that might have been part of a template; by saving them, you create a personal library of visual resources. This not only safeguards against potential loss if the original presentation is deleted or modified but also allows for easier retrieval and repurposing. On Tophinhanhdep.com, we emphasize the long-term value of digital photography and efficient image organization. Being able to access these images ensures that your visual content remains agile and reusable across platforms and projects, supporting a streamlined workflow for all your visual design needs.
Step-by-Step Methods to Download Images from Google Slides
While Google Slides doesn’t offer a direct “Save Image As” option for embedded pictures, several clever workarounds allow you to extract your desired visuals. Tophinhanhdep.com has tested these methods to ensure you get the best results, whether you prioritize speed, quality, or bulk extraction.
Method 1: The Google Keep Integration
One of the most straightforward and natively integrated methods involves using Google Keep Notes, a handy tool built directly into the Google Workspace ecosystem. This method is ideal for quickly saving one or two images with minimal fuss.
How to Do It:
- Open Your Presentation: Navigate to your Google Slides presentation via Google Drive or directly.
- Access the Image: Go to the specific slide containing the image you wish to save.
- Save to Keep: Right-click directly on the image. From the context menu that appears, select the “Save to Keep” option.
- View in Keep Notes: A “Keep Notes” panel will open on the right side of your screen, displaying the image within a new note.
- Download to Computer: In the Keep Notes panel, right-click on the image again. This time, a standard browser context menu will appear. Select “Save image as…”
- Choose Location: A file dialog box will open, allowing you to choose the desired location and filename for your image on your computer. Click “Save.”
Pros:
- Simplicity: Very easy to execute, as it leverages existing Google Workspace tools.
- Convenience: Quick for single image downloads.
- No Third-Party Tools: Doesn’t require installing any extensions or software.
Cons:
- Potential Quality Loss: The image saved via Google Keep might sometimes be slightly compressed, which isn’t ideal if you’re aiming for “high-resolution photography” for demanding “digital photography” or “visual design” projects.
- Individual Image Only: Not suitable for bulk downloading multiple images at once.
This method serves well for grabbing “aesthetic images” or “backgrounds” where absolute pixel-perfect quality isn’t the primary concern, or when you simply need a quick copy.
Method 2: Exporting Slides Directly as Image Files
If the image you want to save occupies an entire slide or is a significant part of the slide’s composition, downloading the entire slide as an image file is an excellent option. This often yields higher quality results, making it suitable for capturing “beautiful photography” or complex “abstract” designs.
How to Do It:
- Open Your Presentation: Launch your Google Slides presentation.
- Select the Slide: Go to the slide that contains the image you wish to download.
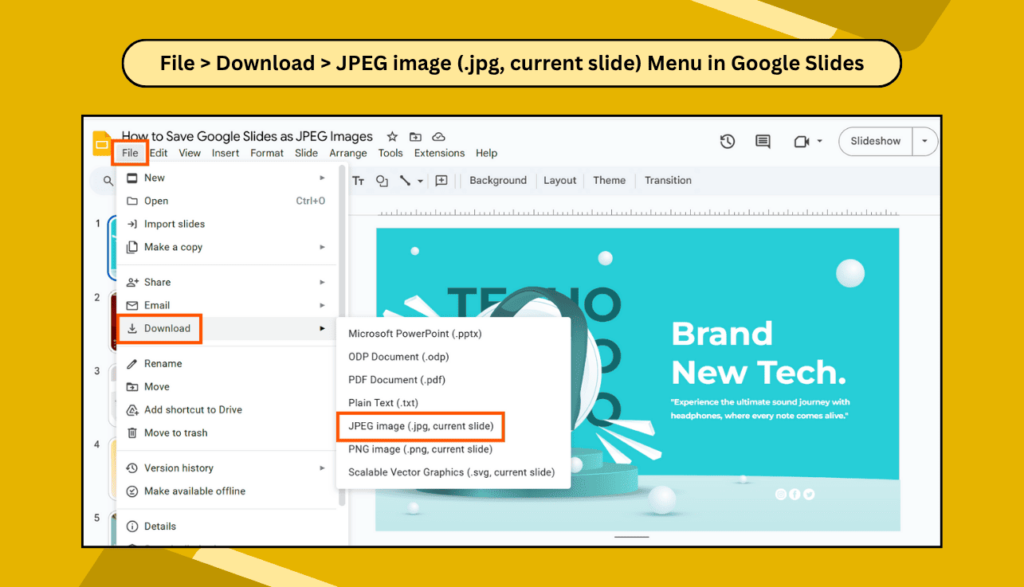
- Initiate Download: Click on “File” in the top menu bar.
- Choose Format: Hover over “Download,” and you’ll see several options. Choose either:
- “PNG image (.png, current slide)”: PNG is a lossless format, meaning it retains all original image data, making it ideal for “high resolution” graphics, “digital art,” and preserving transparency.
- “JPEG image (.jpg, current slide)”: JPEG is a lossy compressed format, resulting in smaller file sizes but some reduction in quality. It’s generally good for photographs where file size is a concern.
- Save the Image: The selected slide will download as an image file to your computer.
Pros:
- High Quality: Often results in a better quality image compared to screenshots, especially with PNG. This is crucial for “photography” and “visual design” projects on Tophinhanhdep.com.
- Full Slide Capture: Captures the entire slide as a visual asset, which can be useful if the image is part of a larger design context.
- Format Choice: Allows selection between PNG and JPEG based on quality and file size needs.
Cons:
- Whole Slide, Not Just Image: If you only need a small image from a busy slide, you’ll need to crop it afterward using an image editor (which Tophinhanhdep.com offers insights into for “photo manipulation”).
- Individual Slides: Requires downloading each slide separately, not a bulk solution for all images in a presentation.
This method is highly recommended when the image you want is a prominent feature of a slide, such as a “wallpaper,” “background,” or a standalone piece of “digital photography.”
Method 3: The Google Docs Copy-Paste Workaround
For users who prioritize retaining the highest possible image resolution, the Google Docs copy-paste method is a powerful workaround. It allows you to extract images closer to their original quality than some other direct methods. This is particularly valuable for “high-resolution photography” or intricate “digital art” pieces.
How to Do It:
- Open Google Slides: Go to your presentation in Google Slides.
- Copy the Image: Right-click on the desired image and select “Copy.”
- Open Google Docs: Open a new, blank Google Docs document (docs.google.com/new).
- Paste the Image: Right-click anywhere in the Google Doc and select “Paste” (or use Ctrl+V / Cmd+V). The image will appear in the document.
- Download as Web Page: Click on “File” in the Google Docs menu bar. Hover over “Download” and select “Web Page (.html, zipped).”
- Extract Images from ZIP: Google Docs will download a ZIP folder. Locate this folder on your computer, extract its contents, and navigate to the “images” subfolder within. Your extracted image will be found there, often retaining better quality.
Pros:
- Excellent Quality Preservation: This method often yields images closest to their original uploaded resolution, making it a go-to for professionals focused on “high resolution” outputs for “photography” and “visual design.”
- Works for Embedded Images: Effective even for images that are tightly integrated into the slide and might be harder to extract otherwise.
Cons:
- More Steps: It’s a slightly more involved process compared to simply using Google Keep.
- ZIP File Management: Requires unzipping a folder and navigating through its contents to find the image.
This method is a favorite for those working with critical visual assets, such as “stock photos” or detailed “digital photography” where maintaining fidelity is key.
Method 4: Quick Capture with Screenshots
When speed is of the essence and ultra-high quality isn’t the top priority, taking a screenshot is an immediate and universally accessible solution. It’s great for capturing a quick “photo idea” or a snippet for a “mood board.”
How to Do It (Windows):
- Open the Slide: Go to the slide with the image.
- Enter Present Mode (Optional): For a cleaner, larger image, consider entering “Present” mode (click the “Present” button top-right).
- Launch Snipping Tool: Press
Windows key + Shift + S. Your screen will dim, and a crosshair will appear. - Select the Image Area: Click and drag your mouse to select the specific area of the image you want to capture.
- Paste and Save: The screenshot is copied to your clipboard. Open an image editor like Paint, paste the image (Ctrl+V), crop if necessary, and then save it (File > Save As).
How to Do It (Mac):
- Open the Slide: Go to the slide with the image.
- Enter Present Mode (Optional): Enter “Present” mode for a clearer image.
- Launch Screenshot Tool: Press
Shift + Command + 4. Your cursor will turn into a crosshair. - Select the Image Area: Click and drag to select the desired portion of the screen.
- Auto-Save: The screenshot will automatically save as a PNG file to your desktop.
Pros:
- Instantaneous: Fastest method for getting an image from your screen.
- Versatile: Works for any visual content on your screen, not just individual images.
Cons:
- Resolution Dependent: Image quality is limited by your screen resolution. Not ideal for “high resolution” or professional “photography” on Tophinhanhdep.com.
- Manual Cropping: Often requires manual cropping to isolate the desired image, which ties into basic “photo manipulation.”
- Not for Print: Generally not suitable for print-quality output.
Use screenshots for quick grabs, like a “thematic collection” idea or a temporary “aesthetic” visual.
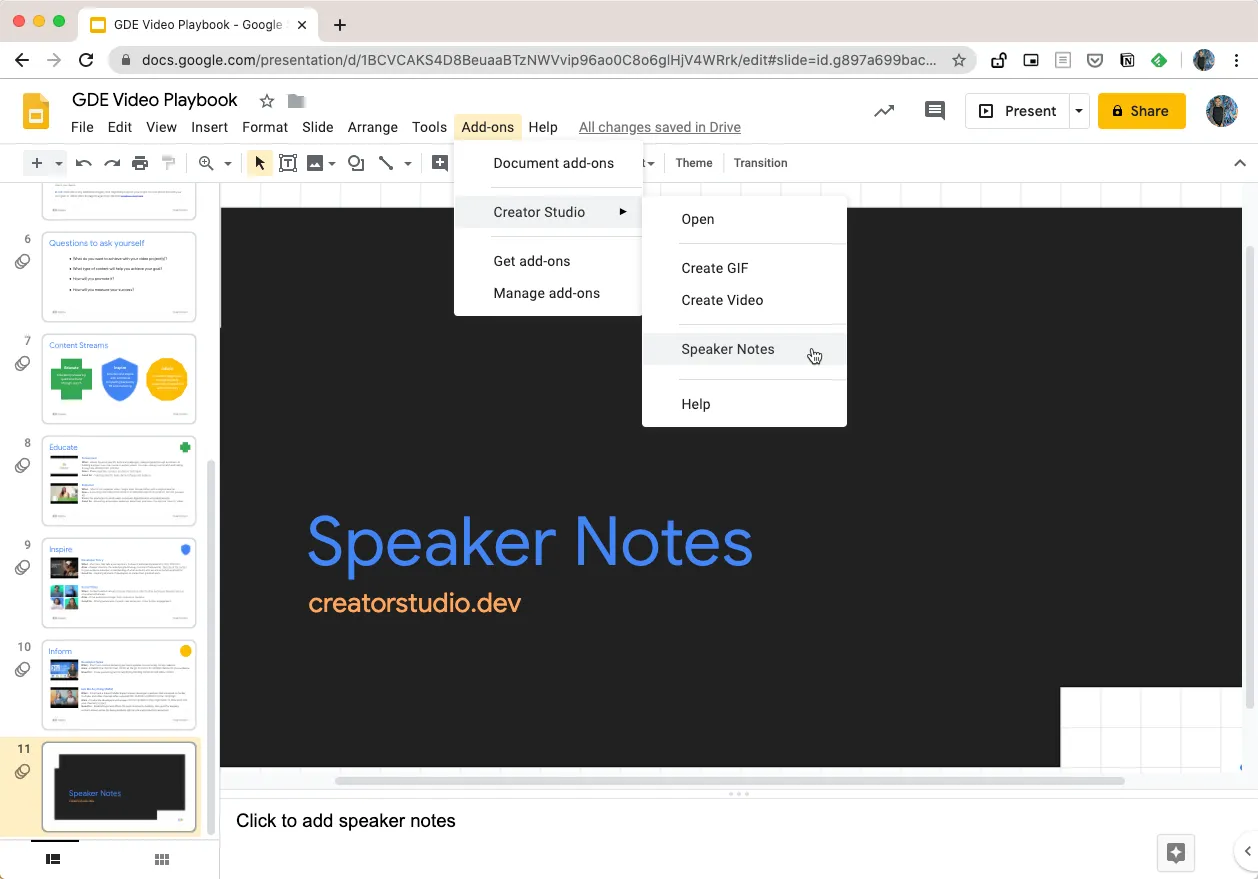
Method 5: Employing Google Workspace Add-ons for Efficiency
For users who frequently need to extract multiple images or entire collections from Google Slides, third-party add-ons can be a game-changer. These tools often streamline the process, allowing for bulk downloads and more sophisticated extraction capabilities. The “Download Images for Slides™” add-on mentioned in the provided URLs is a prime example.
How to Do It (General Steps for an Add-on):
- Install the Add-on: Go to the Google Workspace Marketplace (workspace.google.com/marketplace). Search for “Download Images for Slides™” or similar image extraction tools. Click “Install” and grant the necessary permissions.
- Open Your Presentation: Open the Google Slides presentation where you want to extract images.
- Launch the Add-on: Go to “Extensions” (or “Add-ons” in older interfaces) in the Google Slides menu bar, then navigate to the installed add-on and launch it.
- Select and Download: Follow the add-on’s interface to select the slides or images you wish to download. Many add-ons allow you to download all images at once or select specific ones. They often export images in their original formats (PNG, JPEG, GIF), including slide background images.
Pros:
- Bulk Downloading: The most efficient method for extracting many images at once, saving significant time for “image inspiration & collections” or compiling “thematic collections.”
- Automated: Reduces manual effort and the repetitive nature of individual downloads.
- Specific Features: Some add-ons can extract background images, differentiate between image types, or offer other specialized functions relevant to “visual design.”
Cons:
- Third-Party Dependence: Relies on external developers, requiring trust in their privacy and security practices. Tophinhanhdep.com always advises caution and thorough review before installing any third-party tool.
- Permissions: Add-ons require specific permissions to access your Google Slides data, which should be reviewed carefully.
- Compatibility: May sometimes encounter bugs or require updates due to changes in Google’s APIs, as noted in the “Download Images for Slides™” changelog.
This method is highly recommended for power users, marketers, or anyone building extensive “image collections” where efficiency and comprehensive extraction are critical.
Enhancing Your Downloaded Images with Tophinhanhdep.com’s Tools
Once you’ve successfully downloaded images from Google Slides, the journey of visual asset management is far from over. Tophinhanhdep.com is your ultimate resource for taking these images to the next level, offering a suite of “Image Tools” and “Visual Design” insights to perfect your visuals.
Preserving and Improving Image Quality
The quality of a downloaded image can vary, especially with methods like Google Keep or screenshots. Tophinhanhdep.com provides solutions to address these challenges:
- AI Upscalers: If you’ve downloaded an image that’s lower resolution than desired (e.g., from a screenshot or a compressed Google Keep save), our “AI Upscalers” can intelligently enlarge the image without significant pixelation. This is invaluable for turning a good “photo idea” into a “high-resolution photography” asset suitable for larger displays or prints.
- Image Optimizers and Compressors: For web use, emailing, or reducing storage footprint, downloaded images might need optimization. Tophinhanhdep.com’s “Optimizers” and “Compressors” can reduce file size while maintaining acceptable quality, perfect for making your “wallpapers” or “backgrounds” load faster on websites.
- Converters: Sometimes, an image might download in one format (e.g., PNG) but you need it in another (e.g., JPEG for smaller size, or a less common format for specific software). Our “Converters” allow seamless format changes, ensuring your images are always in the right type for your “digital photography” or “graphic design” projects.
Transforming Images for Diverse Applications
Beyond basic quality adjustments, Tophinhanhdep.com empowers you to transform your extracted images to suit any creative vision:
- Photo Manipulation & Editing Styles: Whether it’s cropping, resizing, color correction, or applying advanced filters, the principles of “photo manipulation” are crucial. Our guides and tools help you adapt your downloaded “nature photography” or “sad/emotional” images into new contexts, aligning with specific “editing styles.”
- Digital Art & Creative Ideas: A downloaded image can be the starting point for a complex “digital art” piece. Use it as a base for painting, compositing, or generating new “creative ideas.” Tophinhanhdep.com offers inspiration and tutorials to guide you through these artistic processes, turning simple “backgrounds” into intricate “abstract” masterpieces.
- Image-to-Text: If your Google Slides image contains text – perhaps a quote, a data label, or a diagram caption – our “Image-to-Text” tools (OCR) can extract that text, making it editable and searchable. This is a powerful asset for researchers, content creators, and anyone needing to repurpose information from visuals.
By leveraging the comprehensive resources on Tophinhanhdep.com, your downloaded images become versatile assets, ready for any challenge in “visual design” and “photography.”
Best Practices and Considerations
As you become adept at downloading images from Google Slides, keep these best practices in mind to maximize efficiency and maintain quality:
- Prioritize Quality: When possible, always opt for methods that preserve the highest resolution (e.g., Google Docs extraction or exporting as PNG). This gives you the most flexibility for future “photo manipulation” or “AI upscaling” if needed. Tophinhanhdep.com advocates for starting with the best possible source material for all “digital photography” endeavors.
- Mind Copyright: Always be mindful of copyright and licensing when reusing images, especially those not created by you. Ensure you have the right to use the image in your new context. Tophinhanhdep.com provides resources on ethical image use.
- Organize Your Downloads: Develop a system for organizing your downloaded images. Create specific folders for “wallpapers,” “backgrounds,” “aesthetic” collections, or project-specific assets. This aligns with the “Image Inspiration & Collections” philosophy of Tophinhanhdep.com, making it easy to find that perfect “nature” or “abstract” image when you need it.
- Backup Your Visual Assets: Regularly back up your image collections to cloud storage or external drives. Digital assets, especially “high-resolution photography” and “digital art” files, are invaluable.
- Consider File Formats: Understand the difference between PNG (lossless, good for graphics and transparency) and JPEG (lossy, good for photos with smaller file sizes). Choose the format appropriate for your immediate and future use cases. Tophinhanhdep.com’s “Image Converters” can help you switch formats as needed.
Conclusion
The ability to download images from Google Slides is a fundamental skill for anyone engaging with visual content today. Whether you need a quick grab for social media, a high-resolution photograph for a print project, or an inspiration piece for your next “digital art” creation, the methods outlined above provide effective pathways. From the simplicity of Google Keep to the precision of Google Docs extraction and the efficiency of add-ons, you now have a versatile toolkit at your disposal.
Beyond mere extraction, Tophinhanhdep.com stands as your comprehensive partner in visual asset management. Once you’ve downloaded your images, explore our “Image Tools” for “converters,” “compressors,” “optimizers,” and “AI upscalers” to refine and enhance them. Dive into our “Visual Design” sections for insights into “graphic design,” “photo manipulation,” and “creative ideas.” And for endless inspiration, browse our “Image Inspiration & Collections” featuring “wallpapers,” “backgrounds,” “aesthetic” trends, “nature photography,” “abstract” art, and poignant “sad/emotional” visuals.
Mastering image downloading from Google Slides is not just about saving files; it’s about empowering your creativity and efficiently managing the visual assets that tell your story. Visit Tophinhanhdep.com to further elevate your visual journey.
Frequently Asked Questions
Can I directly download a single image from Google Slides with a right-click “Save Image As” option? Unfortunately, Google Slides does not natively offer a direct “Save Image As” option for individual embedded images within a slide. You’ll need to use one of the workaround methods discussed on Tophinhanhdep.com, such as Google Keep, Google Docs extraction, or exporting the slide.
What file format will the downloaded image typically be in? The format depends on the method and the original image. When exporting a slide, you can choose PNG or JPEG. The Google Keep and Google Docs methods usually retain the original format (PNG, JPEG, GIF). Screenshots are typically PNG. Tophinhanhdep.com’s “Image Converters” can help you change formats if needed after download.
Is there a way to download multiple images at once from Google Slides? Yes, for bulk downloads, utilizing a Google Workspace add-on like “Download Images for Slides™” is the most efficient method. These tools are designed to streamline the process of extracting many images or all images from a presentation.
Does saving an image through Google Keep affect its quality? It can. Google Keep sometimes compresses images slightly, which might lead to a minor reduction in quality. For “high-resolution photography” or “digital art” where fidelity is critical, Tophinhanhdep.com recommends the Google Docs extraction method or exporting the entire slide as a PNG.
Can I download an image with transparency from Google Slides? Yes, if the original image had transparency (e.g., a PNG file), methods like exporting the slide as a PNG or using the Google Docs extraction will generally preserve that transparency. Screenshots might flatten it depending on the background.
Can I save the entire slide as an image file instead of just an embedded picture? Absolutely! You can go to “File” > “Download” and choose “PNG image (.png, current slide)” or “JPEG image (.jpg, current slide)” to save the entire slide as a visual asset. This is great for capturing “wallpapers” or “backgrounds” designed as part of the slide.
What if the image quality is too low after downloading? If a downloaded image (especially from a screenshot) has low resolution, you can try using an “AI Upscaler” tool, which Tophinhanhdep.com offers resources for. For any “photo manipulation” or enhancement, various “Image Tools” can assist.