Mastering White Background Removal: Unlocking Creative Potential for Your Images with Tophinhanhdep.com

Have you ever gazed at a photograph, envisioning its true potential with a different, more captivating backdrop? Or perhaps you’re a designer striving for that clean, professional look that only a perfectly isolated subject can achieve. The humble white background, while often serving as a clean starting point, frequently needs to be eliminated to unleash an image’s full artistic and commercial power. This guide, brought to you by Tophinhanhdep.com, will navigate the intricate world of background removal, empowering you to transform your visuals.
Whether you’re curating stunning wallpapers and backgrounds, crafting aesthetic compositions, preparing high-resolution stock photos, or delving into complex digital art and photo manipulation, the ability to seamlessly remove a white background is an indispensable skill. It’s a fundamental step that opens up a universe of creative ideas and diverse editing styles, allowing you to integrate subjects into vibrant nature scenes, abstract designs, or bespoke mood boards.

This comprehensive resource will empower you with knowledge and techniques, from the precision tools within Adobe Photoshop to the revolutionary simplicity of AI-driven platforms like Tophinhanhdep.com. You’ll learn:
- How to effectively remove white backgrounds using Photoshop’s powerful array of tools.
- Strategies for replacing plain white with breathtaking backgrounds, elevating your images into eye-catching compositions.
- When and why background removal is essential for various photography and visual design projects, and conversely, when it’s best left untouched.
- How cutting-edge AI image tools and online software, particularly Tophinhanhdep.com, can streamline and perfect this process, saving you invaluable time and effort.
So, prepare to delete the white, embrace boundless creativity, and enrich your photo editing skills to the next level. Let’s delve into the art and science of perfecting your images for any purpose, from beautiful photography collections to trending thematic designs.
The Foundational Art of Background Removal in Adobe Photoshop
Adobe Photoshop remains the industry standard for intricate image manipulation, offering a suite of tools for background removal. The core principle often involves selecting the main subject and then either masking or deleting the surrounding background. The choice of tool typically depends on the complexity of the image, the sharpness of the subject’s edges, and the desired level of precision. Mastering these techniques within Photoshop is crucial for achieving professional-grade results, especially for high-resolution assets, stock photos, and detailed graphic design.
Remove White Background Using Photoshop Pen Tool
The Pen Tool is arguably the most precise and powerful instrument in Photoshop for creating pixel-perfect selections. It is the gold standard for clipping path techniques, delivering clean, sharp edges that are essential for product images, furniture, electronics, and any object requiring a well-defined outline. This meticulous approach is invaluable for digital photography where accuracy is paramount.
To use the Pen Tool effectively:
- Open Your Image: Begin by opening your desired image in Photoshop.
- Select the Pen Tool: From the toolbar, select the Pen Tool. Ensure you’re working on a new path layer.
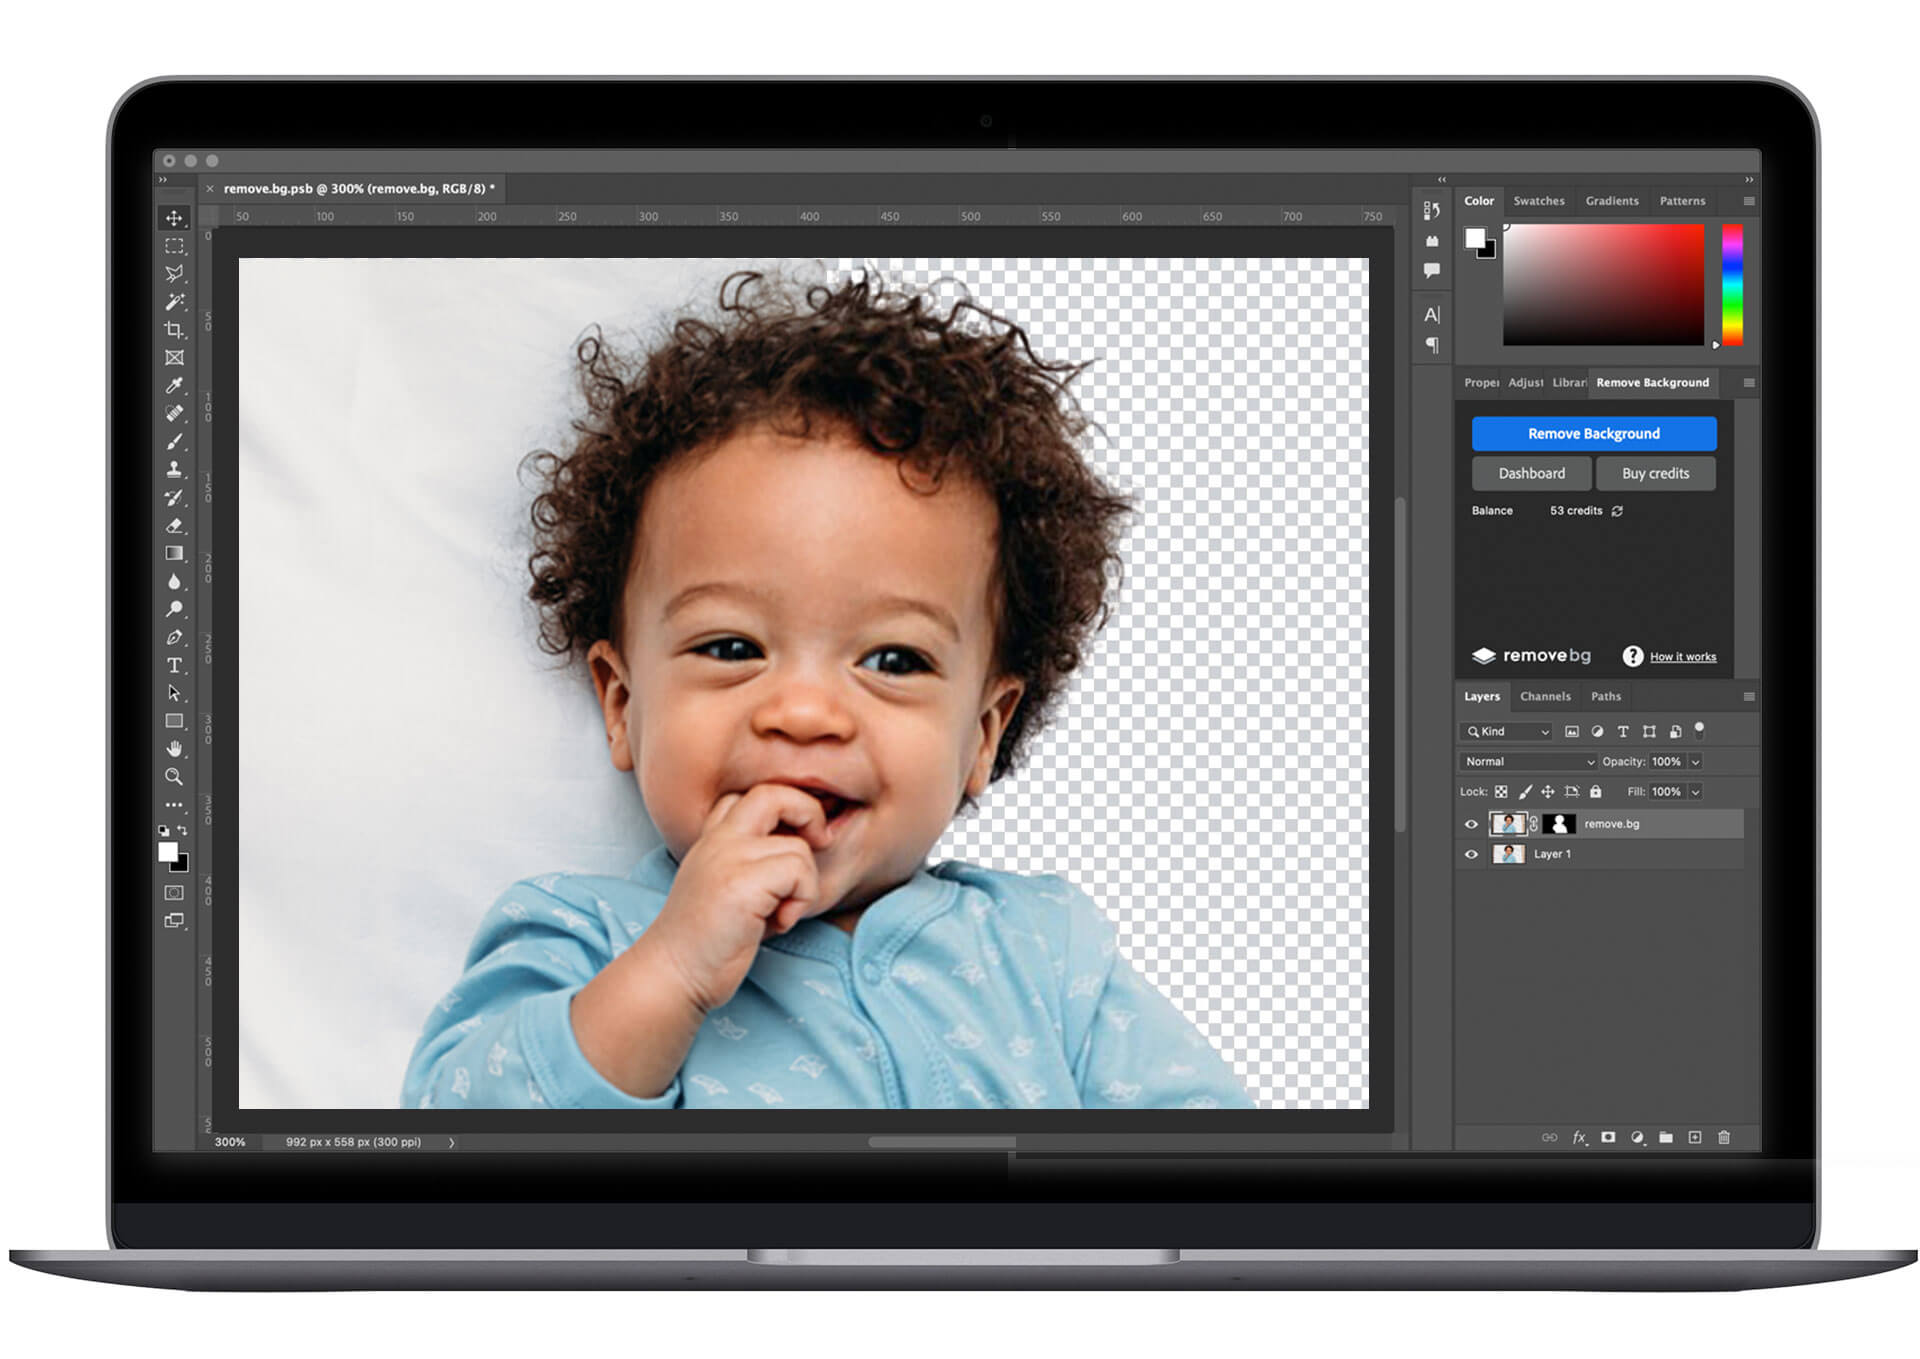
- Zoom for Precision: Zoom into your image, often 300% or more, to clearly see the object’s outlines. This allows for creating an ideal, smooth path.
- Outline the Object: Click along the edges of your subject to create anchor points. Drag handles to form curves, meticulously tracing the entire outline until you return to your starting point.
- Convert Path to Selection: Once the path is complete, press
Ctrl(Windows) orCmd(Mac) and click on the path line in the Paths panel to convert it into a selection. - Apply Feathering: Press
Shift+F6to apply a subtle feather (e.g., 0.3px) to soften the edges of your selection slightly, preventing harsh cutouts. - Add Layer Mask: With the selection active, click the “Add layer mask” icon at the bottom of the Layers panel. This non-destructive method effectively hides the background, leaving your subject isolated.
- Add a New Background: To replace the white background, go to the adjustment layer options and add a “Solid Color” layer. Choose any color you desire and drag this layer below your masked image layer.
After completing these steps, meticulously review your work. A properly executed Pen Tool selection yields a beautiful, professional cutout, ready for integration into any visual design project or collection of aesthetic images.
Background Eraser Tool for White Background Removing
When dealing with complex, soft-edged elements like hair, fur, delicate fabrics, or glass, the Pen Tool can be challenging. This is where the Background Eraser Tool shines, offering a non-destructive way to remove backgrounds with intricate details. It’s particularly useful for achieving realistic photo manipulation and refining portrait photography.
Here’s how to master this tool:
- Prepare Your Layers: Open your image and go to the Layers panel. Right-click on the background layer and select “Duplicate Layer” to create a backup. Hide the original layer by clicking its eye icon.
- Create a High-Contrast Background: For better visibility during editing, create a new layer (by clicking the page icon in the Layers panel) and fill it with a bright, contrasting color using the Paint Bucket Tool. Drag this new color layer below your duplicate image layer. This temporary background will make erased areas clearly visible.
- Select the Background Eraser Tool: Find the Background Eraser Tool in the Tools panel (it might be hidden under the regular Eraser Tool).
- Adjust Settings: In the options bar, set your preferences:
- Sampling: Choose “Background Swatch” or “Once” (if the background color is consistent).
- Limits: “Find Edges” helps to preserve foreground details.
- Tolerance: Start around 50%. This controls how wide the color range the tool will erase.
- Protect Foreground Color: If your subject has a color similar to the background, use the eyedropper to select the subject’s primary color as the foreground color, and check “Protect Foreground Color.”
- Brush Size: Adjust the brush size as needed for different areas.
- Erase the White Background: Click and drag the crosshairs of the brush over the white background. The tool samples the color directly beneath the crosshairs and erases similar colors within the tolerance range, intelligently protecting the foreground colors.
- Handle Low-Contrast Areas: For areas where the subject’s color is very close to the background (like wispy hair or light-colored garments), decrease the Tolerance (e.g., to 5-10%) and reduce the brush size for precise erasure.
- Final Cleanup: After handling the intricate edges, you can increase the tolerance and brush size again to quickly erase the remaining broad background areas.
- Replace the Background: Once the white background is fully removed (revealing your temporary high-contrast layer), hide or delete the temporary layer. You can now add any new background or wallpaper as a new layer beneath your subject.
This tool is invaluable for image masking services and creating beautiful photography where fine details must be preserved.
White Background Removal Using Object Selection Tool
The Object Selection Tool is a relatively newer addition to Adobe Photoshop CC, leveraging AI to automatically identify and select subjects within an image. It’s an excellent choice for efficiency, especially when dealing with multiple objects or looking for a quicker way to achieve a cutout for visual design and creative ideas.
Steps for using the Object Selection Tool:
- Open Your Image: Load the image you wish to edit into Photoshop.
- Select the Object Selection Tool: Locate and select this tool from the toolbar on the left.
- Choose a Mode: In the options bar at the top, select either “Rectangle” for subjects easily enclosed in a box or “Lasso” for more irregularly shaped objects or multiple subjects.
- Draw a Loose Selection: Draw a rough selection around the object you want to isolate. Photoshop’s AI will then analyze the area and automatically generate a refined selection around the subject.
- Refine the Selection: If the automatic selection isn’t perfect, you can refine it. Hold
Shiftto add to the selection orAlt/Optionto subtract from it. - Apply a Layer Mask: Once satisfied with the selection, click the “Add layer mask” icon in the Layers panel. This will instantly remove the background, leaving your subject on a transparent layer.
- Change the Background: You can now easily place your subject on any new background, be it a solid color, a gradient, or an entirely new scenic image, opening up possibilities for aesthetic or thematic collections.
White Background Removal Using Magic Wand Tool
The Magic Wand Tool is one of Photoshop’s oldest selection tools, ideal for quickly selecting areas of uniform color. It’s fastest for removing perfectly solid white (or any single-color) backgrounds without intricate color variations. This tool is a go-to for rapid edits, especially for simple product image background removal.
How to use the Magic Wand Tool:
- Unlock the Layer: If your image layer is locked, click the lock icon in the Layers panel to unlock it.
- Select the Magic Wand Tool: Find the Magic Wand Tool in the toolbar (it’s often grouped with the Quick Selection Tool). You can also press
Shift+Wto cycle through these tools. - Adjust Tolerance: In the options bar, set the “Tolerance.” A lower tolerance selects fewer colors, while a higher tolerance selects a broader range. For pure white, a tolerance of 30-50 is often sufficient.
- Click the Background: Click on the white background area you want to remove. The tool will select all contiguous pixels of similar color within the set tolerance.
- Expand Selection (Optional): If the selection misses parts of the white background (e.g., shadows or areas separated by the subject), hold
Shiftand click those missed areas to add them to the selection. - Inverse the Selection: To select the subject instead of the background, go to
Select > Inverseor pressShift+Ctrl+I(Windows) /Shift+Cmd+I(Mac). - Delete the Background: Press the
Deletekey. If your layer is unlocked, the background will become transparent (represented by the checkered grid). - Deselect: Press
Ctrl+D(Windows) /Cmd+D(Mac) to deselect the area. - Clean Up with Eraser: For any tiny remaining white pixels or imperfect edges, use the regular Eraser Tool with a small brush size.
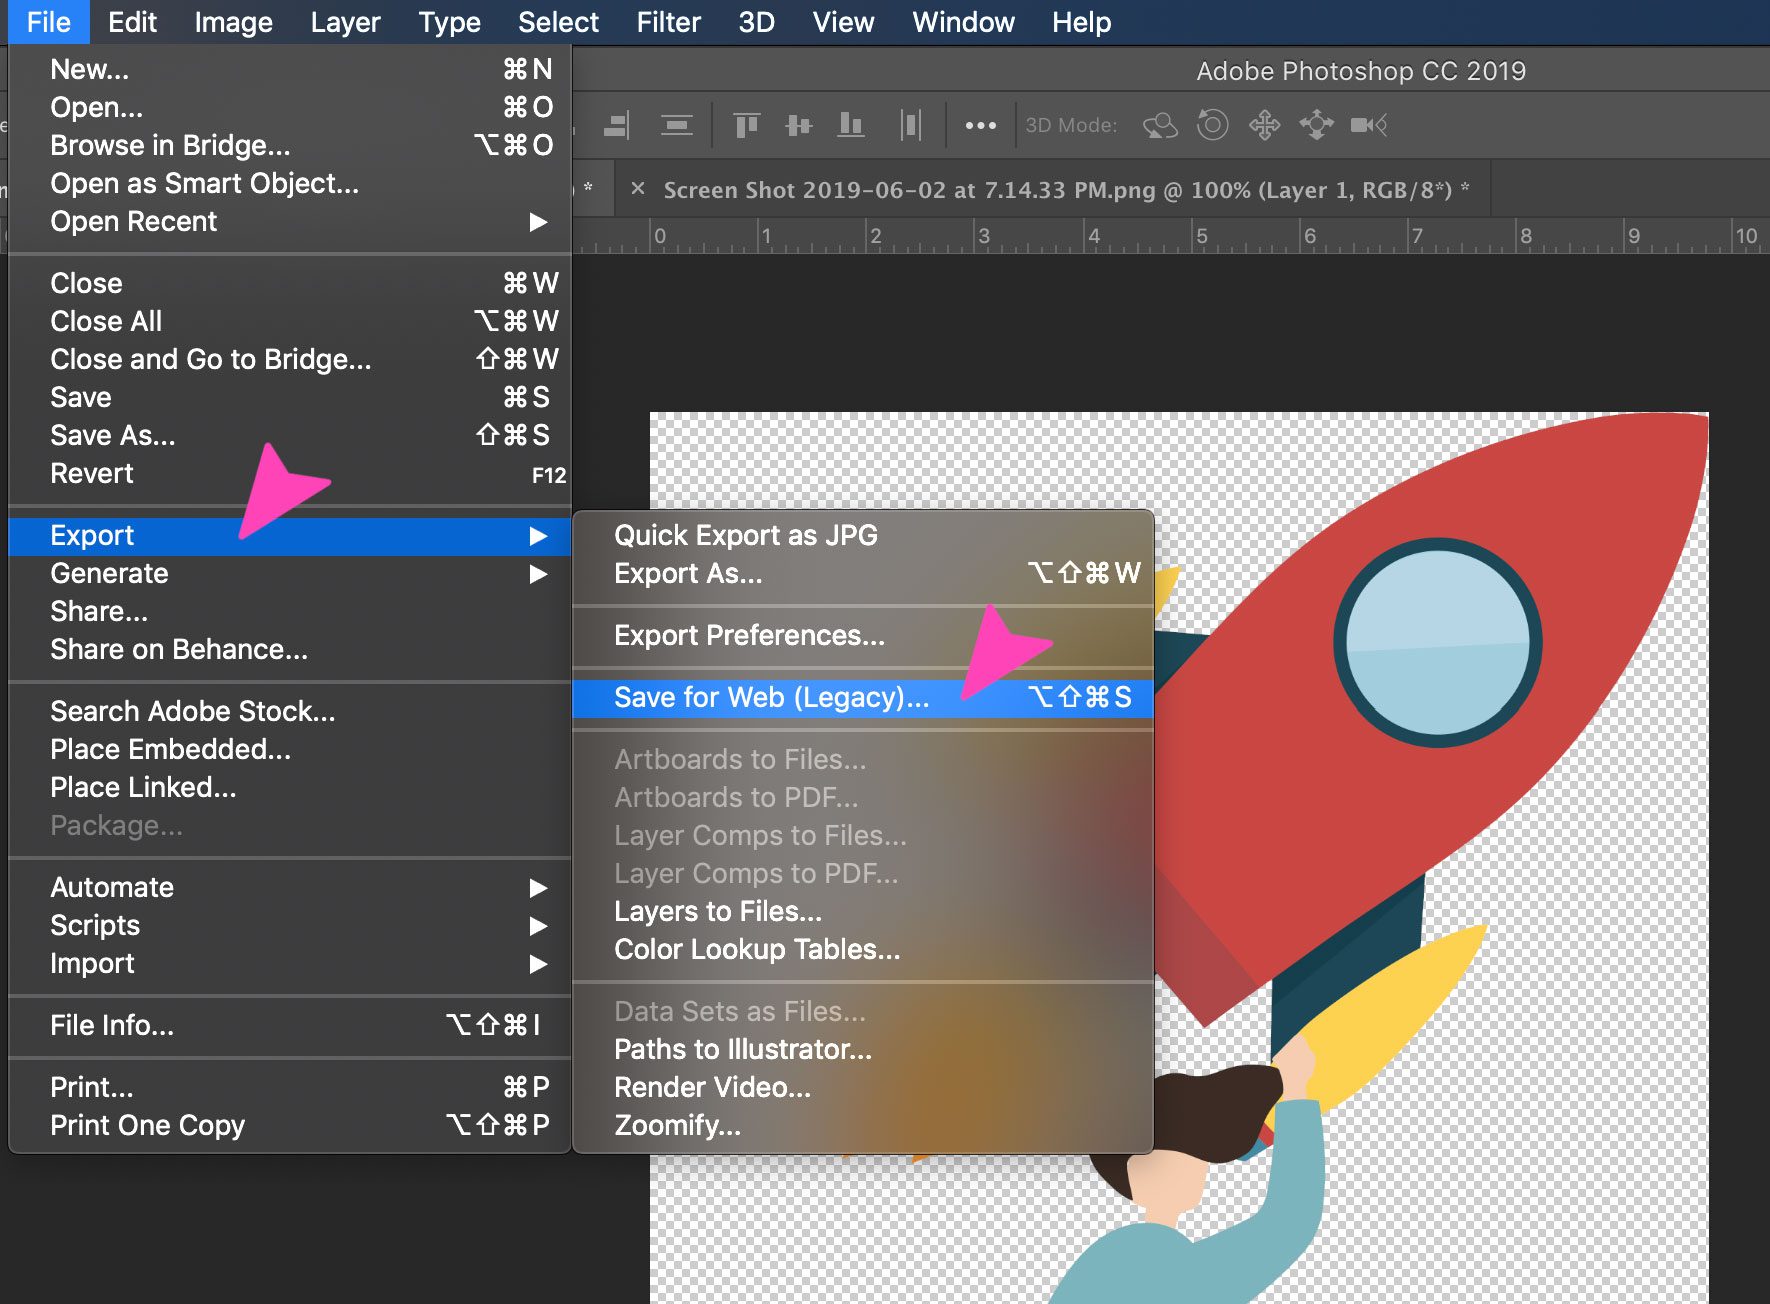
- Save as PNG: Crucially, save your image as a PNG file (
File > Save As). This format preserves transparency, ensuring your hard work isn’t undone by saving as a JPEG, which would fill the transparent areas with white. This is vital for stock photos and digital art assets.
Lasso Tool To Cutout The Background
The Lasso Tool family (Lasso, Polygonal Lasso, Magnetic Lasso) provides manual selection capabilities, allowing you to draw freehand selections. While requiring a steady hand or patience, it offers direct control, making it useful for selecting irregularly shaped objects or areas where automated tools might struggle.
Steps for using the Lasso Tool:
- Select the Lasso Tool: From the toolbar, choose the standard Lasso Tool for freehand drawing, or the Polygonal Lasso Tool for straight-edged selections.
- Duplicate Layer: It’s always good practice to duplicate your background layer (
Ctrl+JorCmd+J) to work non-destructively. - Outline the Subject: Carefully draw a selection around the subject. For the standard Lasso Tool, click and drag to draw a freeform outline. For the Polygonal Lasso, click to set points along straight edges.
- Close the Selection: Connect the end point back to the starting point to complete the selection.
- Feather the Edges: Go to
Select > Modify > Featherand apply a small feather radius (e.g., 1-2 pixels) to soften the cut edges. - Create Layer via Copy: With the selection active, press
Ctrl+J(Windows) orCmd+J(Mac) to copy the selected subject to a new layer. You can then hide or delete the original background layer. - Lock the Lower Layer (Optional): If you have kept the original background, you can lock it to prevent accidental edits.
- Save as PNG: As with other methods, save your final image in PNG format to retain transparency.
The Lasso Tool, while manual, is excellent for quick, approximate cutouts or for refining selections made by other tools, contributing to dynamic photo manipulation and creative ideas in your visual design.
Quick Selection Tool to Remove Background From Image
The Quick Selection Tool is another intuitive option that works by “painting” a selection over your desired object. Photoshop automatically detects edges and expands the selection based on color and texture similarities, making it faster than manual lassoing but still offering good control for a wide range of images.
How to use the Quick Selection Tool:
- Open Image in Photoshop: Start by opening the image you want to edit.
- Create a New Transparent File: Go to
File > New, and in theBackground Contentsdropdown, select “Transparent.” Click OK. This creates a canvas for your cutout. - Select Quick Selection Tool: Go back to your original photo and select the Quick Selection Tool from the toolbar.
- Drag Over Subject: Click and drag the cursor over the subject. The tool will automatically expand the selection to encompass similar areas, trying to find edges.
- Refine Selection: Use
Alt/Option+ click/drag to subtract from the selection if it goes too far. Adjust brush size as needed. - Arrange Windows (Optional but helpful): To see both your original image and new transparent file side-by-side, go to
Window > Arrange > 2-Up Vertical. - Move Subject to New File: Select the Move Tool from the toolbar. Click and drag your selected subject from the original image window to the new transparent file window.
- Final Adjustments: Once moved, you can resize, reposition, and further refine your subject on its new transparent background.
- Save as PNG: Save your final image as a PNG to preserve its transparency.
This method is highly efficient for quickly isolating subjects for aesthetic backgrounds or rapidly iterating through photo ideas for a mood board.
Optimizing Your Workflow: When and How to Apply Background Removal
Understanding the various tools is only half the battle; knowing when and why to employ them is equally crucial for an optimized workflow. This strategic approach ensures efficiency and the best possible outcome for your digital photography and visual design projects.
Which Tool is Best for White Backdrop Removal
There’s no single “best” tool, as each Photoshop method has its strengths tailored to different image characteristics and desired results.
- Pen Tool (Clipping Path): Unbeatable for crisp, hard edges (e.g., product photography of electronics, furniture, vehicles). It delivers pixel-perfect accuracy, essential for professional stock photos and graphic design elements.
- Background Eraser Tool (Image Masking): Ideal for soft, intricate, or blurred edges such as hair, fur, smoke, or transparent objects (e.g., portrait photo background removal, detailed photo manipulation). It allows for non-destructive editing and realistic results.
- Magic Wand Tool: Best for simple images with perfectly solid, uniform white backgrounds and strong contrast against the subject. It offers speed but lacks precision for complex edges.
- Quick Selection Tool: A good balance of speed and relative accuracy for subjects with clear boundaries and some color/texture variation. More flexible than the Magic Wand for moderately complex scenes.
- Object Selection Tool: Excellent for rapid, AI-assisted selections, especially in newer Photoshop versions. Great for quickly isolating subjects, even multiple ones, for visual design mock-ups or preparing image batches.
- Lasso Tools: Provide manual control for irregular shapes or quick rough selections. Useful when other tools might over-select or for specific, custom shapes.
Ultimately, the choice depends on the image, the time available, and the required level of precision. For maximum quality, especially for commercial applications, combining tools and refining selections is often necessary.
When We Need to Remove White Backdrop
Removing a white background unlocks a vast array of creative and commercial possibilities, directly enhancing your images, photography, and visual design capabilities:
- Versatile Background Replacement: To place your subject against any other background – be it a vibrant nature scene, an abstract texture, a customized aesthetic backdrop, or a specific wallpaper. This is fundamental for creating thematic collections or adapting images to trending styles.
- Image Compositing and Manipulation: Essential for digital art and complex photo manipulation where subjects need to be seamlessly integrated into new scenes.
- Graphic Design Elements: Providing clean, isolated assets (like logos or product cutouts) for brochures, websites, advertisements, and other graphic design projects.
- Mood Boards and Creative Concepts: Building visual mood boards or illustrating creative ideas by combining various elements on a cohesive canvas.
- High-Resolution Stock Photos: Creating versatile stock photos with transparent backgrounds, ready for any client’s use case, ensuring maximum marketability.
- E-commerce Flexibility: While many platforms require white backgrounds, having a transparent version allows for marketing campaigns with dynamic, engaging visuals beyond the product page.
When Not to Remove White BG
Paradoxically, sometimes the best action is no action at all. There are scenarios where removing a white background is unnecessary or even counterproductive:
- E-commerce Platform Requirements: Major online marketplaces like Amazon, eBay, and Etsy often mandate a pure white background for product images. This provides consistency, highlights the product, and avoids distractions. Removing it would necessitate replacing it with white again, adding extra steps.
- Product Aesthetics: If a product genuinely looks best and is most effectively showcased against a white backdrop, then maintaining it is the correct choice. White backgrounds can make products appear clean, crisp, and professional.
- Simplicity and Focus: For minimalist aesthetic presentations or when the primary goal is to keep the focus solely on the subject without any visual noise, a white background is perfect.
- Time and Resources: If the image is for internal use, a quick draft, or if time and resources are limited, and the white background is acceptable, then the effort of removal might not be justified.
Specialized Applications and Enhanced Techniques
Beyond the general techniques, specific image types present unique challenges and opportunities for background removal, allowing for truly specialized editing styles and beautiful photography.
Change the Background From Hair Area
Removing a white background from around hair, especially wispy strands or fine fur, is one of the most challenging aspects of background removal. Automated tools can struggle, leading to jagged edges or a halo effect. This is precisely why image masking techniques, predominantly using the Background Eraser Tool or advanced masking workflows in Photoshop, are critical. Patience, meticulous zoom, and careful adjustment of tool settings (like tolerance and brush hardness) are key. Achieving a natural look for portrait photo background removal depends heavily on expertly handling these intricate details.
Portrait Photo Background Removal
Portrait photography often starts with a plain studio background, frequently white. However, for a more engaging and artistic presentation, designers often opt to remove this neutral backdrop. This allows for placing the subject into more dynamic scenes (nature, abstract, or custom aesthetic backgrounds), creating striking composites, or simply replacing it with a solid, contrasting color that better complements the subject’s attire or mood. The goal is always to make the model’s picture appear natural and captivating, transforming a standard shot into a compelling visual narrative.
Product Image Background Removal
For businesses, especially in e-commerce, product image background removal is a cornerstone service. While many platforms demand a white background, removing an existing (perhaps imperfectly white) background or a colored one allows for:
- Brand Consistency: Ensuring all product images adhere to a uniform standard, which is vital for visual design and brand identity.
- Highlighting White Products: For items like white garments or jewelry, removing the white background and replacing it with a contrasting color (even a subtle grey) makes the product “pop” and prevents it from blending into the background.
- Marketing Versatility: Creating clean cutouts that can be placed on promotional banners, seasonal advertisements, or thematic collections without worrying about conflicting backgrounds. This directly feeds into creating impactful digital photography for commercial use.
The Future of Background Removal: AI and Online Tools with Tophinhanhdep.com
While Photoshop provides unparalleled control, the advent of Artificial Intelligence (AI) has revolutionized background removal, making it faster, more accessible, and remarkably accurate, even for beginners. AI-driven image tools like Tophinhanhdep.com represent the cutting edge of this evolution, streamlining workflows and empowering users to create stunning visuals with unprecedented ease.
Cut out Images with Artificial Intelligence AI & Automated Online Tools and Software
AI-powered background removers utilize advanced algorithms to automatically detect and precisely separate the subject from its background in mere seconds. Whether it’s a person, a complex product, or any other object, these tools quickly generate a clean cutout, leaving only the foreground in focus.
The benefits are immense:
- Speed and Efficiency: What might take minutes or even hours in Photoshop can be accomplished in a single click, saving enormous amounts of time and effort, especially for batch processing large image collections.
- High Precision: AI excels at handling traditionally challenging areas like wispy hair, intricate shapes, and subtle shadows, delivering remarkably clean edges that often rival manual Photoshop work.
- Accessibility: These tools don’t require advanced editing skills, making professional-grade background removal available to everyone, from casual photographers to busy entrepreneurs.
Tophinhanhdep.com stands at the forefront of this technology, offering an intuitive and powerful solution. It’s designed to automatically make backgrounds transparent with high precision, saving users considerable time and effort. Its sophisticated AI ensures that subject edges remain smooth and free from jagged artifacts, providing a refined and professional finish.
Leveraging Tophinhanhdep.com for Comprehensive Image Editing
Tophinhanhdep.com goes beyond simple background removal, offering a suite of features that integrate seamlessly with your visual design and photography needs. It acts as a comprehensive image tool that fosters creative ideas and enriches image inspiration.
After achieving a flawless cutout in seconds, Tophinhanhdep.com enables you to:
- Change Background Color: Easily replace the white background with any solid color from a palette or even sample a color directly from your image using the color picker. This is perfect for maintaining brand consistency, creating aesthetic backgrounds, or preparing images for specific mood boards.
- Image Upscaler: Don’t let a smaller image limit your vision. Tophinhanhdep.com’s AI upscaler, found in the “smart tools,” can increase image resolution up to 4x without losing quality, ensuring your high-resolution cutouts are ready for any platform or print.
- AI Color Correction: For photos that are too dull or overly vibrant, the AI color correction feature intelligently balances colors, making your images look just right. This is a game-changer for enhancing digital photography and applying consistent editing styles.
- Cartoon Effects: Transform real-life scenes into vibrant, animated visuals with various cartoon effects (3D, pop, manga). This feature is ideal for digital art, creating unique creative ideas, or adding a playful touch to image collections.
- Custom Photo Size: Achieve perfect image dimensions for any platform (Instagram, Facebook, TikTok) or custom project. Simply tap the page, use the “resize” button, and tailor your image to fit precisely, essential for all aspects of visual design.
- Change Product Photo Background: Specifically designed for e-commerce, this feature allows you to upload product images and replace their backgrounds with studio settings, countertops, outdoor scenes, or anything from Tophinhanhdep.com’s extensive library, ensuring your merchandise gets the spotlight it deserves.
Practical Applications for Enhanced Creativity with Tophinhanhdep.com
Tophinhanhdep.com’s user-friendly interface and vast capabilities extend to various creative projects, making it an indispensable asset for graphic designers and beginners alike:
- Create a Family Photo Collage: Compile cherished family memories into visually stunning single images using the “collage” feature, turning them into personalized frames that capture beautiful photography.
- Design Custom Holiday Cards: Craft unique holiday greetings that stand out. Add festive effects, play with text, and create cards that reflect your personal taste, sparking creative ideas and memorable designs.
- Upgrade Business Flyers and Cards: Enhance your promotional materials with eye-catching flyers and business cards. Integrate your brand identity, customize templates with various color schemes and fonts, and make your graphic design efforts more impactful.
- Showcase Restaurant Menus: Professionally design menus that highlight culinary offerings with mouth-watering visuals, enticing customers with attractive visual design.
Conclusion
The ability to eliminate white backgrounds from images is a powerful skill that transcends mere technicality – it’s a gateway to boundless creative expression and professional polish. From the meticulous control offered by Adobe Photoshop’s diverse toolset, allowing for pixel-perfect clipping paths and intricate image masking, to the revolutionary efficiency of AI-driven solutions like Tophinhanhdep.com, the options are plentiful.
Whether you’re enhancing high-resolution photography, designing captivating wallpapers, building diverse image collections, or preparing assets for digital art and visual design, mastering background removal is a fundamental step. Tophinhanhdep.com stands out as an exceptional image tool, providing not only effortless one-click background removal but also a comprehensive suite of post-editing features that can transform your images to perfectly match any aesthetic, mood board, or thematic collection.
We encourage you to experiment with the techniques discussed, practice your skills, and explore the full potential of your images. For a seamless and powerful editing experience, visit Tophinhanhdep.com today. You can even take advantage of our free trials to test the quality and discover how our professional Photoshoppers deliver precise, on-time results with a commitment to quality. Unleash your creativity and elevate your visuals to truly captivate your audience.
Frequently Asked Questions
1. How can I create a transparent background? Creating a transparent background is simple with the right tools. Tophinhanhdep.com’s background remover tool allows you to launch it on desktop or mobile devices and achieve transparent cutouts instantly. You can also utilize Photoshop tools like the Pen, Background Eraser, Magic Wand, Quick Selection, Object Selection, or Lasso tools, as detailed in this guide.
2. Can you remove a white background from an image with complex edges? Absolutely. While more challenging, Photoshop’s Background Eraser Tool and advanced masking techniques are specifically designed for removing backgrounds from images with intricate or soft edges, such as hair, fur, or glass. Tophinhanhdep.com’s AI also excels at isolating these hard-to-reach parts with high precision.
3. How can I get edited images for a bigger project for eCommerce? After learning and practicing the techniques in this article, you can certainly do it yourself. If you’re managing a large volume or prefer professional assistance for critical projects, outsourcing options are available. Tophinhanhdep.com offers professional image editing services, ensuring high-quality, perfectly edited images suitable for any eCommerce platform or large-scale project.
4. Can I use any background instead of white? Yes! Once the white background is successfully removed, your subject will be on a transparent layer, allowing you to place it onto virtually any new background you desire. This versatility is key for highlighting your subject, adapting images to different marketing campaigns, or creating unique aesthetic and thematic collections. Tophinhanhdep.com offers a selection of instant background options, including solid colors and scenic backdrops, to help you achieve your desired look.