Mastering Image Flipping in Photoshop: A Comprehensive Guide for Visual Creators

In the dynamic world of digital imagery, the ability to manipulate and refine photographs is an indispensable skill for anyone involved in visual content creation. From professional photographers and graphic designers to digital artists and social media enthusiasts, the art of image editing empowers us to transform ordinary pictures into extraordinary visual narratives. Among the fundamental techniques, learning how to flip an image in Photoshop stands out as a deceptively simple yet profoundly impactful operation. This guide, brought to you by Tophinhanhdep.com, will delve deep into the mechanics of flipping images, distinguishing it from rotation, troubleshooting common pitfalls, and unveiling a spectrum of creative possibilities. Whether you’re aiming to correct a compositional imbalance, adhere to specific printing requirements, or unleash unique artistic effects, understanding image flipping in Photoshop is a cornerstone for elevating your visual work.
At Tophinhanhdep.com, we understand the diverse needs of visual creators. Our platform is a rich repository for high-resolution images, stock photos, and digital photography insights, alongside an extensive suite of image tools like converters, compressors, optimizers, and even AI upscalers. We also foster visual design through resources on graphic design, digital art, and photo manipulation, constantly inspiring with photo ideas, mood boards, and thematic collections. This tutorial not only streamlines your Photoshop experience but also serves as a gateway to the broader creative ecosystem Tophinhanhdep.com offers, ensuring you have all the resources to make your images truly stand out.
Understanding the Fundamentals: What is Image Flipping?
Image flipping, often referred to as mirroring, is a core transformation technique in digital image editing. Unlike rotation, which changes the orientation of an image around a central point, flipping creates a mirrored reflection of the image along either a horizontal or vertical axis. Imagine looking at your reflection in a mirror – that’s essentially what a horizontal flip does to your image. A vertical flip, on the other hand, mirrors the image as if it were reflected across a pool of water, inverting it from top to bottom. This seemingly minor adjustment holds significant power in various visual design and photography contexts.

For graphic designers and digital artists, flipping an element can instantly alter the visual flow or balance within a composition. A logo might need to face a different direction to align with surrounding text, or a character’s gaze could be reversed to guide the viewer’s eye more effectively. In photography, particularly digital photography, flipping is a tool for critical assessment. Our natural perception can sometimes overlook compositional flaws in an image that are immediately apparent when viewed as its mirror opposite. Photographers often flip images horizontally during the editing process to gain a fresh perspective, identify areas needing correction, or simply experiment with alternative layouts. Tophinhanhdep.com’s resources on editing styles and digital photography often highlight such techniques as essential for refining your craft. Moreover, for those involved in creating wallpapers, backgrounds, or aesthetic imagery, flipping can generate entirely new visual narratives and abstract forms, making it a powerful creative device.
Step-by-Step Guide to Flipping Images in Photoshop
Photoshop offers straightforward methods to flip images, catering to both flipping an entire canvas and manipulating individual layers. Understanding these distinctions is crucial for precise and effective editing.
Flipping the Entire Canvas: A Quick Overview
When you need to reverse the orientation of your entire artwork or photograph, Photoshop provides a quick and direct command. This action affects all layers simultaneously, treating the entire image as a single entity.
- Open Your Image: Begin by opening the desired image in Photoshop.
- Navigate to the Image Menu: In the top menu bar, click on
Image. - Select Image Rotation: From the dropdown menu, hover over
Image Rotation. - Choose Your Flip Direction:
- To mirror the image from left to right, select
Flip Canvas Horizontal. - To invert the image from top to bottom, select
Flip Canvas Vertical.
- To mirror the image from left to right, select
With just one click, your entire canvas, including all its layers, will be flipped. This method is ideal for initial compositional checks or when the entire scene needs a mirrored perspective. For those exploring different aesthetic and nature-inspired backgrounds or beautiful photography for Tophinhanhdep.com, this quick flip can offer immediate insights into how a scene might appear differently.
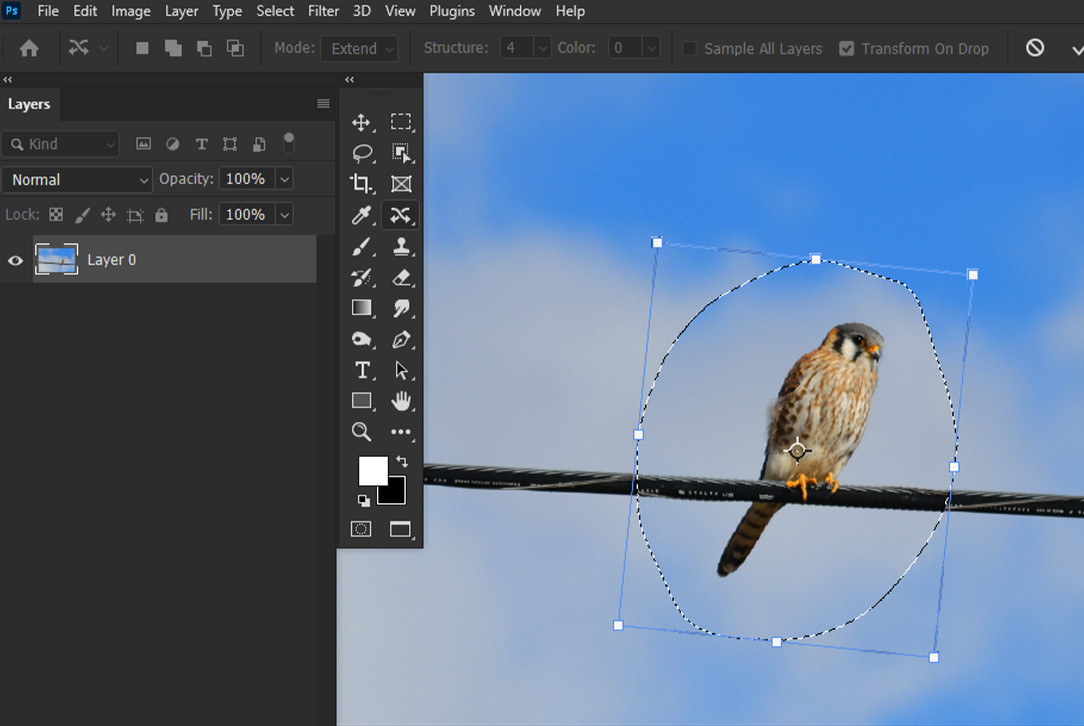
Precision Flipping: Working with Individual Layers
Often, the need to flip is limited to a specific element within your image rather than the whole composition. This is where layer-specific flipping becomes invaluable, allowing for precise control in complex visual designs or photo manipulation projects.
For instance, if you’re incorporating a company logo, a watermark, or a text overlay, and only that specific element needs to be mirrored without affecting the background or other layers, you must target its individual layer. Tophinhanhdep.com’s extensive resources on graphic design and digital art frequently emphasize the importance of non-destructive editing through layers.
There are several methods to flip an individual layer in Photoshop:
Method 1: Using the Transform Menu
This is a direct approach that utilizes the Transform options.
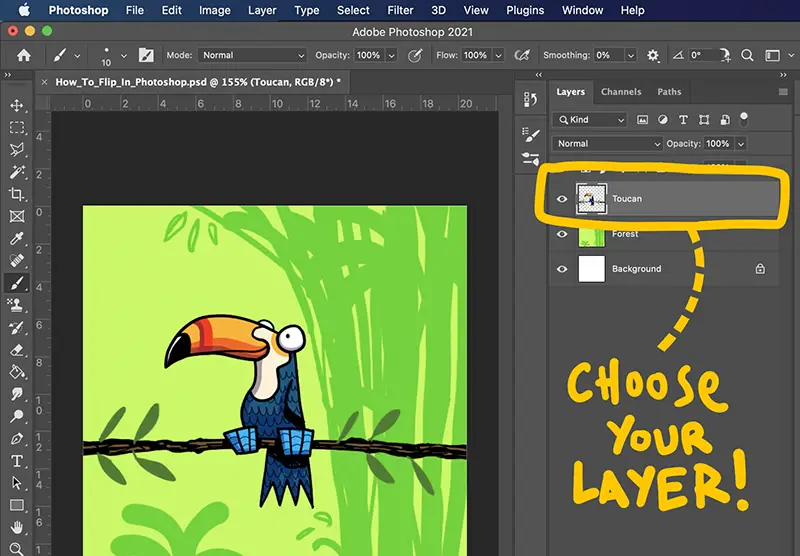
- Select the Desired Layer: In the Layers panel, click on the layer you wish to flip.
- Access the Edit Menu: Go to
Editin the top menu bar. - Navigate to Transform: Hover over
Transform. - Choose Flip Direction: Select
Flip HorizontalorFlip Vertical.
Method 2: Free Transform Bounding Box
The Free Transform tool offers a versatile bounding box that not only allows resizing and skewing but also includes flip options via a right-click.
- Select the Desired Layer: Ensure the layer you want to flip is active in the Layers panel.
- Activate Free Transform: Go to
Edit > Free Transform, or use the shortcutCtrl+T(Windows) orCommand+T(Mac). A bounding box will appear around your layer content. - Right-Click for Options: Right-click anywhere inside the bounding box. A contextual menu will appear.
- Select Flip Direction: Choose
Flip HorizontalorFlip Vertical. - Confirm Transformation: Press
Enter(Windows) orReturn(Mac) to apply the flip.
These layer-specific flipping methods are fundamental for detailed photo manipulation, ensuring that intricate patterns, aesthetic elements, or even parts of a nature scene can be precisely positioned without disrupting the overall image. Tophinhanhdep.com encourages users to experiment with these options to achieve the perfect balance and composition in their work.
Distinguishing Flipping from Rotating: Know the Difference
It’s common for beginners to confuse flipping an image with rotating it, but their effects are fundamentally different. Understanding this distinction is key to achieving your desired visual outcome, especially in high-resolution photography or digital art.
- Flipping (Mirroring): As discussed, flipping creates a mirror image. If you flip horizontally, the left side becomes the right, and vice versa. If you flip vertically, the top becomes the bottom. Think of it as viewing your image through a mirror.
- Rotating: Rotation changes the angular orientation of an image or layer around a central pivot point. You can rotate an image by 90 degrees clockwise, 180 degrees, or any custom angle. This is like tilting your head or turning a physical photograph.
How to Rotate an Image or Layer in Photoshop:
For the entire canvas:
- Open Image: Load your image in Photoshop.
- Image Rotation: Go to
Image > Image Rotation. - Choose Angle: Select
180°,90° Clockwise (CW), or90° Counter Clockwise (CCW). You can also chooseArbitrary...for custom angles.
For individual layers:
- Select Layer: Choose the specific layer in the Layers panel.
- Free Transform: Activate
Edit > Free Transform(orCtrl+T/Command+T). - Rotate: Hover your cursor just outside one of the corner handles of the bounding box. The cursor will change to a curved double-headed arrow. Click and drag to rotate. You can also enter a specific angle in the Options bar at the top.
- Confirm: Press
Enter/Returnto apply.
It’s also worth noting the Rotate View Tool (found in the Tools panel, often grouped with the Hand tool). This tool allows you to temporarily rotate your view of the canvas without actually transforming the image data. This can be useful for working on an image at a more comfortable angle without committing to a permanent rotation. However, this is distinct from permanent image rotation or flipping. Tophinhanhdep.com’s guides on digital photography and editing styles often clarify these nuances, ensuring creators can apply the correct transformation for their specific needs.
Troubleshooting Common Issues When Flipping Images
Even with seemingly simple operations like flipping, unexpected issues can arise. Knowing how to troubleshoot these problems can save time and frustration, allowing you to maintain a smooth workflow in your photo manipulation and visual design projects.
Locating the Flip Option in Different Photoshop Versions
Photoshop’s interface can sometimes vary slightly between versions. If you’re following a tutorial and can’t find the Flip option where it’s indicated, don’t panic.
- Use the Help Menu Search: The most reliable solution is to utilize Photoshop’s built-in help feature. Go to
Helpin the top menu bar and type “flip” into the search box. Photoshop will typically highlight or guide you to the correct menu item. This ensures you can always find the feature, regardless of your Photoshop version.
Preventing Unintended Flips: When Logos or Text Flip
A frequent point of confusion for new users is when they attempt to flip an image, and embedded elements like logos, watermarks, or text also flip, rendering them unreadable. This almost always indicates that you’ve applied the Flip Canvas command instead of flipping a specific layer.
- Solution: The key is to understand the difference between flipping the entire canvas and flipping an individual layer. If you only want a specific element to flip, ensure that element is on its own layer, and then follow the instructions for
Precision Flipping: Working with Individual Layersoutlined above. This allows you to manipulate elements independently, preserving the integrity of your overall visual design. Tophinhanhdep.com’s focus on structured digital art and graphic design workflows emphasizes this layered approach for maximum control.
Correcting the Flip Direction: Horizontal vs. Vertical
Sometimes, you might flip an image only to realize it’s been mirrored along the wrong axis (e.g., vertical instead of horizontal).
- Solution: Simply undo the previous action (
Ctrl+ZorCommand+Z) and re-apply the flip, making sure to select the correct option (Flip Canvas HorizontalorFlip Canvas Vertical, orFlip HorizontalorFlip Verticalfor layers). Paying close attention to the descriptive names of the options will prevent this common oversight.
Rotating Instead of Flipping
As highlighted earlier, rotating and flipping are distinct actions. If your image or element appears tilted rather than mirrored, you’ve likely applied a rotation.
- Solution: Undo the rotation and apply the appropriate flip command. A helpful mental trick is to remember: flipping is like looking in a mirror, while rotating is like turning a clock hand. For more detailed guidance, Tophinhanhdep.com offers specific tutorials on
How to Rotate a Layer in Photoshopwithin itsImage ToolsandPhoto Manipulationsections.
Addressing Unnatural-Looking People in Flipped Photos
Our brains are highly attuned to human faces and forms. When a photograph of a person is flipped, especially horizontally, it can sometimes appear “unnatural” or “weird” to the viewer. This is because we are accustomed to seeing ourselves and others in a certain orientation, and mirroring can subtly distort familiar features or expressions, even if the image is technically symmetrical.
- Solution: While you can’t always “fix” this inherent perceptual effect, consider the context and purpose of the flip. If the flip is for a creative, abstract effect, this might be desirable. If it’s for a realistic portrait, you might reconsider flipping or apply subtle adjustments post-flip to restore a sense of naturalness. Tophinhanhdep.com provides extensive resources on
Beautiful PhotographyandEditing Styles, including tutorials onhow to Photoshop pictures of people and make them look more natural, which delve into techniques like subtle facial adjustments, dodging and burning, and other retouching methods that can help mitigate this effect. Ultimately, ensuring people feel at ease during the original photography session is often more impactful for natural-looking images than post-processing flips.
Creative Applications and Advanced Techniques for Image Flipping
Beyond simple corrections, image flipping in Photoshop opens up a world of creative possibilities, transforming ordinary photos into captivating works of digital art. Tophinhanhdep.com is a hub for Visual Design, Digital Art, and Image Inspiration, constantly encouraging users to push the boundaries of their creativity with these techniques.
Crafting Mirror Effects for Abstract Art and Design
One of the most striking creative uses of flipping is to generate a mirror effect, creating symmetrical or abstract compositions that can be truly mesmerizing. This technique is popular in Graphic Design and for creating unique Wallpapers or Backgrounds.
Here’s how to create a mirror effect by flipping half of an image:
- Prepare Your Image: Open the image you want to work with. Unlock the background layer in the Layers panel (double-click it and click OK).
- Extend Canvas Space: You’ll need extra room to create the mirrored half. Go to
Image > Canvas Size. In the dialog box, you can choose to double the width or height, selecting an anchor point to extend in one direction (e.g., anchor to the left to extend canvas to the right, or anchor to the bottom to extend upwards). ClickOK. - Add a Guide: To ensure precise alignment, add a guide down the middle. Go to
View > New Guideand selectVerticalorHorizontal, then enter50%for its position. - Position Your Subject: Use the
Move Tool(V) to drag your original image to one side of the new guide, leaving space for its reflection. - Duplicate the Layer: Right-click on your layer in the Layers panel and choose
Duplicate Layer, or pressCtrl+J(Windows) /Command+J(Mac). - Flip the Duplicated Layer: With the new layer selected, activate
Free Transform(Ctrl+T/Command+T). Right-click inside the bounding box and chooseFlip Horizontal(if you extended horizontally) orFlip Vertical(if you extended vertically). - Align the Layers: Drag the flipped duplicate layer to perfectly align with the original layer along the guide.
- Refine and Export: Clear your guide (
View > Clear Guides). You may need to trim any excess canvas space (Image > TrimorImage > Canvas Size).
This technique can produce incredible Abstract images. For example, flipping a picture of a building horizontally can make it appear to extend into the earth and sky, creating an eerie, endless structure. Flipping an animal vertically could create a fantastical two-headed creature. The possibilities are truly limitless, fostering Creative Ideas that align with Tophinhanhdep.com’s vision.
Generating Intricate Patterns with Multiple Flips
Taking the mirror effect a step further, you can combine multiple flips and rotations to create complex, kaleidoscopic patterns, transforming a single image into a stunning piece of Digital Art or Thematic Collections.
Here’s a general approach for creating a multi-flipped pattern:
- Start with an Image: Open your desired photo.
- Initial Setup:
- Duplicate your background layer (
Ctrl+J/Command+J). - Double the width of your canvas (
Image > Canvas Size), anchoring to the left to expand right.
- Duplicate your background layer (
- First Flip (Horizontal):
- Select the duplicated layer.
- Use the
Move Toolto drag it to the right side of the canvas. - Flip this right-side layer horizontally (
Edit > Transform > Flip Horizontal). - Merge the two layers (
Ctrl+E/Command+EorLayer > Merge Down). You now have a horizontally mirrored image.
- Second Flip (Vertical):
- Duplicate your merged layer.
- Double the height of your canvas (
Image > Canvas Size), anchoring to the top to expand down. - Use the
Move Toolto drag the new duplicated layer below the original. - Flip this bottom layer vertically (
Edit > Transform > Flip Vertical). - Merge these two layers. You now have a four-quadrant mirrored pattern.
- Add Rotation (Optional, for Kaleidoscope):
- Duplicate your four-quadrant layer.
- Rotate this new layer 90 degrees clockwise (
Edit > Image Rotation > 90° Clockwise). - Carefully position it next to your existing pattern, aligning edges.
- You can repeat duplication and rotation, slightly offsetting or blending them to create even more elaborate
Mood BoardsorTrending Stylesthat Tophinhanhdep.com promotes.
- Final Touches: Crop the canvas as needed and flatten the image (
Layer > Flatten Image) before saving or exporting your unique creation.
This advanced technique demonstrates the power of Photo Manipulation and provides endless Photo Ideas for creating dynamic and visually rich compositions from Nature, Abstract, or Aesthetic images.
Optimizing Your Workflow: Keyboard Shortcuts for Flipping
Efficiency is paramount in digital editing, especially when working on numerous images or complex designs. Setting custom keyboard shortcuts for frequently used actions like flipping can significantly streamline your workflow, aligning with Tophinhanhdep.com’s Image Tools philosophy of optimization.
Photoshop allows you to customize almost any command. Here’s how to set a shortcut for flipping layers:
- Access Keyboard Shortcuts: Go to
Edit > Keyboard Shortcuts. - Select Application Menus: In the
Shortcuts For:dropdown, ensureApplication Menusis selected. - Locate Transform Options: Expand
Edit, then expandTransform. - Assign Shortcuts: Scroll down to find
Flip HorizontalandFlip Vertical.- Click in the
Shortcutcolumn next to each option. - Press your desired key combination (e.g.,
Alt+Shift+Hfor Horizontal,Alt+Shift+Vfor Vertical). Photoshop will alert you if the shortcut is already in use. You might need to experiment to find a free and intuitive combination. Note that modifiers likeCtrl/Command,Alt/Option, orShiftare often required.
- Click in the
- Accept and Save: Click
Acceptand thenOKto save your new shortcuts.
By customizing these shortcuts, you unleash the power of quick and efficient editing, allowing you to fluidly integrate flipping into your creative process without breaking your concentration. This kind of workflow optimization is precisely what Tophinhanhdep.com advocates across all aspects of Digital Photography and Visual Design.
Beyond Basic Flipping: Enhancing Your Visual Creations with Tophinhanhdep.com
Mastering how to flip an image in Photoshop is a foundational skill that empowers you to correct, enhance, and creatively transform your visual content. This guide has taken you through the essential steps, from whole-canvas flips to intricate layer manipulations and creative mirror effects. However, the world of digital image creation extends far beyond this single technique, and Tophinhanhdep.com is your ultimate resource for exploring its vast landscape.
Our platform is meticulously curated to cater to every facet of visual creation. If you’re passionate about Images, you’ll find breathtaking Wallpapers, diverse Backgrounds, Aesthetic compositions, captivating Nature scenes, intriguing Abstract art, and Beautiful Photography to inspire your next project. For Photography enthusiasts, we offer insights into High Resolution imaging, an extensive library of Stock Photos, deep dives into Digital Photography techniques, and tutorials on various Editing Styles to refine your craft.
To streamline your workflow and expand your capabilities, our Image Tools section provides indispensable utilities such as Converters, Compressors, Optimizers, cutting-edge AI Upscalers for enhancing image quality, and even Image-to-Text functionalities. For those immersed in Visual Design, we cover everything from foundational Graphic Design principles and Digital Art creation to advanced Photo Manipulation techniques and sparks for Creative Ideas. Finally, our Image Inspiration & Collections section is a treasure trove of Photo Ideas, ready-made Mood Boards, Thematic Collections, and guides on Trending Styles to keep your work fresh and relevant.
Whether you’re looking to explore new horizons in digital photography, create stunning visual designs, or simply optimize your current images, Tophinhanhdep.com provides the tools, knowledge, and inspiration you need. We are committed to helping you elevate your photography and design skills to the next level. We invite you to explore our comprehensive resources, experiment with the techniques learned here, and discover how Tophinhanhdep.com can be your trusted partner in crafting truly exceptional visual content. Good luck, and happy creating from the Tophinhanhdep.com team!