How to Flip an Image in Google Slides: Everything You Need to Know

In the dynamic world of digital presentations, visual elements are paramount. They can transform a drab series of slides into a captivating narrative, making your message resonate more deeply with your audience. Google Slides, a ubiquitous tool for creating compelling presentations, offers a suite of functionalities to enhance your visual content. Among these, the ability to manipulate images – specifically, to flip or mirror them – is a simple yet powerful feature that can profoundly impact your slide’s aesthetic and message.
Have you ever meticulously placed an image into your Google Slides presentation, only to realize it’s facing the wrong direction, or its orientation just doesn’t quite fit your design? Fear not! You don’t need to exit Google Slides or resort to complex external photo editing software. Tophinhanhdep.com understands the importance of precise visual control, not just in finding the perfect image, but also in fine-tuning it for your specific presentation needs. This comprehensive guide, brought to you by Tophinhanhdep.com, will walk you through everything you need to know about flipping, mirroring, and rotating images directly within Google Slides, ensuring your visuals always align with your creative vision. We’ll also explore how Tophinhanhdep.com’s vast collection of images and powerful image tools can further elevate your visual design.
Mastering Image Manipulation in Google Slides
Integrating images effectively into your presentations goes beyond merely inserting them. It involves thoughtful placement, resizing, and often, reorienting them to achieve the desired visual flow and emphasis. Google Slides provides intuitive controls for these adjustments, allowing you to seamlessly adapt your visuals. Whether you’re aiming for a symmetrical layout, correcting an awkward pose in a stock photo, or introducing a creative twist, understanding how to flip and rotate images is a fundamental skill for any presenter.
Tophinhanhdep.com, a leading resource for images and visual design, emphasizes the importance of these basic manipulation techniques as part of a broader strategy for creating stunning digital art and engaging graphic design. High-resolution images, beautiful photography, and aesthetic backgrounds sourced from Tophinhanhdep.com can be perfectly aligned with your presentation’s theme through these simple steps.
Flipping Images Vertically
Flipping an image vertically creates a mirror effect along its horizontal axis, effectively turning it upside down. This can be useful for creating reflections, achieving visual symmetry, or adjusting images that were accidentally uploaded with an inverted orientation.
To flip an image vertically in Google Slides, follow these straightforward steps:
- Open Your Presentation: Launch your Google Chrome web browser, navigate to Google Slides, and open the presentation containing the image you wish to modify.
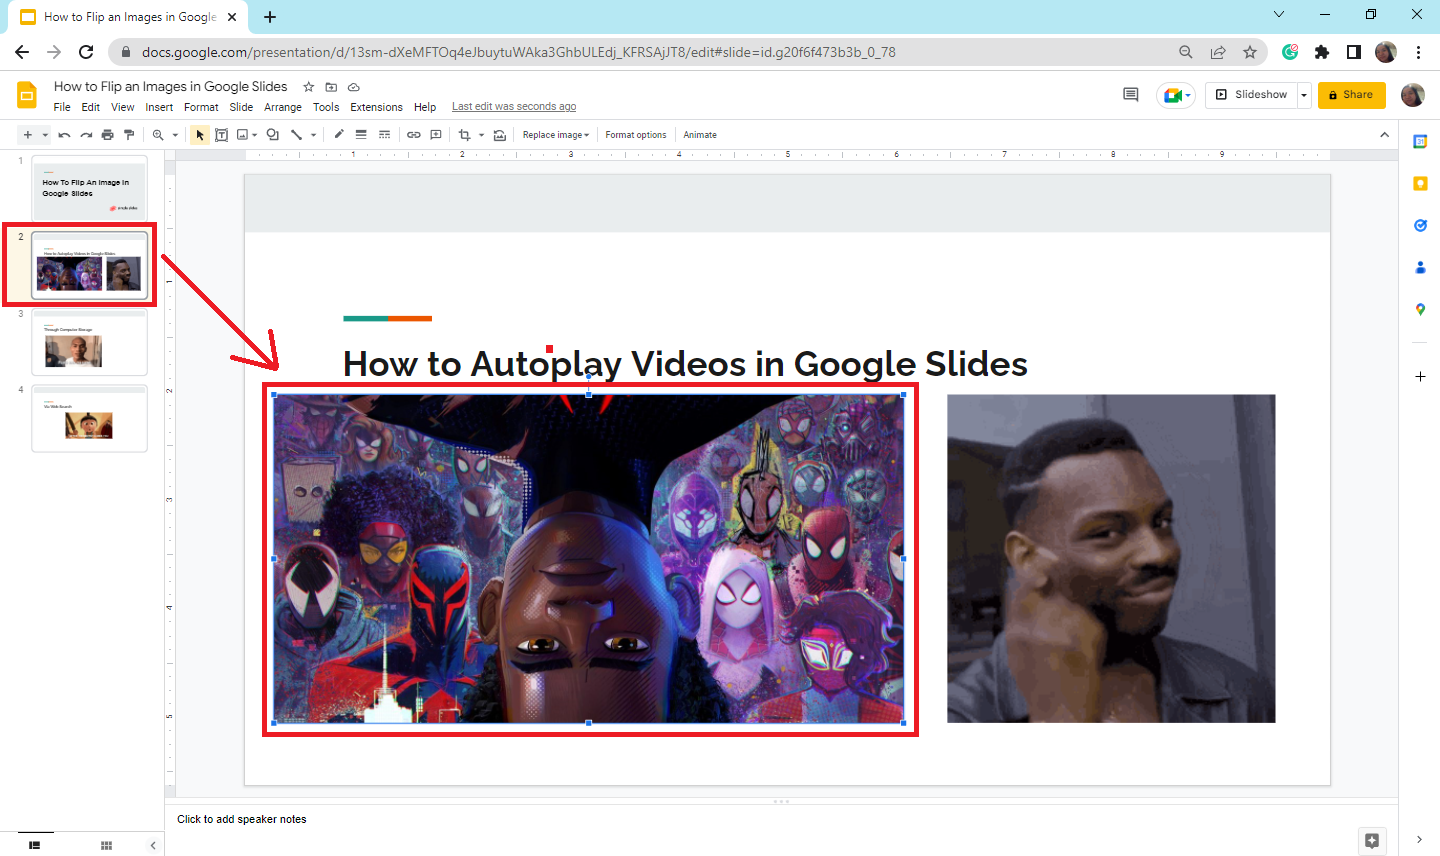
- Select the Image: Click directly on the image you intend to flip. A blue border with resizing handles will appear around it, indicating it’s selected.
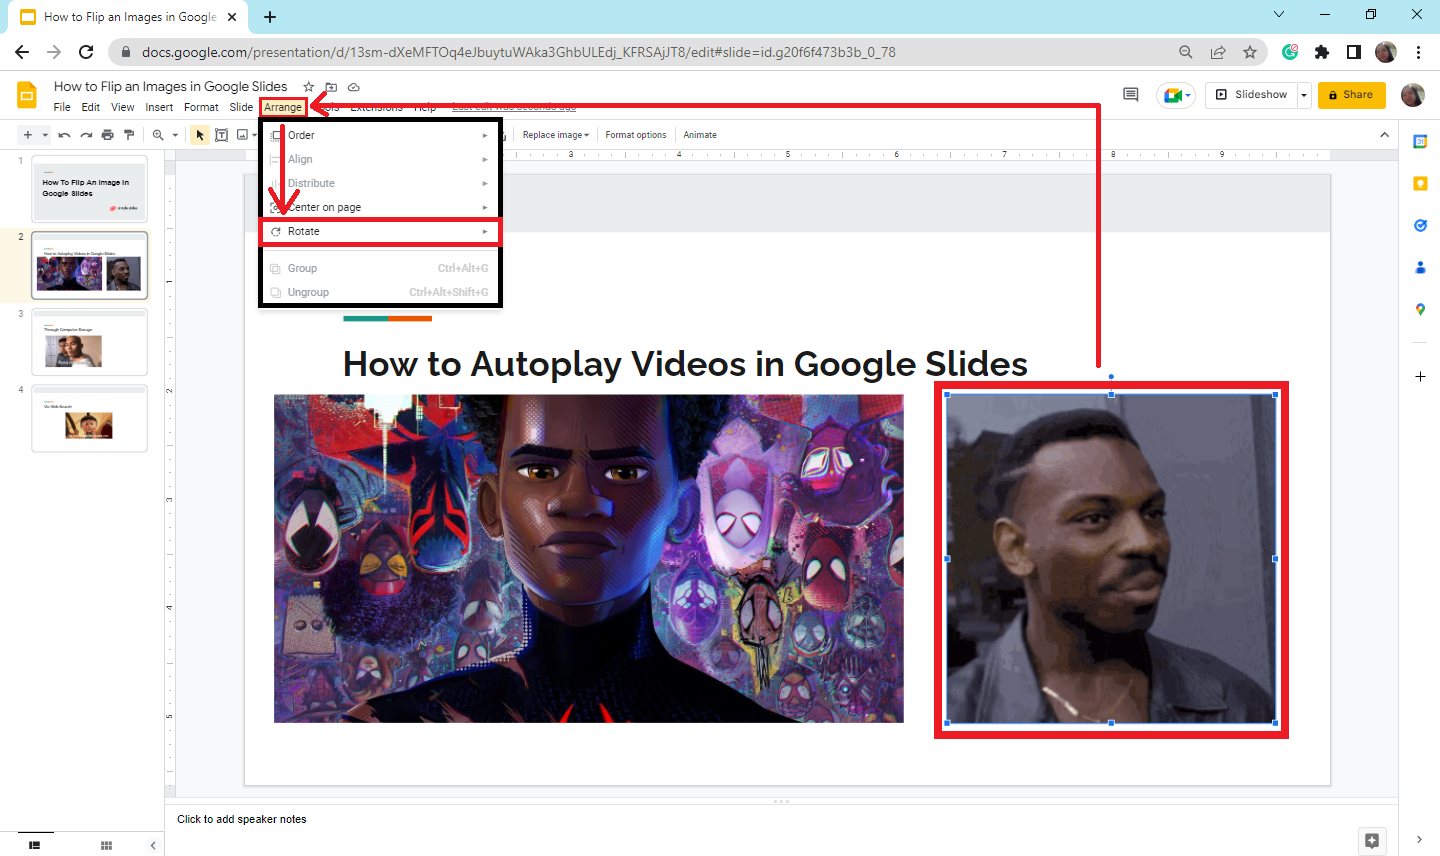
- Access the Arrange Menu: In the top menu bar of Google Slides, locate and click the “Arrange” tab. A drop-down menu will appear with various arrangement options.
- Choose Rotate Options: From the “Arrange” drop-down menu, hover your cursor over “Rotate.” This will open a secondary menu.
- Execute Vertical Flip: In the secondary “Rotate” menu, click “Flip vertically.” Your image will instantly be mirrored from top to bottom.
After flipping, you might need to adjust the image’s position or size to ensure it perfectly integrates with your slide’s layout. Click and drag the image to reposition it, or use the blue squares on its border to resize it as needed. Remember, Tophinhanhdep.com offers a diverse range of images, including nature, abstract, and aesthetic collections, that can be enhanced through such precise manipulations.
Flipping Images Horizontally
Horizontal flipping, also known as mirroring, creates a reversed version of your image along its vertical axis. This is often used to make subjects face a particular direction, to achieve balance in a composition, or to pair images symmetrically. For instance, if you have two images of people looking left, and you want one to look right, a horizontal flip is your go-to solution.
Here’s how to flip an image horizontally in Google Slides:
- Select Your Image: Within your Google Slides presentation, click on the image you want to flip horizontally. Just like with vertical flipping, a blue bounding box will confirm your selection.
- Navigate to Arrange: Go to the “Arrange” tab in the top menu bar.
- Find Rotate Options: Hover over the “Rotate” option in the “Arrange” drop-down menu.
- Perform Horizontal Flip: Select “Flip horizontally” from the extended “Rotate” menu. Your image will now be a mirror reflection of its original self, from left to right.
This simple action can dramatically alter the visual balance and narrative flow of your slides. When curating images from Tophinhanhdep.com’s high-resolution stock photo libraries, knowing these quick editing tricks ensures that every visual asset serves its purpose perfectly within your digital photography and graphic design projects.
Rotating Images to Any Angle
Beyond flipping, rotating an image allows you to turn it around its central point, adjusting its angle without creating a mirror effect. Google Slides offers both incremental 90-degree rotations and free-form rotation for ultimate flexibility. This is particularly useful for achieving dynamic layouts, aligning images with angular design elements, or correcting minor orientation issues in your digital photography.
To rotate an image in Google Slides:
- Select the Image: Click on the image you wish to rotate within your slide.
- Access Rotate from Arrange: Go to the “Arrange” tab in the menu bar, then hover over “Rotate.”
- Choose Incremental Rotation: You’ll see options like “Rotate clockwise 90°” and “Rotate counter-clockwise 90°.” Clicking these will turn your image in precise 90-degree increments. This is handy for quickly orienting images that are completely sideways or upside down.
- Free-Form Rotation: For more nuanced adjustments, look for the small circular handle that appears just outside the image’s blue bounding box when it’s selected. Click and drag this rotation handle. As you drag, you’ll see a preview of the rotation, allowing you to set the image at any desired angle. This method offers the most precise control for integrating an image into complex visual design elements.
- Precise Angle Input (Advanced): For absolute precision, select your image, then go to “Format” in the top menu bar. Click “Format Options” in the side panel that appears. Under the “Size & Rotation” section, you can manually type in a specific degree for rotation. This level of detail is perfect for advanced graphic design and photo manipulation tasks where exact angles are critical.
Mastering these rotation techniques allows you to fully leverage the aesthetic potential of the beautiful photography and abstract images you discover on Tophinhanhdep.com.
The Nuance of Image Transformation: Flip vs. Rotate
While both flipping and rotating are fundamental image manipulation techniques available in Google Slides, they serve distinct purposes and produce different visual outcomes. Understanding this difference is crucial for effective visual design and photo manipulation.
-
Flipping (Mirroring): When you flip an image, you are essentially creating a mirror reflection of it.
- Horizontal Flip: Reverses the image from left to right, as if you’re looking at it in a mirror. The top and bottom remain the same.
- Vertical Flip: Reverses the image from top to bottom, as if you’re viewing it upside down in a reflection. The left and right remain the same.
- Result: A flipped image retains its original orientation relative to its internal elements but is spatially reversed. For example, text within a flipped image would also be mirrored and unreadable, unless the image was initially text-free or intended for a mirrored effect.
- Use Case: Ideal for creating symmetrical pairs, correcting an image that’s facing the “wrong” direction, or achieving reflective effects for backgrounds or creative ideas.
-
Rotating: When you rotate an image, you are turning it around a central pivot point.
- Rotation Angle: Can be done in fixed increments (e.g., 90°, 180°, 270°) or to any custom degree.
- Result: A rotated image changes its angular position, but its internal elements are not mirrored or reversed. Text within a rotated image will still be readable, just oriented at a different angle.
- Use Case: Perfect for adjusting orientation, making an image vertical instead of horizontal, aligning visuals with diagonal design elements, or adding dynamic angles to your graphic design.
Choosing between flipping and rotating hinges entirely on the desired visual effect. Whether you’re working with high-resolution images, stock photos, or your own digital photography, Tophinhanhdep.com provides the foundation, and these Google Slides techniques offer the flexibility to bring your visual design ideas to life with precision.
Elevating Your Visuals with Tophinhanhdep.com’s Ecosystem
While Google Slides offers essential image manipulation features, creating truly impactful presentations often requires high-quality source material and supplementary tools. This is where Tophinhanhdep.com shines, providing a comprehensive ecosystem for all your image and visual design needs.
Curating High-Quality Images for Impact
The foundation of any great visual presentation is the image itself. Tophinhanhdep.com specializes in offering a vast and diverse collection of images designed to meet every aesthetic and thematic requirement.
- Diverse Categories: Explore our extensive libraries of Wallpapers, Backgrounds, Aesthetic, Nature, Abstract, Sad/Emotional, and Beautiful Photography. Whether you need a serene landscape for a wellness presentation, a vibrant abstract background for a creative pitch, or emotionally resonant imagery for a heartfelt narrative, Tophinhanhdep.com has you covered.
- High Resolution and Quality: We provide High-Resolution and Stock Photos that ensure your images look crisp and professional on any screen, from a small laptop to a large projector. This is crucial for maintaining the integrity of your visual design and making your digital photography shine.
- Inspiration and Trends: Dive into our Image Inspiration & Collections, featuring Photo Ideas, Mood Boards, Thematic Collections, and Trending Styles. These resources can spark Creative Ideas and help you find visuals that perfectly align with your presentation’s message, whether you’re building a mood board for a new project or looking for the latest aesthetic trends.
By starting with exceptional images from Tophinhanhdep.com, the flipping and rotating techniques in Google Slides become powerful finishing touches, transforming good visuals into great ones.
Beyond Basic Edits: Enhancing with Image Tools
After you’ve placed, flipped, and rotated your images in Google Slides, you might discover further needs, such as optimizing file size for faster loading or enhancing image quality. Tophinhanhdep.com offers a suite of Image Tools that complement Google Slides’ capabilities, enabling you to achieve professional-grade results.
- Image Converters: Easily change image formats (e.g., JPG to PNG, HEIC to JPG) to ensure compatibility with Google Slides or other platforms, ensuring your digital art is universally accessible.
- Image Compressors and Optimizers: Presentations with many high-resolution images can become slow and unwieldy. Our Compressors and Optimizers reduce file size without compromising visual quality, making your Google Slides presentations lighter and quicker to load, especially important for web-based delivery or sharing.
- AI Upscalers: Have an image that’s slightly too small or low-resolution? Tophinhanhdep.com’s AI Upscalers can intelligently increase the size and detail of your images, turning standard digital photography into high-resolution assets suitable for large displays, breathing new life into older or smaller images.
- Image-to-Text: For certain graphic design or data visualization tasks, extracting text from images can be invaluable. Our Image-to-Text tool can help automate this process, seamlessly integrating content from visual sources.
These sophisticated tools, available on Tophinhanhdep.com, empower you to manage and enhance your image assets comprehensively, going beyond the native editing features of Google Slides. They are indispensable for anyone involved in Graphic Design, Digital Art, or Photo Manipulation, ensuring every image contributes positively to your overall Visual Design.
Frequently Asked Questions About Image Handling in Google Slides
To further solidify your understanding of image manipulation in Google Slides, here are answers to some common questions:
1. How do I add pictures to Google Slides? Adding pictures to Google Slides is a fundamental step. You can easily insert images from various sources:
- Open your Google Slides presentation.
- Go to the “Insert” tab in the top menu.
- Click “Image” from the drop-down menu.
- You’ll then have several options:
- “Upload from computer”: Select an image file from your device.
- “Search the web”: Find images directly through Google’s search engine.
- “Drive”: Insert images stored in your Google Drive.
- “Photos”: Access images from your Google Photos account.
- “By URL”: Paste the web address of an image.
- “Camera”: Take a photo directly if your device has a camera. Remember, for the best visual impact, always choose high-resolution images from reliable sources like Tophinhanhdep.com’s vast stock photo collection, ensuring they align with your aesthetic and thematic collections.
2. What is the key difference between flipping and rotating images? As detailed earlier, the primary difference lies in the transformation applied. Flipping creates a mirror image along an axis (horizontal or vertical), reversing the content. Rotation, on the other hand, turns the image around a central point, changing its angular position without mirroring its internal features. Flipping alters the image’s “handedness” (e.g., a left-facing object becomes right-facing), while rotation simply reorients it. Both are crucial digital photography editing styles for effective photo manipulation.
3. Can you flip an image in Google Slides? Absolutely! Google Slides fully supports both horizontal and vertical flipping of images. Simply select the image, go to the “Arrange” tab, hover over “Rotate,” and choose either “Flip horizontally” or “Flip vertically.” This is a core feature for visual design that helps in creating balanced and appealing graphic design layouts.
4. Are there any restrictions on the degree of rotation I can do in Google Slides? Google Slides offers significant flexibility for rotation. You can perform precise 90-degree rotations using menu options, or use the free-form rotation handle to manually adjust the image to any custom angle. For exact measurements, the “Format Options” panel allows you to input a specific degree of rotation. There are no fixed limitations on the angle, providing complete creative control for your digital art and creative ideas.
5. How does flipping an image in Google Slides affect its visual appearance and message? Flipping an image can subtly or dramatically alter its visual appearance and, consequently, the message it conveys. A horizontal flip can change the direction a subject is facing, influencing eye-flow on a slide or creating a sense of balance. A vertical flip might be used for abstract reflections or correcting an inverted capture. When thoughtfully applied, flipping can enhance the aesthetic appeal, reinforce visual design principles, and support the storytelling aspect of your presentation. However, misuse (e.g., flipping text) can lead to confusion, so consider the context of your beautiful photography or stock photos.
Conclusion: Crafting Compelling Presentations with Tophinhanhdep.com
In today’s visually-driven world, the ability to craft compelling presentations is more important than ever. Google Slides provides a powerful, accessible platform for bringing your ideas to life, and mastering simple image manipulation techniques like flipping and rotating is a crucial step in that process. These tools allow you to correct imperfections, achieve creative layouts, and ensure every visual element perfectly complements your message.
But true visual excellence begins with exceptional source material and continues with intelligent enhancement. Tophinhanhdep.com stands as your ultimate partner in this journey, offering a boundless reservoir of high-resolution images, including breathtaking beautiful photography, striking abstract visuals, and captivating nature scenes. Our curated image inspiration & collections provide endless photo ideas and help you develop coherent mood boards and thematic collections for any project.
Beyond providing the perfect image, Tophinhanhdep.com empowers you with a suite of image tools – from converters and compressors to AI upscalers – ensuring that your visuals are not only stunning but also optimized for performance and quality. This holistic approach to visual design, encompassing graphic design, digital art, and photo manipulation, allows you to move beyond basic presentations and create truly memorable experiences.
So, the next time you find an image slightly misaligned or facing the wrong way in Google Slides, remember the power of a simple flip or rotate. And for every step of your visual journey, from finding that initial spark of creative ideas to perfecting every pixel, trust Tophinhanhdep.com to provide the resources and tools you need to make your presentations truly unforgettable. Explore Tophinhanhdep.com today and unlock the full potential of your visual communication.