How to Flip an Image in Photoshop: A Comprehensive Guide for Tophinhanhdep.com

Image manipulation is an indispensable skill in the digital age, whether you’re a professional photographer, a graphic designer, or simply someone looking to enhance their personal photo collection. Among the myriad of editing techniques available, knowing how to flip an image in Photoshop stands out as a fundamental yet incredibly versatile skill. It’s not just about correcting orientation; flipping can dramatically alter composition, create stunning visual effects, and even imbue an image with a completely different mood.
At Tophinhanhdep.com, we understand the power of compelling visuals. From breathtaking nature wallpapers and aesthetic backgrounds to high-resolution stock photos and inspiring digital art, the ability to control and manipulate images is at the core of visual excellence. This comprehensive guide will walk you through the process of flipping images in Photoshop, covering everything from basic techniques to creative applications and essential troubleshooting tips, ensuring your creations always look their best.

Understanding the Fundamentals: Why Flip Images?
Flipping an image is essentially mirroring it, either along a horizontal axis (left-to-right) or a vertical axis (top-to-bottom). While seemingly simple, this action serves a multitude of purposes in digital photography and visual design.
One of the most common reasons to flip an image is to correct or improve its composition. Sometimes, a photograph might feel imbalanced, or the subject might be leading the viewer’s eye out of the frame. Flipping the image horizontally can reverse this flow, guiding the viewer’s gaze back into the scene, thereby enhancing the overall visual impact. This is particularly useful for landscape photography or candid shots where the original framing might not be ideal.
Another significant application is in the realm of aesthetic and abstract art. Flipping layers can be used to create perfect symmetries, generate mesmerizing mirror effects, or construct intricate patterns that transform an ordinary photograph into a piece of digital art. For graphic designers working with logos or text, flipping individual elements ensures correct orientation within a larger design, maintaining readability and brand consistency.
Furthermore, flipping is crucial for photo manipulation, where elements from different sources need to be seamlessly integrated. A flipped object can fit into a scene more naturally, matching the lighting or directionality of other elements. It’s a foundational skill that, when mastered, opens up a world of creative possibilities, allowing you to achieve a polished and professional look for all your images, from high-resolution stock photos to personal artistic endeavors, all perfectly optimized for sharing on Tophinhanhdep.com.
Mastering the Art of Flipping in Photoshop
Photoshop offers straightforward methods to flip images, whether you need to mirror the entire canvas or manipulate individual layers within your project. Understanding these distinct approaches is key to effective image editing.

Flipping the Entire Canvas (Whole Image)
When your goal is to mirror the entire image, including all its layers and elements, Photoshop provides a quick and efficient way to do so. This method is ideal when the overall composition needs a complete reversal, perhaps to balance visual weight or to prepare an image for a specific layout.
To flip the entire canvas:
- Open your image in Photoshop: Begin by opening the image you wish to flip. This image will represent your entire canvas.
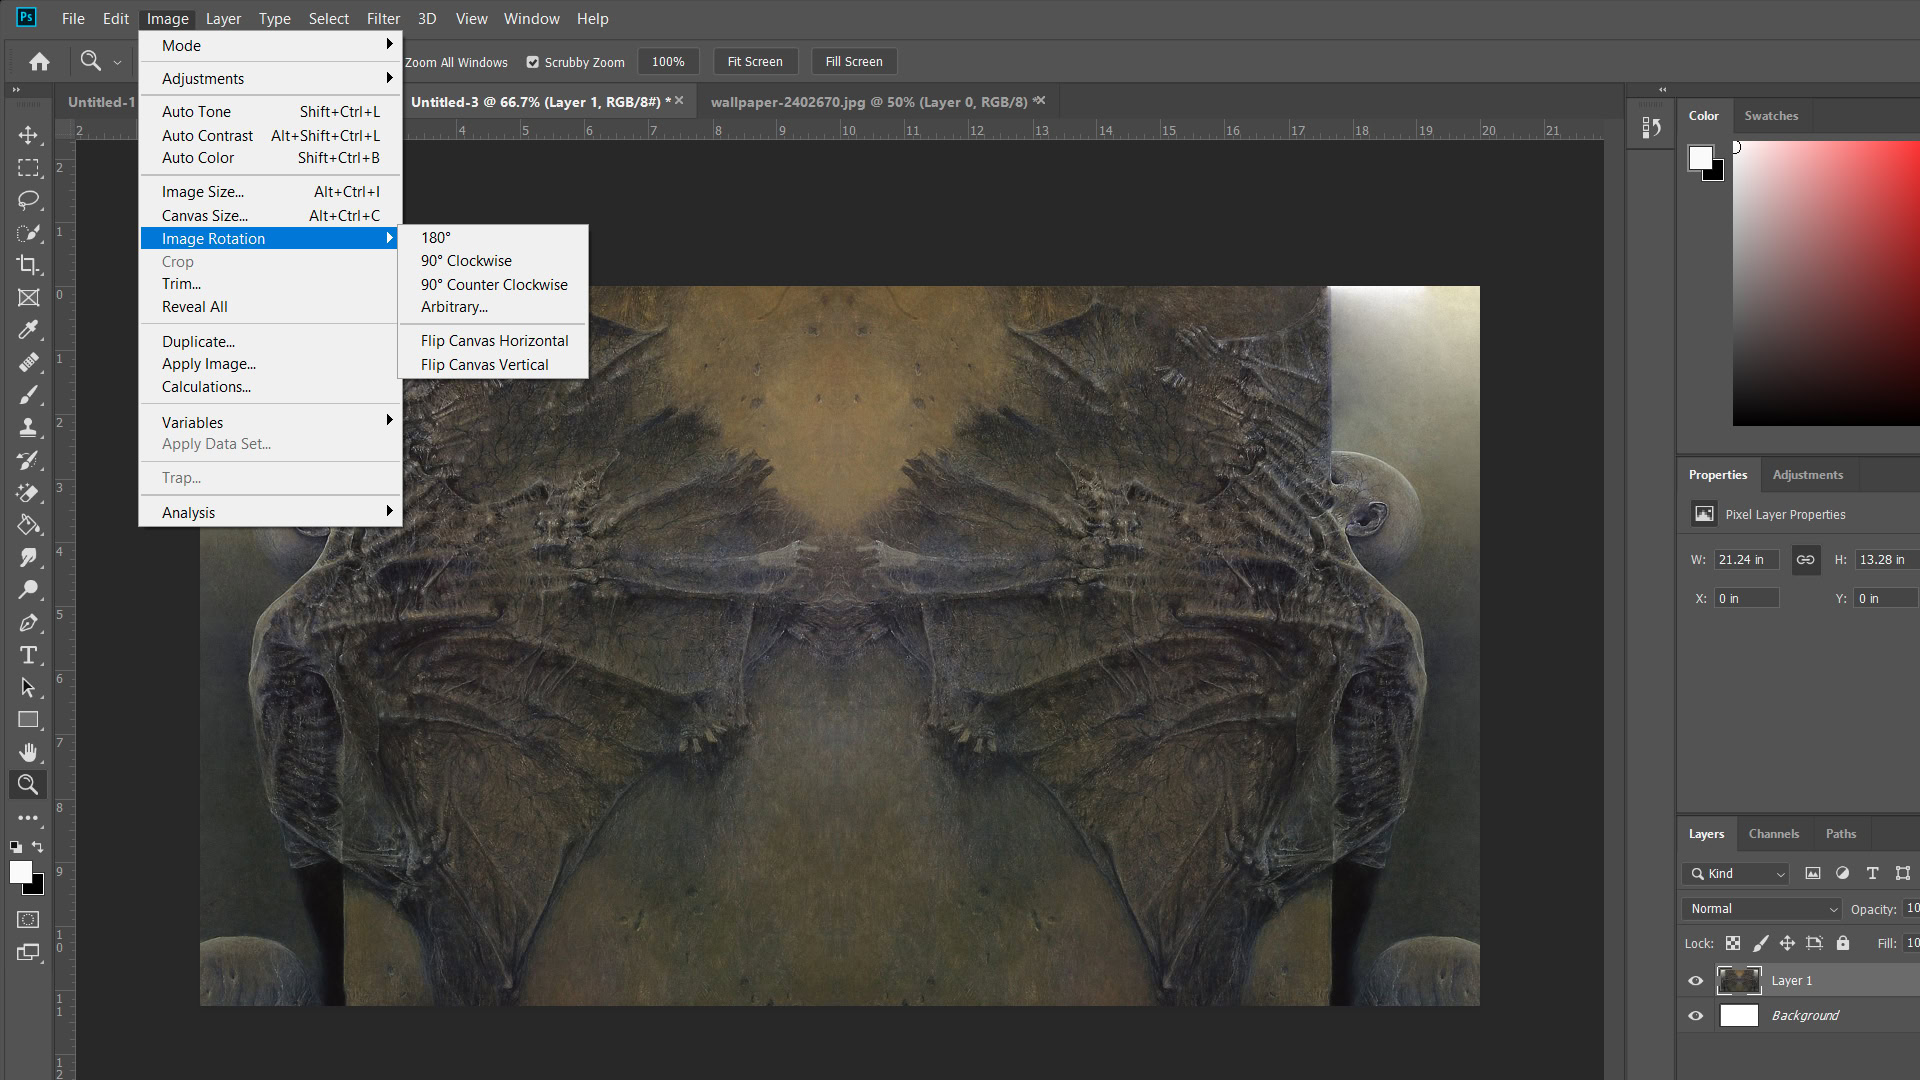
- Navigate to the Image menu: In the top menu bar of Photoshop, click on “Image.”
- Select “Image Rotation”: From the dropdown menu, hover over “Image Rotation.”
- Choose your flip direction: You will then see two options:
- “Flip Canvas Horizontal”: This will mirror your entire image from left to right.
- “Flip Canvas Vertical”: This will mirror your entire image from top to bottom.
With just one click, your entire image will be flipped. It’s important to note that this action affects every pixel on your canvas, making it a powerful tool for global compositional changes. For Tophinhanhdep.com users looking to quickly adjust a wallpaper or a background image, this method is incredibly useful.
Flipping Individual Layers or Elements
Often, you won’t want to flip the entire image. Instead, you might need to mirror a specific object, a piece of text, or a watermark without affecting other parts of your composition. This is where layer-specific flipping becomes essential. Photoshop offers several ways to achieve this, giving you flexibility in your workflow.
Here are three common methods to flip a single layer:
Method 1: Using the Transform Menu
- Select the desired layer: In the “Layers” panel (usually on the right side of your Photoshop workspace), click on the specific layer you want to flip. Make sure it’s highlighted.
- Go to the Edit menu: In the top menu bar, click “Edit.”
- Select “Transform”: Hover over “Transform” in the dropdown menu.
- Choose your flip direction: You’ll find “Flip Horizontal” and “Flip Vertical” options. Select the one that suits your needs.
Method 2: Using Free Transform with Right-Click
- Select the desired layer: As before, ensure the correct layer is selected in the “Layers” panel.
- Enter Free Transform Mode: Go to “Edit” > “Free Transform” from the top menu, or use the keyboard shortcut
Ctrl + T(Windows) orCommand + T(Mac). A bounding box will appear around your selected layer. - Right-click inside the bounding box: While in Free Transform mode, right-click anywhere within the bounding box surrounding your layer. A context menu will appear.
- Select flip options: From this menu, choose “Flip Horizontal” or “Flip Vertical.”
- Confirm the transformation: Press
Enterto apply the flip and exit Free Transform mode.
Method 3: Keyboard Shortcut (Quickest Method)
- Select the desired layer: Ensure the layer you want to flip is active in the “Layers” panel.
- Press
Ctrl + T(Windows) orCommand + T(Mac): This immediately activates Free Transform mode. - Right-click on the image (within the transform box): A contextual menu will pop up.
- Choose “Flip Horizontally” or “Flip Vertically”: Select your preferred orientation.
- Press
Enter: This finalizes the transformation.
These layer-specific methods are incredibly valuable for visual design, allowing you to fine-tune elements for graphic design projects, digital art compositions, or precise photo manipulation. Whether you’re repositioning an element in an aesthetic image or perfecting a thematic collection, these techniques provide granular control.
Distinguishing Between Flipping and Rotating
A common point of confusion for new Photoshop users is the difference between flipping and rotating an image. While both alter an image’s orientation, they achieve fundamentally different visual outcomes.
- Flipping (Mirroring): Think of flipping as looking at an image in a mirror. If you flip horizontally, the left side becomes the right and vice-versa. If you flip vertically, the top becomes the bottom. The content of the image itself is reflected. This is an excellent way to change the flow or direction of a composition without altering its core elements, often used to create symmetrical effects or adjust the focal point.
- Rotating: Rotating, on the other hand, is like tilting your head. The image spins around a central point, maintaining its original left-right and top-bottom relationships, but changing its angular position. Common rotations are 90 degrees clockwise (CW), 90 degrees counter-clockwise (CCW), or 180 degrees. Rotating is typically used to correct an image that was taken at an angle or to change its overall orientation (e.g., from portrait to landscape if the image content allows).
It’s crucial to use the correct command for your intended effect. If you want to create a reflection, you need to flip. If you want to turn a portrait photo into a landscape one, you need to rotate. Both options are available under the “Image Rotation” menu for the entire canvas or within the “Transform” options for layers, but their results are strikingly different.
Troubleshooting Common Image Flipping Issues
Even with clear instructions, issues can arise when flipping images in Photoshop. Tophinhanhdep.com aims to equip you with not just the “how-to,” but also the solutions to common stumbling blocks, ensuring a smooth editing experience.
When Your Flip Option is Missing
Occasionally, you might find that the “Flip Canvas Horizontal” or “Flip Canvas Vertical” options appear grayed out or are simply not where you expect them. This can be frustrating, but there are a few reasons and solutions:
- Wrong menu selection: Ensure you’re looking under “Image” > “Image Rotation” for canvas-wide flips, or “Edit” > “Transform” (or within Free Transform’s right-click menu) for layer-specific flips.
- No active layer (for layer flips): If you’re trying to flip a layer but haven’t selected one, the option will be unavailable. Always click on the desired layer in the Layers panel first.
- Older Photoshop versions: The exact wording might differ slightly in older versions (e.g., “Rotate” instead of “Image Rotation”). If you’re struggling to find it, the “Help” menu is your best friend. In the top menu bar, click “Help” and use the search bar to type “flip.” Photoshop’s integrated help system will guide you directly to the feature.
Preventing Unwanted Flips: Logos and Text
One of the most common mistakes is flipping the entire canvas when you only intended to flip the background or a specific visual element. This often results in logos, watermarks, or text becoming unreadable or appearing backward.
- **The solution is simple: **Always work with layers. If you have text, a logo, or any distinct element that should not be flipped with the rest of the image, ensure it resides on its own separate layer. Then, when you apply a flip action, either select only the layers you want to flip, or use the “Flip Canvas” option sparingly and thoughtfully. For branding elements on Tophinhanhdep.com’s visual assets, precise layer control is paramount to maintain professional quality.
Incorrect Flip Direction and Unnatural Results
Sometimes, you might flip an image and realize it looks “wrong,” or people in the photograph appear unnatural. This usually boils down to two factors:
- Confusing horizontal and vertical: Carefully consider which axis you want to flip along. A horizontal flip (left-to-right) is usually what people mean when they say “mirror image.” A vertical flip (top-to-bottom) is less common but can create interesting reflection effects, especially with water or sky elements. Double-check your selection before confirming.
- The “unnatural people” effect: We are accustomed to seeing faces and bodies in a certain orientation. Flipping a portrait, especially horizontally, can sometimes make a person look subtly “off” or even a bit eerie. This is because asymmetries in our faces become more apparent when mirrored. If your flipped image of a person looks unnatural, consider if the original orientation might have been more aesthetically pleasing, or if the slight imperfections that make a face unique are simply more noticeable when reversed. For beautiful photography on Tophinhanhdep.com, aim for natural and pleasing aesthetics. If flipping causes distortion in human subjects, it might be better to re-evaluate the compositional need for the flip.
By keeping these troubleshooting tips in mind, you can navigate the complexities of image flipping with confidence, ensuring your final output is always aligned with your creative vision.
Creative Applications of Image Flipping for Visual Design
Beyond simple corrections, flipping images in Photoshop unlocks a world of creative possibilities, pushing the boundaries of visual design and digital art. Tophinhanhdep.com encourages experimentation, and here, we explore how mirroring can transform ordinary photos into extraordinary visuals.
Crafting Mirror Effects and Symmetrical Designs
The mirror effect is perhaps the most captivating creative application of image flipping. By duplicating and flipping a portion of an image, you can create stunning symmetrical compositions that are both aesthetically pleasing and often thought-provoking. This technique is especially effective for:
- Water reflections: Imagine a serene landscape photograph where the sky perfectly reflects in a calm body of water. You can enhance or even create this effect by duplicating the landscape layer, flipping it vertically, and then carefully aligning it below the original. Adding a subtle blur and reducing opacity can make the “reflection” look incredibly realistic, transforming an ordinary scene into a beautiful photography piece.
- Abstract architecture: Take a picture of an interesting building. By selecting half of the structure, duplicating it, and flipping it horizontally, you can make the building appear to extend infinitely into the sky or seamlessly merge into a fantastical, symmetrical form. This creates an eerie, almost surreal abstract image that can be highly engaging.
- Artistic portraits: For a unique take on portraiture, you can split a face in half, duplicate, and flip it to create a perfectly symmetrical face. This can highlight facial features in a novel way, revealing hidden aesthetics or creating a dramatic, artistic statement.
To achieve a basic mirror effect:
- Unlock the background layer: If your image is a background layer, double-click it in the “Layers” panel to convert it into a regular layer.
- Add canvas space: Increase your canvas size (
Image>Canvas Size) to accommodate the mirrored half. For a horizontal mirror, double the width; for a vertical mirror, double the height. - Create a guide: Use
View>New Guideto place a vertical or horizontal guide exactly in the middle of your original image. - Duplicate and position: Duplicate your layer (
Ctrl/Cmd + J). Move the duplicated layer to one side of the guide. - Flip the duplicate: With the duplicated layer selected, go to
Edit>Transform>Flip Horizontal(orFlip Vertical). Drag the flipped layer to the other side of the guide, aligning it perfectly with the original. - Refine and blend: Use layer masks, gradients, and opacity adjustments to blend the two halves seamlessly, especially for realistic reflections.
These mirror effects contribute greatly to aesthetic and thematic collections available on Tophinhanhdep.com, inspiring designers and photographers alike.
Generating Unique Patterns and Abstract Art
Flipping can be iterated multiple times to create complex, kaleidoscopic patterns and abstract designs. This technique goes beyond simple mirroring, involving duplication, flipping, and rotating in a sequence to build intricate visual tapestries.
Consider these steps for a fun pattern:
- Start with an interesting photo: Choose an image with intriguing textures, colors, or subjects.
- Prepare your canvas: Duplicate your background layer. Double the width and height of your canvas significantly (e.g.,
Image>Canvas Sizeto 200% width and 200% height relative to your original dimensions). - First flip: Drag your original image (now on a layer) to the top-left quadrant of your enlarged canvas. Duplicate this layer. Flip the duplicate horizontally (
Edit>Transform>Flip Horizontal) and drag it to the top-right quadrant, aligning it perfectly. - Merge and second flip: Merge these two top layers (
Ctrl/Cmd + Eon selected layers). Duplicate this merged layer. Flip the new duplicate vertically (Edit>Transform>Flip Vertical) and drag it to the bottom half of your canvas, aligning it with the top merged layer. - Third flip (and rotation for kaleidoscope): You now have a 2x2 grid of your original image, with various flips. You can continue by merging these into a single layer, then duplicating and rotating by 90 degrees (
Edit>Transform>Rotate 90° CWorCCW). Overlay these rotated layers, adjusting blend modes and opacity, or even flipping them again. - Crop and finalize: Once you have a captivating pattern, crop the canvas to your desired dimensions (
Image>Crop) and export your new piece of digital art.
This method allows for endless experimentation, transforming simple images into complex, trending styles of abstract art. The resulting visuals can serve as stunning backgrounds, dynamic wallpapers, or unique elements in graphic design projects, all suitable for the diverse collections on Tophinhanhdep.com.
Flipping an image in Photoshop is more than just a corrective measure; it’s a creative catalyst. By understanding both the technical execution and the artistic potential, you can unlock new dimensions in your visual content. Whether you’re optimizing high-resolution images, crafting aesthetic backgrounds, or developing unique digital art, mastering this fundamental technique will empower you to create truly inspiring visuals that stand out on Tophinhanhdep.com.