How to Flip Image in Word: A Comprehensive Guide for Enhancing Your Visual Content

In today’s visually-driven world, images are more than just embellishments; they are integral to communication, storytelling, and aesthetic appeal. Whether you’re curating a stunning collection of wallpapers, designing a compelling presentation with abstract backgrounds, or presenting a series of beautiful photography shots, the ability to precisely control your visual elements is paramount. Microsoft Word, often perceived solely as a text-processing powerhouse, quietly offers a robust suite of image manipulation tools, including the essential functions of flipping and rotating images. These seemingly simple actions can dramatically alter the perception and impact of your visuals, transforming a standard layout into a dynamic, professional, and aesthetically pleasing document.
At Tophinhanhdep.com, we understand the profound influence of high-quality imagery, from high-resolution stock photos to intricate digital art. Our platform is dedicated to providing inspiration, tools, and resources for all your visual needs. Just as we offer advanced image tools for conversion, compression, optimization, and AI upscaling, we recognize the foundational importance of mastering basic manipulations within widely used applications like Word. This comprehensive guide delves deep into the nuances of flipping and rotating images within Microsoft Word across various versions, empowering you to refine your visual design, unlock creative ideas, and ensure your images always convey their intended message with maximum impact. You’ll learn how these straightforward techniques can elevate your photography, contribute to sophisticated photo manipulation, and seamlessly integrate into your thematic collections and mood boards, aligning perfectly with trending styles.
Mastering Basic Image Manipulation in Microsoft Word
Effective visual design hinges on the careful arrangement and presentation of images. Whether you’re a professional graphic designer crafting digital art or an enthusiast curating personal photo ideas, the ability to adjust an image’s orientation is a fundamental skill. Microsoft Word provides intuitive tools for both rotation and flipping, allowing you to fine-tune your visuals without ever leaving your document. These capabilities are particularly vital when working with diverse image types, from nature photography where a slight adjustment can enhance a landscape’s horizon, to abstract compositions that gain new dimensions with a mirror effect.
Imagine you’re compiling a mood board with various aesthetic images for a project. One image might be perfect in content but oriented incorrectly, disrupting the flow of your visual narrative. This is where Word’s image manipulation tools become indispensable. They allow you to correct errors, introduce artistic alterations, and ensure every image contributes harmoniously to your overall visual design. Beyond mere correction, these tools open up avenues for creative expression, enabling photo manipulation techniques that can transform ordinary pictures into extraordinary visual statements.

Understanding Rotation: From Freehand to Precision
Rotation is the act of turning an object around a central point. Word offers several methods to rotate images, catering to different needs—from quick adjustments to precise angle requirements. This flexibility is crucial for digital photography, where exact alignment can be the difference between a good shot and a great one. For instance, adjusting a beautiful photograph by a few degrees can straighten a skewed horizon or emphasize a dynamic angle, making it more impactful as a background or part of a thematic collection.
Rotating to Any Angle (Freehand Rotation):
This is the most straightforward method for quick adjustments.
- Select the Object: Click on the image (or text box, shape, WordArt) you wish to rotate. Once selected, a bounding box will appear around it, along with a distinct “rotation handle” (often a circular arrow) at the top.
- Drag the Rotation Handle: Click and hold the rotation handle, then drag your mouse in the direction you want the object to turn. You’ll see a live preview of the rotation.
- Constrain Rotation (Optional): To rotate in precise 15-degree increments, hold down the
Shiftkey while dragging the rotation handle. This is excellent for achieving symmetrical compositions or ensuring consistent angles across multiple images in your visual design. - Multiple Objects: Note that if you select and rotate multiple objects, each object will rotate around its own center, not as a single grouped unit. This is an important consideration for complex graphic design layouts.
Rotating to an Exact Angle by Degrees:
When your visual design demands absolute precision, Word allows you to specify an exact rotation angle. This is particularly useful for achieving specific editing styles or aligning images perfectly within a grid layout, common in high-resolution photography presentations.
- Select the Object: Click the image to select it.
- Access Format Tab: Depending on your Word version and the object type (picture, shape, WordArt), a contextual tab like “Shape Format,” “Drawing Tools Format,” or “Picture Tools Format” will appear on the ribbon. Click this tab. If you don’t see it, double-click the object.
- Open Rotation Options: In the “Arrange” group of the Format tab, click “Rotate.” From the drop-down menu, select “More Rotation Options.”
- Enter Exact Angle: A “Layout” dialog box or “Format Picture” pane will open. Locate the “Rotation” box (often under “Size” or “3-D Rotation”). Enter the desired degree value (e.g.,
45for a 45-degree clockwise rotation) or use the up/down arrows to fine-tune. - Confirm: Press
Enteror click “Close” to apply the rotation.
Rotating 90 Degrees:
For common landscape-to-portrait or portrait-to-landscape conversions, Word offers quick 90-degree rotations. This is often needed for stock photos that are correctly oriented but need a quick shift to fit a document’s layout or a specific creative idea.
- Select the Object: Click the image you want to rotate.
- Access Format Tab: Go to the contextual “Format” tab (e.g., “Picture Format”).
- Select 90-Degree Option: In the “Arrange” group, click “Rotate,” then choose “Rotate Right 90°” (clockwise) or “Rotate Left 90°” (counter-clockwise).
These rotation methods offer the fundamental control needed to shape your images for any purpose, from adjusting wallpapers to perfecting digital photography for print or web. They are essential techniques in photo manipulation, allowing you to correct, enhance, and creatively transform your visual content.
The Art of Flipping: Creating Mirror Effects and Inversions
Flipping an image creates a mirror image or turns it upside down, also known as inverting. This is distinct from rotating 180 degrees, especially for asymmetrical images or those with text. Flipping is a powerful tool in visual design, often used for creating symmetrical compositions, achieving unique artistic effects, or simply correcting an image that was inadvertently captured as a mirror image. For instance, in graphic design, flipping can generate visual balance, while in digital art, it can lead to intriguing abstract patterns.
Consider a scenario where you have a sad or emotional image, and flipping it horizontally might subtly change the direction of a gaze, altering its psychological impact within your visual narrative. Or perhaps you’re working with aesthetic backgrounds and want to create a perfect reflection effect without complex photo manipulation software. Word’s flipping tools make these tasks remarkably simple.
Flipping an Object (General Method):
This method applies to pictures, shapes, and most WordArt.
- Select the Object: Click the image or object you wish to flip.
- Access Format Tab: Go to the contextual “Format” tab (e.g., “Picture Format”).
- Select Flip Option: In the “Arrange” group, click “Rotate,” then choose from:
- Flip Vertical: To turn the object upside down (invert it).
- Flip Horizontal: To create a mirror image of the object.
Flipping by Dragging (A Cool Trick):
This intuitive method allows for quick visual flipping without navigating menus.
- Select the Object: Click the image.
- Drag a Side Handle:
- For Horizontal Flip: Click and hold either the middle-left or middle-right resizing handle (the small square on the side of the bounding box). Drag it across the image until it touches the opposite side, then continue dragging past it. The image will horizontally flip as you cross its original axis.
- For Vertical Flip: Click and hold either the middle-top or middle-bottom resizing handle. Drag it across the image until it touches the opposite side, then continue dragging past it. The image will vertically flip.
This dragging method provides instant visual feedback, making it ideal for quick adjustments or experimenting with different orientations for your aesthetic images or creative photo ideas.
Mirroring WordArt or Shape Text (Advanced Method):
Flipping text within a shape or WordArt requires a slightly different approach, as a simple flip often just reorients the bounding box without mirroring the actual text characters. This is a critical detail for graphic design projects where text elements are key.
- Select the WordArt or Shape: Click the object containing the text you want to mirror.
- Access Format Tab: Go to the contextual “Shape Format” or “Drawing Tools Format” tab.
- Open Text Effects: In the “WordArt Styles” or “Shape Styles” group, click “Text Effects” (it might look like a capital A with effects around it).
- Navigate to 3-D Rotation Options: Select “3-D Rotation” then “3-D Rotation Options.”
- Set X Rotation: In the “Format Shape” pane that opens, under the “3-D Rotation” section, set the “X Rotation” value to
180°. This will mirror the text within the WordArt or shape.- Note: The text will temporarily revert to its original appearance when you click to edit it, then reapply the mirrored effect once you click outside.
The ability to flip and mirror objects, especially text, is a cornerstone of effective visual design and photo manipulation. It allows you to create unique effects for digital art, correct orientations for stock photos, and ensure every element in your document, from a high-resolution background to a simple caption, is presented exactly as intended. These tools are indispensable for anyone looking to produce professional-grade visual content within Microsoft Word, empowering them to fully realize their creative ideas and enhance their thematic collections.
Step-by-Step Guides for Flipping and Rotating Across Word Versions
The ubiquity of Microsoft Word means that users operate across various versions and operating systems. While the core functionality of flipping and rotating images remains consistent, the exact pathway to these tools can differ slightly between newer Windows versions, macOS, and the web-based interface, as well as older desktop versions like Office 2010. Understanding these variations ensures that you can efficiently manipulate your images, regardless of your working environment, maintaining consistent visual design standards across all your documents. These specific instructions are crucial for anyone dealing with diverse image types, from high-resolution photography to aesthetic backgrounds, ensuring that every image fits perfectly into your intended layout and creative vision.
Flipping and Rotating Images in Newer Windows Versions of Word
For users on recent Windows operating systems running modern versions of Microsoft Word (e.g., Microsoft 365, Word 2019, 2021), the interface is streamlined and intuitive, built for efficiency in tasks like photo manipulation and graphic design.
To Flip an Image:
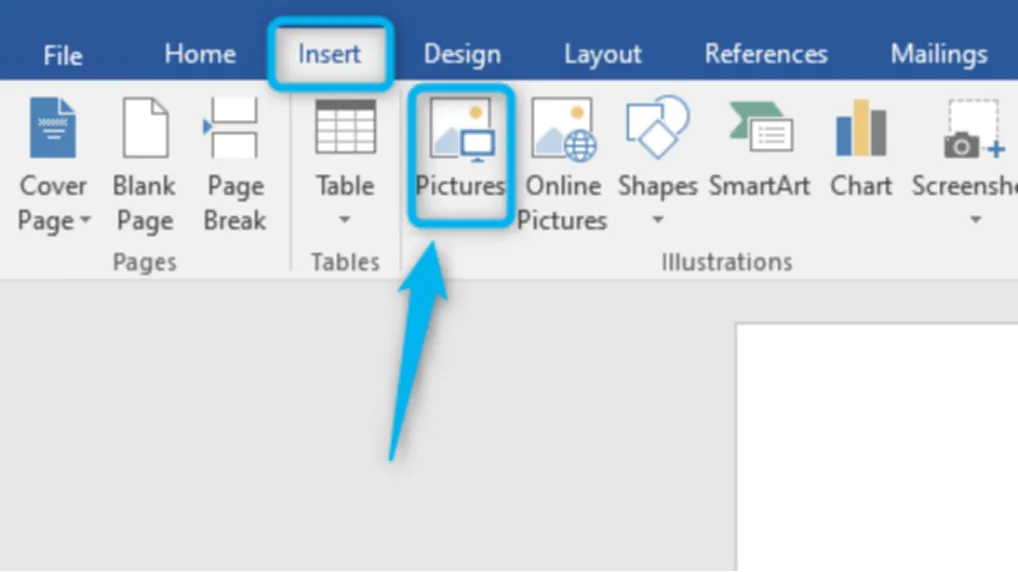
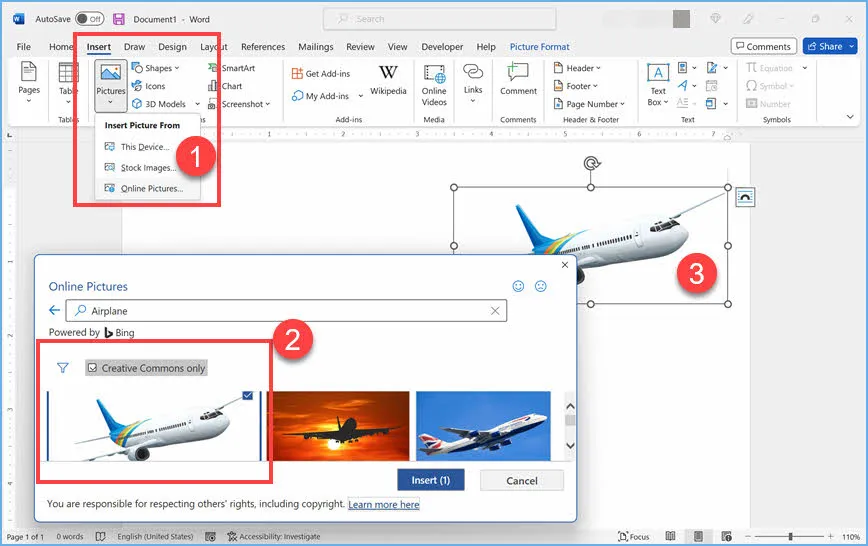
- Insert or Open: Open your Word document and insert the image (Insert > Pictures) or select an existing one.
- Select Image: Click the image to select it. This will activate the “Picture Format” tab on the ribbon.
- Navigate to Rotate: Go to the “Picture Format” tab. In the “Arrange” group, click the “Rotate Objects” (or simply “Rotate”) drop-down button.
- Choose Flip Option: From the menu, select either “Flip Vertical” (to turn it upside down) or “Flip Horizontal” (to create a mirror image).
- Tip: Remember the “drag-and-flip” trick mentioned earlier for a fast, visual flip.
To Rotate an Image:
- Select Image: Click the image to select it, activating the “Picture Format” tab.
- Navigate to Rotate: Go to the “Picture Format” tab. In the “Arrange” group, click “Rotate Objects.”
- Choose Rotation:
- For 90-degree rotations: Select “Rotate Right 90°” or “Rotate Left 90°.”
- For exact angles: Select “More Rotation Options…” and enter your desired degree in the “Rotation” box within the “Layout” dialog or “Format Picture” pane.
- For freehand rotation: Use the rotation handle (circular arrow) at the top of the selected image, dragging it as needed. Hold
Shiftfor 15-degree increments.
These methods are designed to be quick and accessible, allowing for rapid adjustments to stock photos, digital photography, or any visual content needing precise orientation for your document or broader visual design projects.
Navigating Image Adjustments in Word for macOS and the Web
Microsoft Word on macOS and its web-based counterpart offer similar functionalities, albeit with slight interface differences. These platforms are designed to provide a consistent experience, allowing you to seamlessly work on your aesthetic images and thematic collections across different devices.
For Word on macOS:
- Insert/Select Image: Open your document, insert an image (Insert > Pictures), or select an existing one.
- Activate Picture Format: Clicking the image will bring up the “Picture Format” tab on the ribbon.
- Rotate/Flip Options: In the “Arrange” group of the “Picture Format” tab, click the “Rotate” button. You’ll find options for “Rotate Right 90°,” “Rotate Left 90°,” “Flip Vertical,” and “Flip Horizontal.”
- More Rotation Options: To specify an exact angle, select “More Rotation Options…” from the “Rotate” drop-down.
- Alternative: Double-clicking the image often opens the “Format Picture” sidebar, where you can find “3-D Rotation” under “Effects” for custom angle settings.
For Word on the Web: The web version of Word is generally more streamlined but retains essential image manipulation features, perfect for quick edits of backgrounds or image inspiration on the go.
- Log In and Insert/Select: Launch Word in your browser, log in with your Microsoft Account, and insert or select an image.
- Rotation Handle: The most direct way to rotate on the web is to select the image and use the rotation handle (circular arrow) at the top. Drag it to your desired angle.
- Limited Flip Options: Direct “Flip Horizontal” or “Flip Vertical” buttons might be less prominent or require accessing a more extensive “Picture Tools” or “Format” pane, similar to the desktop versions. The web interface often prioritizes the most common actions.
- Check for Contextual Tabs: Ensure the image is selected to see any contextual “Picture” or “Format” tabs that may appear, offering more options.
These cross-platform instructions ensure that whether you’re working on a desktop, laptop, or through a browser, you have the knowledge to perform essential photo manipulation, ensuring your sad/emotional imagery, beautiful photography, and digital art are always presented optimally.
Specifics for Older Word Versions (e.g., Office 2010) and WordArt
Older versions of Microsoft Word, such as Office 2010, still offer robust image editing capabilities, though their interface might be slightly different. Understanding these specifics is vital for users who might not have access to the latest software but still need to incorporate high-resolution images or graphic design elements into their documents.
For Microsoft Word - Office 2010: The process is largely similar to newer Windows versions but might use slightly different terminology or button placements.
- Open Document and Select Image: Open your document and click on the image you want to rotate or flip.
- Picture Tools Tab: When the image is selected, the “Picture Tools” tab will appear at the top of the toolbar, containing a “Format” sub-tab. Click on this “Format” tab.
- Locate Rotate Button: In the “Arrange” group of the “Picture Tools > Format” tab, you’ll find the “Rotate” button.
- Troubleshooting: If you don’t see “Picture Tools” or “Format” tabs, make sure the image is actively selected. You might need to double-click it.
- Choose Option: Click the “Rotate” drop-down button and select your desired action:
- “Rotate Right 90°”
- “Rotate Left 90°”
- “Flip Vertical”
- “Flip Horizontal”
- “More Rotation Options…” for exact degree input.
WordArt Considerations (All Versions): As noted previously, directly flipping WordArt or text within a shape typically requires using the “3-D Rotation” options, setting the X Rotation to 180°. This ensures that the text itself is mirrored, not just the bounding box, which is crucial for specific graphic design effects or creative ideas involving reversed typography.
These detailed instructions for various Word versions ensure that regardless of your software environment, you can effectively manage your visual content. This consistency is key for professionals integrating stock photos into reports, artists showcasing digital art, or anyone maintaining a cohesive aesthetic for their thematic collections and mood boards. Mastering these platform-specific nuances empowers you to achieve precise photo manipulation, contributing to overall visual excellence and reinforcing the impact of your images.
Beyond Word: Leveraging External Tools for Advanced Image Handling
While Microsoft Word offers commendable built-in tools for basic image manipulation like flipping and rotating, the demands of professional photography, graphic design, and comprehensive visual content management often extend beyond these functionalities. For tasks requiring higher precision, specialized effects, or the optimization of image files for diverse platforms, external tools become indispensable. At Tophinhanhdep.com, we specialize in offering a suite of such advanced image tools designed to complement your workflow, ensuring your images are not only perfectly oriented but also optimized, upscaled, and ready for any application.
Consider a scenario where you’ve rotated a high-resolution photograph in Word to correct its orientation for a document. Now, you need to use that same image as a website background or incorporate it into a digital art piece, requiring it to be compressed for faster loading or upscaled to a larger dimension without losing quality. Word’s capabilities are limited here. This is where a holistic approach, combining Word’s layout features with specialized external tools, provides the best results for all your image inspiration and thematic collections.
Introducing UPDF: A Universal Solution for PDF-Embedded Images
Often, documents containing images are shared or archived in PDF format. When you need to flip or rotate an image within a PDF, Word’s tools are no longer applicable. This is a common challenge for professionals handling reports, presentations, or digital art portfolios in PDF form. UPDF emerges as a powerful, universal tool for this specific need, acting as a PDF editor that extends its utility to image manipulation within PDF documents. It addresses a gap where Word leaves off, offering a seamless experience for those who work extensively with PDFs.
Why UPDF is a valuable complementary tool:
- Universal Compatibility: UPDF supports a wide range of image file formats, ensuring you can work with your images regardless of their original format after they’ve been embedded in a PDF.
- User-Friendly Interface: Despite being a powerful PDF editor, UPDF maintains an intuitive interface, making image rotation and flipping accessible even for those without extensive image editing expertise.
- Single Tool Solution: Rather than toggling between a PDF reader and a separate image editor, UPDF allows you to perform image manipulations directly within your PDF document, streamlining your workflow.
Steps to Rotate or Flip Images within a PDF using UPDF:
- Save as PDF: First, save your Word document containing the image as a PDF file.
- Download and Launch UPDF: Obtain and install the UPDF application on your device (available for Windows, macOS, iOS, Android).
- Open PDF in UPDF: Launch UPDF and open your converted PDF file.
- Enter Edit Mode: Click the “Edit” button (usually found in the “Tools” or left toolbar) to activate the editing functionalities.
- Select Image: Click on the image within the PDF that you wish to rotate or flip.
- Rotate/Flip: Right-click the selected image. You will typically see options such as “Rotate Counterclockwise” and “Rotate Clockwise.” Select the desired rotation. While direct “Flip” options might be less explicit than in Word, repeated rotations can achieve specific orientations. For more advanced flipping or mirroring within UPDF, you might sometimes need to combine rotation with other transformation tools depending on the specific UPDF version and its features. However, for basic reorientation, the rotation tools are highly effective.
UPDF serves as an excellent example of a specialized “Image Tool” that complements Word by extending image manipulation capabilities to PDF documents. This is critical for maintaining the visual integrity of your high-resolution photography, graphic design projects, and aesthetic images when transitioning between document formats.
The Tophinhanhdep.com Advantage: Complementary Tools for Image Optimization and Upscaling
After you’ve perfected the orientation of your images in Word or PDF using tools like UPDF, the next step often involves optimizing them for their final destination. This is where Tophinhanhdep.com shines, offering a comprehensive suite of “Image Tools” that go far beyond basic rotations and flips. Our platform is designed to cater to the full spectrum of image needs, from preparing high-resolution stock photos for web use to enhancing digital art for print.
Key Image Tools and How they Complement Word/UPDF:
- Converters: You might have an image in Word that needs to be converted to a specific format (e.g., PNG for transparency, JPG for web, WebP for modern browsers) for broader compatibility or better performance. Tophinhanhdep.com provides robust converters to handle these transitions seamlessly.
- Compressors: High-resolution photography, while visually stunning, can lead to large file sizes, slowing down websites or making documents cumbersome. Our image compressors allow you to reduce file size significantly without compromising visual quality, ensuring your beautiful photography and aesthetic images load quickly and efficiently.
- Optimizers: Image optimization goes beyond simple compression. It involves fine-tuning various aspects of an image file to ensure the best balance between quality and performance. Our optimizers prepare your images for web backgrounds, wallpapers, or thematic collections, ensuring they look great while minimizing resource usage.
- AI Upscalers: Sometimes, you have an image that’s perfect in content but too small in resolution for its intended use (e.g., enlarging a small preview image for a large print). Tophinhanhdep.com’s AI Upscalers can intelligently increase the resolution of your images, adding detail and clarity without pixelation, making your digital art and nature photography suitable for larger displays or print media.
- Image-to-Text (OCR): While not directly related to visual manipulation, this tool highlights the diverse capabilities available. If you’re working with documents containing scanned text within images, our Image-to-Text converter can extract that text, facilitating content management.
By integrating these advanced “Image Tools” from Tophinhanhdep.com into your workflow, you create a powerful ecosystem for visual content creation and management. You can use Word for layout and initial orientation, UPDF for PDF-specific image tasks, and then Tophinhanhdep.com for the final polish – ensuring your images are perfectly optimized, visually stunning, and ready for any application, from aesthetic backgrounds to professional photo manipulation projects. Our platform aims to be your go-to resource for image inspiration & collections, providing everything you need to bring your creative ideas to life.
Creative Applications and Best Practices for Enhanced Visual Storytelling
Mastering the technicalities of flipping and rotating images in Word and leveraging external tools is just the beginning. The true power lies in understanding how these basic manipulations contribute to compelling visual design, enriching your narratives, and captivating your audience. From crafting engaging mood boards to curating thematic collections, every image orientation choice plays a crucial role in delivering impact. Tophinhanhdep.com provides not just the tools, but also the inspiration and context for how these skills elevate your visual storytelling.
Crafting Engaging Visuals: From Mood Boards to Thematic Collections
Flipping and rotating are more than corrective actions; they are fundamental creative techniques that directly influence how your images are perceived.
- Mood Boards: When assembling a mood board with aesthetic images, proper orientation ensures visual harmony. Flipping an image horizontally can create a sense of flow or symmetry, making disparate elements feel connected. Rotating an image slightly can add dynamism or a subtle off-kilter artistic flair, enhancing the overall feeling of your mood board. For a collection of sad/emotional images, precise rotations can emphasize gestures or expressions, deepening their emotional resonance.
- Thematic Collections: For curated thematic collections, consistent orientation is key. If your collection focuses on nature photography, ensuring all horizons are level or that dominant vertical lines are aligned contributes to a cohesive and professional presentation. Flipping can be used to mirror patterns or create interesting visual echoes within your collection, turning simple photos into engaging digital art pieces.
- Graphic Design and Digital Art: In graphic design, flipping and rotating are cornerstones of composition. They allow for the creation of symmetrical logos, mirrored textures, or dynamic layouts that draw the eye. For digital art, these manipulations can transform elements, generating abstract patterns from realistic images or recontextualizing objects for unique creative ideas.
- Creative Ideas: Imagine taking a beautiful photograph of a cityscape and flipping it vertically to create a stunning, surreal reflection effect. Or rotating an abstract background to discover an entirely new visual composition. These simple actions can spark countless creative ideas, enabling you to experiment with photo manipulation and push the boundaries of conventional imagery.
Optimizing Your Images for Diverse Platforms and Aesthetic Appeal
The ultimate goal of image manipulation is to present your visuals in their best light, tailored to their intended platform and purpose. This requires a keen eye for aesthetic appeal and an understanding of best practices.
- Wallpapers and Backgrounds: When preparing images for wallpapers or backgrounds, ensuring the correct orientation is paramount for a seamless user experience. A landscape image needs to be flipped or rotated to portrait mode if it’s meant for a phone background, and vice-versa. The exact rotation can also align an image’s focal point with screen elements or simply enhance its overall aesthetic as a backdrop.
- High-Resolution Photography: For high-resolution photography, meticulous attention to rotation and alignment is critical. Even a slight tilt can detract from the professionalism of a landscape or architectural shot. Flipping can sometimes be used to correct a misorientation from a camera or to create a more pleasing compositional balance. After basic adjustments in Word, utilizing Tophinhanhdep.com’s optimizers will ensure these high-quality images retain their clarity while being suitable for web or print.
- Stock Photos: Stock photos often need minor adjustments to fit specific branding or document layouts. Flipping can reorient a model’s gaze or a product’s direction to better integrate with surrounding text or other graphic design elements. Rotating can crop out distracting elements or align the image with the document’s grid.
- Editing Styles: Consistent application of flipping and rotating contributes to a defined editing style. Whether you prefer bold, symmetrical compositions or dynamic, angled perspectives, these tools are essential for achieving and maintaining that stylistic consistency across your image inspiration and collections.
By thoughtfully applying flipping and rotating techniques, you’re not just correcting images; you’re actively shaping their narrative and visual impact. Coupled with the advanced image tools available at Tophinhanhdep.com, you have everything you need to transform your raw visuals into polished, impactful, and perfectly aligned content. Our commitment at Tophinhanhdep.com is to provide you with the resources, inspiration, and tools to elevate your visual content, ensuring that every image, from a simple background to a complex piece of digital art, contributes meaningfully to your story and resonates with your audience.
In conclusion, mastering the art of flipping and rotating images in Microsoft Word is a foundational skill for anyone involved in digital content creation, from professional graphic designers to casual users curating personal photo collections. These seemingly simple actions are powerful tools for photo manipulation, visual design, and enhancing the aesthetic appeal of any document. Whether you’re adjusting a high-resolution photograph, aligning an abstract background, or creating unique mirror effects for digital art, Word provides accessible and effective functionalities.
Furthermore, recognizing the limitations of basic document editors, Tophinhanhdep.com emphasizes the importance of a comprehensive toolkit. While Word ably handles in-document adjustments, external solutions like UPDF extend image manipulation capabilities to PDF files, and Tophinhanhdep.com offers advanced “Image Tools” for crucial steps like conversion, compression, optimization, and AI upscaling. This integrated approach ensures that your images are not only perfectly oriented but also optimized for diverse platforms, maintaining their integrity as beautiful photography or impactful visual content. By combining Word’s inherent flexibility with the specialized resources available at Tophinhanhdep.com, you are empowered to fully realize your creative ideas, enhance your image inspiration, and build stunning thematic collections that captivate and communicate effectively.