Seamlessly Grabbing and Integrating Images in Photoshop: Your Comprehensive Guide by Tophinhanhdep.com

Adobe Photoshop stands as the industry-standard software for image manipulation, a versatile powerhouse used by photographers, graphic designers, and digital artists worldwide. Whether you’re a seasoned professional aiming for intricate compositing or a beginner simply looking to enhance your everyday photos, mastering the art of “grabbing” and integrating images within Photoshop is a fundamental skill. At Tophinhanhdep.com, we understand the importance of creating visually compelling content, from stunning wallpapers and backgrounds to high-resolution stock photos and breathtaking digital art. This guide will walk you through the essential techniques, tools, and creative strategies to effectively select, combine, and refine images, ensuring your projects achieve a professional and polished appearance.
From isolating subjects to harmonizing colors and crafting realistic shadows, we’ll explore the core functionalities that empower you to transform disparate elements into cohesive, impactful visuals. Our focus aligns with Tophinhanhdep.com’s commitment to providing resources for beautiful photography, aesthetic designs, and practical image tools, helping you unlock your creative potential in the realm of visual design and photo manipulation.
The Foundation: Importing and Positioning Images for Your Creative Vision

The first step in any successful image manipulation project is getting your source images into Photoshop and arranging them effectively. This initial stage sets the groundwork for all subsequent edits, making careful consideration of image dimensions, resolution, and placement crucial for a seamless final composite. Tophinhanhdep.com emphasizes high-resolution photography and digital art, and these foundational steps ensure your work maintains its quality.
Understanding Image Dimensions and Resolution
Before you even begin dragging and dropping, it’s vital to understand the characteristics of your images. Go to Image > Image Size (or Document Dimensions in some versions) and note the width and height in pixels, as well as the resolution (pixels per inch/cm). When combining images, a fundamental rule of thumb is to always scale down, never scale up. Enlarging a smaller image will inevitably lead to pixelation and a noticeable loss in quality, detracting from the crispness expected in high-resolution and stock photos.
Therefore, when you have two images, identify the larger one. You’ll want to bring the larger image into the document of the smaller image, or, if creating a new canvas, ensure the canvas is sized appropriately for the largest element you intend to use. This approach preserves image quality and prevents soft, blurry results, which is key for producing beautiful photography and professional-grade visual design.
Leveraging the Move Tool for Precise Placement
Once you have your images open in Photoshop, the Move Tool (shortcut: V) becomes your best friend for integration. To bring an image from one document to another, simply select the Move Tool, click on the image you wish to transfer, and drag it. Without releasing the mouse button, hover your cursor over the tab of the destination document. The tab will activate, opening the target canvas. Continue dragging your image to the center of this new document, and before releasing the mouse button, hold down the Shift key.

Holding Shift while releasing the mouse button offers a clever advantage: it automatically centers the dragged image within the target canvas. This saves you time on manual alignment and ensures an immediate, symmetrical starting point for your composite. After placement, the new image will appear as a separate layer in your Layers Panel, which is the cornerstone of non-destructive editing in Photoshop.
For further adjustments, ensure your new layer is selected, then press Ctrl+T (Windows) or Command+T (Mac) to activate Free Transform. This allows you to resize and reposition your element. To maintain the aspect ratio while scaling, hold down the Shift key and drag one of the corner handles. If you want to scale the image from its center point, hold down the Alt (Windows) or Option (Mac) key while dragging a corner. Once satisfied with the size and position, hit Enter to commit the transformation. These techniques are essential for creating dynamic layouts and are fundamental to effective photo manipulation and creative ideas.
Precision Selection: Isolating Your Subject for Seamless Composites
Once your images are positioned, the real magic of photo manipulation begins: isolating specific elements. This is where Photoshop’s selection tools truly shine, allowing you to “grab” individual subjects with remarkable accuracy, preparing them for blending into new environments or for focused enhancements. Tophinhanhdep.com’s focus on digital photography and graphic design necessitates precise isolation for professional results.
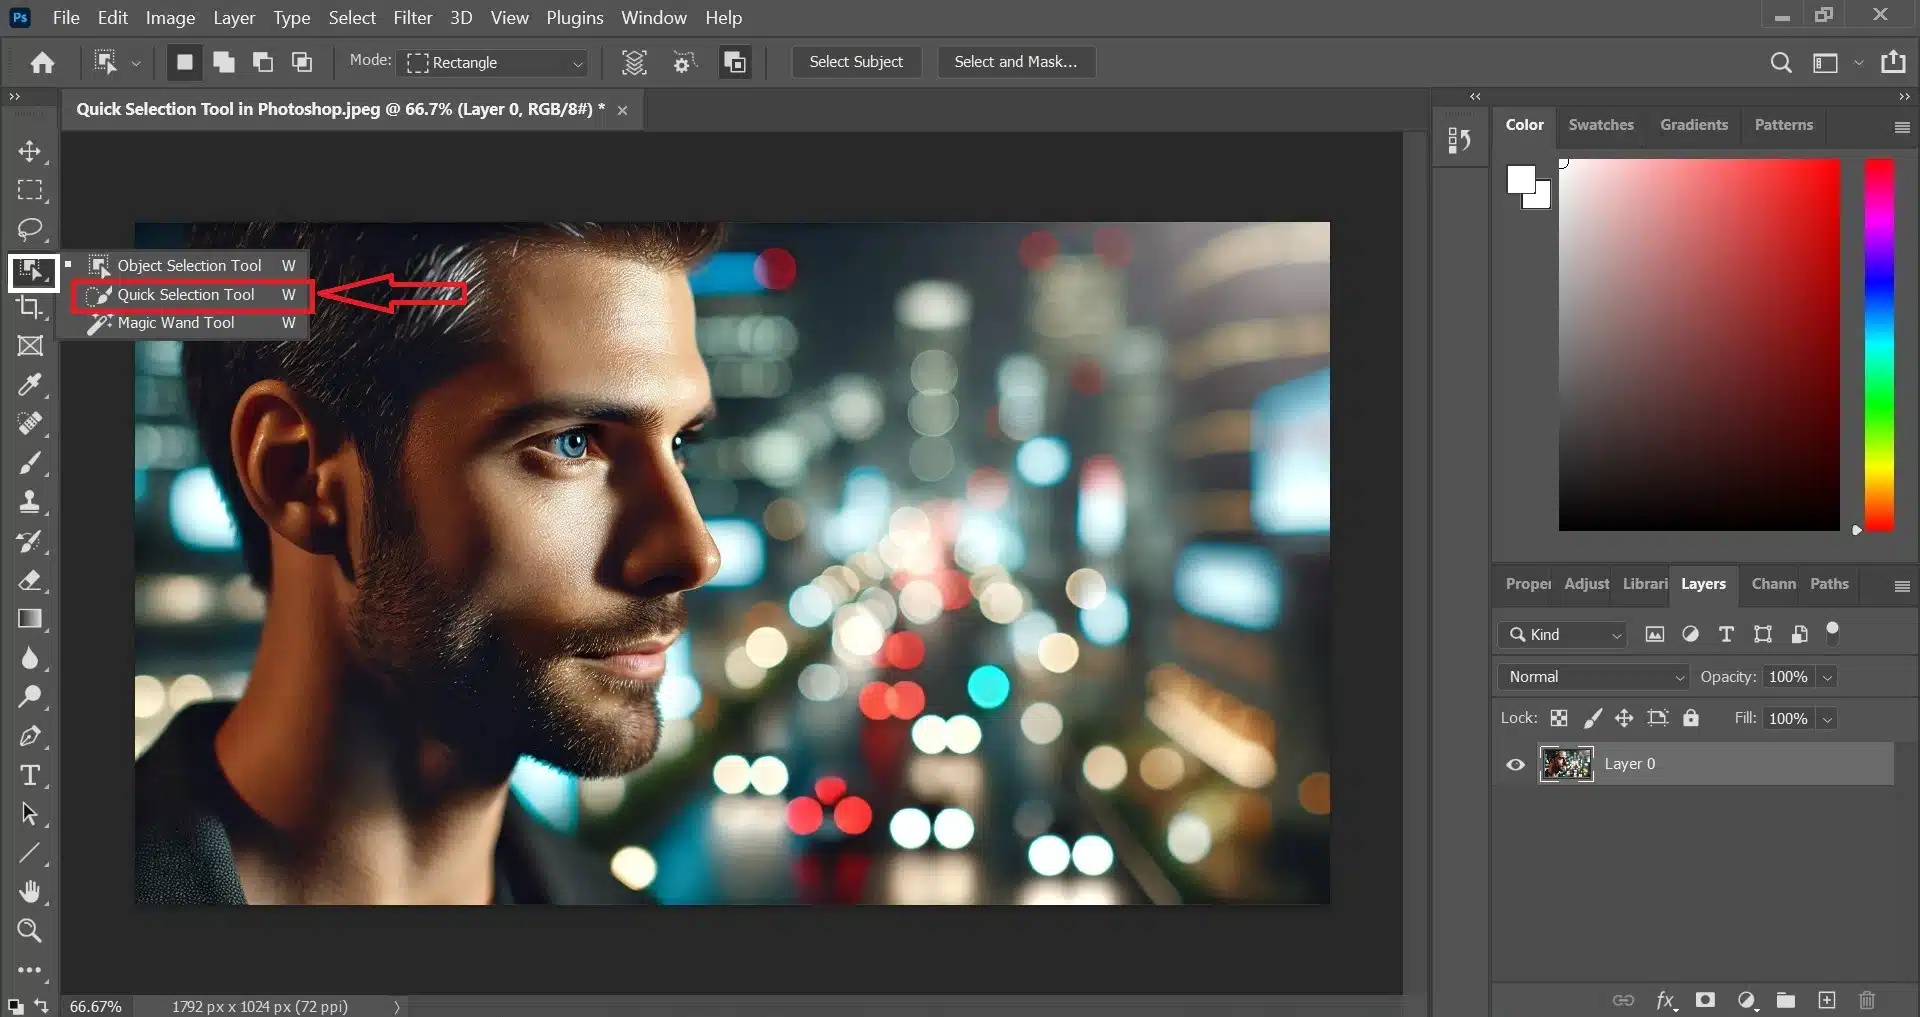
Mastering the Quick Selection Tool and AI Subject Detection
The Quick Selection Tool (often nested under the Magic Wand Tool in the toolbar, shortcut: W) is a marvel of efficiency. It works like a smart brush, automatically detecting edges and recognizing areas of similar color and texture as you drag it across your image. For subjects with clear contrast against their backgrounds, this tool can deliver incredibly fast and accurate initial selections.
Modern Photoshop versions have further enhanced this capability with built-in Artificial Intelligence. After selecting the Quick Selection Tool (or Object Selection Tool), look for the Select Subject button in the options bar at the top of your screen. Clicking this button unleashes Photoshop’s AI, which attempts to automatically identify and select the main subject in your image. This feature is particularly powerful for a wide range of subjects, from people and animals to products, significantly streamlining the initial selection process.
Refining Edges with Select and Mask
While AI-powered selection is impressive, it’s rarely perfect, especially around intricate details like hair, fur, or complex textures. This is where the Select and Mask workspace becomes indispensable. Once you have an initial selection, click Select and Mask in the options bar.
Within this dedicated workspace, you gain access to powerful tools for finessing your selection edges:
- Refine Edge Brush Tool: This is often referred to as the “Hair Tool” because it excels at picking up fine details like stray hairs or fuzzy edges. Paint along the problematic edges of your selection, and Photoshop intelligently attempts to distinguish between foreground and background pixels.
- Radius: Adjusting the
Radiusslider helps Photoshop look further out from the detected edge, which can improve selections with softer transitions. A smallRadius(e.g., 1 pixel) is often effective for delicate details. - Decontaminate Colors: This option, typically found at the bottom of the
Select and Maskpanel, helps remove unwanted color fringes or halos from the edges of your selection, making your subject blend more naturally into a new background. - Smooth, Feather, Contrast, Shift Edge: These sliders allow you to further manipulate the smoothness, softness (feathering), sharpness, and expansion/contraction of your selection edge.
After refining, you can choose how to output your selection (e.g., as a Layer Mask is recommended for non-destructive editing) and click OK. This meticulous refinement is crucial for seamless photo manipulation and achieving the high standard expected from Tophinhanhdep.com’s aesthetic and digital art categories.
Strategic Cropping for Enhanced Composition
Beyond subject isolation, cropping is a fundamental “grab” technique that defines the final composition and visual impact of your image. The Crop Tool (shortcut: C) is much more than just a cutter; it’s a powerful compositional aid.
- Removing Unwanted Elements: The most basic use is to eliminate distracting background elements or empty space, bringing focus to your main subject.
- Refining Composition: Utilize built-in overlay guides, such as the
Rule of ThirdsorGolden Ratio(cycle through them by pressingOwhile theCrop Toolis active), to arrange your subject strategically for a more balanced and dynamic layout. - Straightening Images: If your photo has a skewed horizon or off-kilter elements, select the
Crop Tool, then click theStraighten Toolicon in the options bar. Draw a line across an element that should be straight, and Photoshop will automatically rotate the image to align it, adjusting the crop boundary accordingly. - Controlling Aspect Ratio and Canvas Size: The options bar allows you to set precise aspect ratios (e.g., 16:9 for widescreen, 1:1 for social media posts) or exact pixel dimensions for width and height. This is crucial for optimizing images for various platforms and print formats, aligning with Tophinhanhdep.com’s image tools and photography categories.
- Non-Destructive Cropping: By default, Photoshop retains “cropped pixels,” meaning you can always readjust your crop later. If file size is a concern and you’re certain about your crop, you can check the “Delete Cropped Pixels” option in the options bar to permanently remove them. However, for maximum flexibility in visual design, keeping them is often preferable.
- Adjusting Perspective: For images with skewed perspectives (e.g., architectural shots taken at an angle), the
Perspective Crop Tool(nested under the standard Crop Tool) allows you to correct distortion while cropping, realigning elements to appear straight and natural.
Mastering the Crop Tool ensures that every image you process for Tophinhanhdep.com’s collections, from wallpapers to inspiring photography, is perfectly framed and composed.
Blending for Realism: Color Matching and Shadows for Depth
Once your subjects are cleanly selected and positioned, the next critical step is to make them look like they truly belong in their new environment. This involves meticulous color matching and the realistic addition of shadows, turning a simple composite into a believable scene. These steps are vital for achieving the “beautiful photography” and “digital art” standards upheld by Tophinhanhdep.com.
Achieving Harmonious Colors with Match Color
One of the quickest ways to integrate a selected element into a new background is through color matching. Photoshop’s Match Color adjustment is an incredibly powerful tool for this purpose.
- Select the Subject Layer: Ensure the layer of the subject you want to color-match is active in the
Layers Panel. - Access Match Color: Go to
Image > Adjustments > Match Color. - Define Source and Layer: In the
Match Colordialog box, underSource, select the document you are currently working on. Then, underLayer, choose the background layer (or the layer from which you want to sample colors). As soon as you select the background layer, your subject’s colors will immediately shift to match the tonal qualities of the background. - Refine with Fade: The initial match can often be too strong, making the subject look artificial. Use the
Fadeslider to dial back the intensity of the color match. Moving it to the left increases the effect, while moving it to the right brings back more of the original color. Find the sweet spot where the colors look natural and integrated to your eye. - Adjust Luminance and Color Intensity (Optional): If needed, you can further fine-tune the
LuminanceandColor Intensitysliders to achieve an even better blend, though oftenFadeis sufficient for quick adjustments.
This technique is a cornerstone of realistic photo manipulation and helps create cohesive visual designs, ensuring your aesthetic choices align with Tophinhanhdep.com’s diverse image collections.
Crafting Realistic Shadows for Depth
No object truly belongs in a scene without casting a realistic shadow. Shadows add depth, volume, and anchor your subject to its environment. Ignoring them is a common pitfall that immediately gives away a composite.
- Add a Drop Shadow (Initial Step): With your subject layer selected, click the
fxbutton (Layer Style) at the bottom of theLayers Paneland chooseDrop Shadow. - Create a Solid Shadow: Set
Opacityto 100%,Distance,Spread, andSizeto 0. This creates a hard-edged, solid black silhouette directly beneath your subject. This isn’t the final shadow, but a template. - Separate Shadow into Its Own Layer: Right-click on the
Effects(orDrop Shadow) entry under your subject layer in theLayers Paneland selectCreate Layer. This converts theDrop Shadowinto a standalone layer, giving you full control. - Transform the Shadow: Select the new shadow layer. Press
Ctrl+T(Windows) orCommand+T(Mac) forFree Transform. Right-click on the shadow and selectFlip Vertical. Drag the flipped shadow downwards, positioning it beneath your subject, mimicking where a shadow would naturally fall. - Skew for Perspective: Observe the existing shadows in your background (e.g., from a windmill in the source example). Notice their angle and direction. Right-click the shadow during
Free Transformand chooseSkew. Drag the handles to match the angle and perspective of other shadows in the scene, aligning it realistically with the “feet” or base of your subject. - Apply Gaussian Blur: Realistic shadows are rarely perfectly sharp. With the shadow layer selected, go to
Filter > Blur > Gaussian Blur. Adjust theRadiusslider until the shadow achieves a natural softness that matches the ambient blur of the scene. - Adjust Opacity and Blend Mode: Finally, reduce the
Opacityof the shadow layer in theLayers Panelto make it less harsh and more subtle. Often, setting theBlend ModetoMultiplycan also help the shadow integrate more realistically with the underlying colors of the ground.
By meticulously crafting shadows, you imbue your composited images with a sense of reality, a hallmark of professional photo manipulation and high-quality digital photography available on Tophinhanhdep.com.
The Art of Layer Masking for Seamless Integration
Layer masks are fundamental to non-destructive editing and achieving truly seamless composites. Instead of permanently erasing parts of an image, a layer mask allows you to selectively hide or reveal portions of a layer. This is particularly powerful for blending subjects into new backgrounds, giving you complete control and the ability to reverse your changes at any time.
When you create a layer mask (by clicking the “Add Layer Mask” icon at the bottom of the Layers panel), a white thumbnail appears next to your layer thumbnail.
- White reveals, black conceals: When the mask is active (click its thumbnail), painting with black hides parts of the layer, while painting with white reveals them.
- Grayscale for opacity: Shades of gray on the mask create semi-transparent areas, perfect for subtle blending.
- Soft brushes for blending: Use a soft-edged brush with varying opacity to create smooth transitions between your subject and the background, particularly useful when blending elements like the base of a subject (e.g., a lion’s feet into grass, as in the reference).
- Refining complex edges: For challenging areas, the layer mask can be further refined using techniques from the “Select and Mask” workspace.
Layer masks are the cornerstone of flexibility in photo manipulation, allowing for intricate blending and precise adjustments without damaging your original image data. This non-destructive approach is highly valued in visual design and digital photography, making it a key skill for users of Tophinhanhdep.com.
Elevating Your Visuals: Creative Enhancements and Digital Art Techniques
Beyond basic compositing, Photoshop offers a vast array of tools and techniques to further enhance your images, infuse them with specific moods, and transform them into unique pieces of digital art. Tophinhanhdep.com features a wide range of images, from aesthetic and abstract to thematic collections, and these advanced steps help you achieve such diverse styles.
Tying Elements Together with Color Overlays
A subtle but effective technique to unify a composite image, especially one with elements from different sources, is to apply a global color overlay. This creates a cohesive color harmony that makes the whole scene feel more integrated.
- Add a Solid Color Adjustment Layer: Go to
Layer > New Fill Layer > Solid Color, or click theNew Fill or Adjustment Layericon (half-black, half-white circle) at the bottom of theLayers Paneland chooseSolid Color. - Choose a Harmonious Color: Select a color that complements the overall mood or predominant tones of your composite. Often, a warm or cool tone can help tie everything together.
- Adjust Blend Mode and Opacity: With the solid color layer selected, change its
Blend Mode(found in theLayers Paneldropdown, usually set toNormalby default) toColor. This applies only the hue and saturation of the chosen color, leaving the luminosity of the layers below intact. - Fine-tune with Opacity: Reduce the
Opacityof this color layer significantly, often down to 5-20%, until it provides a subtle unifying tint rather than a dominant wash. This soft touch can dramatically improve the visual cohesion of your entire image, making the composite feel less “stitched together” and more like a single photograph.
This creative application of color, while simple, is a powerful tool in graphic design and digital art, helping to achieve specific aesthetic outcomes.
Advanced Selection for Digital Art and Photo Manipulation
The Quick Selection Tool (QST) and its counterparts aren’t just for simple cut-outs; they are foundational to advanced digital art.
- Enhancing Textural Details: Artists can use QST to select specific textures (like tree bark, rock faces, or fabrics) and then apply adjustments (e.g., contrast, sharpness, dodge/burn) or filters only to those selected areas. This can make elements more pronounced, adding depth and realism to digital paintings or photo-realistic composites.
- Manipulating Light and Shadow: For dramatic visual design, use QST to define areas where light or shadow needs accentuation. Select a bright area, then apply a curves or levels adjustment layer (clipped to the selection or masked) to brighten it further. Similarly, select shadow areas to deepen them. This precise control over chiaroscuro can evoke strong emotions and create powerful aesthetic impacts, crucial for Tophinhanhdep.com’s “emotional” and “abstract” image categories.
- Designing Unique Patterns: By selecting intricate parts of an image with QST, artists can duplicate, transform, and arrange these selections to create complex and unique patterns. This technique is invaluable for generating custom design elements for graphic design, backgrounds, or digital textiles.
- Integrating with Other Selection Tools: For ultimate precision, combine QST with other tools. Start with QST for large areas, then switch to the
Lasso Toolfor freehand corrections, thePolygonal Lassofor straight edges, or theMagnetic Lassofor high-contrast boundaries. TheMarquee Toolsare perfect for geometric selections. - Background Eraser Mode: For isolating subjects from busy backgrounds, the
Background Eraser Tool(often nested with the standardEraser Tool) can be used in conjunction with quick selections to intelligently erase similar colors in the background while preserving foreground details.
These advanced selection strategies empower users to go beyond basic editing and delve into intricate photo manipulation, contributing to the rich tapestry of digital photography and creative ideas showcased on Tophinhanhdep.com.
Optimizing Images for Various Platforms and Styles
Finally, “grabbing” an image in Photoshop also encompasses preparing it for its ultimate destination. Whether it’s for social media, print, or a website, optimization is key.
- Resolution and File Size: After all edits, consider the final output. For web use, a resolution of 72 DPI is generally sufficient, and
File > Export > Save for Web (Legacy)offers excellent controls for balancing quality and file size (JPEG, PNG, GIF). For print, higher DPI (e.g., 300 DPI) is crucial.File > Export > Export Asprovides modern, streamlined options. - Color Profiles: Ensure your color profile (e.g., sRGB for web, Adobe RGB or ProPhoto RGB for print) matches the intended output to maintain consistent colors across different devices and mediums.
- Watermarking and Branding: For stock photos or digital art, techniques like adding watermarks or logos (often involving smart objects and blend modes) protect your work and reinforce your brand, aligning with Tophinhanhdep.com’s emphasis on image protection and professional presentation.
By thoughtfully optimizing your images, you ensure that your “grabbed” and manipulated artwork looks its best, no matter where it’s displayed, fulfilling the diverse needs of Tophinhanhdep.com’s users for images, photography, and visual design.
Conclusion
The ability to “grab” an image in Photoshop extends far beyond simply opening a file; it encompasses a sophisticated suite of tools and techniques for importing, selecting, isolating, and seamlessly integrating visual elements. From the precise control offered by the Move Tool and the intelligent automation of the Quick Selection Tool with AI, to the meticulous refinements possible in the Select and Mask workspace and the compositional power of the Crop Tool, Photoshop provides an unparalleled ecosystem for visual creation.
At Tophinhanhdep.com, we believe that mastering these foundational and advanced techniques empowers you to transform your creative ideas into stunning realities. Whether you are crafting breathtaking composite images for high-resolution wallpapers, refining product shots for stock photography, or pushing the boundaries of digital art and photo manipulation, the skills discussed in this guide are indispensable. By diligently applying color matching, realistic shadow creation, and strategic color overlays, you can elevate your visuals from mere edits to cohesive, professional, and aesthetically pleasing masterpieces. Continue exploring the vast possibilities of Photoshop, and let your imagination soar with Tophinhanhdep.com as your trusted resource for all things visual.