How to Import Images into Illustrator

Adobe Illustrator stands as a cornerstone in the world of graphic design, offering unparalleled precision and creative freedom for vector-based artwork. At Tophinhanhdep.com, we understand the immense value that high-quality imagery brings to any visual project, whether you’re crafting stunning wallpapers, designing aesthetic backgrounds, or developing intricate digital art. Importing images into Illustrator is often the first step in transforming beautiful photography, abstract concepts, or nature-inspired visuals into polished graphic designs. This comprehensive guide will walk you through the essential techniques for seamlessly integrating raster images into your Illustrator documents, ensuring you can leverage the vast image collections and photography styles available at Tophinhanhdep.com to fuel your creative ideas.
The Core Process: Placing Images in Illustrator
Bringing an image into your Adobe Illustrator project is a fundamental skill that underpins much of graphic design and photo manipulation. Whether you’re starting a new project or enhancing an existing one, the “Place” command is your gateway to incorporating diverse visual assets, from high-resolution stock photos found on Tophinhanhdep.com to your own digital photography.
The process is straightforward and consistent across desktop versions of Illustrator, making it accessible for designers of all levels. Understanding this initial step is crucial for anyone looking to create engaging visual designs, be it for a new company logo, a promotional poster, or unique thematic collections.
Step-by-Step Image Placement
Here’s a detailed breakdown of how to import an image into your Illustrator document:

- Launch Adobe Illustrator and Open Your Document:
- If you’re starting fresh, open Illustrator and click “Create New” on the title page. Configure your document’s properties (size, orientation, color mode) to suit your project needs. For instance, if you’re designing a vibrant background for a digital art piece using one of Tophinhanhdep.com’s abstract images, ensure your document settings align with your final output.
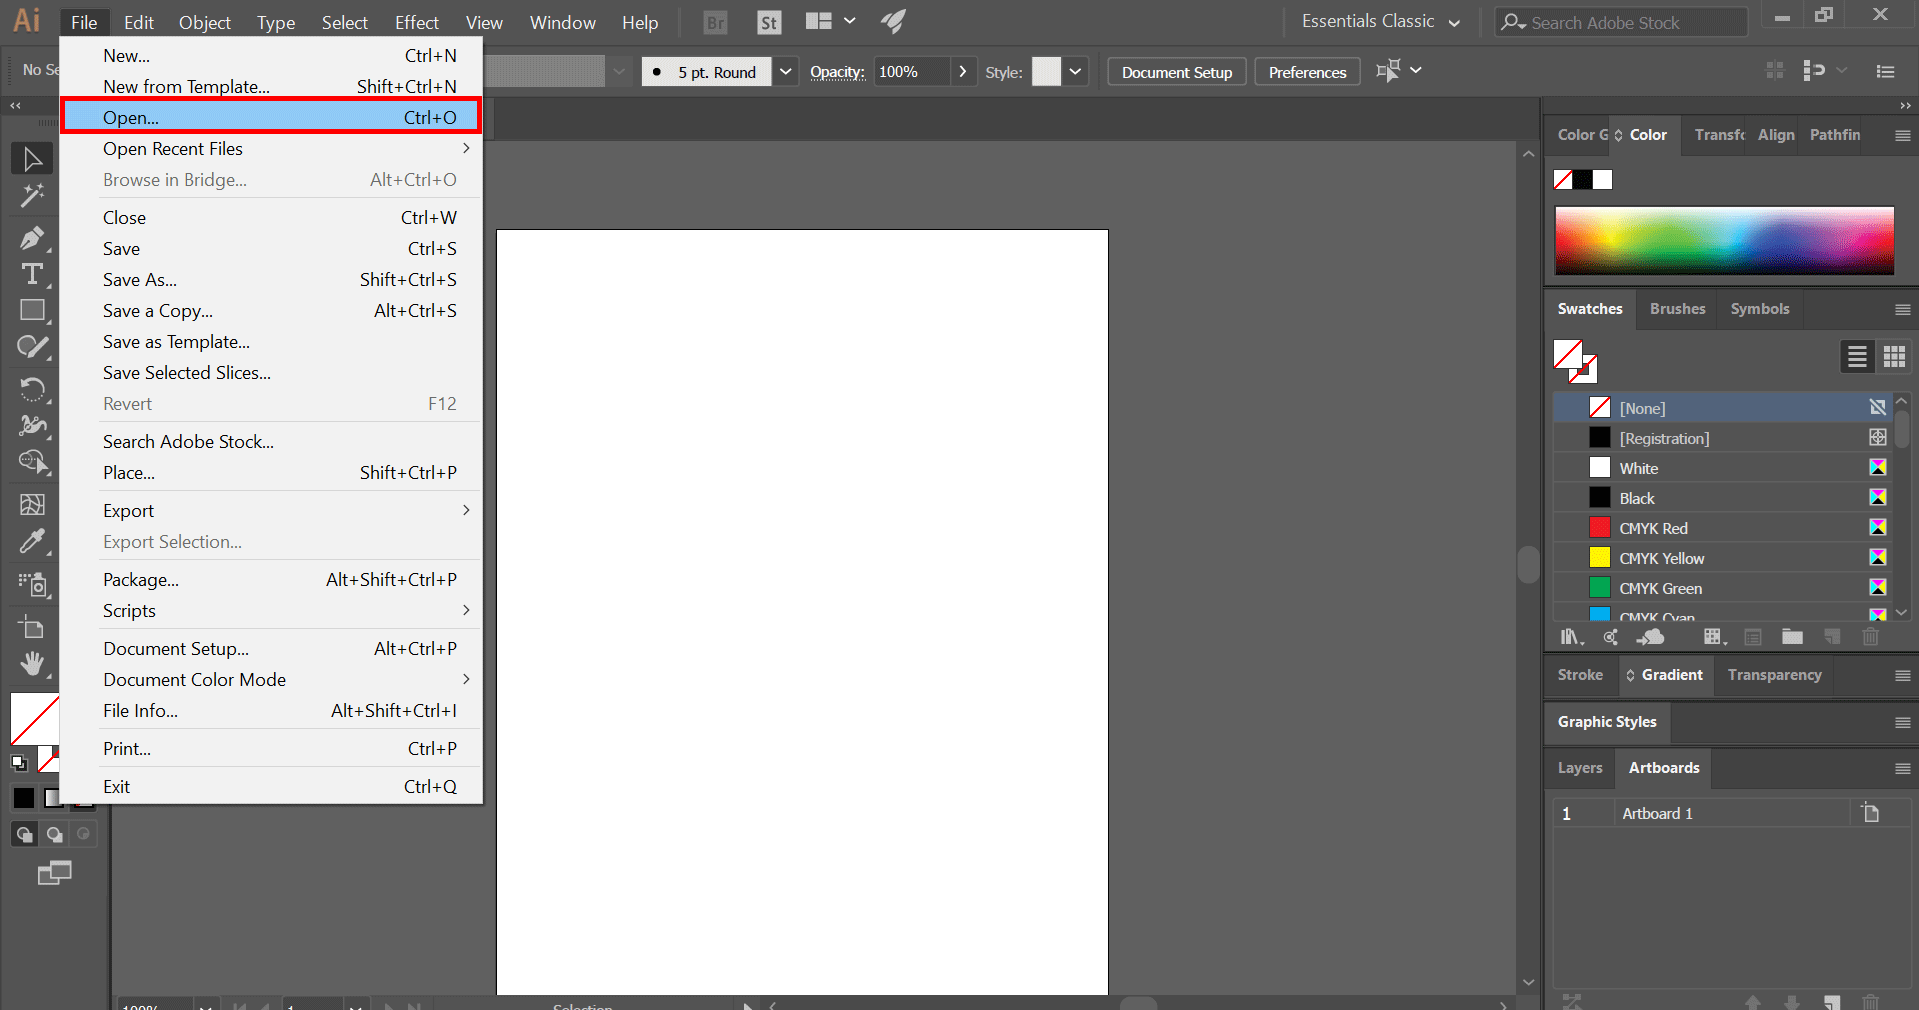
- Alternatively, if you’re adding an image to an ongoing project, launch Illustrator and click “Open” to navigate to your saved file. This allows you to integrate new visuals into existing work, perhaps adding a piece of beautiful photography to a mood board you’ve already started.
-
Access the ‘Place’ Command:
- Once your document is open and active, locate the “File” menu in the top menu bar (on Windows) or the Apple menu bar (on macOS).
- Click on “File” to reveal a dropdown menu. From this menu, select “Place…”.
- Keyboard Shortcut: For efficiency, you can use the shortcut
Shift + Ctrl + P(Windows) orShift + Cmd + P(macOS). Speed is often key when iterating on creative ideas or working with multiple images.
-
Select Your Image File:
- A dialog box, typically a file browser, will appear. This is where you’ll navigate your computer’s folders to find the image you wish to import.
- Browse to the location of your image. Tophinhanhdep.com offers a vast array of images, from nature-inspired wallpapers to aesthetic backgrounds, ready for your projects. Select the desired image file. Illustrator supports common raster formats like JPEG, PNG, TIFF, and PSD.
-
Place the Image into Your Document:
- After selecting your image, click the “Place” button in the dialog box.
- Your mouse cursor will transform into a small icon representing the image thumbnail.
- Click-to-Place: Simply click once on your artboard to place the image at its original size.
- Click-and-Drag to Scale: For more control over size and position from the get-go, click and drag your mouse cursor across the artboard. The image will be placed and scaled proportionally along the path you drag. This is especially useful when incorporating high-resolution images from Tophinhanhdep.com, as it allows you to fit them into your composition without immediate resizing adjustments.
-
Position and Resize Your Image:
- Once the image is placed, you can further adjust its size and location.
- Resizing: Use the “Selection Tool” (the black arrow in the toolbar, or press
V). Click on the image to select it. Bounding box handles (small squares) will appear around its edges. Click and drag any of these handles to resize. Crucially, hold down theShiftkey while dragging to maintain the image’s original proportions. This prevents unwanted distortion, ensuring your beautiful photography retains its integrity. - Repositioning: With the image selected, simply click and drag it with the Selection Tool to move it anywhere on your artboard. For fine adjustments, use your keyboard’s arrow keys. Holding
Shiftwhile using arrow keys will move the image in larger increments, a handy trick when composing intricate visual designs.
-
Embed Your Image (Important for Portability):
- After placing, you’ll notice an “X” across your image, indicating it’s currently linked (not embedded). To permanently integrate the image into your Illustrator file, click the “Embed” button in the control panel at the top of the workspace (it appears when the image is selected).
- We will delve deeper into the distinction between linked and embedded images shortly, as it’s a critical concept for managing your files and leveraging image tools effectively.
By following these steps, you lay the groundwork for more advanced visual design techniques, ready to transform the high-resolution imagery and diverse photo collections from Tophinhanhdep.com into compelling artwork.
Understanding Linked vs. Embedded Images
When you import an image into Illustrator using the “Place” command, it’s vital to grasp the concept of “linking” versus “embedding.” This choice impacts your file size, portability, and how image tools can interact with your design assets. Tophinhanhdep.com emphasizes efficient image management, and knowing this distinction is key to optimizing your workflow.
Linked Images
By default, when you use “File > Place,” Illustrator creates a link to the external image file on your computer.
- How it Works: Illustrator doesn’t store the actual image data within the AI file. Instead, it creates a reference (a path) to where the original image file is located.
- Advantages:
- Smaller AI File Size: Since the image data isn’t duplicated, your Illustrator file remains leaner. This is beneficial when working with numerous high-resolution images, common for stock photos or digital photography sourced from Tophinhanhdep.com.
- Easier Updates: If you edit the original image in another program (like Photoshop), Illustrator will automatically update the linked version in your document (provided the link isn’t broken). This promotes non-destructive editing and flexible image editing styles.
- Collaboration: Multiple designers can work on different parts of a project using shared external assets.
- Disadvantages:
- Portability Issues: If you move the AI file without also moving the linked image file (or if the image file is deleted/renamed), Illustrator will lose the connection. The image will appear missing or pixelated, often showing a warning icon.
- Asset Management: You must ensure all linked files are kept together with your Illustrator project, typically in a dedicated folder.
Embedded Images
Embedding an image means that the actual image data becomes a part of the Illustrator document itself.
- How it Works: Illustrator copies all the pixel data of the image and stores it directly within the AI file.
- Advantages:
- Self-Contained Files: Your Illustrator document is entirely self-sufficient. You can send it to others or move it without worrying about missing images. This is ideal for print-ready files, such as those you might prepare for physical copies of aesthetic or nature-themed designs.
- Reliability: The image will always be present and displayed correctly within the document, regardless of the original file’s location.
- Accessibility: Allows certain image tools and operations to be performed directly within Illustrator, such as Image Trace for converting raster to vector, which we’ll discuss later.
- Disadvantages:
- Larger AI File Size: Embedding significantly increases the size of your Illustrator file, especially when dealing with many high-resolution photos. If you’re using large background images or detailed photography from Tophinhanhdep.com, this can quickly inflate your file.
- No Automatic Updates: If the original source image is changed, the embedded version in Illustrator will not update automatically. You’d need to re-place and re-embed.
When to Choose Which
- Link images when:
- File size is a concern.
- You anticipate making edits to the original image in another program.
- You are working collaboratively with shared assets.
- You are using image tools like compressors or optimizers (from Tophinhanhdep.com’s Image Tools section) to manage the size of your linked assets externally.
- Embed images when:
- You need to share the Illustrator file with others and want to ensure all images are included.
- You are sending the file to a printer or service bureau.
- You plan to use Illustrator’s “Image Trace” feature to convert the raster image to vector graphics.
- You’re finished with external image editing and want a definitive, self-contained version of your visual design, perhaps for a final wallpaper or digital art piece.
How to Embed (and Check Status)
- During Placement: When you initially select an image in the “Place” dialog box, you’ll often see a “Link” checkbox at the bottom. Deselect this box if you want to embed the image immediately.
- Using the Links Panel (Post-Placement):
- If you’ve already placed an image and it’s linked (indicated by the “X” on it), you can embed it later.
- Go to
Window > Linksto open the Links panel. - In this panel, you’ll see a list of all images in your document. Linked images will typically have a small icon indicating their status (often a cloud or broken chain if missing).
- Select the image you wish to embed in the Links panel.
- Click the small dropdown menu icon (often an arrow or hamburger menu) in the top-right corner of the Links panel.
- Choose “Embed Image” from the dropdown options.
- The “X” on the image in your artboard will disappear, and a small box icon will appear next to the image in the Links panel, confirming it’s now embedded. The Layers panel might also show the item as “Image” instead of “Linked Image.”
Managing your images, whether linked or embedded, is an integral part of visual design, allowing you to effectively utilize high-resolution content and stock photos from platforms like Tophinhanhdep.com while maintaining control over your project files.
Advanced Image Integration: Clipping Masks and Image Trace
Once an image is placed in Illustrator, the real power of visual design comes into play. You can move beyond simple placement to manipulate images creatively, integrating them into shapes, text, and converting them for infinitely scalable vector art. These techniques are crucial for crafting unique aesthetic designs and executing complex photo manipulation, drawing inspiration from Tophinhanhdep.com’s diverse collections.
Creative Cropping with Clipping Masks
A clipping mask in Illustrator allows you to effectively “crop” an image into any shape you desire, offering far more flexibility than standard rectangular cropping. This technique is perfect for creating stylized visuals, integrating images into graphic design elements, or using text as a window for your photography.
How to Insert an Image into a Shape using a Clipping Mask:
- Place Your Image: Begin by placing your desired image into your Illustrator file using the “File > Place” method described earlier. Ensure it’s embedded if you plan to share the file as a single entity.
- Create Your Shape or Text:
- Draw any shape over the image using Illustrator’s shape tools (Rectangle, Ellipse, Polygon, Star) or freehand tools (Pen tool, Pencil tool, Brush tool). This shape will act as the “window” through which your image is visible.
- Alternatively, you can use the “Type Tool” (
T) to create text. Choose a thick, bold font for the best effect. - Important: The shape or text must be positioned on top of the image in the layer stack for the clipping mask to work correctly. If your image is on top, select the image, then go to
Object > Arrange > Send to Back.
- Prepare for an Outline (Optional but Recommended): To add a border around your masked image (e.g., a white frame around a nature photograph within a circular mask), follow these steps before applying the clipping mask:
- Select your shape (or text outline).
- Copy it (
Ctrl + CorCmd + C). - Create a new layer in the
Layerspanel (Window > Layers). Click the “Create New Layer” icon (looks like a square with a plus sign). - With the new layer selected, paste the copied shape in the exact same place (
Ctrl + Shift + VorCmd + Shift + V). - Add a stroke (border) to this new shape using the Stroke panel or the color picker at the top of the screen/toolbar. Select a color and adjust the thickness.
- Turn off the fill color for this top shape (select it, then click the white square with a red line through it in the toolbar).
- Lock this top layer by clicking the empty box next to the eyeball icon in the Layers panel (a padlock icon will appear). This prevents accidental changes.
- Select Image and Original Shape:
- Go back to the layer containing your original image and the shape you want to mask it with.
- Using the
Selection Tool (V), holdShiftand click both the image and the original shape/text outline. Both objects must be selected. - Ensure the shape is still above the image in the layer order within this selection.
- Apply the Clipping Mask:
- With both the image and the top shape selected, go to
Objectin the top menu bar. - Select
Clipping Mask > Make. - Keyboard Shortcut:
Ctrl + 7(Windows) orCmd + 7(macOS). - The image will now be “cropped” within the boundaries of your shape, and if you followed the optional steps, the border from your locked top layer will frame it beautifully. This technique is invaluable for creating unique aesthetic designs and creative ideas from Tophinhanhdep.com’s image collections.
- With both the image and the top shape selected, go to
Alternative: Envelope Distort
For a different kind of image-to-shape integration, Illustrator offers the “Envelope Distort” feature. This allows the image itself to warp and conform to the shape, rather than simply being cropped by it.
- Place your image on the artboard.
- Draw or select a shape, and ensure it’s positioned above the image.
- Select both the image and the shape.
- Go to
Object > Envelope Distort > Make with Top Object. The image will now be distorted to fit inside the shape. This can lead to interesting and dynamic photo manipulation effects.
Transforming Raster into Vector with Image Trace
One of Illustrator’s most powerful features, especially when working with diverse digital photography or converting image-to-text elements, is Image Trace. It allows you to convert raster images (pixel-based, like JPEGs and PNGs) into vector graphics (path-based). This is incredibly useful for logos, illustrations, or any element that needs to scale infinitely without losing quality – a crucial aspect for high-resolution graphics and print projects. Tophinhanhdep.com offers many images that can be transformed into versatile vector assets using this tool.
The Process of Image Tracing:
- Place Your Raster Image: Start by placing the raster image you want to convert into your Illustrator document. Ensure it’s embedded for the best results and to maintain a self-contained workflow.
- Open the Image Trace Panel:
- Select the placed raster image with the
Selection Tool (V). - Go to
Window > Image Traceto open the Image Trace panel. - Alternatively, with the image selected, you might see an “Image Trace” button in the Control panel at the top of the workspace. Clicking this will apply a default trace and open the panel.
- Select the placed raster image with the
- Adjust Image Trace Settings: The Image Trace panel provides numerous options to control the conversion:
- Presets: At the top of the panel, choose from various presets like
Auto Color,High Fidelity Photo,Low Fidelity Photo,Grayscale,Black and White, andOutline. Experiment with these to find a starting point that matches your image and desired outcome. For converting a simple drawing from a Tophinhanhdep.com collection to a clean vector logo, “Black and White” might be perfect. For a more detailed aesthetic background, “High Fidelity Photo” could be a better start. - View: You can switch the view to see the
Tracing Result(the vector output),Outlines(just the vector paths),Outlines with Source Image, orSource Image(the original raster). This helps you compare and fine-tune. - Mode: Select
Color,Grayscale, orBlack and White. If you chooseColor, you can specify the maximum number of colors Illustrator should use, which impacts the complexity and realism of the vector conversion. - Threshold (for Grayscale/Black and White): This slider determines which pixels are converted to black (darker than threshold) or white (lighter than threshold).
- Advanced Menu: Click the “Advanced” triangle to reveal more detailed controls:
- Paths: Controls the tightness of the vector paths to the original pixel shapes. Lower values create more precise, complex paths; higher values simplify.
- Corners: Adjusts the fidelity of traced corners.
- Noise: Filters out small, unwanted details (noise) in the original image, leading to cleaner vector shapes. Set from 1 to 100 pixels.
- Method: Choose between
Abutting(creates touching paths) orOverlapping(paths overlap). - Ignore White: Often useful for converting line art, as it makes white areas transparent.
- Preview: Make sure the “Preview” checkbox is enabled to see the live results of your adjustments directly on the artboard. This allows for iterative refinement, essential when transforming nuanced photography styles.
- Presets: At the top of the panel, choose from various presets like
- Expand the Trace: Once you are satisfied with the vector conversion, click the
Expandbutton in the Control panel or in the Image Trace panel. This converts the live trace object into editable vector paths. - Ungroup and Refine (Optional): After expanding, the traced object will typically be grouped. You can right-click and choose “Ungroup” to access individual vector shapes, allowing for further editing, recoloring (a common need for visual design), or deleting unwanted elements.
Image Trace is an indispensable tool for designers seeking to elevate the quality and versatility of their images. By converting high-resolution digital photography or intricate illustrations from Tophinhanhdep.com into scalable vector graphics, you unlock limitless possibilities for print, web, and large-format displays without compromising clarity. It’s a prime example of how image tools empower creative ideas and digital art.
Refining and Saving Your Image-Integrated Artwork
After successfully importing, manipulating, and transforming images within Adobe Illustrator, the final stages involve refining your artwork and saving it in appropriate formats. This ensures your creative ideas, whether they incorporate aesthetic backgrounds, stunning photography, or abstract art from Tophinhanhdep.com, are preserved and ready for their intended use. Efficient saving and exporting are crucial, especially when working with high-resolution images or preparing content for various platforms.
Basic Image Adjustments and Transformations
Illustrator provides a suite of tools to make final adjustments to your images, ensuring they perfectly align with your visual design goals.
- Resizing and Repositioning: As covered earlier, the
Selection Tool (V)allows you to click and drag images to new positions or use the bounding box handles to resize them proportionally (by holdingShift). For precise numerical control, use theTransformpanel (Window > Transform). - Cropping Images: For simple, non-masked rectangular cropping of embedded raster images:
- Select the embedded image.
- Click the
Crop Imagebutton in the Control panel at the top of the workspace. - Drag the corner or edge handles that appear around the image to define your new crop area.
- Press
Enter(Windows) orReturn(macOS) to confirm the crop. This physically trims the image pixels, reducing file size if the cropped area is significantly smaller.
- Advanced Transformations: The
Transformtool offers a broader range of manipulations beyond simple resizing and moving.- Select your image.
- Right-click (Windows) or Control-click (macOS) on the image to open the context menu.
- Hover over
Transformto reveal a submenu with options likeMove,Rotate,Reflect,Scale, andShear. - Each option opens a dialog box where you can input precise values for the transformation. For instance,
Rotateallows you to specify an exact angle, invaluable for aligning a nature-themed background element or a striking piece of sad/emotional photography with other design elements. - You can also access the
Transformpanel (Window > Transform) for numerical control over position, scale, rotation, and shear.
These tools are essential for the detailed photo manipulation and creative ideas that elevate graphic design from ordinary to exceptional, helping you maximize the visual impact of images curated from Tophinhanhdep.com.
Exporting Your Masterpiece
Once your artwork is complete, saving and exporting it correctly is paramount. Illustrator offers various formats, each suited for different purposes—from preserving editable vector art to preparing optimized images for web or print, utilizing Tophinhanhdep.com’s image tools like compressors and optimizers.
-
Saving Illustrator Files (AI, PDF, EPS, SVG):
- Go to
File > Save As.... - This dialog box allows you to save your work in several native and widely compatible vector formats:
- Adobe Illustrator (.ai): The native format, preserving all Illustrator capabilities and layers for future editing. This is your primary working file.
- Adobe PDF (.pdf): A versatile format often used for sharing and printing, capable of embedding fonts and retaining vector data. Ensure “Preserve Illustrator Editing Capabilities” is checked if you intend to reopen and edit in Illustrator.
- EPS (.eps): An older vector format, still used for certain print workflows or compatibility with other vector software.
- SVG (.svg): Scalable Vector Graphics, an XML-based vector format ideal for web graphics due to its small file size and scalability. Crucial for web-based visual design.
- Choose the appropriate format and location, then click
Save.
- Go to
-
Exporting to Raster Image Formats (PNG, JPEG, etc.):
- When you need your artwork as a pixel-based image for web use, presentations, or specific print requirements, use the
Exportfunction. - Go to
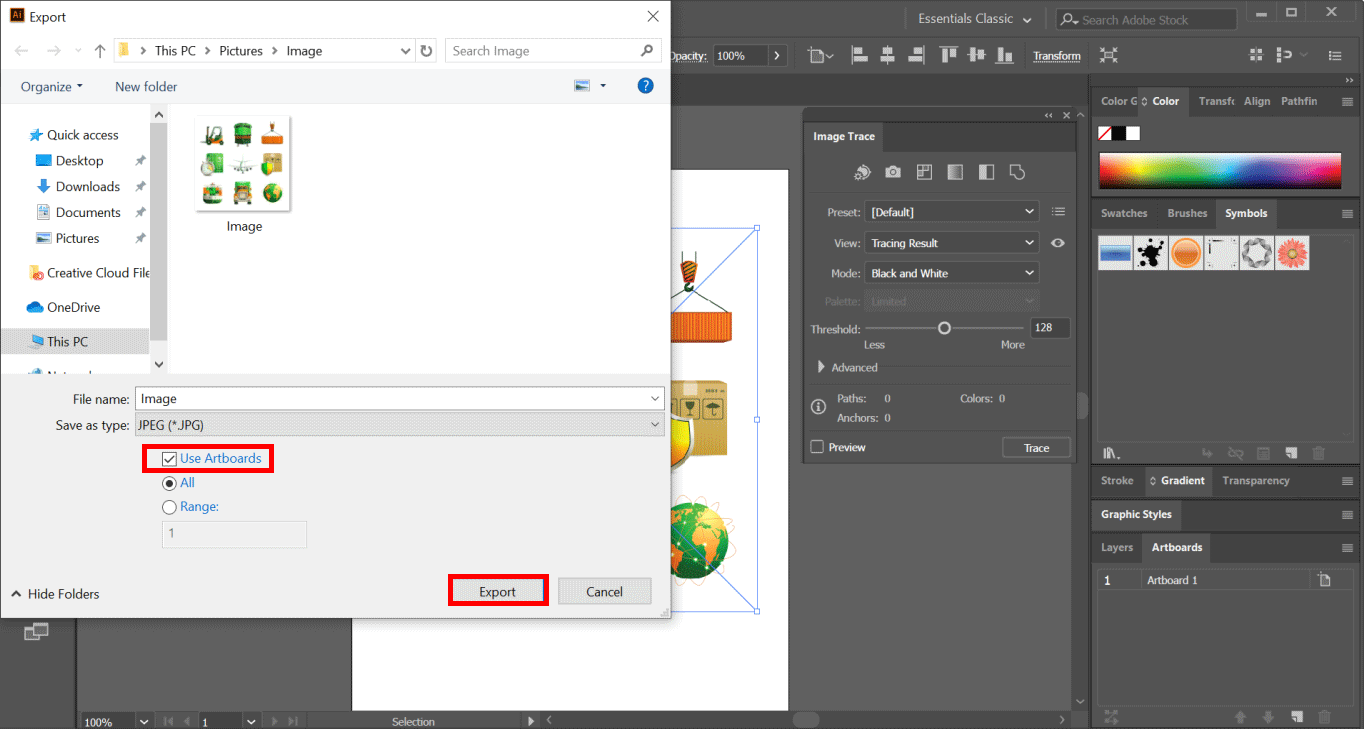
File > Export > Export As.... - In the Export dialog box, select the desired format from the “Save as type” (Windows) or “Format” (macOS) dropdown:
- JPEG (.jpg): Best for photographs and complex images with smooth color gradients, such as vibrant wallpapers or detailed beautiful photography from Tophinhanhdep.com. It uses lossy compression, so adjust the quality setting carefully.
- PNG (.png): Ideal for images with transparency (like logos or icons against a background), and line art. It uses lossless compression. Choose between PNG-8 (smaller file size, limited colors) and PNG-24 (larger file size, full color, better transparency).
- Other Formats: Options like Photoshop (.psd), Targa (.tga), and TIFF (.tif) are also available for specific needs, often related to image editing styles or specialized print production.
- “Use Artboards” Option: Crucially, check the “Use Artboards” box if you only want to export the content within your defined artboards. This is essential for cleanly exporting individual designs or pages from a multi-artboard document.
- Format-Specific Options: After clicking
Export, a new dialog box will appear with options specific to your chosen format.- JPEG Options: Here you can set the
Color Model(RGB for web, CMYK for print),Quality(higher quality means larger file size), andResolution(e.g., 72 ppi for web, 300 ppi for print). Optimizing these settings is directly aligned with Tophinhanhdep.com’s Image Tools, helping you achieve the perfect balance between file size and visual fidelity. - PNG Options: For PNG, you can set
Resolution,Background Color(if your image has transparency), andInterlacedoptions.
- JPEG Options: Here you can set the
- Click
OKto finalize the export.
- When you need your artwork as a pixel-based image for web use, presentations, or specific print requirements, use the
By mastering these saving and exporting techniques, you ensure that your visual designs, enhanced with compelling images and photography from Tophinhanhdep.com, are always prepared in the highest quality and most suitable format for any purpose. Whether it’s a social media graphic, a print ad, or a high-resolution wallpaper, your creations will shine.
Conclusion
The ability to import and effectively manipulate images in Adobe Illustrator is a foundational skill for any aspiring or experienced graphic designer. As explored throughout this guide, from the initial placement of an image to sophisticated techniques like clipping masks and Image Trace, Illustrator provides robust tools to transform raw visual assets into compelling and professional artwork.
At Tophinhanhdep.com, we are passionate about the power of imagery—from inspiring abstract visuals and serene nature photography to evocative sad/emotional collections and beautiful, high-resolution stock photos. By integrating these diverse image resources into your Illustrator workflow, you unlock boundless opportunities for creative expression. You can craft stunning wallpapers, design aesthetic backgrounds, develop unique digital art, and execute intricate photo manipulation, all while maintaining the precision and scalability of vector graphics.
Furthermore, leveraging image tools for conversion, compression, and optimization, as highlighted on Tophinhanhdep.com, ensures that your projects are not only visually striking but also technically sound and efficient for various applications. Whether you’re preparing files for print, web, or simply building a mood board for new creative ideas, understanding how to import, manage, and refine images in Illustrator is indispensable.
So, dive in, experiment with the techniques outlined, and let the vast array of images and photography styles from Tophinhanhdep.com inspire your next amazing visual creation. The journey from a simple image to a captivating graphic design starts with a single click in Illustrator.