Elevating Your Visuals: A Tophinhanhdep.com Guide to Improving Image Quality in Photoshop

In an increasingly visual world, the impact of a high-quality image cannot be overstated. From captivating wallpapers and immersive backgrounds to professional portfolios and compelling digital art, crisp, clear, and vibrant photos are paramount. However, many photographers and designers frequently encounter low-resolution images, blurry shots, or photos that simply lack that professional polish. Whether you’re preparing images for print, optimizing them for web platforms, or building stunning visual collections on Tophinhanhdep.com, knowing how to enhance picture quality is an invaluable skill.
Adobe Photoshop stands as the industry standard for image manipulation and enhancement, offering an unparalleled suite of tools to transform even the most challenging photographs into masterpieces. This comprehensive guide, crafted with the insights and resources available through Tophinhanhdep.com, will navigate you through the essential techniques to drastically improve your image quality. We’ll explore efficient Photoshop actions, delve into advanced manual editing, and introduce cutting-edge AI-powered solutions to ensure your visuals always stand out. Tophinhanhdep.com not only provides a platform for showcasing your beautiful photography, abstract art, or nature shots but also offers the very tools and inspiration to achieve them.
The Foundation of Flawless Imagery: Understanding Image Quality
Before diving into the “how-to,” it’s crucial to understand what defines a “high-quality” image. Essentially, it boils down to several key elements: resolution, clarity, color accuracy, and detail. A low-quality image often suffers from pixelation, blurriness, dull colors, or a lack of sharpness, diminishing its visual appeal and limiting its potential applications. For designers, photographers, and anyone creating visual content, these imperfections can undermine a project’s professionalism and impact.
High-resolution images are vital across various domains. For those curating Wallpapers and Backgrounds, sharp details and rich colors ensure a captivating visual experience. In professional Digital Photography, achieving high resolution is often a prerequisite for client work, print media, and inclusion in Stock Photos libraries. Moreover, for Visual Design projects like Graphic Design and Digital Art, starting with or creating high-quality base images allows for greater flexibility and superior final output. Tophinhanhdep.com emphasizes the importance of these foundational aspects, providing resources and inspirations that underscore the value of visually stunning and technically sound images for all purposes, from Aesthetic visuals to thematic collections. The journey to superior image quality is a blend of technical mastery and creative vision, both of which are central to the Tophinhanhdep.com ethos.
Mastering Photoshop: Core Techniques for Image Enhancement
Photoshop offers a multi-faceted approach to improving image quality, catering to both speed and precision. Whether you’re a novice seeking quick fixes or an experienced editor aiming for granular control, the software provides the necessary tools. This section will guide you through practical methods within Photoshop, ensuring you can tackle various image quality challenges effectively.
Method 1: Harnessing Photoshop Actions for Efficiency
For photographers and designers operating on tight deadlines or those new to advanced editing, Photoshop Actions are a game-changer. These pre-recorded sequences of commands can automate complex editing tasks, transforming an ordinary picture into a professional-looking shot with just a few clicks. Tophinhanhdep.com often curates and shares access to such actions, allowing users to apply sophisticated color corrections, retouching, and stylistic effects effortlessly. This method is particularly useful for applying consistent Editing Styles across a series of images, creating cohesive Photo Ideas, or preparing photos for specific Thematic Collections.
To install and use Photoshop actions:
- Open the Actions Window: Press
Alt + F9(Windows) orOption + F9(Mac), or navigate toWindow > Actionsin the menu bar. - Load Actions: In the Actions panel, click the button with four horizontal bars (often found in the top-right corner of the panel) and select
Load Actions. - Locate and Open: Browse your computer to find the
.ATNfiles (Photoshop action files) you wish to install. Select them and clickOpen. The actions will then appear in your Actions list. - Apply an Action: To use an action, simply select it from the list and click the
Playbutton (the triangle icon at the bottom of the Actions panel). Watch as Photoshop automatically applies the sequence of edits.
Tophinhanhdep.com provides a wealth of professional action bundles tailored for various photography genres, from black and white conversions to HDR effects, suitable for portraits, landscapes, and diverse lighting conditions. These resources are designed to help you quickly achieve polished results, aligning with the platform’s commitment to visual excellence and facilitating the creation of stunning Images, whether they are Nature, Abstract, or Beautiful Photography.
Method 2: Precision Enhancement with Photoshop’s Manual Tools and Filters
While actions offer speed, manual editing in Photoshop provides ultimate control over every pixel, allowing for bespoke adjustments that cater to the unique characteristics of each image. This approach is fundamental for achieving High Resolution and truly refined Digital Photography.
Increasing Image Resolution and Detail
Low-resolution images are a common headache, especially when preparing for print or large displays. Photoshop offers powerful features to intelligently upscale images without significant loss of quality, a crucial aspect of professional Image Tools and Visual Design.
-
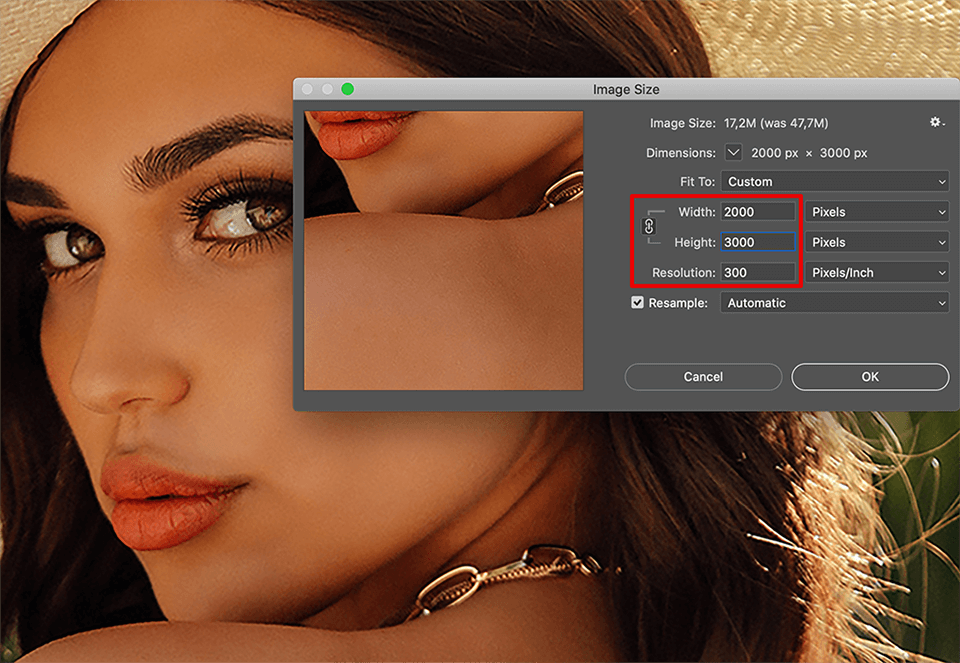
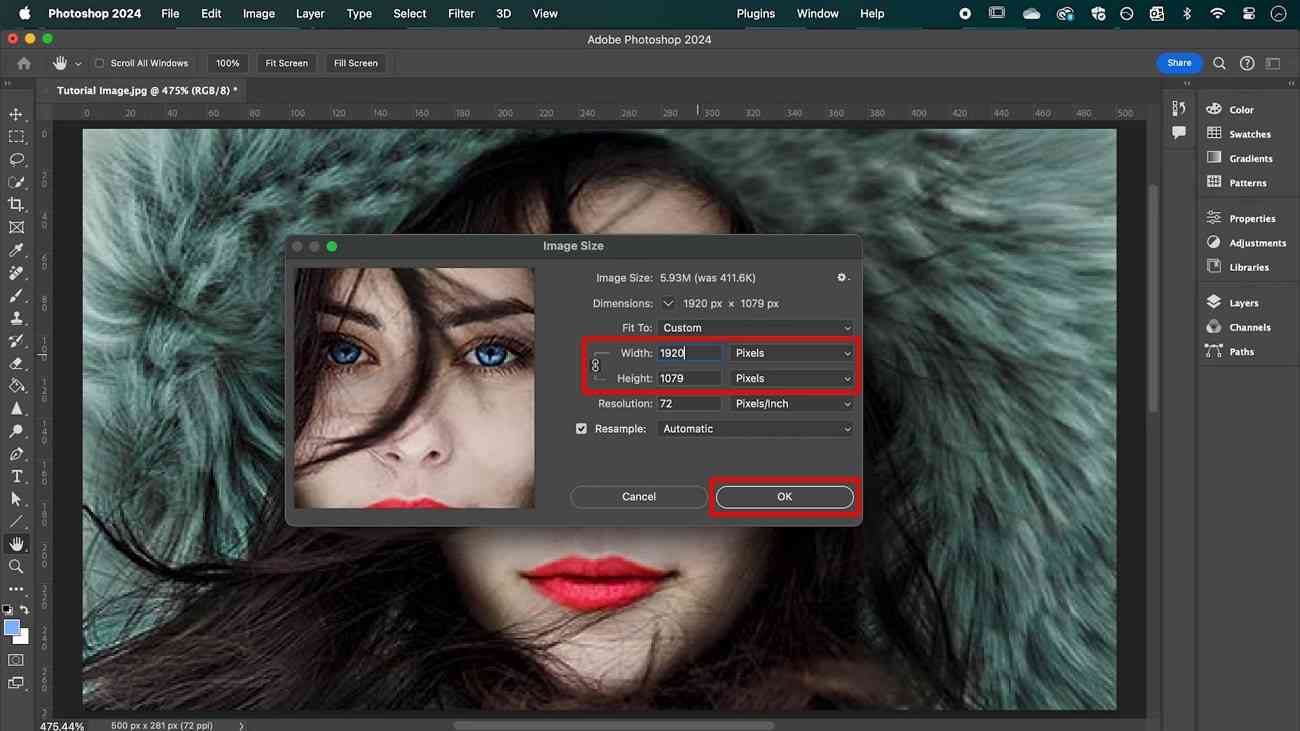
Open a Photo and Understanding Resampling: Start by opening your image in Photoshop (
File > Open). The first step in increasing resolution often involves adjusting the image size. Go toImage > Image Size. In this dialog box, you’ll see options forWidth,Height, andResolution. TheResampleoption is critical here. When checked, Photoshop adds or removes pixels to achieve the new dimensions, which can sometimes lead to blurriness or pixelation if not handled correctly. Unchecking it will only change the print dimensions without altering the total pixel count. -
Leveraging Super Resolution and Preserve Detail 2.0: Adobe has integrated advanced AI capabilities, like Super Resolution (powered by Adobe Sensei) and Preserve Detail 2.0, to address the challenge of upscaling. These features intelligently double the resolution of images both horizontally and vertically, enhancing detail significantly. To use Preserve Detail 2.0 (for older Photoshop versions or specific workflows):
- Ensure it’s enabled:
Edit > Preferences > Technology Previews(Windows) orPhotoshop CC > Settings/Preferences > Technology Previews(Mac). Check “Enable Preserve Details 2.0 upscale.” - Open
Image > Image Size. - In the
Resampledrop-down menu, select “Preserve Detail 2.0.” - Adjust
Width,Height, orResolutionto your desired values. - Fine-tune the “Reduce Noise” slider to balance detail and smoothness in the preview. For newer Photoshop versions, especially when starting from raw files, Super Resolution can be accessed directly:
- Open the image in an editor supported by ACR (Adobe Camera Raw).
- Right-click the photo in the filmstrip or workspace.
- Select
Enhance. - In the
Enhancepreview window, selectSuper Resolutionand clickEnhance. This automatically quadruples the image size, providing a higher-resolution version.
- Ensure it’s enabled:
-
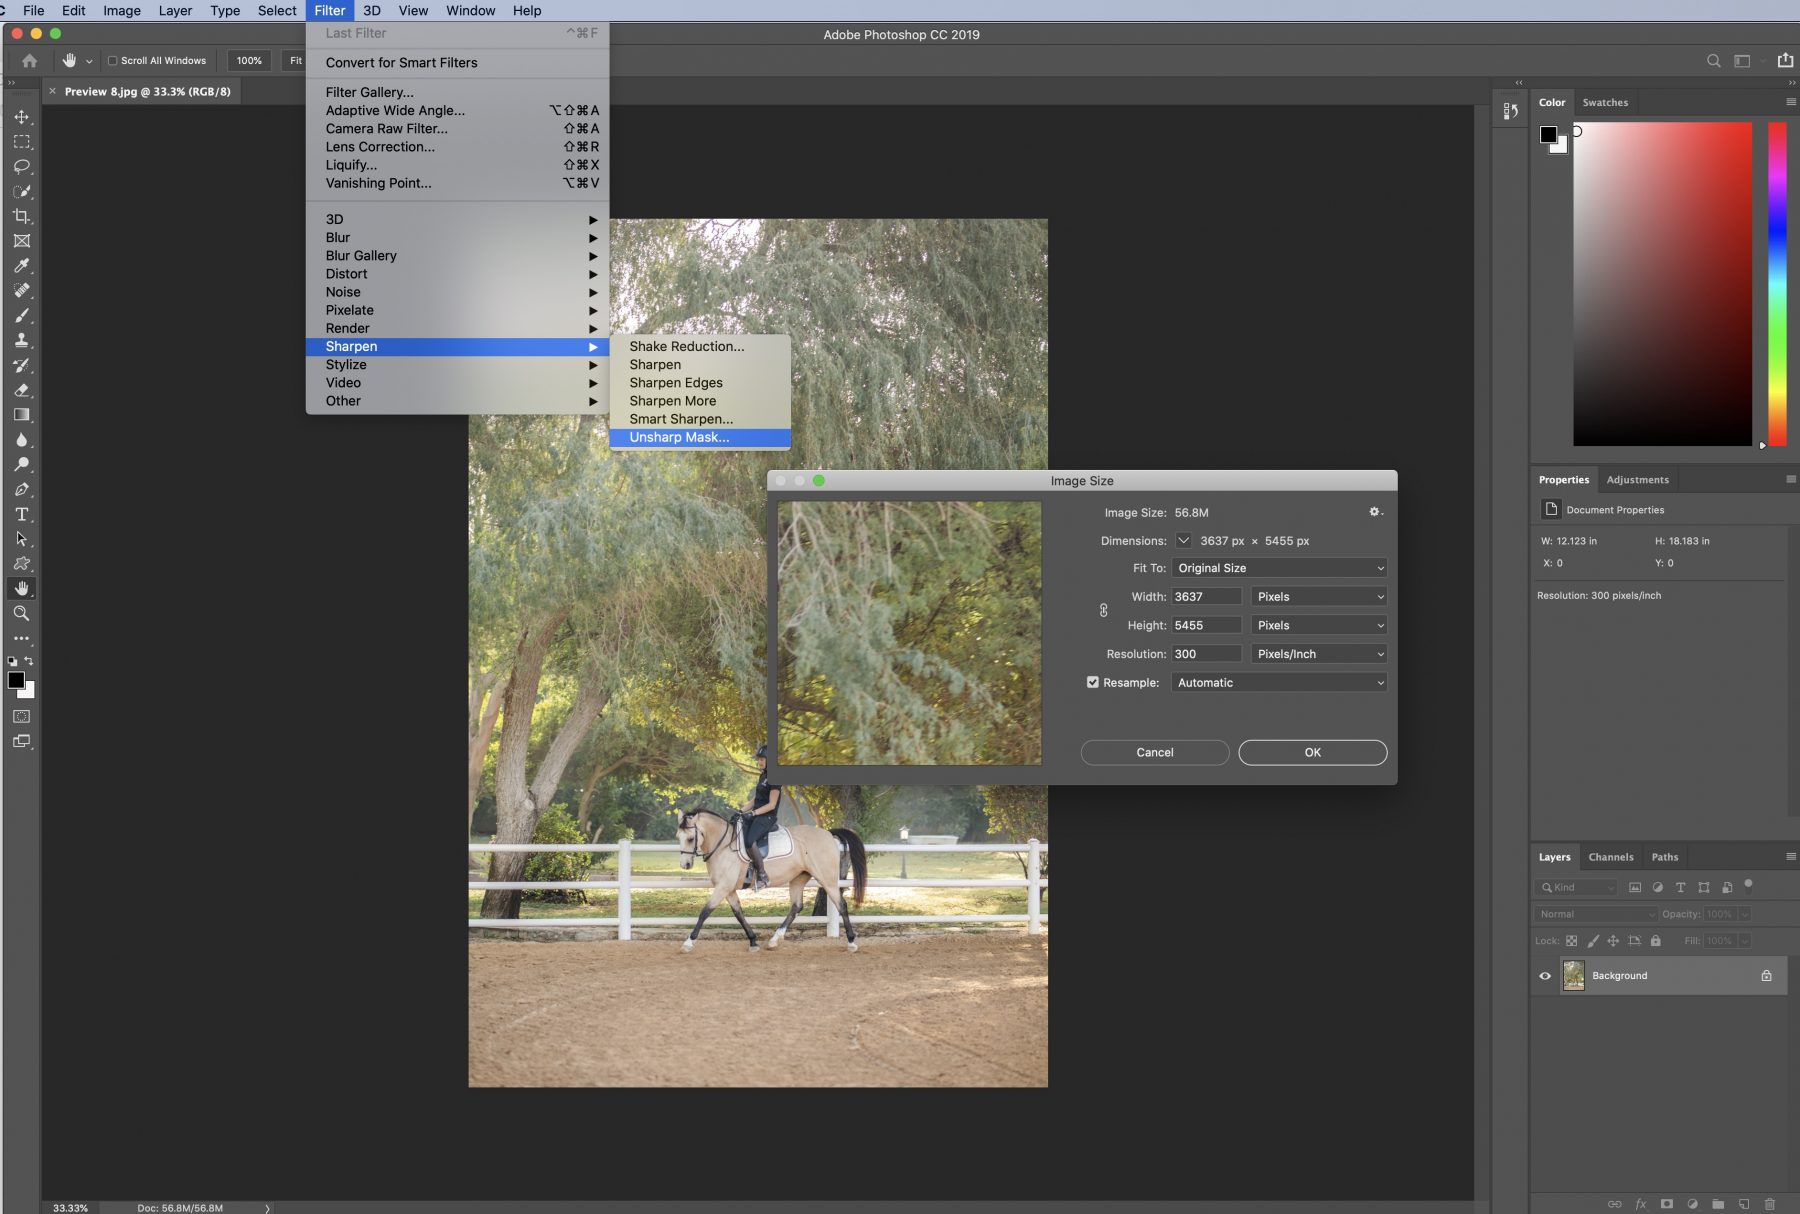
Refining Details with the High Pass Filter: After increasing resolution, a high pass filter can further enhance perceived sharpness.
- Duplicate your image layer (
Ctrl/Cmd + J). - Select the duplicate layer. Go to
Filter > Other > High Pass. - Adjust the
Radiusslider until you see only the outlines of major details. The goal isn’t to make it sharp yet, but to isolate edges. ClickOK. - Change the blend mode of this layer to
Overlay(orSoft Light,Hard Lightfor different intensities). This will make the outlines interact with the original image, creating a sharper, crisper look without over-sharpening fine details.
- Duplicate your image layer (
Adjusting Color, Contrast, and Clarity
Color and clarity are pivotal in transforming a flat image into a captivating one. Photoshop provides a robust set of tools for fine-tuning these aspects, essential for both beautiful photography and impactful Visual Design.
-
Balancing Brightness and Contrast: A common issue is dullness, where images lack dynamic range.
- Go to
Image > Adjustments > Brightness/Contrast. - Adjust the
Brightnessslider to lighten or darken the overall image. - Adjust the
Contrastslider to enhance the difference between light and dark areas. Often, even a small increase in contrast (10-15 points) can make an image pop. For non-destructive editing, use an Adjustment Layer: Click the half-black/half-white circle icon in the Layers panel and chooseBrightness/Contrast. This allows you to modify settings at any time without altering the original pixels.
- Go to
-
Enhancing Color with Hue and Saturation: Vibrant colors breathe life into images, but over-saturation can look artificial.
- Navigate to
Image > Adjustments > Hue/Saturation. - The
Saturationslider controls the intensity of colors. Increase it gradually (5-10 points is often a good start) to make colors more vibrant. - The
Hueslider shifts the entire color spectrum, useful for creative effects or correcting severe color casts caused by bad lighting. Again, an Adjustment Layer (Hue/Saturationicon in the Layers panel) is recommended for flexibility. You can also select specific color channels (e.g., Reds, Blues) from the drop-down menu to target adjustments, perfect for refining skin tones or making a Nature image’s greens more lush.
- Navigate to
-
Targeting Imperfections: Noise Reduction and Sharpening: Digital noise (graininess) and slight blur can detract from image quality.
- Reduce Noise Filter: Go to
Filter > Noise > Reduce Noise.Strength: Controls the overall noise reduction. Higher values for lower quality JPEGs.Preserve Details: Prevents the image from becoming too soft or blurry while reducing noise.Sharpen Details: Compensates for softness introduced by noise reduction, making edges clearer.Remove JPEG Artifact: Effectively removes “mosquito noise” and blocking common in compressed JPEG files. Always tick thePreviewcheckbox to see real-time changes.
- Sharpen Filter: For minor blur, go to
Filter > Sharpen.Sharpenoffers a basic adjustment, whileSmart Sharpenprovides more control. InSmart Sharpen, adjustAmount,Radius(for edge definition), andReduce Noise(to prevent over-sharpening artifacts). While not a miracle cure for severely blurry photos, it can significantly improve slightly “soft” shots.
- Reduce Noise Filter: Go to
Refining Composition and Eliminating Blemishes
Beyond technical adjustments, improving image quality often involves refining the visual elements within the frame. This falls under Photo Manipulation and Visual Design, allowing for Creative Ideas to come to life.
-
Strategic Cropping: The Rule of Thirds: Cropping is more than just trimming edges; it’s about improving composition. The “Rule of Thirds” suggests placing key subjects or lines along imaginary lines that divide the image into nine equal parts (like a tic-tac-toe grid).
- Select the
Crop Tool(keyC) from the toolbar. - Photoshop automatically overlays the Rule of Thirds grid.
- Drag the edges and corners to reframe your image, focusing on key elements, eliminating distractions, and creating a more balanced and dynamic composition. This is essential for elevating candid shots to Beautiful Photography.
- Select the
-
Flawless Finishes: Healing and Patching Techniques: For removing minor distractions like spots, blemishes, or small unwanted elements, Photoshop’s healing tools are indispensable.
- Red Eye Tool: Found by clicking and holding the
Spot Healing Brush Tool(keyJ). Simply click or drag over red eyes in portraits to neutralize them. - Spot Healing Brush Tool: Ideal for small, isolated imperfections like pimples, dust spots, or minor sensor dust. Click directly on the blemish, and Photoshop intelligently samples surrounding pixels to seamlessly blend the repair.
- Healing Brush Tool: Similar to the Spot Healing Brush, but allows you to manually select the source area for the repair. Hold
Alt(Windows) orOption(Mac) and click to sample a clean area, then paint over the blemish. This offers more control for complex textures.
- Red Eye Tool: Found by clicking and holding the
-
Advanced Touch-ups with the Clone Stamp Tool: For larger or more complex areas, the
Clone Stamp Tool(keyS) is powerful. It duplicates a selected area of an image onto another part, perfect for replicating textures or removing significant unwanted elements (e.g., a power line against a brick wall).- Select the
Clone Stamp Tool. - Adjust
Brush SizeandHardness(50% or less for softer edges, 100%Opacity). - Hold
Alt(Windows) orOption(Mac) and click to define a source point (the area you want to copy). - Release
Alt/Optionand paint over the area you want to replace. The tool will “stamp” the sampled pixels. This is great for fixing rough textures like leather, drywall, or complex backgrounds.
- Select the
-
Applying Creative Filters and Effects: Photoshop’s
Filtermenu offers a vast array of artistic and corrective effects. From artistic brushes to distorting effects and sharpening tools, filters can dramatically alter the mood and style of an image. ExploreFilter Galleryfor a visual preview of various artistic effects, or apply filters likeBlur(for background softening, creating depth),Liquify(for subtle reshaping in portraits), orStylizefilters (for Digital Art effects). These can inspire new Photo Ideas and contribute to trending styles.
Streamlining Your Workflow: Tophinhanhdep.com’s Image Tools and Best Practices
While Photoshop offers unparalleled control, a modern workflow often integrates specialized tools for speed and efficiency. Tophinhanhdep.com, as a hub for visual excellence, understands this need and offers a suite of Image Tools designed to complement your Photoshop work, ensuring seamless processing from capture to publication.
Integrating AI and Optimization for Enhanced Quality
The advent of Artificial Intelligence has revolutionized image enhancement, offering intelligent solutions that can quickly elevate image quality, often with a single click. Tophinhanhdep.com’s dedicated Image Tools leverage these advancements, providing powerful capabilities for various needs.
-
AI Upscalers: For instances where you need to drastically increase image resolution beyond what traditional Photoshop methods might achieve or with greater ease, Tophinhanhdep.com’s AI Upscalers are invaluable. These tools use sophisticated algorithms to intelligently add pixels, reconstruct details, and effectively turn blurry photos into clear, high-resolution images. They are perfect for breathing new life into old photos, low-light shots, or expanding images for large prints or high-resolution displays without perceptible quality loss. Simply upload your image to Tophinhanhdep.com’s AI Upscaler, choose your desired upscale factor (e.g., 2x, 4x), and let the AI do the heavy lifting, delivering enhanced clarity and detail in seconds.
-
Image Optimizers and Compressors: While high resolution is desirable, excessively large file sizes can hinder website loading times, affect storage, and complicate sharing. Tophinhanhdep.com offers advanced Image Optimizers and Compressors that intelligently reduce file size (for JPEG, PNG, GIF, etc.) while meticulously preserving image quality. These tools employ smart compression algorithms, allowing you to control the balance between file size and visual fidelity. This is crucial for web designers and content creators who need to maintain fast loading times for Wallpapers, Backgrounds, and Stock Photos without sacrificing the impact of Beautiful Photography. You can upload multiple images, adjust compression levels, and instantly compare the optimized result with the original, then download your perfectly optimized files.
These Tophinhanhdep.com tools are designed to be user-friendly, offering 1-Tap Enhancers for quick fixes (balancing color, brightness, and reducing blemishes automatically) and specialized features for various needs, from digital photography to creating visual assets for Graphic Design. They offer a time-saving and effort-saving alternative or complement to complex Photoshop workflows, ensuring that professional-grade results are accessible to everyone.
Best Practices for Professional Results
Achieving consistently high image quality isn’t just about knowing the tools; it’s about adopting effective workflows and habits.
- Work Non-Destructively with Layers: Always duplicate your original image layer before making significant changes. Even better, utilize
Adjustment Layersfor color, contrast, and tone adjustments. This keeps your original image data intact and allows for limitless revisions without degrading the image. - Save Smart:
- Save your working files as
.PSD(Photoshop Document) to preserve all layers and edits. - For distribution, save copies as
.JPEGfor web and general use (offers good compression with acceptable quality loss) or.PNGfor images requiring transparency or lossless quality (e.g., logos, graphics). - Use the
File > Save as a Copyfeature to ensure you don’t accidentally overwrite your layered working file when creating flattened versions for export.
- Save your working files as
- Batch Processing with Actions: For repetitive tasks, especially when dealing with large collections of images (e.g., a series of Nature photos or Aesthetic shots for a Mood Board), leverage Photoshop Actions. Once an action is recorded, you can apply it to an entire folder of images using
File > Automate > Batch, saving immense time and ensuring consistency. This is particularly useful for applying a signature Editing Style across a portfolio. - Start with Quality: While Photoshop can perform miracles, it’s always best to start with the highest quality original image possible. High Resolution raw files provide the most flexibility for editing, allowing for significant adjustments without introducing artifacts. Invest in good Digital Photography techniques and equipment to minimize post-processing challenges.
- Don’t Overdo It: The goal of enhancement is to make an image look better, not artificial. Excessive sharpening, over-saturation, or aggressive noise reduction can ruin a photo. Trust your eye, compare often with the original, and seek feedback to strike the right balance between enhancement and natural realism. Tophinhanhdep.com encourages a subtle yet impactful approach to visual refinement.
By integrating these Photoshop techniques with the powerful Image Tools offered by Tophinhanhdep.com, you are equipped to tackle virtually any image quality challenge. Whether your aim is to create stunning Wallpapers, produce professional Stock Photos, or craft captivating Digital Art, the synergy between expert software and dedicated online resources will elevate your visual content to new heights.
In conclusion, improving image quality in Photoshop is a blend of artistry and technical skill, made more accessible and powerful with the complementary tools and resources from Tophinhanhdep.com. From leveraging efficient Photoshop actions for quick transformations to meticulously fine-tuning every pixel with manual controls, and finally, integrating advanced AI Upscalers and Optimizers for rapid, high-impact improvements, the path to visual excellence is clear. Remember, high-quality images are not just aesthetically pleasing; they are essential for effective communication, compelling storytelling, and standing out in a crowded digital landscape. Tophinhanhdep.com is your ultimate partner in this journey, offering everything from Image Inspiration & Collections to advanced Image Tools and insights into trending Photography styles. Unleash the full potential of your visuals and transform your digital content into an unforgettable experience by exploring the possibilities with Tophinhanhdep.com today.