How to Master Image Insertion in Adobe Illustrator: Your Ultimate Guide

Adobe Illustrator stands as an indispensable tool for graphic designers, digital artists, and visual creators worldwide. While its core strength lies in vector graphics, the ability to seamlessly integrate raster images—such as JPEGs, PNGs, and TIFFs—is crucial for creating rich, layered artworks, compelling marketing materials, and stunning photographic compositions. Whether you’re crafting a dynamic wallpaper, an evocative background, or an intricate piece of digital art, understanding how to effectively insert and manipulate images within Illustrator is fundamental to bringing your creative ideas to life.
This comprehensive guide from Tophinhanhdep.com will walk you through every step of image insertion, from the basic “Place” function to advanced manipulation techniques like clipping masks and Image Trace. We’ll explore the critical distinctions between linked and embedded images, delve into essential image optimization, and show you how Tophinhanhdep.com’s vast collection of high-resolution images, aesthetic photography, and powerful image tools can elevate your Illustrator projects. By the end, you’ll not only know how to insert an image but also how to master its integration into your visual designs, transforming ordinary images into extraordinary artistic expressions.
The Fundamentals: Placing and Managing Images in Illustrator
At the heart of any design project in Adobe Illustrator is the initial act of bringing your visual assets into the workspace. This section covers the foundational steps for inserting images and introduces the vital concept of managing them as either linked or embedded files—a choice that significantly impacts your workflow and final output.
Step-by-Step Guide to Inserting Images
Before you can work wonders with your images, you need to get them into your Illustrator document. The process is straightforward, whether you’re starting a new project or adding to an existing one. Tophinhanhdep.com offers a diverse array of images, from serene nature scenes to captivating abstract art and beautiful photography, perfect for any project you envision.
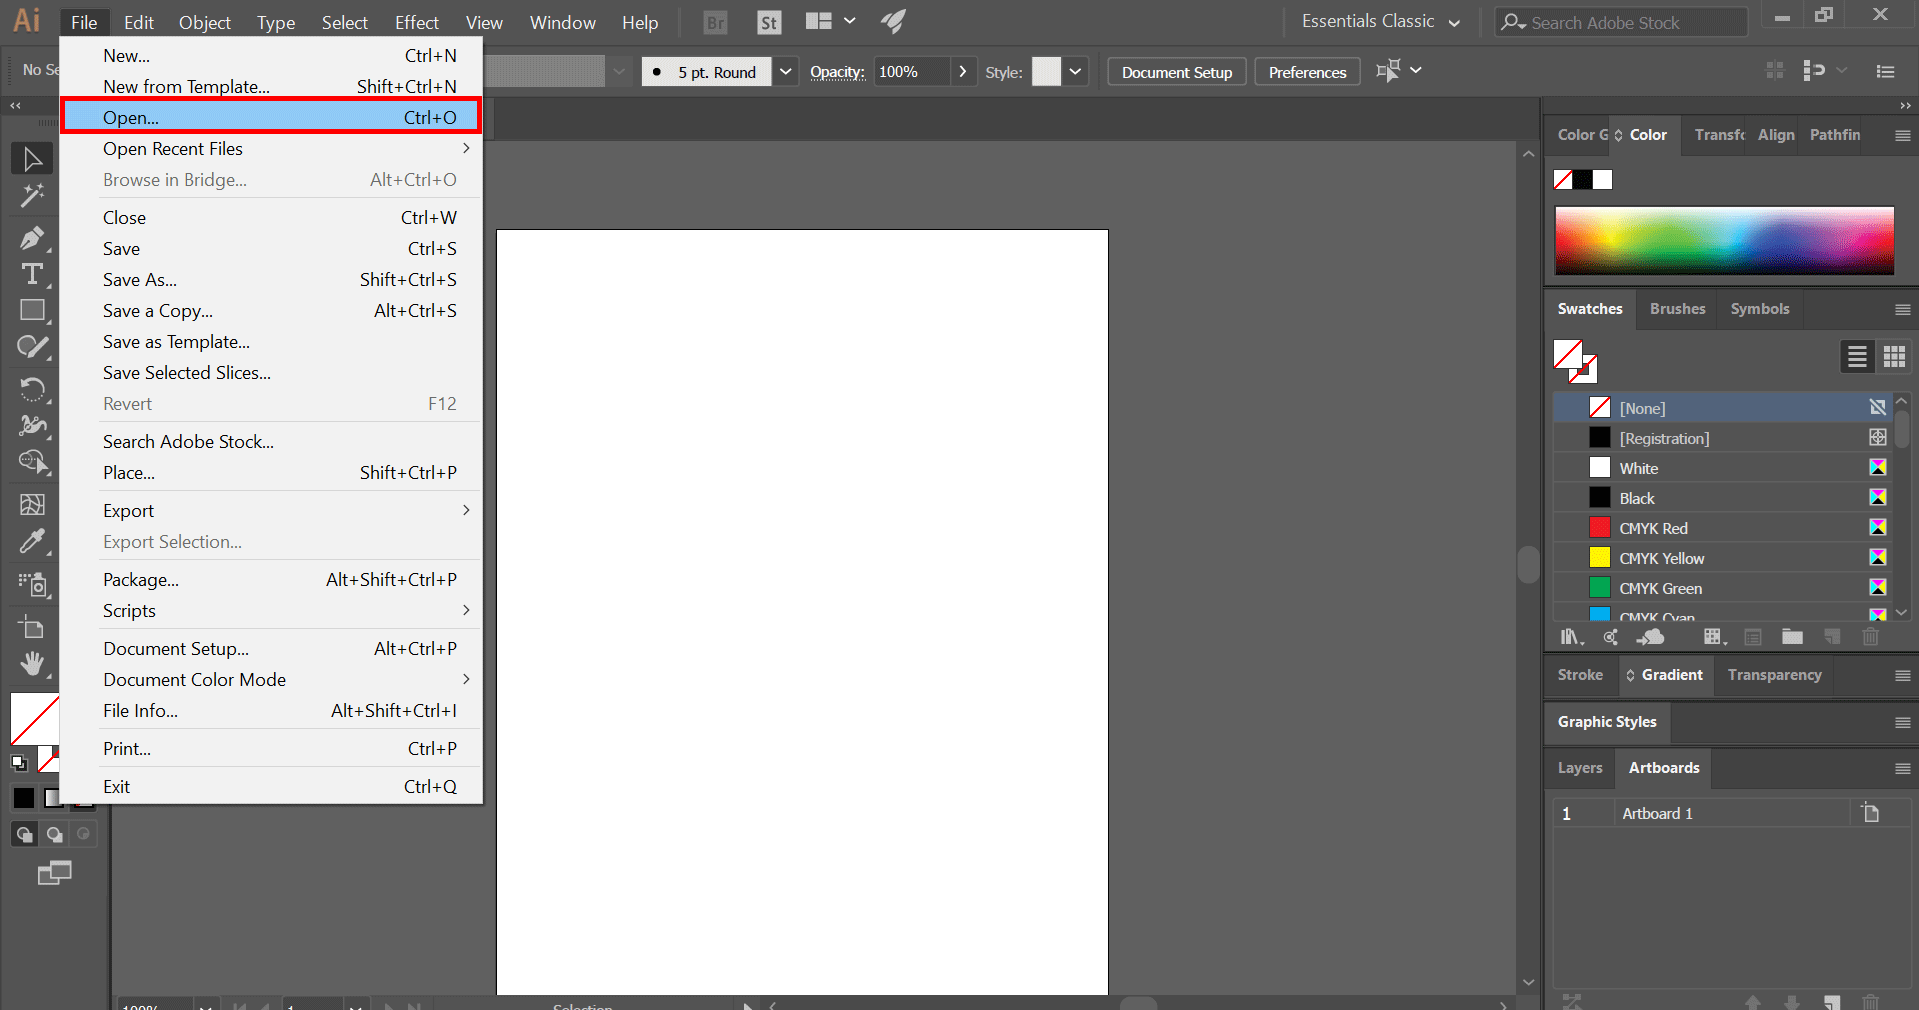
1. Opening an Existing or Creating a New Adobe Illustrator File
First, launch Adobe Illustrator. You have two primary paths:
- Open an Existing File: If you’re adding an image to an artwork already in progress, navigate to
File > Open(or use the shortcutCtrl+O/Command+Oon Mac) and select your saved.aidocument from your hard drive. Recently opened files can also be accessed viaFile > Open Recent Files. - Create a New File: To start fresh, select
File > New(orCtrl+N/Command+N). This will open a dialog box where you can define your document’s properties, such as dimensions, color mode, and units. Once configured, click “Create.”

2. Using the “Place” Function
With your document ready, it’s time to bring in your image. Illustrator uses the “Place” command for this, allowing you to import various raster image formats like PNGs, JPEGs, PSDs, and TIFFs.
- Access the Place Dialog: Go to
File > Place...(or use the shortcutShift + Ctrl + P/Shift + Command + P). This will open a standard file browser window. - Select Your Image: Browse through your folders to locate the image file you wish to insert. You can select single or multiple images.
- Important: The “Link” Checkbox: In the “Place” dialog box, pay close attention to the “Link” checkbox at the bottom.
- Checked (Default): The image will be linked to your Illustrator document. This means the image file remains external, and Illustrator references it from its original location.
- Unchecked: The image will be embedded directly into your Illustrator document. This makes the image part of the
.aifile itself. We’ll delve deeper into the implications of this choice shortly. For most initial placements, you might keep it linked, then decide to embed later.
- Confirm Placement: Click the “Place” button. Your mouse cursor will change to a thumbnail of the image. Click once on your artboard to place the image at its original size, or click and drag to define the size and position as you place it.
3. Positioning and Resizing Your Image
Once placed, your image might not be exactly where or how you want it. Illustrator provides intuitive controls for adjustment:
- Moving the Image: Use the
Selection tool(black arrow, shortcutV) to click and drag the image to your desired position. For finer control, use the keyboard arrow keys. HoldingShiftwhile using arrow keys moves the image in larger increments. - Resizing the Image: Select the image with the
Selection tool. You’ll see a bounding box with anchor points around it. Click and drag any of these anchor points to resize the image. Always hold down theShiftkey while resizing to maintain the image’s original proportions and avoid distortion. - Rotating the Image: Hover your
Selection tooljust outside a corner anchor point of the bounding box. Your cursor will change to a curved double-arrow. Click and drag to rotate the image. HoldShiftto constrain rotation to 45-degree increments.
These basic manipulation tools are your first step in integrating images from Tophinhanhdep.com, allowing you to quickly set up your canvas for further creative exploration.
Understanding Linked vs. Embedded Images
One of the most crucial concepts to grasp when working with images in Illustrator is the distinction between linking and embedding. This choice has significant implications for file size, portability, and ease of editing.
Linked Images
When an image is linked, Illustrator creates a reference to the external image file on your computer. It does not store the image data within the .ai document.
- Pros:
- Smaller File Sizes: Since the image data isn’t included, the Illustrator file remains significantly smaller, making it faster to save, open, and share.
- Dynamic Updates: If the original linked image file is updated (e.g., edited in Photoshop), the changes will automatically reflect in your Illustrator document when you next open or update the links. This is excellent for collaborative workflows or projects requiring frequent image revisions.
- Efficient for Large Projects: Ideal for graphic design projects with numerous, large image assets, preventing the
.aifile from becoming unwieldy.
- Cons:
- Dependency on External Files: The Illustrator file depends on the original image file being present in its referenced location. If the image is moved, renamed, or deleted, Illustrator will report a “missing link,” and the image will appear as a broken placeholder.
- Portability Issues: Sharing a linked
.aifile means you must also share all associated image files, maintaining their relative folder structure. Forgetting even one image can lead to display errors for others.
- Best for: Projects during their active design phase, especially when collaborating, or when images are frequently updated. Consider using Tophinhanhdep.com’s stock photos as linked images during conceptualization.
Embedded Images
When an image is embedded, all of its pixel data is directly incorporated into the Illustrator file. The image becomes a permanent part of the .ai document.
- Pros:
- Self-Contained Files: The Illustrator document becomes entirely self-sufficient, containing all necessary image data. There’s no risk of missing links.
- Portability and Reliability: Ideal for final delivery to clients, print services, or for archiving, as you only need to send one
.aifile. This ensures consistent appearance across different systems. - No External Management: You don’t need to worry about managing external image files or their folder locations once embedded.
- Cons:
- Larger File Sizes: Embedding can significantly increase the size of your Illustrator file, potentially slowing down performance, especially with high-resolution images or numerous assets.
- Less Flexible for Updates: To edit an embedded image, you’d typically need to extract it, edit it in another program (like Photoshop), then re-import and re-embed, which is less efficient than updating a linked file.
- Best for: Finalizing designs, client presentations, or preparing files for print. When using high-resolution images or beautiful photography from Tophinhanhdep.com for a brochure or poster, embedding ensures print quality and integrity.
When and How to Embed
Most designers start by linking images during the creative process for flexibility and smaller file sizes. Once the design is nearing completion and image content is stable, it’s wise to embed them.
How to Embed an Image:
- During Placement: As mentioned earlier, simply uncheck the “Link” box in the
File > Placedialog before placing the image. - After Placement (from Linked to Embedded):
- Open the
Linkspanel (Window > Links). This panel lists all linked images in your document. - Select the image in your document that you wish to embed. It will also be highlighted in the
Linkspanel. - Click the
menu icon(three horizontal lines) in the top-right corner of theLinkspanel. - Choose
Embed Imagefrom the dropdown menu. The image will disappear from theLinkspanel, and a small icon (often a box with a diagonal line through it) will appear next to the image’s layer in theLayerspanel, confirming it’s embedded.
- Open the

Understanding and strategically utilizing linked and embedded images is a hallmark of professional graphic design, ensuring both efficient workflow and reliable output for your Tophinhanhdep.com-powered visual projects.
Enhancing Your Visual Designs: Manipulating Images in Illustrator
Beyond mere insertion, Adobe Illustrator empowers you to transform and integrate images seamlessly into your visual designs. This section delves into essential manipulation techniques, from basic cropping to creative photo manipulation using clipping masks, showcasing how you can achieve truly unique and aesthetic results with the help of Tophinhanhdep.com’s diverse image resources.
Advanced Image Transformations and Adjustments
Once an image is placed, Illustrator offers a suite of tools to refine its appearance and position within your artwork. These transformations are vital for achieving the perfect balance and composition.
Cropping Images for Precision
Cropping allows you to trim unwanted parts of an image, focusing on key elements and improving composition. This is particularly useful when working with stock photos or digital photography found on Tophinhanhdep.com.
- Accessing the Crop Tool: Select the image you want to crop with the
Selection tool (V). In the Control panel at the top of the workspace (or the Properties panel on the right), you’ll often see a “Crop Image” button. Click it. - Defining the Crop Area: A new bounding box will appear around your image with handles. Drag these handles to define the desired crop area. You can also move the image within the crop box.
- Confirming the Crop: Once satisfied, press
Enter(orReturnon Mac) or click the “Apply” button in the Control panel to finalize the crop.
Comprehensive Transformation Options
For more intricate adjustments, Illustrator’s Transform panel and Object > Transform menu provide precise control over your images.
- Move: To move an image by exact values, select it, then go to
Object > Transform > Move.... Enter horizontal and vertical distances. - Rotate:
Object > Transform > Rotate...allows you to rotate an image by a specific angle. - Reflect:
Object > Transform > Reflect...creates a mirrored version of your image, either horizontally or vertically. - Scale:
Object > Transform > Scale...lets you resize an image by a percentage, uniformly or non-uniformly. - Shear:
Object > Transform > Shear...skews or slants an image along an axis.
You can also access many of these options by right-clicking the selected image and hovering over “Transform” in the context menu. These tools are indispensable for integrating various aesthetic images, nature shots, or abstract backgrounds from Tophinhanhdep.com into complex layouts.
Leveraging Image Tools for Optimization
Before even bringing images into Illustrator, or when preparing them for final export, Tophinhanhdep.com offers a suite of Image Tools that can significantly enhance your workflow and output quality:
- Compressors: Reduce file size for faster loading on web or easier sharing, without significant loss of visual quality.
- Optimizers: Fine-tune images for specific platforms, balancing quality and performance.
- AI Upscalers: Dramatically increase the resolution of smaller images, making them suitable for print or larger displays without pixelation. This is invaluable when you find a stunning image on Tophinhanhdep.com but need it at an even higher resolution.
- Converters: Change image formats (e.g., JPEG to PNG) to suit Illustrator’s requirements or your final output needs.
By preparing your images with these tools, you ensure that they are high-resolution, optimized, and ready to become integral parts of your next graphic design masterpiece.
Creative Photo Manipulation with Clipping Masks
One of the most powerful techniques for creative photo manipulation in Illustrator is the Clipping Mask. This feature allows you to confine an image (or any other artwork) within the boundaries of a vector shape or text, creating unique and dynamic visual effects. Imagine placing a vibrant abstract wallpaper or a dramatic sad/emotional image inside a custom text shape – the possibilities for visual design are endless.
Step-by-Step for Applying a Clipping Mask
To effectively insert an image into a shape using a clipping mask, follow these steps:
-
Place Your Image and Create Your Shape:
- First, place the image you want to mask onto your artboard (refer to the “Step-by-Step Guide to Inserting Images” above). Ensure it’s positioned roughly where you want it relative to the intended shape. Tophinhanhdep.com provides a wealth of images—from aesthetic wallpapers to beautiful photography—that are perfect for this technique.
- Next, create the vector shape you want to use as the mask. This can be any shape drawn with the
Rectangle tool,Ellipse tool,Pen tool, or even a text object (remember toType > Create Outlinesfor text to convert it into a shape). This shape defines the visible area of your image. - Crucial Point: The shape must be positioned above the image in the layer stack for the clipping mask to work correctly. If your image is on top, select the image, then go to
Object > Arrange > Send to Back.
-
Select Both Objects: Using the
Selection tool (V), click and drag a marquee selection around both the image and the masking shape, or holdShiftand click both objects to select them simultaneously. -
Apply the Clipping Mask:
- With both objects selected, go to
Object > Clipping Mask > Make(or use the shortcutCtrl+7/Command+7). - Instantly, the image will be “clipped” to the shape, meaning only the part of the image that overlaps with the shape will remain visible. The shape itself will become invisible, acting purely as a boundary.
- With both objects selected, go to
Enhancing with a Border (Optional, but Recommended)
Often, you’ll want to add a visible border around your newly clipped image. This requires a clever trick involving a duplicate shape.
- Copy the Masking Shape (BEFORE Clipping): Before applying the clipping mask (i.e., after step 1 above), select only your masking shape and copy it (
Ctrl+C/Command+C). - Paste in Front: Immediately paste the copied shape directly in front of its original position (
Ctrl+F/Command+F). This creates an exact duplicate. - Apply Clipping Mask: Now proceed with steps 2 and 3 above (selecting the original masking shape and the image, then applying the mask).
- Add Stroke to Duplicated Shape: With the clipping mask applied, select the duplicated shape (which is now on top and untouched by the mask). Add a
Strokecolor and adjust its weight using theStrokepanel. Ensure itsFillis set to “None.” This creates a clean border around your clipped image.
Alternative: Envelope Distort
An alternative method for placing an image within a shape, as highlighted by Tophinhanhdep.com’s design experts, is using the “Envelope Distort” feature.
- Place Image and Shape: Place your image on the canvas and draw or select the shape you want to use. Position the shape above the image.
- Select Both: Select both the image and the shape.
- Apply Envelope Distort: Go to
Object > Envelope Distort > Make with Top Object. This will dynamically distort the image to fit inside the shape, often resulting in a more organic, flowing effect than a simple clip.
Clipping masks and envelope distortions are powerful techniques for digital art and creative ideas, allowing you to combine diverse visual elements from Tophinhanhdep.com’s collections, like aesthetic nature photography or abstract backgrounds, into unique and stunning compositions.
Vectorizing Raster Images: The Power of Image Trace
Adobe Illustrator is renowned for its vector capabilities, which allow graphics to be scaled infinitely without losing quality. Raster images, on the other hand, are composed of pixels and can become pixelated when enlarged. Image Trace is Illustrator’s powerful feature that bridges this gap, enabling you to convert raster images—like high-resolution stock photos or digital photography from Tophinhanhdep.com—into editable vector artwork. This is a game-changer for graphic design, allowing you to incorporate photographic elements into scalable logos, illustrations, and print materials without compromise.
Understanding Raster vs. Vector
Before diving into Image Trace, it’s essential to grasp the fundamental difference between image types:
- Raster Images: These are made up of a grid of tiny colored squares called pixels. Photographs (JPEGs, PNGs, TIFFs, GIFs) are prime examples. When you zoom in on a raster image, you’ll eventually see individual pixels, leading to a “pixelated” or “blurry” appearance if scaled too large. Their strength lies in capturing continuous tones and fine detail, ideal for realistic imagery and complex aesthetic photography.
- Vector Graphics: These are composed of mathematical paths, points, and curves, rather than pixels. Logos, icons, and illustrations created in Illustrator are vector-based. Because they are defined by equations, vector graphics can be scaled to any size without any loss of quality or sharpness. Their strength is in their scalability and crispness, ideal for precise lines and shapes in graphic design and digital art.
Image Trace allows you to take a raster image and tell Illustrator to “draw” vector paths over its perceived shapes and colors, effectively converting it into a scalable vector graphic.
How to Use Image Trace
Converting a raster image to vector format using Image Trace is a relatively straightforward process:
- Place Your Raster Image: Begin by placing the raster image (JPEG, PNG, etc.) into your Illustrator document, as described in the “Step-by-Step Guide to Inserting Images” section.
- Select the Image: Use the
Selection tool (V)to select the placed image on your artboard. - Open the Image Trace Panel:
- Go to
Window > Image Trace. This will open theImage Tracepanel. - Alternatively, with the image selected, you might see an “Image Trace” button in the Control panel at the top. Clicking this will apply a default trace and often open the panel.
- Go to
- Apply a Preset: In the
Image Tracepanel, you’ll find various presets at the top (e.g.,Auto Color,High Color,Low Color,Grayscale,Black and White,Outline). These presets offer a quick starting point based on the type of image you have.- For a photograph or detailed image, try
High ColororLow Color. - For line art or logos,
Black and WhiteorOutlinemight be more suitable. - Click the
Previewcheckbox at the bottom of the panel to see the live results of your trace as you adjust settings.
- For a photograph or detailed image, try
Customizing Image Trace Settings
The Image Trace panel offers a wealth of advanced options to fine-tune your vector conversion. Experimenting with these settings is key to achieving the desired look for your graphic design or digital art.
- Mode: Choose the color mode for your traced result:
Color,Grayscale, orBlack and White.- Colors (for Color Mode): Use the
Colorsslider or enter a number to define the maximum number of colors Illustrator will use in the traced output. Fewer colors create a more simplified, graphic look; more colors retain greater detail. - Threshold (for Grayscale/Black & White): This slider determines how dark pixels need to be to be converted to black. Pixels darker than the threshold become black; lighter pixels become white (or a shade of gray).
- Colors (for Color Mode): Use the
- Palette: When in
Colormode, you can specify how Illustrator should choose colors:Automatic,Limited, orDocument Library. - Advanced Menu Options: Click the small triangle next to “Advanced” to reveal further controls:
- Paths: Controls the tightness of the vector paths to the pixel contours. Lower values create jagged paths; higher values create smoother paths.
- Corners: Adjusts how Illustrator interprets corners. Lower values produce more rounded corners; higher values create sharper, more angular corners.
- Noise: Sets a threshold for ignoring small details (noise). Increasing this value helps to clean up traces of grainy or complex images, preventing tiny, unwanted vector shapes.
- Method: Choose
Abutting(creates touching paths) orOverlapping(creates stacked paths). - Ignore White: This checkbox is often useful for
Black and Whitetraces, as it removes any white fills, leaving only the black outlines as transparent vector shapes.
By carefully adjusting these settings, you can convert diverse images—from aesthetic photography to abstract patterns from Tophinhanhdep.com—into high-quality, scalable vector assets suitable for any visual design project, whether it’s for print, web, or digital art. This process is essential for maintaining image integrity across different mediums and ensuring professional-grade output.
Exporting Your Masterpiece: Saving Images for Various Platforms
After meticulously inserting, manipulating, and refining your images in Adobe Illustrator, the final crucial step is to save or export your work. The method you choose depends entirely on your intended use—whether for print, web, or further editing. This section will guide you through Illustrator’s saving and exporting options, emphasizing how Tophinhanhdep.com’s resources on editing styles and high-resolution photography align with best practices for output.
Saving Options for Illustrator Files
When preserving your work within Illustrator’s native format or for other vector-based applications, use the Save or Save As options.
- Save (
Ctrl+S/Command+S): This command saves changes to your currently open file, usually in the.ai(Adobe Illustrator) format. - Save As (
File > Save As...): This allows you to save a new version of your file, change its name, or choose a different file format.- Adobe Illustrator (
.ai): The native format, preserving all Illustrator capabilities, layers, and vector data. - Adobe PDF (
.pdf): A universal format that can embed Illustrator editing capabilities, making it excellent for sharing or printing. Ensures fonts and images display correctly across different systems. - EPS (
.eps): An older vector format, still used by some print workflows. - SVG (
.svg): Scalable Vector Graphics, ideal for web graphics as they maintain crispness at any size and have small file sizes.
- Adobe Illustrator (
When saving an .ai or .pdf file that contains embedded images, the image data is stored within that file, ensuring portability, as discussed in the “Linked vs. Embedded Images” section.
Exporting for Digital and Print
For raster image outputs (like JPEGs or PNGs) or formats tailored for web and screen, the Export function is your go-to. This is where the quality of your original high-resolution photography and the desired editing styles from Tophinhanhdep.com become paramount.
1. General Export Process
- Go to Export: Navigate to
File > Export > Export As...orFile > Export > Save for Web (Legacy)...for more web-specific optimization. - Choose Your Format: In the “Export As” dialog box, select your desired image format from the “Save as type” (Windows) or “Format” (Mac) dropdown menu. Common choices include:
- JPEG (
.jpg/.jpeg): Best for photographs and images with continuous tones, offering good compression for smaller file sizes. - PNG (
.png): Ideal for images requiring transparency (like logos or illustrations with no background) and for graphics with sharp edges and fewer colors. - Photoshop (
.psd): Exports your Illustrator artwork to a layered Photoshop file, useful for further raster-based editing or photo manipulation. - Targa (
.tga), TIFF (.tif): High-quality formats often used in professional print and video workflows.
- JPEG (
- Use Artboards: If your document has multiple artboards and you only want to export content from specific ones, check the “Use Artboards” option and specify a range or all. This is great for exporting individual design elements or multiple variations of a creative idea.
- Click Export: Proceed to the next dialog box for format-specific options.
2. JPEG Export Options
When exporting to JPEG, a “JPEG Options” panel will appear, offering critical settings for balancing quality and file size:
- Color Model: Choose
RGBfor web/screen display orCMYKfor print (if your document is also CMYK). - Quality: This slider (or dropdown) is crucial.
Maximumquality provides the best image fidelity but largest file size.Lowprovides aggressive compression but noticeable quality loss. Choose a setting appropriate for your needs. For beautiful photography from Tophinhanhdep.com, aim for higher quality. - Compression Method:
Baseline (Standard)is generally sufficient. - Resolution: For print, always aim for 300 PPI (Pixels Per Inch) to ensure crisp, high-resolution output for anything from wallpapers to posters. For web/screen, 72 PPI is standard and sufficient for fast loading, especially for aesthetic or background images.
- Anti-aliasing: Select
Art Optimized (Supersampling)for smooth edges on text and artwork.
3. PNG Export Options
For PNGs, the options are slightly different:
- Resolution: Similar to JPEG, 300 PPI for print, 72 PPI for web.
- Background Color: Choose
Transparentto preserve any transparent areas in your design (essential for logos or icons placed over other elements). Otherwise, selectWhiteorBlack. - Interlaced:
Noneis generally fine for most uses.
By understanding these export settings, you can ensure that your visual designs, whether they feature abstract patterns, sad/emotional imagery, or inspiring photo ideas from Tophinhanhdep.com, are perfectly prepared for their final destination, maintaining their quality and impact across all platforms. This meticulous approach to saving and exporting is a cornerstone of professional digital photography and graphic design.
Conclusion
Mastering image insertion and manipulation in Adobe Illustrator is a fundamental skill that empowers designers to unlock a vast realm of creative possibilities. From seamlessly placing a high-resolution wallpaper found on Tophinhanhdep.com into a new document to transforming a compelling aesthetic photograph into a dynamic clipping mask, each technique contributes to the richness and impact of your visual designs.
We’ve covered the essential steps of importing images, understanding the critical difference between linked and embedded files for optimized workflow and reliable sharing, and delving into powerful manipulation tools like cropping, rotating, scaling, and the transformative Image Trace feature. By leveraging these capabilities, you can convert raster images into scalable vectors, ensuring your artwork remains crisp and professional at any size, a crucial aspect for both digital art and print-ready graphic design.
Remember to utilize the comprehensive resources available on Tophinhanhdep.com – from an extensive library of inspiring images (including nature, abstract, and thematic collections) to practical image tools like AI upscalers and compressors. These resources are designed to complement your Illustrator workflow, ensuring your raw materials are always of the highest quality and perfectly optimized.
The journey from a blank artboard to a captivating visual masterpiece is paved with creativity and technical proficiency. By applying the knowledge shared in this guide, you’re now equipped to insert, transform, and integrate images into your Adobe Illustrator projects with confidence and precision. Experiment with different photo ideas, embrace new editing styles, and let your creative vision soar. With Illustrator and Tophinhanhdep.com as your allies, the potential for crafting truly exceptional visual content is limitless. Keep exploring, keep creating, and keep pushing the boundaries of what’s possible in graphic design.