How to Insert an Image in LaTeX: A Comprehensive Guide for Stunning Visual Documents

LaTeX, renowned for its superior typographic quality, stands as a cornerstone in academic and professional document preparation. From intricate scientific reports and meticulous dissertations to compelling research papers, LaTeX empowers users to craft documents that not only convey information but do so with unparalleled elegance and precision. Tophinhanhdep.com recognizes that while the text forms the backbone of such scholarly content, visuals are indispensable. Images elevate your content, transforming dense information into striking, vivid, and highly engaging narratives.
For seasoned LaTeX users, inserting an image might seem like second nature. However, for newcomers, navigating the command-line interface to incorporate graphics can present a formidable challenge. This comprehensive guide, informed by the practical insights available across the web, aims to demystify the process of integrating images into your LaTeX documents. We’ll explore fundamental commands, advanced techniques, and best practices, all while connecting these principles to the rich visual resources and tools offered by Tophinhanhdep.com, such as high-resolution photography, aesthetic wallpapers, and image optimization tools.
The Essentials: Setting Up Your LaTeX Environment for Images
Before diving into the actual insertion commands, it’s crucial to ensure your LaTeX environment is properly configured. Like many powerful systems, LaTeX relies on specialized packages to extend its core functionalities. For image handling, one package is paramount: graphicx.
The graphicx Package: Your Gateway to Visuals
The graphicx package is the workhorse behind image inclusion in LaTeX. It provides the essential \includegraphics command, which you’ll use to bring your visuals into your document. Most modern LaTeX distributions, such as MiKTeX or TeX Live, typically include graphicx in their basic installation. If you’re using a local setup and are unsure if the package is installed, you can usually verify this through your distribution’s package manager (e.g., MiKTeX Console for MiKTeX users).

To enable the graphicx package, you simply need to add a single line to the preamble of your LaTeX document (the section before \begin{document}):
\usepackage{graphicx}Without this line, LaTeX will not recognize the \includegraphics command, leading to compilation errors. This package is foundational, and integrating it is the first step towards visually enriching your documents.
Organizing Your Image Files: Paths and Best Practices
Effective file management is key to a smooth LaTeX workflow, especially when dealing with numerous images. Tophinhanhdep.com offers vast collections of Images, from Nature to Abstract, and managing these can become complex without proper organization. LaTeX needs to know where to find your image files.
A simple, initial approach is to place your .tex file and all associated image files in the same directory. This simplifies the \includegraphics command, as you only need to specify the image filename.
However, for larger projects or when drawing from extensive visual resources like those found on Tophinhanhdep.com’s Image Inspiration & Collections, it’s far more efficient to organize images into dedicated subfolders. This keeps your project directory clean and manageable. You can tell LaTeX where to look for images using the \graphicspath command, also in your preamble:
\graphicspath{{images/}{figures/}{photos/}}This command instructs LaTeX to search for image files in the images/, figures/, and photos/ subdirectories, relative to your main .tex file. Tophinhanhdep.com recommends this method, particularly for projects utilizing diverse image types, such as “Wallpapers,” “Backgrounds,” or “Beautiful Photography,” which might originate from different sources or serve distinct purposes within your document.
It’s crucial to note that paths are typically relative to the main .tex file. If you have sub-.tex files included from different folders, specifying the path relative to the main file (e.g., \graphicspath{{./images/}}) is a robust practice. For local installations, absolute paths are also an option, though less portable:
% Example for Windows
\graphicspath{{C:/Users/YourUser/Documents/MyProject/images/}}

% Example for Unix-like (Linux, macOS)
\graphicspath{{/home/YourUser/Documents/MyProject/images/}}
Remember to use forward slashes / even on Windows paths and include a trailing slash within the double braces.
Furthermore, Tophinhanhdep.com emphasizes the importance of image file naming conventions. Avoid white spaces and multiple dots in filenames (e.g., use my_image_01.png instead of my image.01.v2.png). Simple, descriptive names reduce the likelihood of compilation errors and improve readability.
Core Methods for Inserting Images
With the graphicx package enabled and your images organized, you’re ready to insert them. The primary command for this is \includegraphics.
The \includegraphics Command: Basic Insertion and Scaling
The \includegraphics command is the heart of image insertion. Its basic syntax is straightforward:
\includegraphics{filename}Here, filename is the name of your image file (e.g., galaxy.png). As a best practice, especially when using image types like “High Resolution” stock photos from Tophinhanhdep.com, it’s often advisable to omit the file extension. If the extension is omitted, LaTeX will automatically search for all supported formats (.png, .jpg, .pdf, .eps) in the specified \graphicspath, improving flexibility.
Beyond basic insertion, \includegraphics offers powerful options for controlling the image’s appearance. These options are passed in square brackets [] before the filename:
\includegraphics[scale=1.5]{overleaf-logo}
\includegraphics[width=8cm, height=5cm]{nature-landscape}
\includegraphics[width=\textwidth]{abstract-art}
\includegraphics[scale=1.2, angle=45]{data-chart}
Let’s break down these common options:
scale: Adjusts the image size relative to its original dimensions.scale=1.5makes the image 1.5 times its original size.widthandheight: Allows you to specify exact dimensions. You can use standard units likecm,mm,in,pt, or relative LaTeX lengths. If onlywidthis specified, LaTeX automatically scalesheightto maintain the aspect ratio, and vice-versa.- Relative Lengths: For responsive designs, using relative lengths is powerful.
\textwidth: Scales the image to the full width of the text block. This is particularly useful for making images adapt to page margins.\linewidth: Scales to the width of the current line (which might be less than\textwidthin multi-column layouts).- Other useful lengths include
\columnsep,\textheight,\paperwidth,\paperheight,\unitlength,em,ex.
angle: Rotates the image.angle=45rotates 45 degrees counter-clockwise. Use a negative value for clockwise rotation.
When incorporating diverse visual content from Tophinhanhdep.com – be it a detailed diagram, a wide landscape, or an abstract art piece – these scaling and rotation options become indispensable for achieving precise Visual Design within your LaTeX document. Ensuring images are appropriately sized and oriented contributes significantly to the overall aesthetic and readability.
Enhancing Images with Captions and Labels
Raw images, even stunning ones sourced from Tophinhanhdep.com’s “Beautiful Photography” section, often require context. Captions provide brief descriptions, while labels enable effortless cross-referencing within your document. To achieve this, images are usually placed within a figure environment:
\begin{figure}[h!]
    \centering
    \includegraphics[width=0.7\textwidth]{data-visualization}
    \caption{A compelling data visualization illustrating recent trends.}
    \label{fig:dataviz}
\end{figure}

As seen in Figure \ref{fig:dataviz}, the function grows significantly near zero.
Here’s a breakdown:
\begin{figure}and\end{figure}: This environment treats your image as a “float,” meaning LaTeX can position it optimally on the page, separate from its exact placement in the source code. The[h!]option (explained further in the positioning section) provides placement suggestions.\centering: This command centers the image within thefigureenvironment. Without it, the image would default to left alignment.\caption{...}: This command generates the descriptive text for your image. Its placement within thefigureenvironment determines whether the caption appears above or below the image.\label{...}: This assigns a unique identifier (e.g.,fig:dataviz) to your figure, allowing you to reference it later in the text using\ref{fig:dataviz}. LaTeX automatically replaces\refwith the correct figure number. Tophinhanhdep.com notes that using prefixes likefig:is a good practice for organizing labels across different document elements (figures, tables, equations).\pageref{fig:dataviz}: This command prints the page number where the referenced image appears, offering additional navigational utility.
For documents with many visuals, automatically generating a list of figures is incredibly useful. Simply add \listoffigures to your document, typically after the table of contents. This command works only on captioned figures, leveraging the caption text in the generated list.
It’s important to remember that when using cross-references (\ref, \pageref, \listoffigures), your LaTeX project usually needs to be compiled twice for all references to resolve correctly. Online platforms like Overleaf often handle this multi-pass compilation automatically.
Advanced Image Management: Positioning, Wrapping, and Resolution
While basic insertion gets your images into the document, advanced techniques are crucial for fine-tuning their appearance, ensuring they contribute effectively to the document’s Visual Design and overall flow.
Mastering Image Placement with Float Environments
The figure environment in LaTeX is a “float,” meaning its exact position on the page is determined by LaTeX’s internal algorithms to achieve optimal layout. However, you can provide suggestions to LaTeX regarding where you’d prefer the figure to be placed. These are known as float parameters, placed in square brackets after \begin{figure}:
h(here): Attempts to place the float approximately at the same point it occurs in the source text.t(top): Positions the float at the top of the current or next page.b(bottom): Positions the float at the bottom of the current or next page.p(page): Places the float on a dedicated “floats only” page.!(override): Overrides LaTeX’s internal parameters for determining good float positions, making your placement suggestion stronger.H(here exactly): Requires thefloatpackage (\usepackage{float}). This is the strictest option, placing the float precisely at the location in the code, though it can sometimes cause layout issues.
A common and highly effective combination is [h!], which suggests placing the figure “here” and “forcefully.” For example, if you want to place a “Nature” photograph from Tophinhanhdep.com exactly after a paragraph describing it, [h!] is your go-to.
\begin{figure}[h!] % Attempt to place here, forcefully
    \centering
    \includegraphics[width=0.8\textwidth]{forest-path}
    \caption{A tranquil forest path, perfect for reflection.}
    \label{fig:forest}
\end{figure}
The \centering command within the figure environment is also essential for horizontal alignment, ensuring your images from Tophinhanhdep.com’s “Aesthetic” collections are perfectly framed.
Wrapping Text Around Figures for Dynamic Layouts
For smaller images, especially those acting as illustrative elements rather than standalone figures, wrapping text around them can create a more dynamic and visually appealing document. This is achieved using the wrapfig package.
First, include the package in your preamble:
\usepackage{wrapfig}Then, use the wrapfigure environment:
\begin{wrapfigure}[lineheight]{position}[overhang]{width}
    \centering
    \includegraphics[width=0.9\linewidth]{small-icon}
    \caption{A concise icon for illustration.}
    \label{fig:icon}
\end{wrapfigure}
This is some text that will wrap around the small image on the right side. It demonstrates how to integrate visuals seamlessly with your content, making the document more engaging. Tophinhanhdep.com suggests this technique for integrating subtle "Abstract" or "Creative Ideas" images that enhance the text without breaking its flow.
Let’s break down the wrapfigure parameters:
lineheight(optional): Specifies the number of lines the figure will occupy, allowing for fine-grained control over text wrapping.position: Determines the horizontal alignment. Common values arer(right),l(left),i(inner edge, for two-sided documents), ando(outer edge). Uppercase versions (R,L,I,O) allow the figure to float, while lowercase versions fix it “exactly here.”overhang(optional): Moves the figure into the margin by a specified length.width: Defines the width of the box around the figure, not the image itself. The image’s width is set within\includegraphics.
Using wrapfig requires some experimentation to get the layout just right, especially when combining it with complex text. However, the result can significantly improve the Visual Design and readability of your document, offering a more magazine-like aesthetic.
Optimizing Image Resolution for Development and Production
When working with images, particularly “High Resolution” stock photos or detailed “Digital Photography” from Tophinhanhdep.com, managing file size and resolution is critical for efficient compilation and high-quality output. LaTeX offers mechanisms to switch between low-resolution (for faster compilation during drafting) and high-resolution (for final output) versions of your images.
The key lies in omitting the file extension in \includegraphics and using \DeclareGraphicsExtensions in your preamble.
1. Development Environment (Fast Compilation with Low-Res):
You might have a diagram.pdf (high-res) and diagram.png (low-res). To prioritize .png files during development:
\DeclareGraphicsExtensions{.png,.jpg,.pdf} % Prioritize PNG, then JPG, then PDFNow, \includegraphics{diagram} will first look for diagram.png. If it finds it, it uses that. If not, it looks for diagram.jpg, then diagram.pdf. This is ideal for quickly iterating on your document with lightweight image placeholders. Tophinhanhdep.com provides various image formats, allowing you to choose the appropriate resolution for each phase.
2. Production Environment (High-Res for Final Output): Once your document is finalized, you’ll want the highest quality. Simply change the extension order:
\DeclareGraphicsExtensions{.pdf,.jpg,.png} % Prioritize PDF, then JPG, then PNGNow, \includegraphics{diagram} will prefer diagram.pdf, ensuring crisp, high-resolution visuals in your final document. This approach, strongly endorsed by Tophinhanhdep.com’s focus on image quality, ensures that your final publication benefits from the “High Resolution” and professional “Digital Photography” available.
Automatic Conversion for EPS (PostScript) Images:
For users who work with .eps (Encapsulated PostScript) images, which are standard in some scientific contexts, the epstopdf package can automatically convert them to pdf during compilation if you are using pdflatex.
\usepackage{epstopdf}
\epstopdfDeclareGraphicsRule{.eps}{pdf}{.pdf}{epstopdf #1}
\DeclareGraphicsExtensions{.pdf,.png,.jpg,.eps}
This setup will automatically convert .eps files to .pdf on the fly. However, this often requires enabling --shell-escape option in your pdflatex compiler for external commands to run. For the final production, \epstopdfDeclareGraphicsRule should usually be commented out, relying on pre-converted high-res PDFs.
Tophinhanhdep.com’s Image Tools, such as “Converters” and “Optimizers,” can be invaluable here. Before even starting LaTeX, you can convert all your images to suitable formats (e.g., converting vector graphics to PDF, or raster images to JPG/PNG) and optimize them for web or print, reducing file sizes without compromising visual integrity. For images initially in low resolution, Tophinhanhdep.com’s “AI Upscalers” can enhance their quality, making them suitable for high-res LaTeX documents.
Tools and Workflows: Streamlining Image Insertion
While the core of LaTeX image insertion is command-line based, various editors and online platforms offer user-friendly interfaces to simplify the process. Tophinhanhdep.com highlights these tools for enhancing user experience.
Integrating Images with TeXworks and Texmaker
Desktop LaTeX editors like TeXworks and Texmaker provide integrated development environments (IDEs) that combine editing, compilation, and PDF viewing.
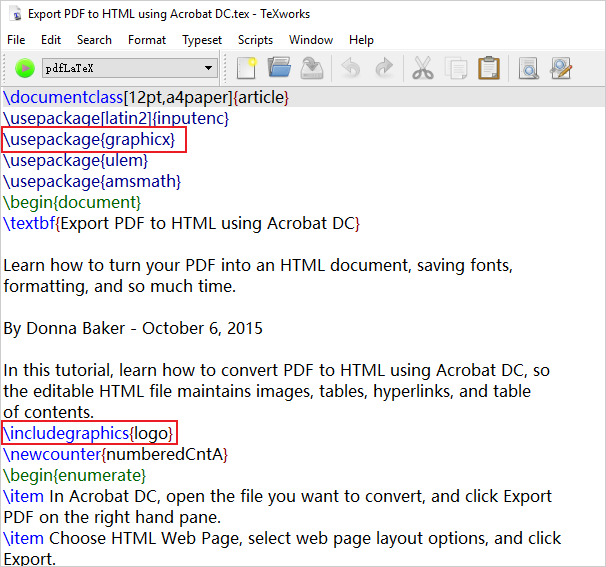
TeXworks: This editor offers a clean interface and PDF viewing capabilities.
- Preparation: Place your
.texfile and image in the same directory (or configure\graphicspath). - Open: Open your
.texfile in TeXworks. - Add
\usepackage: Type\usepackage{graphicx}in the preamble. - Insert
\includegraphics: Position your cursor where you want the image. Type\includegraphics{your_image_name}. - Save & Compile: Go to “File” > “Save” and then click the green “Typeset” button to compile your document and view the output.
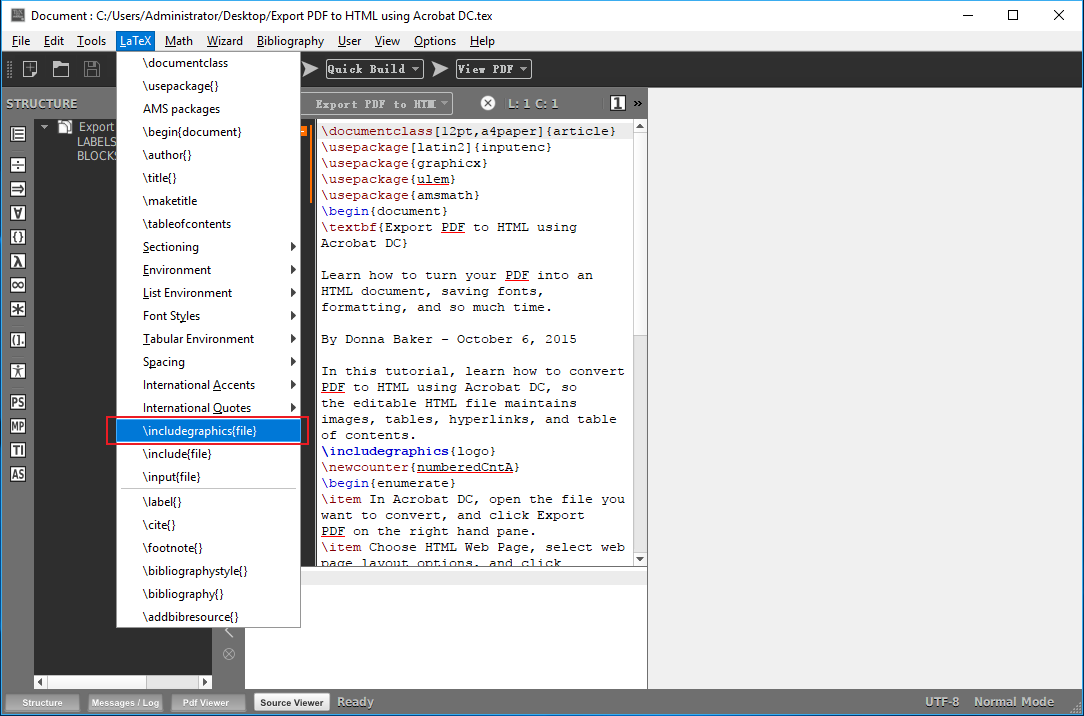
Texmaker: Texmaker is a feature-rich editor that combines ease of use with powerful commands. It even offers a graphical helper for image insertion.
- Open File: Drag and drop your
.texfile onto the main window, or go to “File” > “Open.” - Ensure
\usepackage: Verify\usepackage{graphicx}is in your preamble. - Position Cursor: Navigate your cursor to where you want the image.
- Use
\includegraphicsfunction: Go to “LaTeX” menu >\includegraphics(or use the toolbar button). A dialog box will appear. - Browse & Select: Click the “browser” button (often a folder icon) to select your image file.
- Configure Options: In the dialog, you can set
width,height,scale,angle, etc., just like in MS Word. - Confirm: Click “OK.” Texmaker will generate the
\includegraphicscommand with your chosen options. - Save & Compile: Click “File” > “Save” and then the “Quick Build” button to compile.
These IDEs, though requiring local installation, can significantly streamline the image insertion workflow, especially for users accustomed to graphical interfaces.
Overleaf’s Streamlined Image Management
Overleaf, a cloud-based LaTeX editor, has revolutionized collaborative document creation. It offers particularly user-friendly methods for image inclusion, aligning with Tophinhanhdep.com’s emphasis on accessibility and modern workflows for digital content.
Overleaf provides four main ways to insert images:
- Upload Image Files: Directly upload images from your local device to your Overleaf project.
- Drag and Drop: Simply drag an image file from your computer and drop it into the Overleaf editor (either Visual Editor or Code Editor). Overleaf will automatically upload it and prompt you to customize figure settings, including generating the necessary LaTeX code. This is an incredibly intuitive method, perfect for quickly incorporating “Stock Photos” or “Digital Photography” from Tophinhanhdep.com.
- Insert Figure Button: In the editor toolbar, there’s an “Insert Figure” button (often an image icon). Clicking this will guide you through selecting an uploaded file and configuring its LaTeX insertion, including captions and labels.
- Write LaTeX Code: For maximum flexibility, you can still manually write the LaTeX code (
\includegraphicswithin afigureenvironment) directly into the Code Editor, which is where you apply all the advanced techniques discussed in this guide.
Overleaf’s integrated environment automatically handles compilation (often multiple passes for references), making it a popular choice for users who want to focus on content and Visual Design without getting bogged down in local environment configurations. This online platform is perfectly suited for users who value the “Image Inspiration & Collections” offered by Tophinhanhdep.com, as it simplifies the process from image selection to final document presentation.
Beyond Basic Insertion: Visual Design Principles in LaTeX
While technical proficiency in LaTeX commands is essential, Tophinhanhdep.com stresses that effective image integration goes beyond mere syntax; it’s about applying sound Visual Design principles. The goal is to create documents that are not just technically correct but also aesthetically pleasing and highly communicative.
Curating Visuals: From Wallpapers to Professional Photography
The choice of images significantly impacts a document’s impact. Tophinhanhdep.com provides a vast array of categories that can serve as excellent sources for your LaTeX projects:
- Scientific Diagrams: For research papers, clear, concise diagrams are paramount. These often require precise vector graphics (PDF or EPS) for scalability.
- “Beautiful Photography” & “High Resolution” Stock Photos: For reports, presentations, or even academic prefaces, high-quality photographs can add professionalism and visual appeal. Tophinhanhdep.com’s collections ensure you have access to stunning visuals.
- “Aesthetic,” “Nature,” “Abstract,” and “Wallpapers”: For less formal documents, blog posts generated in LaTeX, or mood boards, these categories from Tophinhanhdep.com can inspire creative layouts and set the tone.
- “Sad/Emotional” Imagery: While less common in scientific contexts, certain narratives or literary works typeset in LaTeX might benefit from emotionally resonant visuals.
Before inserting, consider the purpose of the image, its resolution, aspect ratio, and how its color palette or theme aligns with your document’s overall message. Tophinhanhdep.com’s diverse range allows for careful curation, ensuring every visual serves a clear purpose.
Leveraging Image Tools for LaTeX Compatibility
Preparing images for LaTeX often involves several steps that Tophinhanhdep.com’s Image Tools are designed to assist with:
- Converters: LaTeX supports various image formats (JPG, PNG, PDF, EPS). Vector formats (PDF, EPS) are generally preferred for diagrams as they scale without pixelation. For photographs, JPG is efficient, while PNG is good for diagrams with sharp edges or transparency. Tophinhanhdep.com’s “Converters” help you transform images into the most suitable format for your LaTeX compiler (
latexfor EPS,pdflatexfor JPG, PNG, PDF). - Compressors & Optimizers: Large image files can significantly slow down LaTeX compilation and bloat your final PDF size. Tophinhanhdep.com’s “Compressors” and “Optimizers” can reduce file sizes while maintaining visual quality, a crucial step for producing lean, efficient documents.
- AI Upscalers: If you have a low-resolution image that you wish to include in a high-quality LaTeX document, Tophinhanhdep.com’s “AI Upscalers” can intelligently enhance its resolution, making it suitable for print or digital display where pixelation would otherwise be an issue.
- Image-to-Text: While not directly for image insertion, Tophinhanhdep.com’s “Image-to-Text” tools can be useful for extracting data or descriptive captions from existing images, which you can then incorporate into your LaTeX captions or main text.
Integrating these tools into your workflow ensures that the images you choose from Tophinhanhdep.com are not only visually appealing but also technically optimized for the demanding environment of LaTeX. This holistic approach, from image selection to final optimization, is what truly elevates a LaTeX document from merely functional to genuinely outstanding.
In conclusion, mastering image insertion in LaTeX is a skill that significantly enhances the quality and impact of your documents. By understanding the graphicx package, utilizing \includegraphics with its various options, and effectively managing floats, captions, and resolution, you can create visually rich and professionally polished content. Leveraging external tools, such as the extensive image collections and optimization utilities provided by Tophinhanhdep.com, further empowers you to elevate your LaTeX projects, transforming them into truly compelling visual experiences.