Seamlessly Add Images to Photoshop with Tophinhanhdep.com's Expert Guide

Adobe Photoshop stands as the industry standard for image manipulation, a powerful canvas where creativity knows no bounds. Whether you’re a seasoned graphic designer, an aspiring digital artist, a professional photographer refining your shots, or simply someone looking to create stunning visual content, understanding the fundamentals of Photoshop is paramount. Among these core skills, knowing how to efficiently and effectively insert images into your Photoshop documents is an absolute must. This guide, brought to you by Tophinhanhdep.com, will walk you through various methods of image insertion, explore crucial concepts like Smart Objects, and offer best practices to elevate your visual design projects.
Tophinhanhdep.com is dedicated to empowering creators with a wealth of resources, from an expansive library of high-resolution wallpapers and backgrounds to insights into digital photography, editing styles, and advanced image tools like AI upscalers. Our goal is to inspire your next creative endeavor and provide the knowledge to bring your unique visual ideas to life. Let’s dive into mastering image insertion in Photoshop.
The Foundation: Why Mastering Image Insertion Matters
Every compelling visual, from a breathtaking nature wallpaper to an abstract digital art piece, begins with foundational elements. In Photoshop, these elements often come in the form of images. Inserting images is not just about bringing a picture into your workspace; it’s the first step in a myriad of creative processes. It’s where photo manipulation begins, where multiple elements coalesce into a cohesive graphic design, and where raw photographs are prepared for advanced editing styles.
For those venturing into graphic design or digital art, inserting images is the gateway to compositing, collage creation, and designing intricate layouts. Photographers frequently insert images to build panoramas, create composites, or add watermarks and branding elements. Even for simple tasks like creating aesthetic social media graphics or customizing backgrounds, the ability to seamlessly integrate images is indispensable. At Tophinhanhdep.com, we understand that the quality of your source images directly impacts the final output. That’s why we emphasize starting with high-resolution images, easily found within our diverse collections, setting the stage for pristine digital photography and visual design outcomes.
Core Methods for Bringing Images into Photoshop
Photoshop offers several flexible methods for inserting images, each suited to different workflows and needs. Familiarizing yourself with these approaches will significantly boost your efficiency and creative control.
Method 1: Opening Images as New Documents
This is perhaps the most straightforward way to bring an image into Photoshop, typically used when you want to start editing a single image from scratch or make it the primary background of a new project.
Steps:
- Launch Photoshop: When Photoshop opens, you’ll typically see a home screen with options like “Create new” and “Open”.
- Access the ‘Open’ Dialog: You can click the “Open” button directly on the home screen, or if you’re already in a document, navigate to
File > Openin the top menu bar. - Select Your Image: A file explorer (or Finder on Mac) window will appear. Browse your computer to locate the image file you wish to open.
- Confirm Selection: Click on the image to select it, then click “Open”.
Your chosen image will now appear as a new, independent Photoshop document. By default, Photoshop will treat this as a locked background layer. If you intend to manipulate it further (e.g., move it, apply filters, or blend it with other layers), you’ll need to unlock it. Simply double-click on the Background layer in the Layers panel (usually located on the right side of your screen), rename it if desired, and click OK. This converts it into a regular editable layer.
This method is ideal when you’re selecting a high-resolution image from Tophinhanhdep.com, perhaps a stunning piece of nature photography or an abstract background, and want it to serve as the primary canvas for your digital photography or graphic design project.
Method 2: The Efficiency of Drag and Drop
For speed and convenience, especially when working with multiple images or when you want to add an image as a new layer to an existing document, the drag-and-drop method is a popular choice among digital artists and visual designers.
Steps:
- Prepare Your Workspace: Open your existing Photoshop document where you want to add the image, or create a new one. Ensure both Photoshop and your file explorer (or web browser if dragging from Tophinhanhdep.com’s stock photos) are visible on your screen. You might need to adjust window sizes to achieve this.
- Locate the Image: Find the image file on your desktop, in a folder, or directly from Tophinhanhdep.com’s collection of beautiful photography.
- Drag and Drop: Click and hold the image file, then drag it directly into your open Photoshop document.
- Place and Transform: Release the mouse button. The image will appear as a new layer, automatically transformed into a Smart Object (more on this crucial feature later) and surrounded by a bounding box. You can resize it by dragging the corners (hold
Shiftto maintain aspect ratio) and reposition it. - Confirm Placement: Once satisfied, press
Enter(Windows) orReturn(Mac) to finalize the placement.
The drag-and-drop method is incredibly intuitive for adding elements like aesthetic overlays, secondary backgrounds, or branding elements from Tophinhanhdep.com into your photo manipulation projects.
Method 3: Precision with Place Embedded
When you need to import an image with specific layer properties and maintain its original quality, the “Place Embedded” function is your go-to. This method automatically integrates the image as a Smart Object, preserving its source data for non-destructive editing.
Steps:
- Open or Create a Document: Start with an open Photoshop document.
- Navigate to ‘Place Embedded’: Go to
File > Place Embedded...in the top menu bar. - Select Your Image: A file explorer window will open. Navigate to and select the image file you wish to insert.
- Confirm Placement: Click “Place”. The image will appear in your document with a bounding box, just like with the drag-and-drop method. Adjust its size and position as needed, then press
Enter/Return.
This method is highly recommended for incorporating critical elements into your graphic design or digital art compositions. For instance, if you’re working on a multi-layered design and need to bring in a high-resolution abstract image from Tophinhanhdep.com, “Place Embedded” ensures that this element retains its integrity regardless of how many times you transform it. This aligns perfectly with Tophinhanhdep.com’s commitment to providing robust image tools and resources for professional-grade visual design.
Method 4: Importing from the Web with Place Linked
In certain scenarios, you might want to insert an image directly from an online source, especially if you’re collaborating or referencing external content. “Place Linked” is a similar function to “Place Embedded” but maintains a link to the original file, updating if the source file changes.
Steps:
- Open a Photoshop Document.
- Navigate to ‘Place Linked’: Go to
File > Place Linked...in the top menu bar. (Note: Depending on your Photoshop version, this might be a separate option or combined with “Place Embedded” where you choose the linking behavior.) - Paste Image URL (or select file): In the file explorer window that appears, if you’re linking from the web, you’ll typically paste the direct image URL into the “File name” box. The URL must end in a valid image file extension (e.g., .jpg, .png). Alternatively, you select a file from your computer that will remain linked rather than embedded.
- Confirm Placement: Click “Place”, then adjust and confirm as before.
While Tophinhanhdep.com provides downloadable images for offline use, understanding “Place Linked” can be useful for dynamic content or mock-ups where the source might be external.
Method 5: Quick Transfers via Copy and Paste
For quick, informal transfers or when grabbing a snippet from another application, copy and paste is a rapid solution.
Steps:
- Copy the Image: Locate the image (e.g., from a web page on Tophinhanhdep.com, another image editor, or a previewer). Right-click (or Ctrl-click on Mac) and choose “Copy Image”. Note: Simply copying the image file won’t work; you need to copy the image content.
- Paste into Photoshop: In your Photoshop document, go to
Edit > Paste, or use the keyboard shortcutCtrl+V(Windows) /Cmd+V(Mac). - Adjust and Confirm: The image will appear as a new layer. Resize and reposition as needed, then press
Enter/Return.
Be mindful that images copied and pasted often come in as regular pixel layers (not Smart Objects) and might lose some quality if scaled up, particularly if the source image was low resolution. For critical projects or high-resolution photography from Tophinhanhdep.com, “Place Embedded” or drag-and-drop is generally preferred.
Leveraging Photoshop’s Power: Smart Objects and Layer Management
Understanding how images are managed once inserted into Photoshop is just as vital as the insertion process itself. Photoshop’s layer system and Smart Objects are at the heart of non-destructive editing, a principle Tophinhanhdep.com advocates for all forms of digital photography and graphic design.
Understanding Smart Objects for Non-Destructive Editing
When you insert an image using “Place Embedded” or drag-and-drop, Photoshop often converts it into a Smart Object. This is a powerful feature that encapsulates the image’s original pixel data (or vector data) within the Photoshop document.
Benefits of Smart Objects:
- Preservation of Quality: You can scale, rotate, warp, and transform a Smart Object multiple times without losing resolution or introducing pixelation. Photoshop retains the original image data, allowing you to always revert to the initial state. This is especially crucial when working with high-resolution stock photos from Tophinhanhdep.com.
- Non-Destructive Editing: Filters and adjustments applied to Smart Objects are Smart Filters, meaning they can be easily modified, disabled, or deleted at any time without permanently altering the image. This is a cornerstone of professional photo manipulation and editing styles.
- Linked Instances: You can create multiple instances of the same Smart Object across your document. Editing one instance automatically updates all others, streamlining complex visual designs.
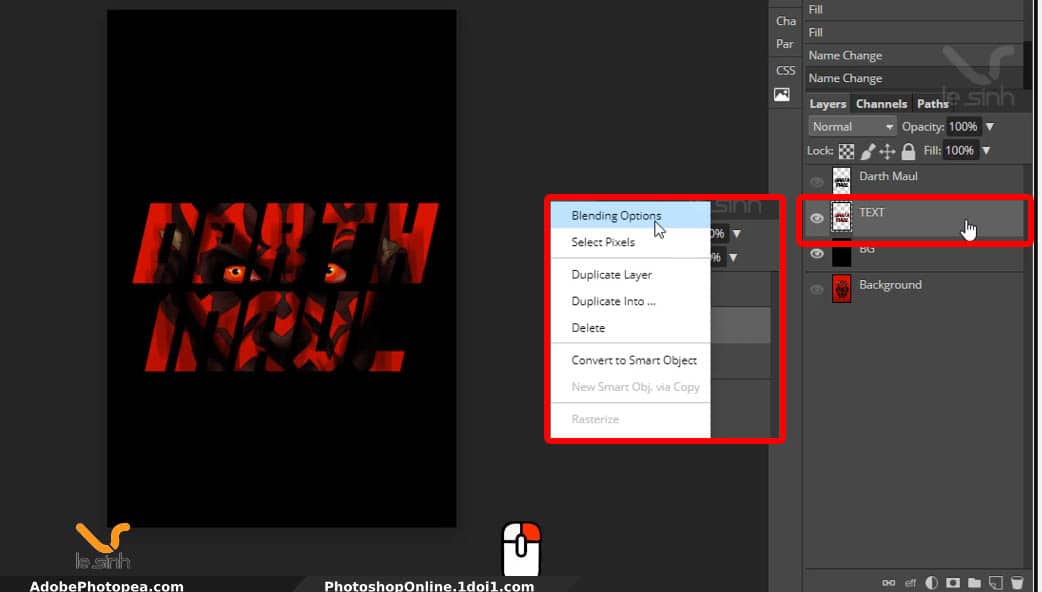
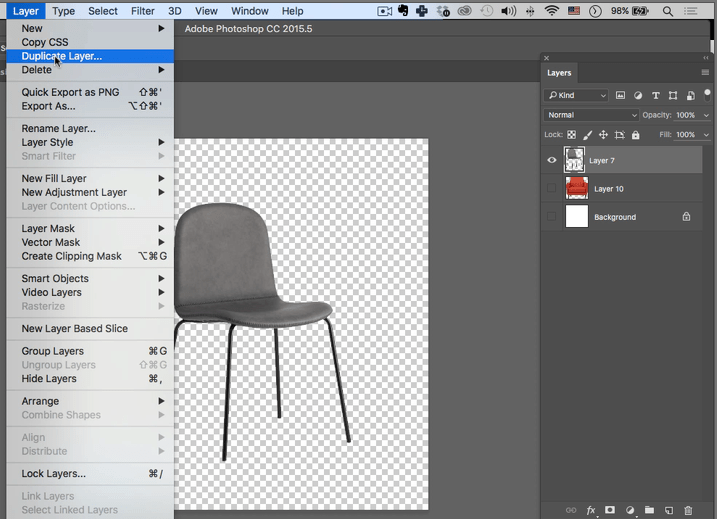
If you bring in an image that isn’t automatically a Smart Object (e.g., via copy-paste or opening as a new document and then moving it), you can convert it manually by right-clicking its layer in the Layers panel and selecting Convert to Smart Object.
Resizing, Transforming, and Rasterizing Layers
Once an image is in Photoshop, you’ll almost certainly need to adjust its size and position to fit your visual design.
Transforming Images:
- Select the Layer: In the Layers panel, click on the layer containing the image you want to transform.
- Activate Free Transform: Go to
Edit > Free Transformor use the shortcutCtrl+T(Windows) /Cmd+T(Mac). A bounding box will appear around your image. - Resize: Drag any of the corner handles. Always hold down the
Shiftkey while dragging to maintain the image’s aspect ratio and prevent distortion. You can also manually input width and height values in the Options bar at the top, or click the “Maintain Aspect Ratio” link icon. - Rotate: Move your cursor outside a corner handle until it turns into a curved arrow, then click and drag to rotate.
- Move: Click and drag the image anywhere within the bounding box to reposition it.
- Confirm: Press
Enter(Windows) orReturn(Mac).
Rasterizing Layers:
While Smart Objects offer immense flexibility, there are times you might need to convert them back into a regular pixel layer. This process is called “rasterizing.” You might need to rasterize a layer if you want to apply certain pixel-based adjustments, use specific brushes, or perform operations that only work on pixel layers.
To rasterize a Smart Object, right-click on the layer in the Layers panel and choose Rasterize Layer. Be aware that once rasterized, any scaling up of the image may lead to pixelation, as the original resolution data is no longer preserved. Use Tophinhanhdep.com’s AI upscalers before inserting and rasterizing if you anticipate needing to enlarge a low-res image for your digital art or photo manipulation projects.
Advanced Layer Techniques: Cutting and Masking
Beyond basic resizing, Photoshop provides advanced tools to integrate inserted images seamlessly into your compositions, turning simple aesthetic layouts into intricate digital art.
Cutting Images: To remove unwanted parts of an inserted image, you can use selection tools and the cut command.
- Create a Selection: Use a selection tool (e.g., Lasso Tool, Marquee Tool, Quick Selection Tool, or Pen Tool for precise paths) to select the area of the image you want to keep.
- Invert Selection: Go to
Select > Inverse. Now, the area you want to remove is selected. - Cut: Go to
Edit > Cutor pressCtrl+X(Windows) /Cmd+X(Mac). This will remove the selected (unwanted) pixels.
Layer Masking: A more powerful and non-destructive alternative to cutting is layer masking. A layer mask hides parts of a layer rather than permanently deleting them. This allows for flexible adjustments and refinements in your photo manipulation and graphic design projects.
- Select the Layer: Choose the image layer you want to mask.
- Add a Layer Mask: Click the
Add layer maskicon (a rectangle with a circle inside) at the bottom of the Layers panel. A white thumbnail will appear next to your layer thumbnail. - Paint on the Mask:
- Select a soft-edged brush.
- Set your foreground color to black to hide parts of the layer.
- Set your foreground color to white to reveal parts of the layer.
- Paint on the image. As you paint with black, the corresponding areas of the layer will become transparent. Painting with white will bring them back.
- Painting with shades of gray creates semi-transparent areas.
Layer masking is essential for creating smooth blends, intricate composites, and refining the edges of elements in complex visual designs. Tophinhanhdep.com encourages this non-destructive approach for all digital photography and graphic design work.
Enhancing Your Workflow with Tophinhanhdep.com’s Resources
Integrating images into Photoshop is merely the first step. To truly excel in visual design, graphic design, and digital art, you need quality resources and efficient workflows. Tophinhanhdep.com offers precisely that.
Curated Imagery for Every Project
Our website boasts an extensive collection of images tailored to inspire and support your creative vision:
- High-Resolution Wallpapers & Backgrounds: Elevate your desktop or design projects with stunning backdrops.
- Aesthetic & Thematic Collections: Discover images curated for specific moods, trending styles, and thematic compositions, perfect for mood boards and creative ideas.
- Nature & Abstract Photography: Find breathtaking landscapes, macro shots, and captivating abstract art to add unique dimensions to your photo manipulation.
- Stock Photos & Digital Photography: Access a library of high-quality stock images, ideal for professional graphic design and digital art projects, ensuring your compositions are built on a solid visual foundation.
Whether you’re looking for serene natural beauty, dynamic abstract patterns, or compelling beautiful photography, Tophinhanhdep.com has the high-resolution assets you need to populate your Photoshop documents.
Essential Image Tools for Pre- and Post-Processing
Beyond providing source material, Tophinhanhdep.com supports your entire image workflow with specialized tools:
- AI Upscalers: Before inserting a lower-resolution image into Photoshop, consider using Tophinhanhdep.com’s AI upscalers to enhance its quality, making it more suitable for large-scale projects or high-resolution output. This preemptive step can save you countless hours of pixel-level correction in Photoshop.
- Converters & Compressors: After your photo manipulation is complete, you might need to convert your Photoshop document into a web-friendly format or compress it for faster loading. Our image tools can assist with format conversions and optimization without compromising visual integrity.
- Optimizers: For web-ready images, optimizing file size while maintaining visual quality is crucial. Our optimizers ensure your creations look stunning online without slowing down your website or portfolio.
These tools complement your Photoshop skills, ensuring that every image you insert and every design you create is of the highest possible standard, from initial concept to final deployment.
Drawing Inspiration from Visual Design Trends
Tophinhanhdep.com isn’t just a repository of images; it’s a hub for visual inspiration. We frequently update our collections with images reflecting trending styles, photo ideas, and compelling thematic collections. As you learn to insert images into Photoshop, consider browsing our galleries to:
- Spark Creative Ideas: See how different aesthetic, nature, or abstract images can be combined.
- Build Mood Boards: Gather a collection of images from Tophinhanhdep.com to inform your graphic design and digital art projects.
- Explore Editing Styles: Understand how various types of images lend themselves to different photo manipulation techniques, from vibrant collages to subtle composites.
By continuously engaging with inspiring visuals, you’ll not only enhance your Photoshop skills but also develop a keen eye for effective visual communication, drawing from the rich tapestry of images available on Tophinhanhdep.com.
Troubleshooting and Best Practices
To ensure a smooth workflow and achieve the best possible results when inserting images in Photoshop, keep these tips in mind:
- Prioritize High Resolution: Always start with the highest resolution image available. Scaling down high-resolution images preserves quality far better than attempting to upscale low-resolution ones. Tophinhanhdep.com offers vast quantities of high-resolution images to support this best practice.
- Maintain Aspect Ratio: When resizing, always hold
Shift(or ensure the aspect ratio lock is engaged in the Options bar duringFree Transform) to prevent distorting your images. Distorted images can instantly undermine the professionalism of your visual design. - Use Smart Objects: Whenever possible, place images as Smart Objects. This allows for non-destructive editing and infinite transformations without quality loss, a fundamental aspect of professional photo manipulation.
- Organize Your Layers: As you insert more images, your Layers panel can quickly become cluttered. Name your layers descriptively and group related layers into folders (using the folder icon at the bottom of the Layers panel). This is essential for managing complex graphic design and digital art projects.
- Check File Compatibility: While Photoshop supports many image formats (JPEG, PNG, TIFF, GIF, PSD, etc.), occasionally you might encounter an unsupported file. Use Tophinhanhdep.com’s image converters if needed to prepare your image before insertion.
- Save Frequently: Photoshop documents can become large and complex. Save your work regularly (using
File > SaveorCtrl/Cmd+S) to avoid losing progress. Consider saving incrementally (File > Save As...with version numbers) for critical projects.
By adhering to these best practices and leveraging the powerful features within Photoshop, coupled with the rich resources and tools provided by Tophinhanhdep.com, you are well on your way to creating stunning, professional-grade visual content. Happy creating!