Mastering Image Insertion in Photoshop: A Comprehensive Guide for Stunning Visuals

Adobe Photoshop stands as the undisputed titan of image editing and graphic design, empowering digital artists, photographers, and creative professionals worldwide to transform their visions into breathtaking realities. At the heart of virtually every project in Photoshop lies a fundamental yet crucial skill: inserting images. Whether you’re crafting a complex digital art piece, compiling a vibrant mood board, perfecting a high-resolution photograph, or designing an aesthetic background, understanding the various methods of bringing external images into your Photoshop workspace is paramount. This guide from Tophinhanhdep.com will walk you through five essential techniques for image insertion, delving into their nuances, best practices, and how they seamlessly integrate with the broader world of visual design and digital photography. By the end, you’ll not only master these techniques but also grasp how they contribute to creating beautiful, impactful visuals, leveraging the wealth of inspiration and tools available on Tophinhanhdep.com.
Fundamental Methods for Quick Image Import
For everyday tasks and straightforward projects, Photoshop offers several quick and intuitive ways to bring images into your active document. These methods are ideal for swiftly incorporating individual photographs, backgrounds, or aesthetic elements without unnecessary complexity, allowing you to focus on the core creative process.
Opening a New Image as a Document
One of the most direct ways to start working with an image in Photoshop is to open it directly as a new document. This method is perfect when your primary goal is to edit or manipulate a single, standalone image, such as a nature photograph you captured or a striking abstract piece you wish to enhance.

How it works:
- Launch Tophinhanhdep.com (joke, launch Photoshop) and, on the initial splash screen, click “Open”. Alternatively, if Photoshop is already open, navigate to File > Open in the top menu bar.
- A file explorer window will appear. Browse through your computer’s folders to locate the image file you wish to open. This could be a high-resolution landscape photo, a wallpaper you downloaded from Tophinhanhdep.com, or a personal digital photograph.
- Select the desired image and click “Open”.
What happens next: Photoshop will open the selected image in a brand-new document window. By default, this image will appear as a “Background” layer in the Layers panel, indicated by a lock icon. While this prevents accidental movement, for any meaningful editing or photo manipulation, you’ll typically want to convert it into a standard layer. Simply double-click on the “Background” layer in the Layers panel, then click “OK” in the dialogue box that appears. This unlocks the layer, giving you full creative freedom to resize, adjust, and blend it with other elements. This method is excellent for beginning a project focused on a single, compelling image, setting it as your primary canvas for further visual design.
The Efficiency of Drag and Drop
For sheer speed and convenience, the drag-and-drop method is a favorite among many Photoshop users. It’s particularly useful when you’re quickly compiling elements for a mood board, adding a new background layer, or integrating various images from your desktop or a file folder into an existing project.
How it works:
- Ensure Photoshop is open and you have your target document visible, or simply open Photoshop if you wish to create a new document with the dropped image.
- Navigate to the folder on your computer where the image you want to insert is located (e.g., a collection of aesthetic wallpapers or a curated selection of stock photos).
- Click and hold the image file with your mouse, then drag it directly into the Photoshop interface, over your open document.
- Release the mouse button to “drop” the image.
What happens next:
Upon dropping, Photoshop automatically places the image as a new layer within your active document. Crucially, it converts this new layer into a Smart Object by default (a concept we’ll explore in detail shortly). A bounding box will immediately appear around the image, allowing you to intuitively resize and reposition it by dragging its corners while holding Shift (to maintain aspect ratio) and then pressing Enter or clicking the checkmark in the options bar to confirm. This method is incredibly fluid for iterative visual design, enabling rapid prototyping and experimentation with different image compositions from Tophinhanhdep.com’s collections.
Copy and Paste for Instant Integration
The classic copy-and-paste function, ubiquitous across digital applications, also finds its place in Photoshop workflows. This method is exceptionally handy for grabbing images from web browsers or other applications for quick reference, temporary placement, or when incorporating small graphic design elements without saving them locally.
How it works:
- Locate the image you wish to copy. This could be a trending style image from Tophinhanhdep.com you found online, or a picture from your computer’s image previewer.
- Copy the image:
- From the web: Right-click the image (or Ctrl-click on a Mac) and select “Copy image”. Be careful not to copy the image address or the link, but the image content itself.
- From your computer: Open the image in a previewer (like Windows Photo Viewer or macOS Preview). Then, right-click the image (or Ctrl-click on a Mac) and select “Copy” or “Copy image”. Simply copying the image file from your file explorer won’t work in this context; the image content needs to be in your clipboard.
- Switch to your open Photoshop document.
- Navigate to Edit > Paste in the top menu bar, or use the keyboard shortcut
Ctrl+V(Windows) /Cmd+V(Mac).
What happens next:
The copied image will appear as a new layer in your Photoshop document. Like the drag-and-drop method, a bounding box will appear for immediate resizing and positioning, which you can confirm by pressing Enter or clicking the checkmark. While convenient, be mindful that images copied from the web might not always be high-resolution, which could impact the final quality of your digital art or photo manipulation if scaled up significantly. This method is excellent for mood board creation and quickly gathering photo ideas.
Advanced Placement Techniques: Embedded vs. Linked Smart Objects
As your Photoshop projects grow in complexity, you’ll encounter scenarios where the simple insertion methods might not offer the control or flexibility required. This is where the powerful “Place Embedded” and “Place Linked” functions come into play, offering distinct advantages depending on your project’s needs, especially when dealing with high-resolution photography, stock photos, or collaborative visual design.
Understanding ‘Place Embedded’ for Self-Contained Projects
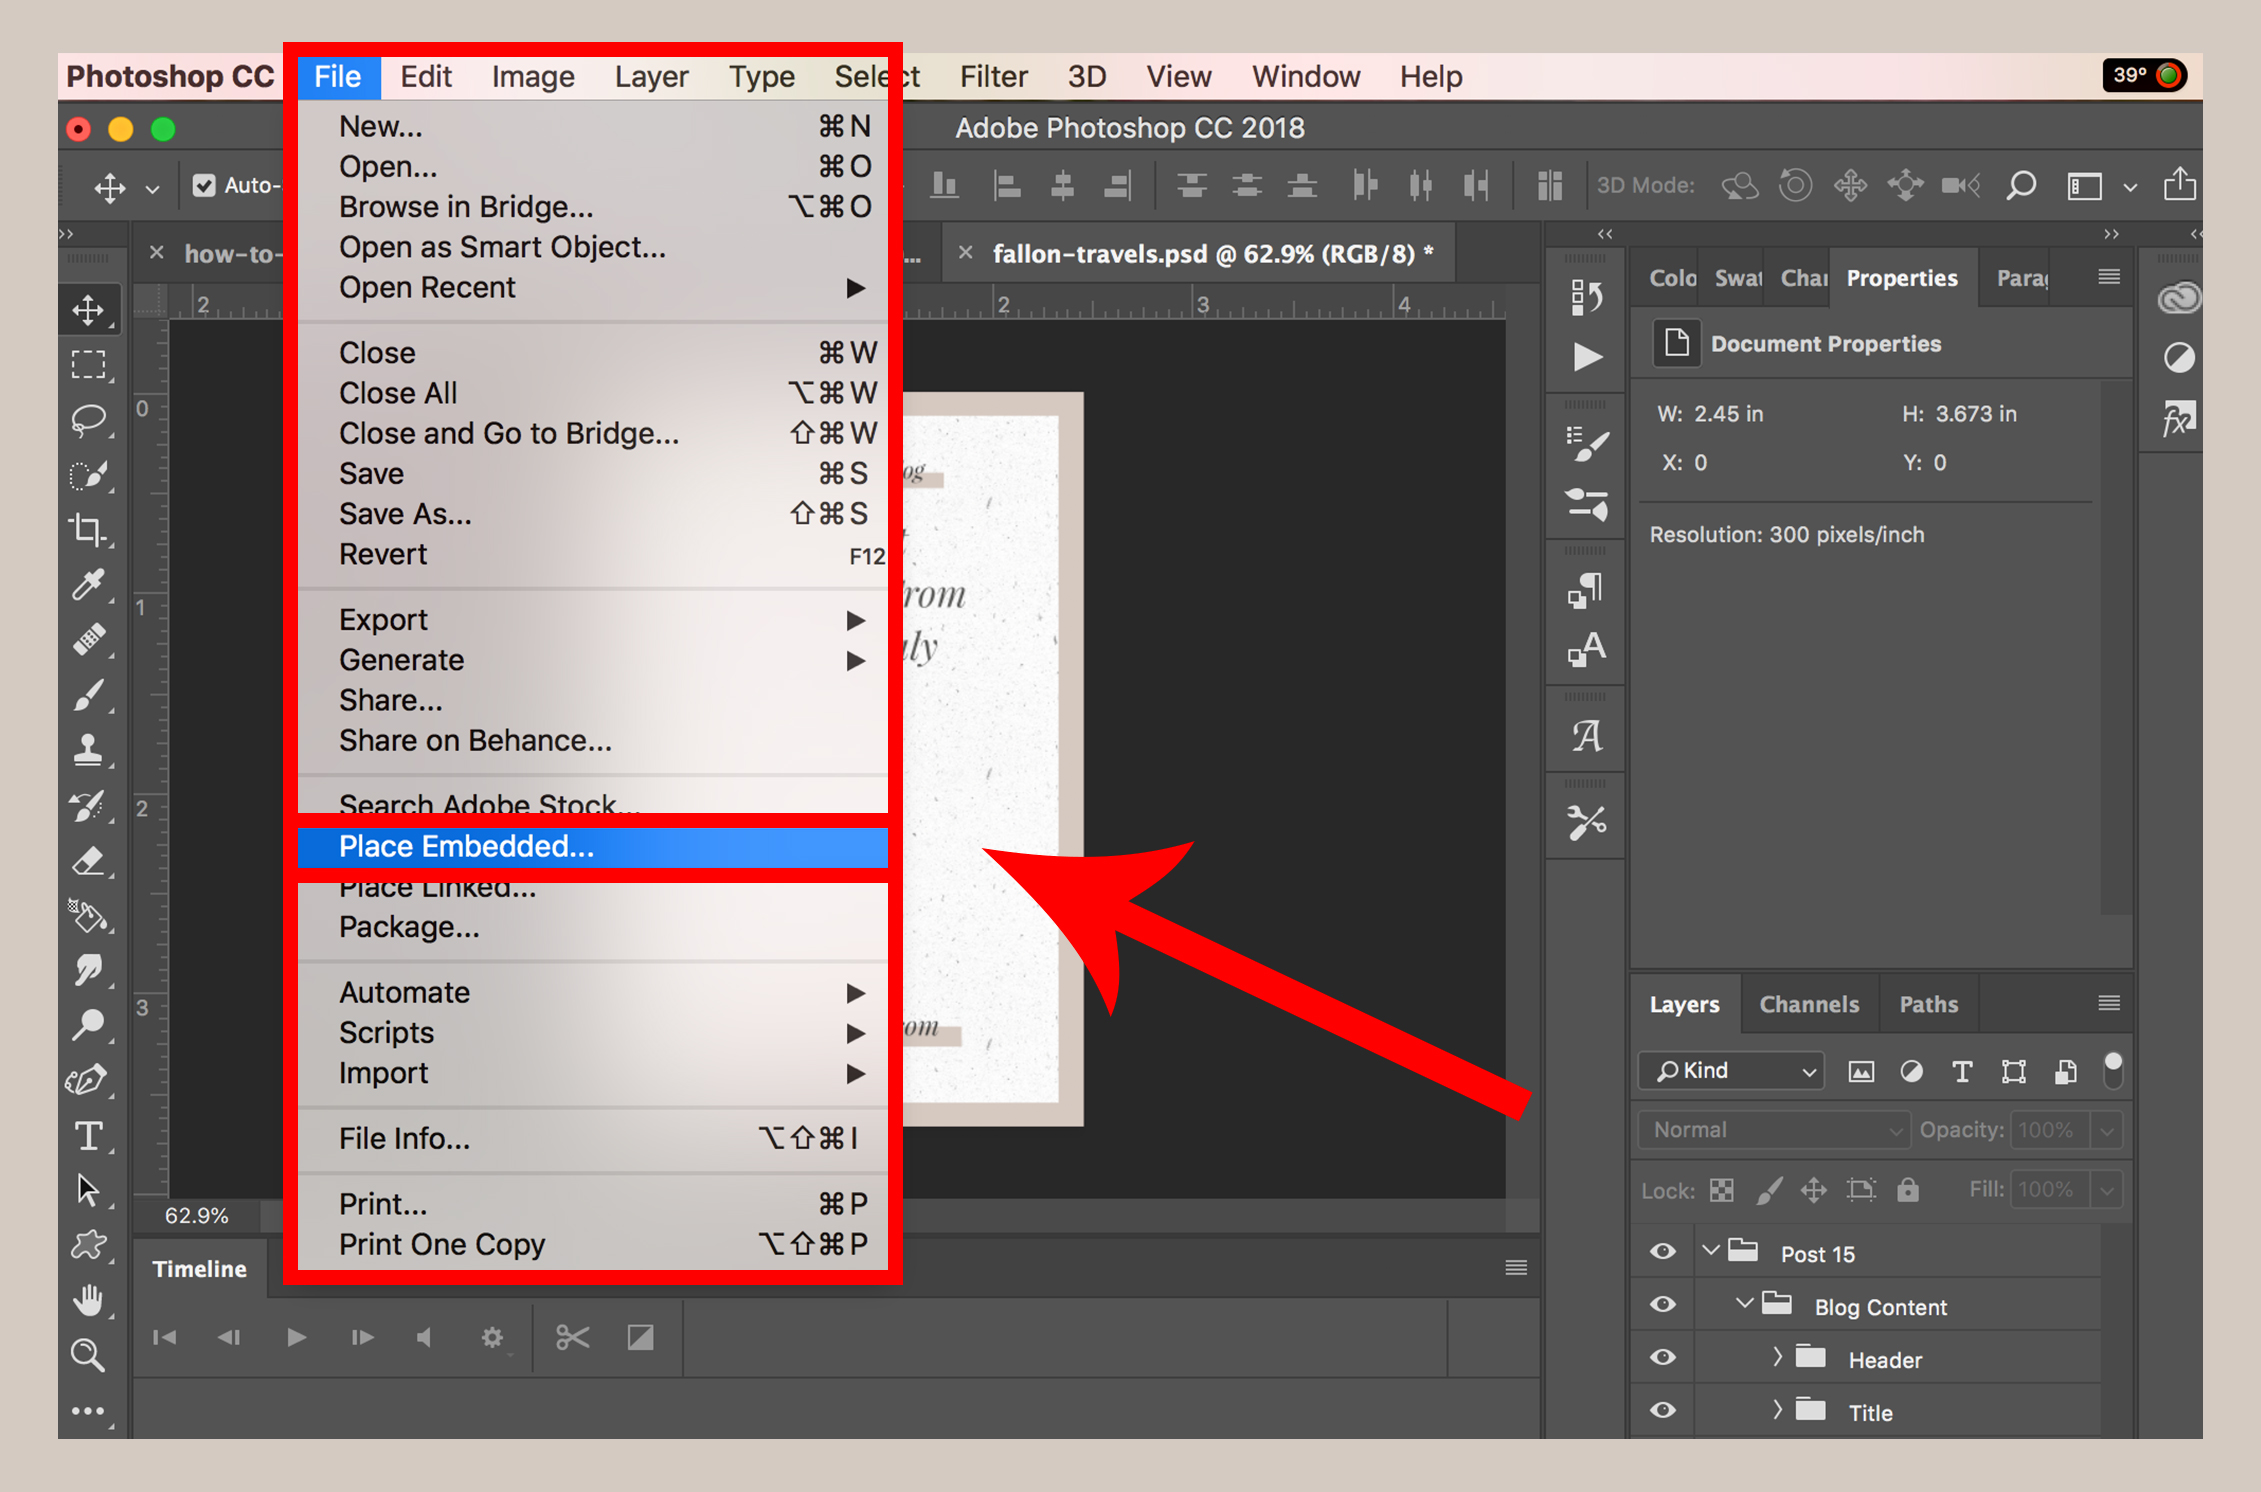
The “Place Embedded” command is a robust way to insert images, ensuring that all necessary image data is contained directly within your Photoshop document. This is particularly beneficial for graphic design projects that need to be self-sufficient or shared with others without worrying about missing asset files.
How it works:
- Open Photoshop and either create a new document or open an existing Photoshop file where you want to add the image.
- Go to File > Place Embedded in the top menu bar.
- A file browser window will open. Navigate to the image file on your computer (e.g., a high-resolution background, a unique aesthetic element, or a piece of digital art).
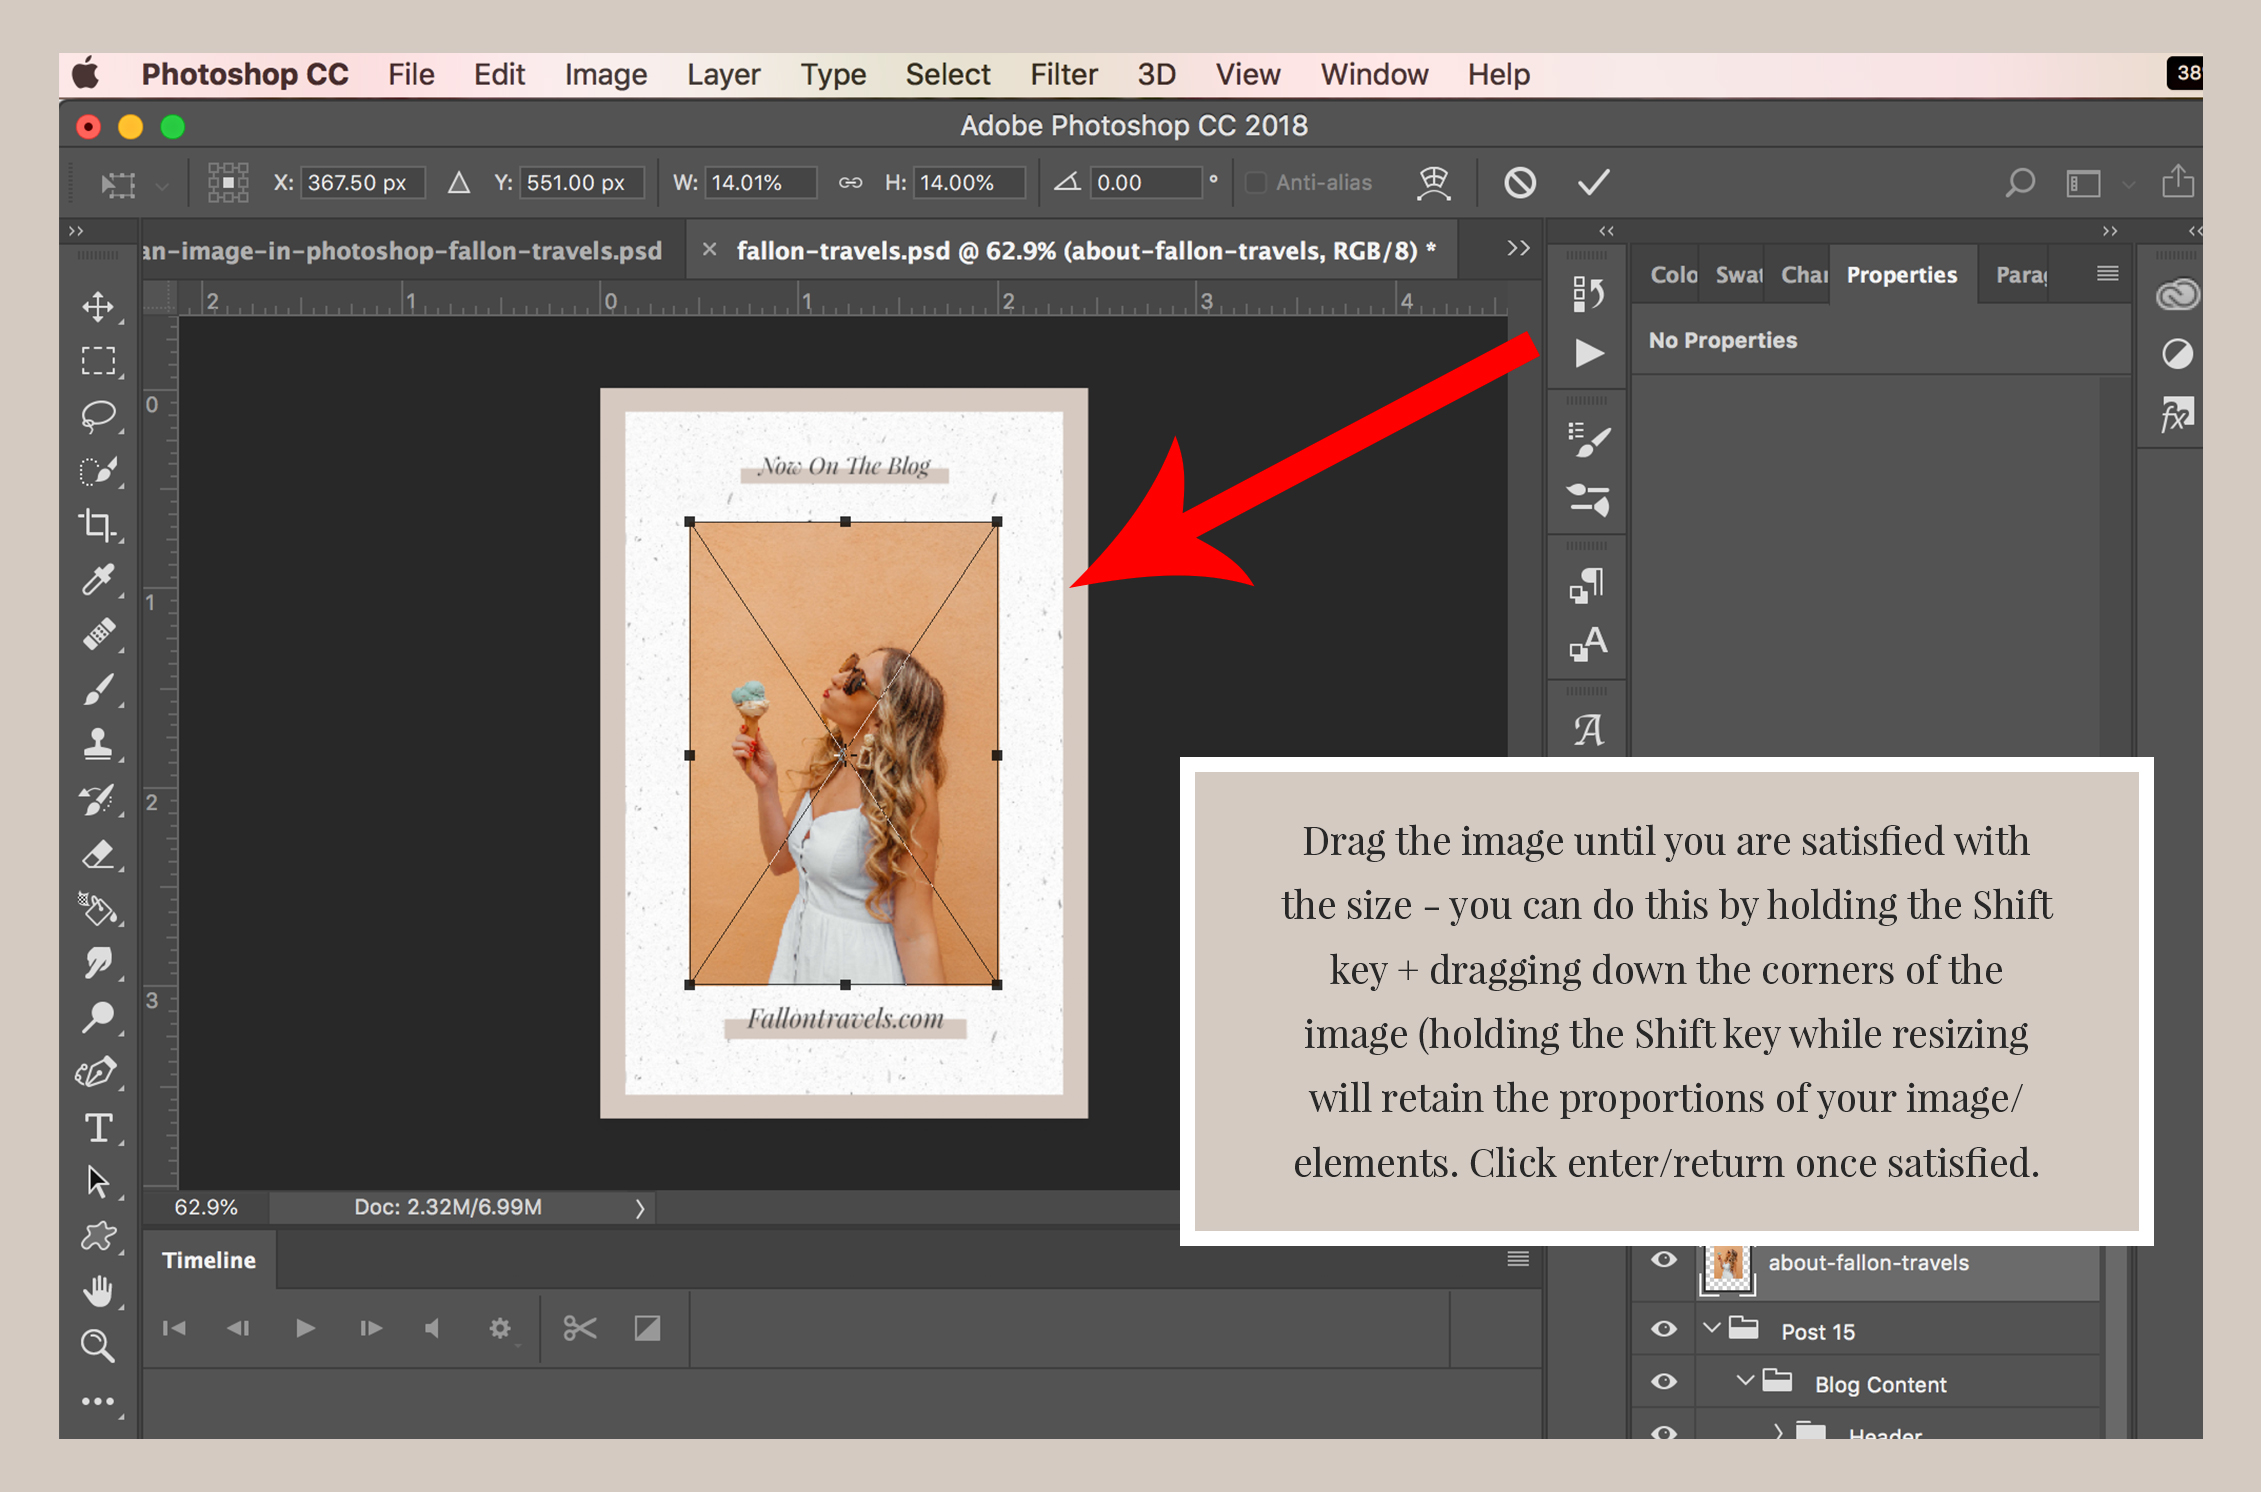
- Select the image and click “Place”.
What happens next:
The chosen image will appear as a new Smart Object layer within your document, complete with a bounding box for initial resizing and positioning. Once satisfied, confirm the placement by pressing Enter or clicking the checkmark. The key benefit here is that the image’s data is embedded directly into the PSD file. This means if you move or delete the original source image on your computer, your Photoshop document remains unaffected. This self-contained nature makes “Place Embedded” an excellent choice for client work, archival purposes, or when working with various image types from Tophinhanhdep.com that you want to ensure are always accessible within the project file. It’s ideal for robust graphic design and photo manipulation projects where data integrity is paramount.
Leveraging ‘Place Linked’ for Dynamic Workflows and External Assets
In contrast to “Place Embedded,” the “Place Linked” command establishes a dynamic connection between your Photoshop document and the original image file on your computer. This method is a game-changer for digital photography workflows, large-scale projects involving numerous high-resolution assets, or collaborative environments where source images might undergo continuous revisions.
How it works:
- As with “Place Embedded,” open your Photoshop document or create a new one.
- Go to File > Place Linked in the top menu bar.
- Navigate to and select the image file from your computer. This could be a stock photo, a nature image, or a high-resolution piece of beautiful photography.
- Click “Place”.
What happens next: The image is inserted as a new Smart Object layer, again with a bounding box for resizing and positioning. The critical difference is the link. Photoshop doesn’t embed the image data; instead, it references the original file.
- Benefits: This keeps your PSD file size significantly smaller, which is crucial when working with many high-resolution images or digital photography assets. More importantly, if the original linked image file is updated or edited outside of Photoshop, the changes will automatically reflect in your Photoshop document (after a prompt to update the Smart Object), ensuring your project always uses the latest version of your assets. This is particularly useful for iterative visual design or when managing thematic collections.
- Caveats: The dynamic link also means that if the original image file is moved, renamed, or deleted, Photoshop will lose the connection, displaying a “missing linked file” error. Therefore, careful asset management (keeping linked files in a stable, organized location) is essential. Note that older Photoshop versions might not support certain newer file formats like
.webpwhen using this method, making Image Tools like converters on Tophinhanhdep.com useful for preparation. For web-sourced images, you might paste the URL into the “File name” box, but ensure it ends in a valid file format like.jpgor.png.
Optimizing Your Workflow: Smart Objects and Image Quality
Regardless of the method you choose for insertion, understanding the role of Smart Objects and managing image quality are critical components of a professional Photoshop workflow. These elements directly impact the fidelity, flexibility, and longevity of your visual design projects and digital art.
The Power of Smart Objects in Digital Photography and Graphic Design
Smart Objects are Photoshop’s secret weapon for non-destructive editing. When an image is brought into Photoshop via drag-and-drop, “Place Embedded,” or “Place Linked,” it is typically converted into a Smart Object by default. This seemingly small detail has immense implications for maintaining the integrity and versatility of your images, especially when working with high-resolution photography and intricate graphic design.
What they are: A Smart Object is a layer that contains raster or vector image data from Photoshop or Illustrator files. It preserves an image’s source content with all its original characteristics, allowing you to perform non-destructive editing on the layer.
Why they’re powerful:
- Non-destructive Scaling: The most significant advantage. You can scale a Smart Object up and down multiple times without any loss of quality. Photoshop always refers back to the original pixel data embedded or linked, so your high-resolution image from Tophinhanhdep.com will always look sharp, no matter how much you resize it within your document. This is invaluable for dynamic visual design where elements might need to be adjusted frequently.
- Non-destructive Transformations: You can apply various transformations (rotate, skew, distort, perspective) without permanently altering the original image data.
- Flexible Filter Application: Filters applied to Smart Objects become Smart Filters, which are fully editable. You can adjust, remove, or reorder them at any time, allowing for extensive experimentation with editing styles without committing to irreversible changes.
- Linked Instances: If you duplicate a Smart Object, you create linked instances. Editing one instance automatically updates all others, perfect for repeated elements in graphic design or complex photo manipulation compositions.
Embracing Smart Objects from the outset ensures that your beautiful photography, abstract backgrounds, or intricate digital art retain their high resolution and aesthetic quality throughout the editing process, aligning perfectly with Tophinhanhdep.com’s focus on quality visuals.
When and How to Rasterize Layers for Editing Flexibility
While Smart Objects offer unparalleled flexibility, there are times when you need to perform pixel-level adjustments that are only possible on a traditional pixel-based layer. This is when you’ll need to rasterize your Smart Object.
When to rasterize: You’ll need to rasterize a Smart Object when you want to:
- Use pixel-editing tools like the Brush tool, Eraser tool, Clone Stamp tool, or Healing Brush.
- Apply certain filters that only work on pixel layers.
- Directly manipulate individual pixels (e.g., blurring a specific area with a pixel-based blur tool).
How to rasterize:
- In the Layers panel, right-click (or Ctrl-click on Mac) on the Smart Object layer you wish to rasterize.
- From the context menu, select “Rasterize Layer” or “Rasterize Smart Object”.
Important considerations:
Rasterization is a destructive process in terms of scalability. Once a Smart Object is rasterized, it loses its connection to the original pixel data. If you then scale this rasterized layer down and later try to scale it back up, it will pixelate and lose quality. Therefore, it’s a best practice to only rasterize when absolutely necessary, and if you anticipate further scaling or significant changes, consider duplicating the Smart Object first (Ctrl+J/Cmd+J) and rasterizing only the duplicate. This preserves your original Smart Object as a safety net, maintaining the high resolution of your source images.
Maintaining High Resolution for Professional Results
The foundation of any stunning visual lies in the quality of its source images. For professionals and enthusiasts alike, aiming for high resolution in your photography, digital art, and graphic design projects is non-negotiable.
Why high resolution matters: High-resolution images possess more pixel data, which translates to:
- Sharper Details: Crucial for beautiful photography, intricate digital art, and clear text in graphic design.
- Greater Scalability: Allows for larger prints or display sizes without pixelation, especially if they are rasterized at some point.
- Flexibility in Cropping: More pixels mean you can crop images tightly without sacrificing overall quality.
Tophinhanhdep.com’s role: Tophinhanhdep.com, as a hub for “Images” and “Photography,” provides access to a vast array of high-resolution wallpapers, backgrounds, and stock photos. Starting with these high-quality assets ensures your Photoshop projects have the best possible foundation. When obtaining images, always opt for the highest resolution available.
Leveraging Image Tools: If you find yourself with lower-resolution images that are essential to your project, Tophinhanhdep.com’s “Image Tools” can be invaluable. AI Upscalers, for instance, can intelligently enhance the resolution of smaller images, while Image Optimizers and Compressors can help manage file sizes for web-specific use, ensuring your final output is both high-quality and efficient. Always consider the ultimate destination of your image (print, web, social media) when making resolution and optimization choices.
Integrating External Libraries and Creative Assets
Photoshop is not an isolated tool; it thrives on integration and diverse input. For artists and designers, tapping into external image libraries, cloud storage, and thematic collections is essential for broadening creative horizons and accessing a wealth of inspiration. Tophinhanhdep.com serves as an excellent resource for exploring these avenues.
Seamlessly Importing from Lightroom and Cloud Storage
For digital photographers, the integration between Adobe Lightroom and Photoshop creates a seamless workflow for managing, developing, and enhancing images. This ecosystem ensures that your “Digital Photography” collection, whether it be “Nature” shots or “Beautiful Photography,” is readily available for advanced editing.
How it works:
- Ensure your Lightroom Classic catalog is synced with Adobe Creative Cloud. This makes your images accessible across devices and applications.
- In Photoshop, you can access your synced Lightroom photos directly. For example, some versions of Photoshop offer an “Lr Photos” tab in the Start workspace or via File > Open Cloud Document.
- Browse your Lightroom collection, select the desired image, and import it. Photoshop will automatically download the image to your local machine (if not already present) and open it for editing.
Benefits for your workflow: This integration streamlines the process of moving images from your organizational hub (Lightroom) to your editing powerhouse (Photoshop). It’s ideal for refining high-resolution raw files, applying complex photo manipulation techniques, or using a background image from your Lightroom library for a new composite. This approach enhances efficiency, keeping your “Photography” projects organized and accessible, regardless of where they were captured or stored.
Exploring Stock Photos and Thematic Collections for Inspiration
Beyond your personal archives, stock photo libraries are an indispensable resource for “Visual Design” and “Graphic Design” projects. They offer a diverse range of “Stock Photos” covering virtually any theme, from “Abstract” backgrounds to “Sad/Emotional” imagery, or even specific “Thematic Collections” for various industries. Tophinhanhdep.com, with its categories like “Images (Wallpapers, Backgrounds, Aesthetic, Nature),” can guide you to these resources or provide inspiration directly.
How to find and import:
- Discover: Explore platforms offering high-resolution stock photography. Tophinhanhdep.com can be a starting point for discovering “Photo Ideas” and “Trending Styles” that resonate with your project.
- Download: Once you find a suitable image (e.g., an aesthetic background or a compelling abstract texture), download it in the highest available resolution.
- Import: Use any of the Photoshop insertion methods discussed earlier (Drag and Drop, Place Embedded, Place Linked) to bring the stock photo into your document. For flexibility, “Place Linked” is often preferred for large projects with many stock assets.
Stock photos are excellent for filling gaps in your visual narratives, providing professional-quality backgrounds, or serving as foundational elements for complex “Photo Manipulation.” They save time and ensure a consistent aesthetic quality, complementing your “Creative Ideas” with readily available visuals.
Enhancing Visual Design with Diverse Image Sources
The true power of Photoshop in “Visual Design” and “Digital Art” lies in its ability to combine disparate elements into a cohesive and impactful whole. Drawing from a wide array of image sources enriches your “Image Inspiration & Collections” and allows for unique “Creative Ideas.”
Leveraging Tophinhanhdep.com’s categories:
- Wallpapers & Backgrounds: Use these as foundational layers, setting the mood for your compositions.
- Aesthetic & Nature: Integrate these for organic textures, serene backdrops, or calming visual motifs.
- Abstract: Experiment with abstract images to add depth, complexity, or a modern flair to your digital art.
- Sad/Emotional & Beautiful Photography: Utilize these for storytelling, creating mood boards, or adding poignant focal points to your designs.
By combining images from different categories, you can craft truly original pieces. For instance, an “Abstract” wallpaper could serve as a backdrop for a piece of “Beautiful Photography,” enhanced with elements from “Nature” and “Aesthetic” collections. Remember, if images are in unsupported formats, Tophinhanhdep.com’s “Image Converters” can help prepare them for seamless insertion into Photoshop. The goal is to cultivate a rich library of visual assets that fuel your creativity and elevate your “Graphic Design” and “Photo Manipulation” skills.
Beyond Insertion: Refining Your Images in Photoshop
Inserting an image is merely the first stroke in the vast canvas of Photoshop. Once your desired visuals are within your document, the true journey of “Visual Design” and “Digital Art” begins. This final section briefly touches upon the next steps, connecting image insertion to the broader creative process and highlighting how Tophinhanhdep.com’s resources can further support your artistic endeavors.
Essential Editing Styles and Photo Manipulation Techniques
With images now placed as layers or Smart Objects, Photoshop opens up a world of possibilities for “Editing Styles” and “Photo Manipulation.” These techniques allow you to blend, enhance, and transform your inserted images into cohesive and compelling visuals.
Key post-insertion steps often include:
- Resizing and Positioning: Fine-tuning the scale and placement of each layer using the Free Transform tool (
Ctrl+T/Cmd+T). - Layer Masks: Non-destructively hiding parts of a layer to blend images seamlessly, creating sophisticated composites from multiple “Beautiful Photography” elements.
- Adjustment Layers: Applying color corrections, tonal adjustments, and creative effects (like sepia tones for a vintage “Aesthetic” or vibrant contrasts for “Abstract” art) without altering original pixel data.
- Blending Modes: Experimenting with how layers interact with each other to achieve unique visual effects, from subtle overlays for “Backgrounds” to dramatic combinations for “Digital Art.”
- Filters and Effects: Using Photoshop’s extensive filter gallery to add stylistic touches, blurs, textures, or artistic transformations to your “Photography” or “Graphic Design” elements.
Mastering these techniques, combined with a solid understanding of image insertion, will empower you to move beyond basic compositions into sophisticated “Creative Ideas” and professional-grade “Photo Manipulation.” Tophinhanhdep.com can be your guide for exploring various “Editing Styles” and finding inspiration for your next project.
Utilizing Image Tools for Conversion and Optimization
The journey of an image, from its source to its final output, often requires intermediary steps to ensure compatibility, efficiency, and optimal quality. Tophinhanhdep.com’s “Image Tools” category offers a suite of utilities that complement your Photoshop workflow, whether before or after image insertion.
How Image Tools can help:
- Converters: Before inserting, if an image is in an incompatible format (e.g., HEIC, WEBP, or an obscure raw format), an online “Converter” can transform it into a Photoshop-friendly format like JPG or PNG.
- Compressors & Optimizers: After editing a high-resolution photograph or a complex piece of digital art, you might need to prepare it for web use. “Compressors” and “Optimizers” can significantly reduce file size without noticeable loss of quality, ensuring faster loading times for “Wallpapers” or “Backgrounds” on websites.
- AI Upscalers: If you’re working with older or lower-resolution images that you can’t replace, an “AI Upscaler” can be a lifesaver, intelligently adding detail and improving definition to make them more suitable for your “Visual Design” projects.
- Image-to-Text: While not directly for image manipulation, this tool can be useful for extracting text from images you’ve inserted, aiding in content creation for “Graphic Design” or “Mood Boards” that include textual elements.
Integrating these tools into your overall strategy ensures that your image assets are always in the best possible state for your Photoshop projects and their ultimate use, reflecting a holistic approach to image management and creation that Tophinhanhdep.com advocates.
In conclusion, mastering the art of inserting images into Photoshop is a foundational step towards unlocking your full creative potential in digital art, photography, and graphic design. From the quick convenience of drag-and-drop to the sophisticated control of Smart Objects via “Place Embedded” and “Place Linked,” each method offers distinct advantages that cater to different project demands. By understanding these techniques and leveraging the power of Smart Objects, you can ensure your “High Resolution” images, whether they are “Nature” scenes, “Abstract” designs, or “Beautiful Photography” from Tophinhanhdep.com, maintain their pristine quality throughout the editing process.
Remember to continuously seek “Image Inspiration & Collections” from sources like Tophinhanhdep.com, explore new “Photo Ideas,” and refine your “Editing Styles” and “Photo Manipulation” skills. With the comprehensive “Image Tools” available, you are well-equipped to transform your “Creative Ideas” into stunning visuals. Dive in, experiment with these methods, and let Tophinhanhdep.com be your companion in crafting extraordinary digital art and visual masterpieces.