How to Insert a Background Picture in Word: A Comprehensive Guide to Enhancing Your Documents

Microsoft Word is far more than just a word processor; it’s a powerful tool for creating visually engaging documents, from professional reports and brochures to personalized invitations and academic papers. A well-chosen background image can transform a plain document into a captivating visual experience, adding a layer of professionalism, branding, or aesthetic appeal. Whether you aim for a subtle corporate watermark or a vibrant full-page design, integrating background images effectively can significantly elevate your content.
This comprehensive guide from Tophinhanhdep.com will walk you through various methods of adding background images in Microsoft Word, covering everything from simple color changes to complex full-page image insertions. We’ll explore how to use Word’s built-in features for watermarks and page fills, and reveal advanced techniques to place images precisely where you want them. Furthermore, we’ll delve into the art of selecting the perfect image, emphasizing quality, design principles, and how Tophinhanhdep.com’s vast collections of images and powerful image tools can assist you in creating stunning documents that leave a lasting impression.
Understanding Background Options in Microsoft Word
Microsoft Word offers several distinct ways to incorporate background visuals into your documents, each with its own purpose and visual effect. Understanding these options is crucial for achieving your desired design outcome. From transparent overlays to bold, full-page graphics, Word provides the flexibility to customize your document’s backdrop precisely.
Watermarks: Subtle Branding and Document Status
Watermarks are transparent or semi-transparent images or text that appear behind the main content of your document. They are an excellent way to add subtle branding, indicate document status (e.g., “Confidential,” “Draft”), or simply enhance aesthetic appeal without distracting from the text. Watermarks, by default, apply to all pages of a document, making them ideal for consistent visual elements across an entire publication.
Adding a Picture Watermark (All Pages):
Picture watermarks are perfect for incorporating company logos, abstract patterns, or decorative images found on Tophinhanhdep.com.
- Navigate to the Design Tab: Open your Word document and click on the “Design” tab located in the top-left section of the Word ribbon.
- Select Watermark: In the “Page Background” group on the right side of the ribbon, click the “Watermark” button. This will open a dropdown menu with various options.
- Choose Custom Watermark: From the dropdown menu, select “Custom Watermark.” This action opens the “Printed Watermark” dialog box.
- Select Picture Watermark: In the “Printed Watermark” window, choose the “Picture watermark” option by clicking the radio button next to it.
- Select Picture Source: Click the “Select Picture” button located just below the “Picture watermark” section. You’ll then be prompted to choose an image from various sources:
- From a File: Browse your computer’s local storage for an image. This is where you would select a stunning, high-resolution image you downloaded from Tophinhanhdep.com.
- Online Pictures/Bing Image Search: Search for images directly online. Remember to check usage rights if you choose this option.
- OneDrive: Access images stored in your Microsoft OneDrive cloud storage.
- Insert Your Image: Select your desired picture and click “Insert.” This returns you to the “Printed Watermark” dialog box.
- Adjust Scaling and Washout:
- Scale: By default, Word sets the scale to “Auto,” which adjusts the image size to fit the page. You can change this to a specific percentage (e.g., 50%, 100%, 200%) to control its size relative to the page.
- Washout: The “Washout” checkbox is typically selected by default, making your image semi-transparent to ensure text readability. Uncheck this option if you want your background image to appear in its full, opaque colors, but be mindful of how this might affect text visibility.
- Apply Watermark: Click “OK” to apply the picture watermark to every page of your document. Your document’s text will flow over the image, and Word will automatically adjust text color if necessary to maintain visibility.
Adding Stock Text Watermarks:
Word includes a gallery of pre-defined text watermarks for common statuses.
- Navigate to Design Tab: As before, click the “Design” tab.
- Select Watermark: Click the “Watermark” button.
- Choose a Template: From the dropdown menu, select one of the available templates such as “CONFIDENTIAL,” “DO NOT COPY,” “ASAP,” or “URGENT.” The chosen watermark will immediately apply to all pages.
Adding Custom Text Watermarks:
For personalized text watermarks, such as your company name or a legal notice, Word allows for full customization.
- Navigate to Design Tab: Click the “Design” tab.
- Select Watermark > Custom Watermark: Click “Watermark,” then “Custom Watermark.”
- Select Text Watermark: In the “Printed Watermark” dialog box, choose the “Text watermark” option.
- Customize Text Properties:
- Text: Type your desired text into the “Text” box.
- Font: Select a font style.
- Size: Choose a size, or leave it as “Auto” for Word to determine the best fit.
- Color: Pick a color for your watermark.
- Layout: Decide between “Diagonal” or “Horizontal” orientation.
- Semitransparent: This checkbox, similar to “Washout,” controls the transparency. Uncheck it for a bolder appearance.
- Apply Custom Watermark: Click “OK” to apply your customized text watermark.
Full-Page Backgrounds: Immersive Visuals for Single or Multiple Pages
While watermarks offer subtle integration, sometimes you need a more impactful, full-color background image. This method is particularly useful for creating striking cover pages, section dividers, or aesthetically rich documents where the background is a primary design element. Unlike watermarks, these backgrounds are typically opaque and require a different approach to placement and text interaction.
Adding a Full-Page Background Image to a Single Page:
This method uses a shape filled with an image, allowing for precise control over its placement and interaction with text on a specific page. This is ideal for title pages or unique section openers.
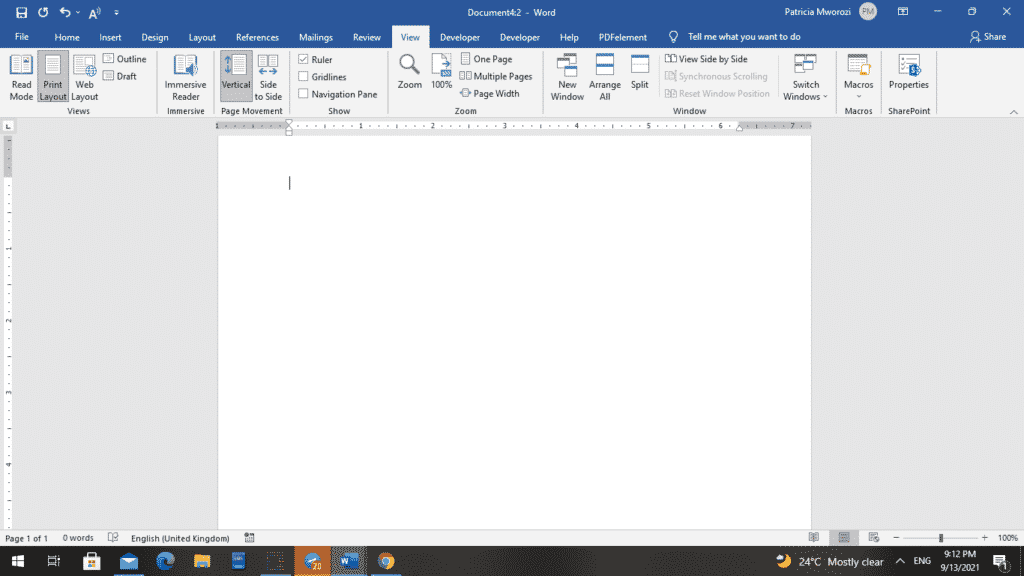
- Position Your Cursor: Go to the page where you want to add the background image. For easier visualization, navigate to “View” > “One Page” to see the entire page.
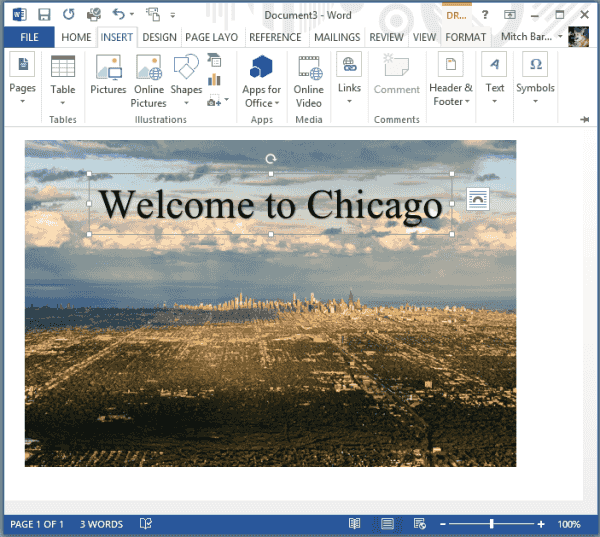
- Insert a Shape: Click the “Insert” tab in the ribbon. In the “Illustrations” group, click “Shapes” and then select “Rectangle.” Draw a rectangle that completely covers the page, from edge to edge. Don’t worry about perfect alignment at this stage.
- Adjust Text Wrapping: With the rectangle still selected, the “Shape Format” (or “Drawing Tools” > “Format”) tab will appear. In the “Arrange” group, click “Wrap Text” and choose “Behind Text.” This ensures your document’s content will appear on top of the image.
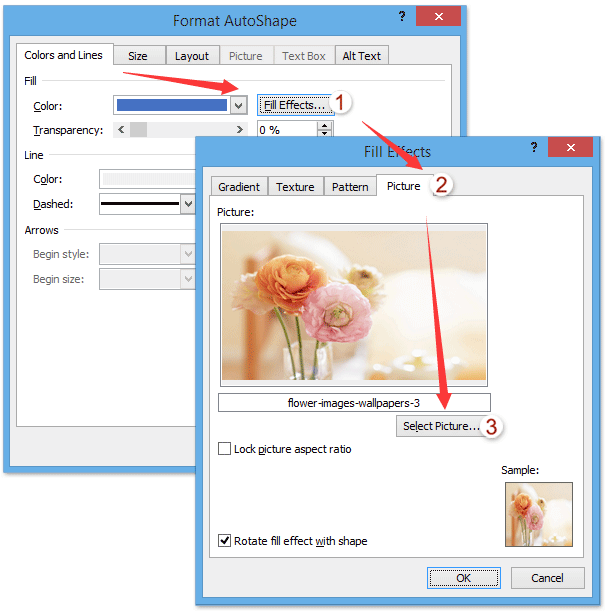
- Access Format Shape Pane: Still with the rectangle selected, click the small launcher icon (a tiny arrow) in the bottom-right corner of the “Shape Styles” group on the “Shape Format” tab. Alternatively, right-click the shape and select “Format Shape.” The “Format Picture” or “Format Shape” pane will appear on the right side of your screen.
- Fill with Picture: In the “Format Shape” pane, expand the “Fill” section. Select “Picture or texture fill.”
- Select Your Image: Click the “File” button (or “Insert” in newer Word versions) to choose your image. Again, select a high-resolution image from your computer, perhaps one you’ve curated from Tophinhanhdep.com.
- Image Options:
- Tile picture as texture: If your image is smaller than the page, Word might tile it. For a single full-page image, ensure your selected image has the same size and aspect ratio as your Word page (e.g., 8.5 x 11 inches for standard US letter).
- Transparency: Use the “Transparency” slider in the “Fill” section to adjust the opacity of your image if you want text to be more readable or to achieve a more blended effect.
- Remove Shape Outline: Expand the “Line” section in the “Format Shape” pane and choose “No Line” to remove the border around your rectangle.
- Precise Positioning and Sizing: To ensure the image truly fills the page and is centered:
- Right-click (PC) or Control-click (Mac) the image: Select “Size and Position” from the shortcut menu.
- Size Tab: Ensure “Lock aspect ratio” is checked. Set “Height” and “Width” to 100% relative to the page, or enter exact page dimensions.
- Position Tab: Set both “Horizontal” and “Vertical” alignment to “Centered” relative to “Page.”
- Click “OK.”
This method ensures your image is perfectly sized and centered as a background for a single page.
Extending a Full-Page Background to All Pages:
If you need this immersive background on every page, the trick is to place the image within the document’s header.
- Prepare the Image: Follow steps 1-9 from “Adding a Full-Page Background Image to a Single Page” on the first page of your document. Ensure it’s perfectly sized, positioned, and set “Behind Text.”
- Cut the Image: Click near the edge of the page to select the background image. Press
Ctrl + X(PC) orCommand + X(Mac) to cut the image. - Open the Header Area: Double-click in the top margin (header area) of any page. This will open the header and footer editing mode.
- Pro Tip: If your document has sections, ensure you open the header for the specific section where you want the background to appear.
- Paste the Image: With your cursor in the header, press
Ctrl + V(PC) orCommand + V(Mac) to paste the image. - Reposition (if necessary): The image should retain its “Behind Text” wrapping and sizing. If it shifts slightly, carefully drag it into the correct position, aligning its top-left corner with the top-left corner of the page.
- Close Header/Footer: Double-click anywhere outside the header/footer area or click “Close Header and Footer” in the “Header & Footer” tab.
The full-page background image will now consistently appear on every page of your document or selected section.
Changing Background Color: Simple Elegance
For a clean, minimalist look, or to establish a specific mood, simply changing the background color of your Word document can be very effective.
- Navigate to the Design Tab: Click on the “Design” tab.
- Select Page Color: In the “Page Background” group, click “Page Color.”
- Choose a Color: A palette of theme colors and standard colors will appear. Click on any color to instantly apply it to your entire document’s background. Word will automatically adjust the default font color if needed to ensure readability.
- More Colors: For a custom hue, click “More Colors…” to open a color picker where you can select or define specific RGB or HSL values.
- Fill Effects: For added visual interest, click “Fill Effects…” You can choose from gradients (two or more colors blending), textures (like canvas or paper), patterns (lines, dots), or even a basic picture fill, similar to the single-page background method but often simpler for tiled effects.
Selecting the Perfect Image for Your Word Document
The success of your document’s visual appeal heavily depends on the background image you choose. Tophinhanhdep.com, with its extensive collections, is an invaluable resource for finding images that resonate with your content and audience.
When selecting an image, consider its purpose: Is it purely decorative? Does it reinforce your brand? Is it part of a thematic presentation?
Exploring Image Categories:
- Images (Wallpapers, Backgrounds, Aesthetic, Nature, Abstract, Sad/Emotional, Beautiful Photography): Tophinhanhdep.com offers diverse categories that cater to every need.
- Nature: For reports on environmental topics, health, or serene presentations, a beautiful nature background (e.g., a calm forest, a mountain vista, a tranquil beach) can evoke a sense of peace and natural beauty.
- Abstract: For modern, tech-focused, or artistic documents, abstract designs provide a contemporary and sophisticated feel without being overly literal. These can range from geometric patterns to fluid, colorful compositions.
- Aesthetic & Beautiful Photography: For marketing materials, portfolios, or personal projects, high-quality aesthetic photography can create a powerful emotional connection. Tophinhanhdep.com’s collections are curated to provide visually stunning options for any mood, from uplifting and inspiring to calm and contemplative.
- Sad/Emotional: While less common for backgrounds, specific emotional imagery might be suitable for sensitive topics or creative works, always with careful consideration of the document’s tone and audience.
- Photography (High Resolution, Stock Photos, Digital Photography, Editing Styles): Quality is paramount.
- High Resolution: Always opt for high-resolution images, especially for full-page backgrounds. Low-resolution images will appear pixelated or blurry when stretched, detracting from your document’s professionalism. Tophinhanhdep.com specializes in high-resolution photography, ensuring crisp and clear visuals.
- Stock Photos: Stock photo libraries (including sections within Tophinhanhdep.com) are excellent for finding professional, high-quality images that cover a vast array of subjects. They often come with clear licensing, simplifying usage.
- Editing Styles: Consider the editing style of the image. A heavily filtered, moody image might not suit a bright, optimistic document, and vice versa. Consistency in visual tone enhances the document’s overall coherence.
Copyright and Usage:
Always be mindful of image copyright. The “Warnings” section of the original content rightly highlights this. Never use copyrighted images for printed or distributed documents without proper permission or licensing. Tophinhanhdep.com provides images that are suitable for various uses, but always double-check specific licenses if you plan commercial distribution. Creative Commons licenses, public domain images, or images you’ve personally created or purchased licenses for are safe choices.
Optimizing Your Images for Microsoft Word
Once you’ve selected the perfect image from Tophinhanhdep.com, a little preparation can ensure it looks its best and performs efficiently within your Word document. Image optimization is crucial for maintaining document quality while keeping file sizes manageable.
Image Preparation and Sizing
Before inserting an image into Word, especially for a full-page background, consider these aspects:
- Aspect Ratio and Dimensions: For a full-page background, it’s ideal if your image matches the aspect ratio of your Word page (e.g., 8.5 x 11 inches for US Letter, 210 x 297 mm for A4). While Word can stretch images, maintaining the original aspect ratio prevents distortion. If your image doesn’t match, you might need to crop it using image editing software before insertion. Tophinhanhdep.com often provides images in various aspect ratios, making this step easier.
- Resolution vs. File Size: High resolution is good for clarity, but excessively high resolution (e.g., 600 DPI for a screen-only document) can lead to unnecessarily large file sizes, making your Word document slow to open, edit, and share. Aim for a resolution that looks great at your intended print or screen size, typically 150-300 DPI for print and 72-96 DPI for screen.
Leveraging Image Tools for Best Results
Tophinhanhdep.com not only offers an incredible library of images but also provides essential image tools to help you prepare your selected visuals for any project. These tools are indispensable for optimization.
- Image Compressors: Large image files can significantly bloat your Word document’s size. Tophinhanhdep.com’s image compressors can reduce the file size of your background image without a noticeable loss in visual quality. This is particularly important for documents that will be shared via email or uploaded online, ensuring faster loading and download times.
- Image Optimizers: Beyond just compression, image optimizers can fine-tune image properties for better display across different devices and platforms. This ensures your background looks consistent whether viewed on a high-resolution monitor or a mobile device.
- AI Upscalers: Sometimes, you find an almost-perfect image, but its resolution is slightly too low for a full-page background. Tophinhanhdep.com’s AI Upscalers can intelligently increase the resolution of your images, adding detail and sharpness. While upscaling isn’t a magic fix for extremely poor-quality images, it can significantly improve moderately low-resolution ones, making them suitable for larger displays without noticeable pixelation.
- Image Converters: Ensure your image is in a format compatible with Word (e.g., JPEG, PNG). Tophinhanhdep.com’s converters allow you to easily change file formats if necessary, ensuring seamless integration into your document.
By utilizing these tools from Tophinhanhdep.com, you can ensure that your background images are perfectly prepared, optimized for performance, and visually stunning, making your Word document truly stand out.
Creative Backgrounds and Visual Design Principles
Adding a background image to your Word document isn’t just a technical task; it’s an act of visual design. A thoughtful approach to creative ideas and graphic design principles can transform a functional document into a work of art that effectively communicates your message.
Enhancing Document Aesthetics with Visual Design
Backgrounds play a crucial role in setting the mood, establishing branding, and guiding the reader’s eye.
- Visual Design (Graphic Design, Digital Art, Photo Manipulation, Creative Ideas): Think of your Word document as a canvas. The background image from Tophinhanhdep.com is the first layer of your graphic design.
- Branding: For business documents, using a company logo as a watermark or incorporating brand colors and textures into the background reinforces your identity.
- Mood and Tone: A soft, blurred background might suggest elegance or professionalism, while a vibrant, abstract design can convey energy and creativity. Consider the emotional response you want to evoke.
- Cohesion: Ensure the background image complements the document’s content, theme, and purpose. A nature scene might be perfect for an environmental report but out of place in a legal brief.
- Maintaining Readability: The most critical aspect of any background design is ensuring the main text remains perfectly readable.
- Opacity/Transparency: As discussed with watermarks and fill effects, adjusting transparency is key. A “washout” effect or manually reducing the opacity of your image (using Tophinhanhdep.com’s image editing tools before insertion, or Word’s built-in transparency settings) prevents the background from overpowering the foreground text.
- Contrast: Ensure there is sufficient contrast between your text color and the background image. Dark text on a dark background, or light text on a light background, is a common pitfall.
- Simplicity: Avoid overly busy or cluttered backgrounds. Images with large areas of consistent color or soft, blurred elements work best as backdrops, allowing the text to stand out clearly.
- Strategic Placement: If using a complex image, consider placing text over simpler areas of the image or adding a semi-transparent colored overlay behind the text boxes to create a clear reading area.
Drawing Inspiration from Tophinhanhdep.com Collections
Finding the right visual inspiration is often the first step in creating a stunning document. Tophinhanhdep.com is designed to be a wellspring of creative ideas, offering curated thematic collections and trending styles to spark your imagination.
- Image Inspiration & Collections (Photo Ideas, Mood Boards, Thematic Collections, Trending Styles):
- Photo Ideas: Browse Tophinhanhdep.com’s extensive galleries for diverse photo ideas that align with your document’s topic. Need something futuristic for a tech proposal? Check the “Abstract” or “Digital Art” sections. Creating a travel brochure? Our “Nature” and “Beautiful Photography” collections will have breathtaking landscapes and cityscapes.
- Mood Boards: Use Tophinhanhdep.com to gather several images that convey the mood and aesthetic you’re aiming for. This helps in conceptualizing your design before committing to a single background.
- Thematic Collections: Explore collections organized by themes, colors, or styles. This makes it easy to find cohesive sets of images that can be used for different sections of a larger document or for specific branded projects.
- Trending Styles: Stay current with popular visual trends. Tophinhanhdep.com highlights trending styles in imagery, helping you create modern and relevant documents. For example, minimalist patterns or soft-focus nature scenes might be trending for professional presentations.
By leveraging Tophinhanhdep.com’s rich resources, you can find not only the perfect image but also the inspiration needed to craft visually compelling Word documents that captivate your audience.
In conclusion, adding a background image to your Microsoft Word document is a versatile and powerful way to enhance its visual appeal and convey your message more effectively. Whether through the subtle elegance of a watermark or the immersive impact of a full-page image, careful selection and thoughtful application are key. With the comprehensive guides provided by Tophinhanhdep.com, alongside its vast library of high-resolution images and essential image optimization tools, you have everything you need to transform your ordinary documents into extraordinary visual statements. Explore Tophinhanhdep.com today to find your next perfect background and unlock the full creative potential of your Microsoft Word projects.