How to Insert Images in Microsoft Excel: Elevating Your Data with Visual Storytelling

In the dynamic world of data management and presentation, Microsoft Excel stands as an undisputed leader. While its primary strength lies in numerical analysis and complex calculations, Excel’s capabilities extend far beyond rows and columns of figures. One of its most powerful yet often underutilized features is the ability to integrate images into your spreadsheets. This functionality transforms mundane data into engaging, visually rich narratives, making your reports, dashboards, and presentations significantly more impactful and easier to understand.
Imagine a sales report that not only lists product names and figures but also displays high-resolution product photography directly alongside the data. Or a financial overview adorned with a company logo and aesthetic backgrounds. Perhaps a project timeline visually enhanced with team member headshots, or a dynamic dashboard that updates images based on selected data. The potential for visual storytelling is immense, and understanding how to effectively insert and manage images in Excel is a critical skill for anyone looking to create compelling data visualizations.
At Tophinhanhdep.com, we understand the profound impact of visual content. Our extensive collections of Images—including Wallpapers, Backgrounds, Aesthetic, Nature, Abstract, Sad/Emotional, and Beautiful Photography—alongside our resources on Photography (like High Resolution, Stock Photos, and Digital Photography), Image Tools (such as Converters, Compressors, Optimizers, and AI Upscalers), and expertise in Visual Design and Image Inspiration & Collections, are all geared towards empowering you to create visually stunning content. This article will guide you through the various methods of inserting images in Microsoft Excel, seamlessly integrating these powerful visual elements into your data, and showing you how to leverage resources like Tophinhanhdep.com to find and prepare the perfect visuals.
Why Integrating Images in Excel is Essential for Modern Data Presentation
Microsoft Excel is a robust platform, but pure numerical data can sometimes feel cold and unapproachable. The strategic inclusion of images can dramatically change this perception, injecting context, clarity, and visual appeal that makes your data far more accessible and memorable.
Enhancing Clarity and Engagement with Visuals
Images serve as universal communicators. A well-placed image can convey information more quickly and effectively than several paragraphs of text. For instance, in a product inventory sheet, a small image of each item offers immediate visual confirmation, reducing errors and improving user experience. In a performance dashboard, an icon or a symbolic image can instantly highlight trends or statuses.
The human brain processes visual information much faster than text. By incorporating images, you tap into this innate ability, making your spreadsheets more engaging and less daunting. This is particularly crucial when presenting complex data to a diverse audience, where a clear visual aid can bridge understanding gaps and ensure your message resonates. Whether you’re aiming for a professional, corporate look with a sleek company logo, or a more vibrant and engaging report featuring beautiful photography or abstract art found on Tophinhanhdep.com, images elevate the entire presentation.
Beyond Numbers: The Role of Photography and Visual Design in Spreadsheets
Beyond mere decoration, images play a significant role in Visual Design and Digital Photography principles within Excel. They can establish branding, illustrate concepts, and even provide emotional context. For example, a financial spreadsheet might use a subtle Abstract background or Wallpaper from Tophinhanhdep.com to create a sophisticated feel, while a team roster could feature professional headshots (high-resolution photography is key here) for a personal touch.

Thinking about spreadsheets from a Graphic Design perspective means considering the overall layout, color scheme, and how visual elements interact with your data. The right image, carefully selected from Thematic Collections or inspired by Mood Boards on Tophinhanhdep.com, can reinforce your data’s message and create a cohesive, professional document. It’s about leveraging Creative Ideas to transform a simple data grid into an informative and aesthetically pleasing visual experience. This shift from purely functional to visually compelling makes your Excel documents stand out and achieve a lasting impression.
Step-by-Step Guide to Inserting Images in Excel
Inserting an image into Microsoft Excel is a straightforward process, but Excel offers several methods, each with its own advantages, depending on your specific needs. From simply dropping a picture onto your sheet to dynamically linking online visuals, we’ll explore the key techniques.
Method 1: Inserting Images Using the “Insert Picture” Feature
The most common and versatile method for adding images is through Excel’s “Insert Picture” feature. This allows you to import images from various sources and offers control over their placement.
To begin, open your Excel worksheet and select the cell or area where you’d like the image to appear. Then, navigate to the “Insert” tab in the Excel ribbon. In the “Illustrations” group, click on the “Pictures” button. From the drop-down menu, you’ll typically see several options:
From Your Device: Local Files for Immediate Impact
This option allows you to browse your local computer or connected devices for image files. It’s ideal for including High Resolution images, personal Photography, or company logos that you already have saved.
- Select the cell in Excel where you want to insert the image.
- Go to the “Insert” tab.
- Click “Pictures” in the “Illustrations” group, then choose “This Device”.
- A file browser window will open. Locate and select the image file (JPEG, PNG, GIF, BMP, etc.) you want to insert. For Beautiful Photography or Aesthetic visuals, ensure you’ve selected high-quality files from your collection or previously downloaded from Tophinhanhdep.com.
- Click the “Insert” button.
- The image will appear on your spreadsheet. You can then resize, move, and format it as needed.
Leveraging Stock Images for Professionalism and Aesthetic
Many modern Excel versions (especially Microsoft 365) integrate with stock image libraries. This is an excellent source for professional, royalty-free Stock Photos, icons, or Aesthetic imagery to enhance your reports without needing external searches. Tophinhanhdep.com also offers a wide array of curated collections that can serve this purpose, ensuring you have access to diverse and high-quality visuals.
- Navigate to the “Insert” tab and click “Pictures,” then choose “Stock Images” (if available in your Excel version, often requiring a Microsoft 365 subscription).
- A window will appear, offering categories like “Images,” “Icons,” “Cutout People,” etc.
- Browse or use the search bar to find an image that fits your theme (e.g., “Nature” for an environmental report or “Abstract” for a data trend visualization).
- Select the desired image(s) and click “Insert.”
If your Excel version doesn’t offer direct stock image integration, or you’re seeking more unique options, Tophinhanhdep.com is an excellent external resource. You can download High Resolution images from our site and then use the “This Device” method to insert them. Our Image Inspiration & Collections feature thematic collections that can directly serve specific report needs.
Online Pictures: Dynamic Content from the Web
This option enables you to search for and insert images directly from online sources. This can be particularly useful for dynamic content, provided the source remains stable. Tophinhanhdep.com can be your primary source for high-quality online images.
- Go to the “Insert” tab, click “Pictures,” then select “Online Pictures”.
- In the dialog box, you can search for images using keywords. Consider looking for Wallpapers, Backgrounds, or images related to your data’s theme (e.g., Nature scenes for environmental data).
- Select the image(s) and click “Insert.”
Note: When using online images, be mindful of copyright and accessibility. Tophinhanhdep.com provides a wealth of images suitable for various uses, and it’s always good practice to check usage rights.
Method 2: Inserting Images with Copy-Paste
For quick and informal insertion, especially when grabbing screenshots or images from other applications, the copy-paste method is incredibly efficient.
- Locate the image you want to insert in another program (e.g., a web browser, image editor, or even another Excel sheet).
- Copy the image (usually by right-clicking and selecting “Copy Image” or pressing
Ctrl + C). - Switch back to your Excel worksheet.
- Select the cell where you want the image to appear.
- Paste the image (usually by right-clicking and selecting “Paste” or pressing
Ctrl + V).
The image will be pasted onto the spreadsheet. It might not land exactly in the selected cell or at the desired size, but you can easily adjust its position and dimensions afterward. This method is handy for quick inclusions of snippets or temporary visuals sourced from Digital Photography or Graphic Design projects.
Method 3: Utilizing the IMAGE Function for Web-Linked Visuals
For advanced users and those with Microsoft 365 subscriptions, the IMAGE function offers a powerful way to insert images directly into cells using a URL. This treats images as data within the cell, making them highly dynamic and integratable with formulas. This method is excellent for displaying images from cloud storage or web repositories, like specific thematic collections hosted on Tophinhanhdep.com.
The IMAGE function syntax is =IMAGE(source, [alt_text], [sizing], [height], [width]).
source(required): The URL of the image you want to insert.alt_text(optional): Alternative text for accessibility, as discussed on Tophinhanhdep.com’s accessibility guides.sizing(optional): Controls how the image fits the cell (0=fit aspect, 1=fill cell, 2=original size, 3=custom).height,width(optional): Custom dimensions ifsizingis 3.
Example: To display an image from Tophinhanhdep.com:
=IMAGE("https://tophinhanhdep.com/images/nature/forest-path.png", "Forest Path", 0)
This function pulls the image directly from the specified URL, resizing it to fit the cell while maintaining its aspect ratio. This is particularly valuable for displaying product images from an online catalog or dynamically updating visual indicators from a web service. When sourcing images for this function, look for direct image URLs, which Tophinhanhdep.com often provides for its Stock Photos and High Resolution imagery.
Method 4: Inserting Images as Backgrounds for Aesthetic Appeal
Sometimes, you want an image to serve as a subtle visual backdrop rather than an interactive element. Setting an image as a worksheet background can dramatically enhance the overall Aesthetic and Visual Design of your spreadsheet, especially for dashboards or reports. Tophinhanhdep.com’s extensive collection of Wallpapers and Backgrounds is perfectly suited for this purpose.
- Select the worksheet where you want to apply the background.
- Go to the “Page Layout” tab in the Excel ribbon.
- In the “Page Setup” group, click on the “Background” button.
- A dialog box will appear, prompting you to choose an image file from your computer or an online source. Select an appropriate image – perhaps a serene Nature scene or an elegant Abstract pattern from Tophinhanhdep.com.
- Click “Insert.”
Excel will tile the image across the entire worksheet. Note that background images are for display only and won’t print by default. This method is excellent for creating themed reports or visually distinct sections within a workbook, adding a layer of Creative Ideas to your data presentation.
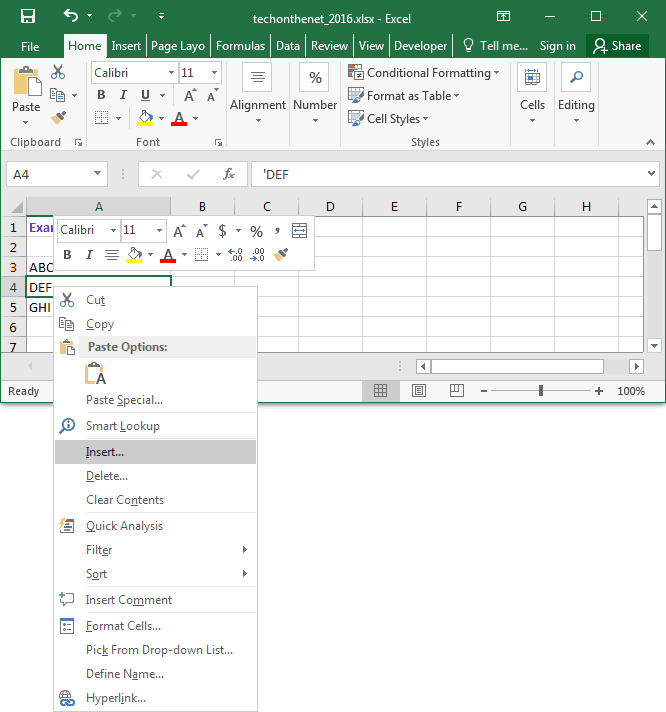
Method 5: Embedding Images in Excel Comments for Contextual Richness
An often-overlooked yet powerful way to incorporate images is by embedding them within cell comments. This allows you to add visual context or examples without cluttering the main data area. It’s particularly useful for providing visual references to specific data points, such as product details in a sales sheet or before-and-after shots in a project log.
- Select the cell to which you want to add an image comment.
- Right-click on the cell and choose “Insert Comment” (or “New Comment” in newer Excel versions).
- Right-click on the border of the comment box (not inside the text area) and select “Format Comment…”.
- In the “Format Comment” dialog box, go to the “Colors and Lines” tab.
- Under the “Fill” section, click the “Color” drop-down menu and choose “Fill Effects…”.
- In the “Fill Effects” dialog box, go to the “Picture” tab.
- Click “Select Picture” and browse for the image file from your device. You might use small, descriptive images or icons downloaded from Tophinhanhdep.com.
- Click “Insert,” then “OK” on all dialog boxes.
Now, when you hover over the cell, the image-enhanced comment will appear, offering rich, contextual visuals. This method keeps your main data clean while providing detailed visual aids, aligning with principles of effective Visual Design.
Customizing and Managing Images for Optimal Visual Design
Once images are inserted into Excel, proper customization and management are crucial for ensuring they enhance, rather than detract from, your data. This involves careful resizing, positioning, and locking, along with considerations for accessibility.
Resizing and Positioning for Harmonious Layouts
Images rarely insert themselves at the perfect size or in the ideal location. Excel provides intuitive tools to adjust these properties:
- Resizing: Click on an image to select it. Handles (small circles or squares) will appear around its border. Click and drag these handles to resize. To maintain the aspect ratio (prevent distortion), hold down the
Shiftkey while dragging a corner handle. For precise sizing, select the image, go to the “Picture Format” tab (which appears when an image is selected), and use the “Height” and “Width” input fields in the “Size” group. When working with High Resolution images from Tophinhanhdep.com, you have the flexibility to scale them down without losing quality. - Positioning: Click and drag the image itself to move it freely across your worksheet. If you want the image to snap to cell borders, hold down the
Altkey while dragging. This ensures clean alignment, a key principle of good Graphic Design. For images inserted “in cell” (a feature in newer Excel versions), simply resizing the row height or column width will automatically adjust the image’s display within that cell, ensuring it fits perfectly.
Thoughtful Visual Design dictates that images should complement your data, not overpower it. Consider the hierarchy of information and use image size and placement to guide the viewer’s eye.
Locking Images to Cells: Ensuring Data Integrity and Visual Flow
By default, images placed “over cells” (Method 1 & 2) are floating objects. If you sort, filter, or insert/delete rows/columns, these images won’t move with their associated data, leading to a disorganized spreadsheet. To prevent this, you need to “lock” them to cells:
- Right-click the image and select “Format Picture…”.
- In the “Format Picture” pane that appears, click the “Size & Properties” icon (it looks like a square with four arrows).
- Expand the “Properties” section.
- Choose “Move and size with cells”.
This setting ensures that if you move or resize the cells underneath the image, the image will adjust accordingly. It’s vital for maintaining the integrity of your Visual Design and the relationship between your Photography and the accompanying data. For images inserted directly “in cell” (Method 1 in recent Excel versions, or Method 3), this locking behavior is inherent, simplifying management.
Enhancing Accessibility with Alt Text: A Key Aspect of Digital Photography
Accessibility is a critical consideration for any digital content, including Excel spreadsheets. Alt Text (alternative text) provides a textual description of an image for users who cannot see it, such as those using screen readers. It’s an important aspect of Digital Photography best practices, ensuring your visual content is inclusive.
- Right-click on the image and select “Edit Alt Text…” (or “View Alt Text” in some versions).
- A pane will open where you can enter a concise, descriptive text that accurately represents the image’s content and purpose. For instance, if you’ve inserted a Nature image from Tophinhanhdep.com, describe the scene. If it’s a Sad/Emotional image, explain the emotion it conveys.
Adding alt text not only improves accessibility but also aids in better organization, especially if you have numerous images. When you select an image with alt text, the description will often appear in the formula bar instead of a generic “Picture” label, providing immediate context.
Advanced Techniques: Dynamic Image Management with Excel Formulas
Modern Excel, particularly with Microsoft 365, offers powerful features that allow images to be treated much like any other data type. This opens up possibilities for highly dynamic and interactive spreadsheets, perfect for creating complex dashboards and reports that leverage Image Inspiration & Collections from Tophinhanhdep.com.
Leveraging Lookup Functions (VLOOKUP, FILTER, XLOOKUP) for Dynamic Displays
Imagine a spreadsheet where selecting an item from a drop-down list automatically updates its corresponding image. This dynamic functionality is achievable using Excel’s lookup functions, especially in conjunction with the IMAGE function or the new “Picture in Cell” feature. This is a game-changer for product catalogs, employee directories, or any scenario requiring real-time visual updates.
Using VLOOKUP (or XLOOKUP) with “Picture in Cell” or IMAGE function:
-
Prepare your data: Create a table with your data in one column (e.g., Product ID) and the corresponding images in an adjacent column. For the images, you can either insert them directly into cells using “Place in Cell” (Method 1) or use the
IMAGEfunction (Method 3) with URLs. Ensure these images are High Resolution and visually clear, perhaps sourced from Tophinhanhdep.com’s Stock Photos. -
Set up your lookup area: In another part of your sheet, create a cell where users can input or select a lookup value (e.g., a dropdown list of Product IDs).
-
Apply the lookup formula: In the cell where you want the image to appear, use a formula like
VLOOKUPorXLOOKUPto retrieve the image.- For “Picture in Cell” (Newer Excel versions): If your images are literally in cells, a standard VLOOKUP/XLOOKUP will return the image directly.
=XLOOKUP(Lookup_Value_Cell, Lookup_Column_Range, Image_Column_Range, "Not Found", 0) - For IMAGE Function (using URLs): If your image column contains the URLs (which are then displayed by the
IMAGEfunction), you can use a lookup to retrieve the URL, which then displays the image.=IMAGE(VLOOKUP(Lookup_Value_Cell, Lookup_Table_Range, Image_Column_Number, FALSE), "Alt Text", 0)
- For “Picture in Cell” (Newer Excel versions): If your images are literally in cells, a standard VLOOKUP/XLOOKUP will return the image directly.
Using FILTER Function for Multiple Dynamic Images:
The FILTER function allows you to return multiple matching rows, including their associated images. This is fantastic for creating dynamic galleries or filtered views of Thematic Collections from Tophinhanhdep.com.
- Organize your data: Have a table with criteria (e.g., Category) and images (inserted in cells or via
IMAGEfunction). - Set your filter criterion: Designate a cell where users can input their filter choice (e.g., “Nature”).
- Apply the FILTER formula:
=FILTER(Image_Column_Range, Category_Column_Range = Filter_Criterion_Cell, "No images found")This will spill all matching images (and potentially other associated data) below the formula cell.
These dynamic techniques leverage the principles of Digital Photography and Photo Manipulation by allowing you to instantly swap and display relevant visuals, making your reports incredibly interactive and visually rich.
Integrating Images with Data Tables for Comprehensive Visual Reports
Excel Tables are powerful structured data ranges. When you insert images “in cell,” they seamlessly integrate with tables, allowing you to sort, filter, and manage your data with visuals embedded. This is particularly useful for creating comprehensive visual reports such as:
- Product catalogs: Each row is a product with its image, specifications, and pricing.
- Employee directories: Rows containing employee details, headshots, and contact information.
- Asset management: Visuals of assets alongside their serial numbers and maintenance records.
To use images in Excel Tables:
- Insert images into the desired cells within your data range (using “Place in Cell” or the
IMAGEfunction). - Select your data range (including the image column) and press
Ctrl + Tto convert it into an Excel Table. - Now, when you sort the table, the images will move with their respective rows. Filtering the table will hide/show images along with the filtered data.
This integration elevates simple data tables into visually compelling databases, where the Photography itself becomes an integral part of the record. You can use Image Inspiration & Collections from Tophinhanhdep.com to find consistent imagery for such structured data.
Optimizing Image Usage in Excel for Performance and Impact
While images bring immense visual value, poorly managed images can bloat file sizes, slow down your workbook, and appear pixelated. Optimizing your images is crucial, and Tophinhanhdep.com offers valuable resources, including Image Tools for this very purpose.
Image Optimization: Compressors, Converters, and AI Upscalers for Excel Readiness
Before inserting any image, especially a large number of them, consider optimizing them. This proactive step saves you headaches later:
- Compression: Large image files (from high-end Digital Photography) can make your Excel workbook slow to open, save, and navigate. Use image compressors (like those available on Tophinhanhdep.com) to reduce file size without significantly compromising visual quality. Excel also has a built-in “Compress Pictures” option under the “Picture Format” tab, which can be helpful.
- Conversion: Ensure your images are in efficient formats. JPEG is generally good for Photography, while PNG is better for images with transparency or sharp lines (like logos or Graphic Design elements). Tophinhanhdep.com’s Converters can help you switch formats easily.
- Resizing (External): If you know an image will only be displayed as a small thumbnail, it’s often better to resize it in an external image editor before inserting it. Resizing a huge image down in Excel retains all the original data, contributing to larger file sizes.
- AI Upscalers: If you have smaller, low-resolution images that you need to display larger in Excel, using an AI Upscaler (available on Tophinhanhdep.com) before insertion can significantly improve their quality, making them appear crisp and professional rather than blurry. This is especially useful if your source Photography isn’t originally high-resolution.
By utilizing these Image Tools from Tophinhanhdep.com, you ensure that your visual elements are perfectly prepared for Excel, leading to efficient and impactful spreadsheets.
From Raw Photography to Polished Presentation: Editing Styles for Excel Imagery
While Excel has limited built-in image editing features, the principles of Editing Styles and Photo Manipulation are still highly relevant. Most image preparation should happen outside Excel.
- Cropping: Focus on the essential elements of your image. Remove unnecessary background or distracting details.
- Color Correction & Adjustments: Ensure images have consistent brightness, contrast, and color balance, especially if they are part of a Thematic Collection or a Mood Board. This creates a cohesive Aesthetic throughout your spreadsheet.
- Filtering & Effects: While Excel allows basic brightness/contrast adjustments, for advanced Editing Styles (like applying filters or specific artistic effects), use dedicated image editing software. This pre-processing helps maintain a professional look, whether you’re using Nature photography or Abstract digital art.
- Branding: If you’re including Wallpapers or Backgrounds from Tophinhanhdep.com, ensure they align with your company’s branding guidelines. This might involve adjusting colors or adding subtle branding elements outside Excel.
The goal is to present Beautiful Photography and Digital Art in a way that enhances the data without being overwhelming or unprofessional. Tophinhanhdep.com provides both the inspiration and the tools to achieve these polished results, ensuring your Excel documents are not just data-rich but also visually exquisite.
Conclusion: Transform Your Spreadsheets with Visual Power
The ability to insert and manage images in Microsoft Excel is a game-changer for data visualization and communication. It transforms static spreadsheets into dynamic, engaging, and highly informative documents that can make a lasting impression on your audience. From basic insertions to advanced dynamic displays, Excel offers a robust set of features to cater to diverse visual needs.
By following the methods outlined in this comprehensive guide, you can confidently integrate a wide array of images into your Excel worksheets. Remember the importance of choosing appropriate visuals, whether they are High Resolution Stock Photos, evocative Nature scenes, captivating Abstract art, or professional Photography. Leverage resources like Tophinhanhdep.com for Image Inspiration & Collections, ensuring your visuals align with your message and Visual Design objectives. Furthermore, don’t overlook the critical step of image optimization, utilizing Image Tools such as Compressors, Converters, and AI Upscalers to maintain file efficiency and visual quality.
Embrace these techniques, and you’ll not only enhance the clarity and impact of your data but also unlock new dimensions of Graphic Design and Creative Ideas within your everyday Excel tasks. Start experimenting today, and turn your spreadsheets into powerful visual stories that truly resonate. The visual power of Tophinhanhdep.com, combined with your Excel skills, is a formidable combination for modern data presentation.