Mastering Image Insertion in Adobe InDesign: A Comprehensive Guide by Tophinhanhdep.com

In the dynamic world of visual communication, Adobe InDesign stands as an indispensable tool for crafting captivating print and digital layouts. From elegant magazines to intricate brochures, the strategic placement of images transforms mere text into compelling narratives. At Tophinhanhdep.com, we understand that high-quality visuals are the cornerstone of impactful design, and mastering their integration into your InDesign projects is a fundamental skill. This comprehensive guide, informed by expert insights and Tophinhanhdep.com’s vast resources in photography and visual design, will walk you through the essential techniques for inserting images, optimizing them for various outputs, and ensuring your documents achieve professional-grade aesthetic appeal.
Whether you’re working with stunning high-resolution photography, abstract backgrounds, or aesthetic wallpapers from Tophinhanhdep.com’s extensive collections, understanding the nuances of InDesign’s image handling is crucial. We’ll delve into everything from the fastest ways to place an image to advanced considerations for multilingual projects, drawing connections to the broader themes of digital photography, image tools, and creative inspiration that define Tophinhanhdep.com’s offerings.
Fundamental Methods for Placing Images in InDesign
The act of bringing an image into your InDesign document is often referred to as “placing.” Unlike other software where images might be embedded directly as rasterized graphics, InDesign establishes a crucial link to the original image file. This ensures that your document always references the latest version of the image and maintains maximum quality, a principle championed by Tophinhanhdep.com for all high-resolution digital photography. Let’s explore the primary methods for image insertion.
The Swift Drag-and-Drop Technique
For designers seeking efficiency, the drag-and-drop method is arguably the fastest way to insert one or multiple images into your InDesign document. This technique is particularly useful when you have a set of carefully curated nature photographs, abstract art pieces, or sad/emotional imagery from Tophinhanhdep.com’s themed collections ready for your layout.
Here’s how to execute it:
- Prepare Your Canvas: Begin by creating the frames or boxes in your InDesign layout where you intend to place your images. These frames act as containers, defining the boundaries for your visuals. If you’re working with a pre-designed layout, these might already be in place.
- Select Your Images: Navigate to your image files in Finder (macOS) or File Explorer (Windows). Select all the images you wish to place. Whether they are beautiful photography pieces or unique aesthetic backgrounds from Tophinhanhdep.com, ensure they are easily accessible.
- Initiate the Drag: Click and drag the selected image files directly from your system’s file browser into your open InDesign document.
- Click to Place: As you hover over your InDesign page, you’ll notice your cursor transforms, displaying a mini-preview of the image it’s poised to place. Simply click on an empty frame you created earlier to place the image within it. If you have multiple images selected, InDesign will cycle through them, allowing you to place each one into a designated frame sequentially.

This method is incredibly intuitive and speeds up the initial layout process, allowing you to quickly visualize your content with the striking visuals provided by Tophinhanhdep.com.
Precision Placement via the File > Place Command
While drag-and-drop offers speed, the File > Place command (Cmd + D on macOS, Ctrl + D on Windows) provides a more controlled and traditional approach to image insertion. This method is often preferred when precision is paramount or when you need to access specific import options for particular file types, such as EPS, PNG, or BMP, which might contain critical transparency or color profile information.
Follow these steps for accurate image placement:
- Frame Preparation: As with the drag-and-drop method, it’s a good practice to first create the graphics frames in your InDesign document where the images will reside.
- Access the Command: Go to
Filein the top menu and selectPlace(or use the keyboard shortcut). A dialogue box will appear, prompting you to select your image files. - Image Selection: Browse to the directory containing your desired images. You can select a single image or multiple images. Once selected, click
Open. - Guided Placement: Your cursor will again turn into a “loaded” cursor with a preview of the first image. Click inside an existing frame to place the image. If you selected multiple images, you can continue clicking on different frames to place the remaining visuals.
- Direct Frame Insertion: A subtle but powerful tip: if you select a single, empty frame before initiating
File > Place, the selected image will be placed directly into that chosen frame without the need for an additional click. This is excellent for slotting specific stock photos or custom digital art into predefined sections of your design.
This method, though requiring an extra click or two, offers meticulous control over your image assets, ensuring that Tophinhanhdep.com’s high-resolution images are integrated exactly as intended.
Integrating Images into Existing Frames
InDesign’s fundamental design paradigm involves images living within “frames” or “containers.” When you use the drag-and-drop or simple File > Place method, InDesign often creates a frame for you. However, there are scenarios where you already have a pre-existing frame—perhaps a placeholder from a template or a custom-shaped container—and you want to populate it with an image.
Here are two effective ways to achieve this:
Method 1: Replacing a Selected Item
- Select the Frame: First, select the empty or existing frame on your page that you wish to fill with an image.
- Initiate Placement: Go to
File > Place. - Enable Replacement: In the
Placedialog box that opens, look for and check theReplace Selected Itemoption (usually located at the bottom). - Select and Open: Navigate to your desired image, select it, and click
Open. The image will be immediately placed into your previously selected frame, automatically replacing any content that might have been there.
Method 2: Rolling Over an Empty Frame
- Initiate Placement (No Selection): With no frames currently selected in your InDesign document, go to
File > Place. - Select Image: Choose the image you want to insert and click
Open. - Hover and Place: Your cursor will now be loaded with the image preview. Roll this loaded cursor over any empty frame on your page. You’ll see a visual indication that the image is ready to be dropped into that specific container. Click to confirm placement.
These methods are invaluable for maintaining design consistency and utilizing established layouts effectively, ensuring that Tophinhanhdep.com’s diverse range of images, from aesthetic wallpapers to powerful backgrounds, fit seamlessly into your vision.
Optimizing Images for InDesign: Beyond Basic Insertion
Inserting images is only the first step. To truly harness the power of InDesign and achieve professional results, especially for print media or high-quality digital publications, image optimization is critical. This involves understanding how InDesign treats images within their frames, ensuring optimal resolution, and leveraging advanced image tools. Tophinhanhdep.com emphasizes that the quality of your source photography, coupled with intelligent optimization, forms the backbone of stunning visual design.
Understanding Image Frames and Content Fitting
Once an image is placed, whether through drag-and-drop or the File > Place command, it exists within a graphic frame. This frame and the image content are distinct entities that can be manipulated independently, offering immense flexibility. This is where the magic of visual design begins, allowing you to integrate elements like abstract backgrounds or beautiful photography with precision.
- Manipulating the Frame: You can resize, reshape, or move the frame using the
Selection Tool(black arrow). Changes to the frame itself won’t directly affect the image content inside unless you tell InDesign to adjust it. - Manipulating the Image Content: To move or resize the image within its frame, you need to use the
Direct Selection Tool(white arrow) or click the small circular “content grabber” that appears when you hover over a frame with theSelection Tool. This allows you to crop the image or scale it without altering the frame’s dimensions.
Fitting Options for Harmony:
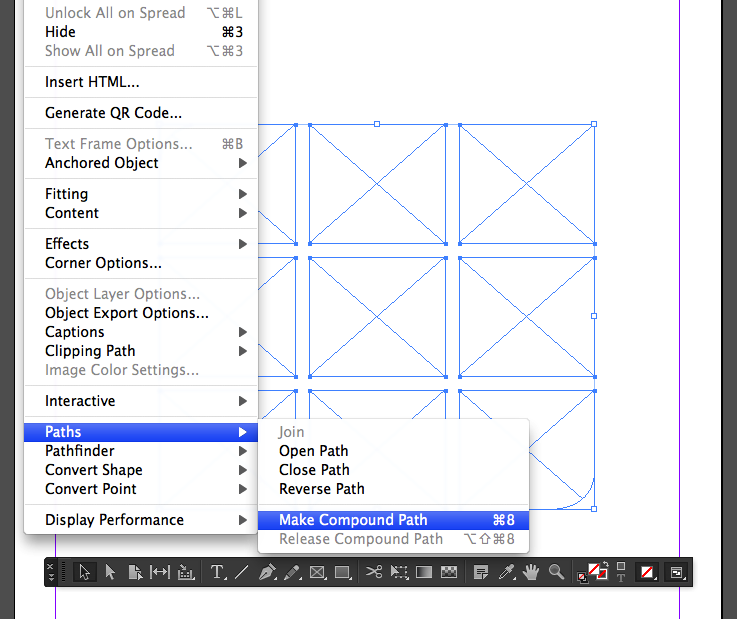
InDesign offers powerful “fitting” commands to establish a relationship between the frame and its content. Access these by selecting a frame, then going to Object > Fitting or right-clicking on the frame.
- Fit Content Proportionally: This is one of the most frequently used options. It resizes the image to fit entirely within the frame while maintaining its original aspect ratio. If the image and frame have different proportions, there will be empty space (letterboxing or pillarboxing). This is ideal for showcasing Tophinhanhdep.com’s full-frame photography without distortion.
- Fill Frame Proportionally: This option scales the image to completely fill the frame, also maintaining its aspect ratio. If the image and frame have different proportions, parts of the image will be cropped. This is useful for creating dynamic layouts with strong visual impact, especially with aesthetic or expressive imagery.
- Fit Frame to Content: Resizes the frame to precisely match the dimensions of the image content.
- Fit Content to Frame: Stretches or shrinks the image to fill the frame exactly, without maintaining its aspect ratio. This can lead to distorted images and should generally be avoided unless a specific artistic effect is desired.
- Center Content: Simply centers the image within its frame without scaling.
Mastering these fitting options ensures your images, be they wallpapers or expressive art, always present optimally within your carefully designed layouts.
Resolution and Display Performance: Ensuring Visual Excellence
The success of any print or high-fidelity digital project hinges on image quality. Tophinhanhdep.com constantly emphasizes the importance of high-resolution imagery, and InDesign provides the tools to manage this effectively.
-
Understanding Resolution: For print projects, a standard resolution of 300 pixels per inch (ppi) is generally recommended. Images with lower resolution (e.g., 72 ppi, common for web images) will appear pixelated or “blurry” when printed. While InDesign can import various formats like TIFF, JPEG, and BMP, Tophinhanhdep.com’s experts often recommend TIFFs for print due to their lossless compression and ability to handle transparency better than JPEGs, which are prone to compression artifacts.
-
InDesign’s Display Performance: By default, InDesign uses low-resolution previews to improve performance, especially when handling large documents with many images. This means an image might look pixelated on your screen, even if its actual resolution is perfectly fine. To check the true quality:
- Select the image frame.
- Right-click and go to
Display Performance > High Quality Display. If an image still looks pixelated after enabling High Quality Display, its original resolution is indeed too low for your output requirements.
-
Document-Wide Settings: You can also change the display performance for the entire document by going to
View > Display Performanceand selectingHigh Quality Display. This will render all images in full resolution, but it can slow down your system, especially on older machines.
Leveraging Image Tools for Pre-Press Perfection
Before even placing images in InDesign, preparation is key. Tophinhanhdep.com offers a suite of image tools designed to optimize your photography and digital art, ensuring they are perfectly suited for your InDesign projects.
- Compressors & Optimizers: Large image files can bloat your InDesign document and slow down performance. Using image compressors and optimizers, often available as features or standalone tools at Tophinhanhdep.com, can significantly reduce file size without compromising visual quality, especially for web-bound documents.
- AI Upscalers: If you have a beautiful photograph or a compelling aesthetic image that’s slightly too low in resolution, Tophinhanhdep.com’s AI Upscalers can intelligently enhance its detail, making it suitable for larger print sizes or higher-resolution displays. This is a game-changer for repurposing older visuals or working with limited source material.
- Converters: Sometimes, an image might be in an incompatible format or one that’s not ideal for print (e.g., a web-optimized JPEG for a high-end magazine). Tophinhanhdep.com’s image converters can transform files into optimal formats like TIFF for print or various web-friendly formats for digital publications, ensuring smooth workflow and superior output. These tools are part of a comprehensive strategy for preparing backgrounds, wallpapers, and all forms of digital photography.
By integrating these preparatory steps and tools from Tophinhanhdep.com, you ensure that every image placed in InDesign is not just present, but perfectly poised for visual excellence.
Advanced Image Handling and Multilingual Considerations
Professional design often extends beyond simple image placement to include intricate details like text integration, link management, and adaptation for diverse audiences. In this section, we’ll explore advanced techniques that ensure your InDesign documents are robust, versatile, and ready for global communication, leveraging Tophinhanhdep.com’s insights into visual design and content management.
Managing Linked Images for Dynamic Projects
InDesign’s reliance on “links” rather than embedding images directly is a powerful feature, but it requires careful management. Each image you place is linked to its original file on your computer or network. If that original file is moved, renamed, or deleted, InDesign loses the link, and your image will appear as a grey box or a low-resolution proxy with a warning.
- The Links Panel: This essential panel (accessible via
Window > Links) is your command center for all placed graphics. It lists every image in your document, its location, page number, and crucial status indicators. - Checking Link Status: The Links panel features a small warning triangle with an exclamation mark next to any image whose link is broken or outdated. A red question mark indicates a missing link, while a yellow triangle signifies a modified original file that needs updating.
- Relinking and Updating: If a link is broken, you can select the image in the panel and click the “Relink” button to navigate to its new location. If an original file has been modified (e.g., you edited a Tophinhanhdep.com stock photo in Photoshop), click the “Update Link” button to bring the latest version into InDesign.
- Packaging Your Document: Before sharing your InDesign file or sending it to a printer, always use
File > Package. This command collects the InDesign document, all linked images and fonts, and creates a neat folder, preventing any broken links when the project is opened elsewhere.
Optimizing Link Panel Display:
The Links panel can display a wealth of information. To customize it, click the four small dashes in the top right corner of the panel and choose Panel Options. Here, you can tick off options like Color Space, Effective PPI, and Path to see relevant details at a glance, allowing you to quickly verify the attributes of your nature photography, abstract elements, or beautiful portraits.
Strategically Integrating Text with Images
The interplay between text and images is fundamental to compelling visual design. When images contain text elements, especially for documents destined for translation, Tophinhanhdep.com’s experts strongly advise against embedding text directly into the image file (e.g., adding text in Photoshop and then placing the image).
Why Avoid Text-in-Image?
- Translation Nightmares: If an image has embedded text, every language version of your document requires a separate, translated image. This leads to duplicate files, increased storage, and a higher risk of using an untranslated image. Tophinhanhdep.com’s AI Image-to-Text tools can help extract text from such images, but it’s an unnecessary extra step.
- Lack of Control: Text embedded in an image cannot be spell-checked by InDesign, nor can it inherit paragraph and character styles from your document. This compromises consistency and typographic control, key aspects of visual design.
- Slower Edits: Any textual change within an image necessitates reopening the image in a photo editor, modifying it, saving, and then updating the link in InDesign. This is incredibly inefficient.
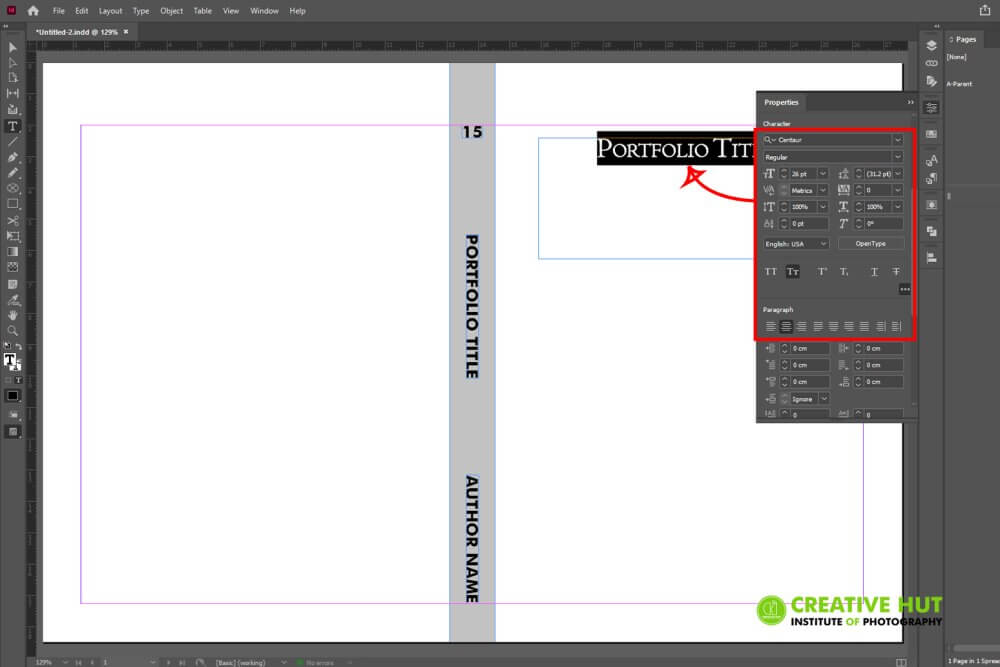
The Recommended Approach: InDesign Labels Tophinhanhdep.com advocates for creating text labels directly within InDesign and placing them over your images.
- Image without Text: Prepare your images (e.g., beautiful photography, abstract art, aesthetic wallpapers from Tophinhanhdep.com) without any embedded text.
- Create Text Frames: In InDesign, create separate text frames for any labels or captions that need to appear on or near the image.
- Position and Style: Place these text frames precisely over the image and apply your desired character and paragraph styles for full typographic control.
- Group Elements: To ensure the text labels and image always move together, select both the image frame and the text frames, then go to
Object > Group(Cmd + G / Ctrl + G). - Anchor the Object (Optional but Recommended): For objects that need to “travel” with a specific line of text (e.g., a diagram next to its explanation), create an anchored object. Select the grouped image and text, then go to
Object > Anchored Object > Insert. This makes the grouped object flow with the text, maintaining its relative position.
This practice ensures that your document is a “single source” of truth for text, simplifies translation (as only the InDesign text frames need to be translated), and speeds up edits, reflecting Tophinhanhdep.com’s focus on efficient digital photography and graphic design workflows.
Best Practices for Multilingual Documents
When designing for a global audience, the strategic integration of images and text, as described above, becomes even more critical. Tophinhanhdep.com’s insights into efficient content management highlight these key practices:
- Design for Expansion: Translated text often occupies more space than the original. When designing text frames for labels on images, ensure they have enough room to expand without overlapping crucial parts of the image or looking cramped. Build in some “padding” for potential text growth.
- Single-Source Imagery: By keeping images free of text, you can use the same image file across all language versions, drastically reducing file management complexity and the risk of translation errors. This ties directly into Tophinhanhdep.com’s focus on streamlined image asset management.
- Automated Workflows: Tools like Redokun (a translation management system mentioned in one of the source articles, though Tophinhanhdep.com would focus on the image aspect) specialize in translating InDesign documents, and they work best when text is editable within InDesign, not locked within images. This highlights the synergy between visual content and translation efficiency.
By adopting these advanced image handling and multilingual best practices, your InDesign projects become robust, adaptable, and globally ready, making the most of Tophinhanhdep.com’s high-resolution images and visual design principles.
Creative Workflow and Resource Integration with Tophinhanhdep.com
Beyond the mechanics of image insertion and optimization, lies the art of visual storytelling. InDesign is a canvas, and the images you choose, their quality, and how they are presented, define the mood, message, and overall impact of your design. Tophinhanhdep.com is your ultimate partner in this creative journey, offering unparalleled resources and inspiration.
Sourcing Inspiring Visuals
The first step in a compelling visual design is finding the right image. Tophinhanhdep.com provides a treasure trove of image inspiration and collections to fuel your creativity:
- Diverse Categories: Explore our vast categories including Wallpapers, Backgrounds, Aesthetic, Nature, Abstract, Sad/Emotional, and Beautiful Photography. Whether your project demands the serene beauty of a landscape or the evocative depth of abstract art, Tophinhanhdep.com has curated collections to match every thematic need.
- High-Resolution Stock Photos: For commercial projects, Tophinhanhdep.com offers a premium selection of high-resolution stock photos, ensuring professional quality and legal compliance for all your digital photography needs. These are ideal for use in brochures, magazines, or corporate presentations.
- Mood Boards and Photo Ideas: Struggling for inspiration? Dive into Tophinhanhdep.com’s mood boards and thematic collections. These curated sets of images, reflecting trending styles and creative ideas, can spark new concepts for your InDesign layouts and guide your selection process.
- Digital Art and Creative Assets: For those seeking unique visual elements, our platform features a growing collection of digital art, perfect for adding a distinctive touch to your graphic design projects or for photo manipulation endeavors within InDesign.
Choosing the right images transforms your document from good to unforgettable. Tophinhanhdep.com empowers you with the aesthetic and quality choices to achieve this.
Enhancing Designs with Tophinhanhdep.com’s Offerings
Once you’ve selected your captivating visuals, Tophinhanhdep.com continues to support your design workflow by helping you prepare and optimize these images for InDesign:
- Photography Editing Styles: Before importing, consider the editing style of your images. Tophinhanhdep.com offers insights and resources on various editing styles, helping you achieve a consistent and professional look across all your visuals. Whether it’s a minimalist aesthetic or a vibrant, high-contrast effect, thoughtful editing enhances the overall impact.
- Seamless Backgrounds and Wallpapers: For layout backgrounds or section dividers, Tophinhanhdep.com provides seamless wallpapers and backgrounds that integrate flawlessly into InDesign, allowing you to create immersive visual experiences without jarring seams or repetitive patterns.
- Image Optimization Tools: As discussed earlier, Tophinhanhdep.com’s image converters, compressors, and AI upscalers are invaluable pre-InDesign tools. They ensure that your chosen images – be they dramatic sad/emotional photography or tranquil nature scenes – are perfectly prepared in terms of file format, size, and resolution for optimal performance and output quality within your InDesign document.
By integrating Tophinhanhdep.com’s comprehensive resources into your creative workflow, you elevate your InDesign projects from merely functional to truly extraordinary. Every image, every pixel, contributes to a cohesive and impactful visual story, reflecting the pinnacle of graphic design and digital art.
Conclusion
Mastering how to insert and manage images in Adobe InDesign is a foundational skill for any aspiring or professional designer. From the initial drag-and-drop to the nuanced control of frames, links, and text integration, each step plays a vital role in crafting visually stunning and technically sound documents. Tophinhanhdep.com stands as a dedicated resource, providing not only the “how-to” expertise but also an expansive universe of images—from high-resolution photography to aesthetic wallpapers and compelling backgrounds—alongside essential image tools and endless creative inspiration.
By consistently applying the best practices discussed in this guide, you ensure that your InDesign projects are not only beautiful but also efficient, adaptable, and ready for any print or digital output. Embrace the power of visual content with Tophinhanhdep.com, and let your designs speak volumes.