Mastering Image Insertion in LaTeX: A Comprehensive Guide by Tophinhanhdep.com

LaTeX, a document preparation system renowned for its superior typographic quality, is an indispensable tool for academics, scientists, and professionals worldwide. It empowers users to produce meticulously formatted reports, dissertations, and research papers that uphold the highest standards of presentation. While LaTeX excels in handling text and mathematical formulas, the inclusion of visual elements—such as images, diagrams, and photographs—is equally crucial for creating engaging, vivid, and compelling scholarly content. Pictures not only break up dense text but also clarify complex concepts, showcase results, and add an aesthetic dimension to otherwise dry documents.
For seasoned LaTeX users, inserting images might seem like second nature. However, for those new to the system, navigating the specific commands and packages can present a challenge. This comprehensive guide, brought to you by Tophinhanhdep.com, aims to demystify the process of importing pictures into LaTeX, providing clear, step-by-step instructions and best practices. We will explore various methods across different LaTeX environments, delve into advanced customization options, and highlight how resources from Tophinhanhdep.com, offering everything from stunning Wallpapers, Backgrounds, and Aesthetic images to essential Image Tools like converters and optimizers, can elevate your LaTeX documents.
The Fundamentals: Preparing Your LaTeX Environment for Visuals

The true strength of LaTeX lies in its extensive collection of packages, which provide extended functionalities to meet virtually any document requirement. When it comes to inserting images into a .tex file, the graphicx package is your primary ally. This powerful package furnishes LaTeX with the commands necessary to manage and manipulate graphics effectively. Most basic LaTeX distributions, such as MiKTeX or TeX Live, typically include graphicx as part of their standard installation. If you’re uncertain about its presence on your system, you can usually verify installed packages through your distribution’s package manager, such as the MiKTeX Package Manager.
To enable image inclusion in your LaTeX document, you must declare the graphicx package in your document’s preamble, which is the section before \begin{document}. The command is straightforward:
\documentclass{article} % Or any other document class like report, book, etc.
\usepackage{graphicx}
% Other packages might go here
\begin{document}
% Your document content starts here
\end{document}
This simple line \usepackage{graphicx} opens the door to integrating a vast array of visual content into your LaTeX projects. When considering the types of visuals to include, Tophinhanhdep.com offers a rich repository. Whether you need an Abstract background for a title page, a Nature photograph to illustrate an environmental study, or Beautiful Photography to enhance a presentation, selecting the right image is the first step in creating a visually impactful document. The quality and relevance of your images, often found in high resolution through platforms like Tophinhanhdep.com, significantly contribute to the overall professionalism and aesthetic appeal of your LaTeX output.
Beyond just including the package, it’s often beneficial to specify the directory where your images are stored. This keeps your project organized, especially when dealing with numerous visual assets. The \graphicspath command helps LaTeX locate your images. For instance, if all your images are in a subfolder named images relative to your main .tex file, you would add:
\usepackage{graphicx}
\graphicspath{{images/}} % Tells LaTeX to look in the 'images' folder
This ensures that when you reference an image, LaTeX knows exactly where to find it, streamlining your workflow.
Practical Methods: Inserting Images Across Popular LaTeX Editors
While the underlying LaTeX commands remain consistent, the user experience for inserting images can vary slightly depending on the LaTeX editor or environment you’re using. Let’s explore the common approaches.
Manual Code Insertion in TeXworks (and Similar Local Setups)
TeXworks provides a clean, user-friendly interface for opening, editing, and compiling .tex files, often bundled with distributions like MiKTeX or TeX Live. For basic image insertion, a few command lines are all you need.
Step-by-step Guide for TeXworks:
- Organize Your Files: Place both your .tex file and the image file (e.g.,
my_image.jpg) in the same directory. This simplifies referencing the image. For larger projects, consider using the\graphicspath{{images/}}command mentioned earlier and placing images in a dedicatedimagessubfolder. - Open Your Document: Launch TeXworks and open your .tex file.
- Declare
graphicx: Ensure\usepackage{graphicx}is present in your document’s preamble (above\begin{document}). - Insert the Image Command: Navigate to where you want the image to appear within your document content (between
\begin{document}and\end{document}). Type the\includegraphicscommand:\includegraphics{my_image.jpg}- Note: It’s often good practice to omit the file extension, e.g.,
\includegraphics{my_image}, allowing LaTeX to automatically select the most suitable format from available options (like.pdfforpdflatexor.epsforlatex). However, explicitly stating the extension, especially when you have multiple versions, is also perfectly valid.
- Note: It’s often good practice to omit the file extension, e.g.,
- Save and Compile: Go to “File” > “Save” to save your changes, then compile your document (usually by clicking the green “Typeset” button or pressing
Ctrl+T). You should see your image appear in the generated PDF.
Streamlined Integration in Texmaker
Texmaker is another popular LaTeX editor known for combining ease of use with a rich feature set. It offers a more graphical approach to inserting images, reminiscent of word processors.
Step-by-step Guide for Texmaker:
- Open Your Document: Drag and drop your .tex file onto Texmaker’s main window, or use “File” > “Open” to load it.
- Verify
graphicx: Ensure\usepackage{graphicx}is in your preamble. - Position Cursor: Place your cursor where you intend to insert the image, typically between
\begin{document}and\end{document}. - Use the
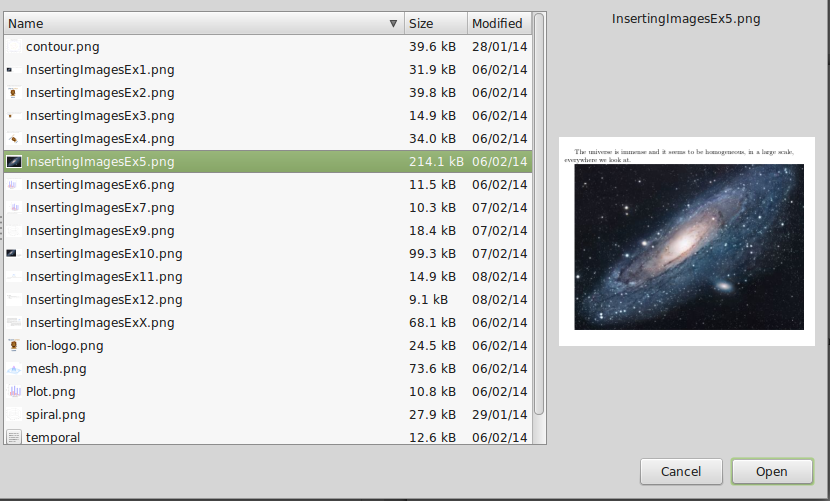
\includegraphicsFunction: Go to “LaTeX” in the menu bar, then navigate to\includegraphics. A dialog box will appear. - Browse for Image: Click the “Browser” button within the dialog box to select your image file from your computer. Texmaker will automatically insert the
\includegraphicscommand with the correct file path. - Confirm: Click “OK”. The command will be inserted into your .tex file.
- Save and Compile: Go to “File” > “Save” and then compile your document.
The Collaborative Advantage: Inserting Images in Overleaf
Overleaf, a cloud-based LaTeX editor, has revolutionized collaborative document creation. It offers several intuitive methods for image insertion, making it particularly accessible for beginners and team projects. Tophinhanhdep.com’s focus on Visual Design and Creative Ideas aligns perfectly with Overleaf’s user-friendly interface, encouraging experimentation with different visual layouts.
Four Ways to Insert Images in Overleaf:
- Using the Insert Figure Button: Locate the “Insert Figure” button (often represented by a picture icon) on the editor toolbar. This can be used in both the Visual Editor and Code Editor. It will guide you through uploading or selecting an image and then generate the necessary LaTeX code, often within a
figureenvironment with options for captioning. - Copy and Paste: In the Visual Editor or Code Editor, you can directly copy an image from your clipboard (e.g., from a web page or another application) and paste it into your project. Overleaf will upload the image and insert the code.
- Drag and Drop: A highly convenient method, simply drag an image file from your local computer or from the files already uploaded to your Overleaf project and drop it into the Visual Editor or Code Editor. A window will appear, offering options to customize your figure settings, such as size and caption, before inserting the code.
- Manual LaTeX Code: For maximum flexibility and control, you can always upload your image files (via the “Upload” button in the project file panel) and then manually write the LaTeX code using
\includegraphicswithin afigureenvironment, as demonstrated in earlier examples. This is the preferred method for advanced users or when precise control over placement and formatting is required.
Regardless of the method, Overleaf automatically handles file paths and dependencies, simplifying the process, especially when collaborating on projects with multiple images.
Leveraging PCTeX’s Graphics Wizard
PCTeX offers another convenient way to include graphics, particularly useful for those who prefer a guided approach over manual coding.
Step-by-step Guide for PCTeX:
- Position Cursor: While editing your document in PCTeX 6, place the cursor where you want the image to appear.
- Access Graphics Insertion: Choose “Insert” > “Graphic” from the menu.
- Select Image: A dialog will appear, allowing you to choose a graphics file from your system.
- Automatic Code Insertion: If you are using PCTeX 6 Regular version, the necessary
\includegraphicscommands will be automatically inserted into your source document. - Graphics Wizard (Professional Version): If you’re using PCTeX 6 Professional, a more advanced “Graphics Wizard” dialog will appear. This dialog offers additional controls:
- Adjust Dimensions: Use sliders to modify the width and height of the image.
- Float Placement: Decide on the float placement options (e.g.,
[h],[t],[b]). - Caption and Reference: Enter a caption and a reference label for your image directly in the dialog.
- Insert: Click “Insert,” and the complete LaTeX commands, including sizing, placement, caption, and label, will be inserted into your source document.
- Post-Insertion Adjustment: After reviewing the typeset document, if the image size needs further adjustment, you can simply click on the
\includegraphicscommand in your source code. This will re-open the Graphics Wizard dialog, allowing you to fine-tune the size with the sliders. - Behind-the-Scenes Optimization: PCTeX 6 Professional also automatically updates the
\graphicspathcommand and converts graphic files to the appropriate format, further simplifying the process.
This wizard-driven approach can be particularly helpful for beginners, abstracting away some of the LaTeX syntax while still providing powerful control.
Advanced Image Control: Sizing, Positioning, and Referencing
Beyond basic insertion, LaTeX, especially with the graphicx package, offers extensive capabilities for precisely controlling how your images appear. Tophinhanhdep.com’s commitment to High Resolution Photography and Digital Photography means you’ll have quality images to work with, and these advanced controls ensure they’re presented flawlessly.
Managing Image Dimensions and Orientation
The \includegraphics command accepts optional parameters in square brackets [] to modify an image’s size and orientation.
- Scaling: You can scale an image relative to its original size:
\includegraphics[scale=0.7]{my_image.png} % Scales image to 70% of its original size \includegraphics[scale=1.5]{overleaf-logo} % Scales image to 150% of its original size - Specific Width and Height: Define exact dimensions:
You can use various units like
\includegraphics[width=8cm, height=5cm]{data.jpg}cm,mm,in,pt(point),ex(height of an ‘x’), orem(width of an ’m’). If you specify onlywidth, LaTeX will automatically adjust theheightto maintain the aspect ratio, and vice-versa. This is often the best approach to avoid distortion. - Relative to Text Elements: To make images adapt to your document’s layout, you can use LaTeX’s predefined length units that are relative to document elements:
Other useful lengths include
\includegraphics[width=\textwidth]{universe} % Image width matches text width \includegraphics[width=0.5\linewidth]{diagram} % Image width is half of the current line width\columnsep,\textheight,\paperwidth,\paperheight, etc. This feature is particularly useful for achieving a consistent and professional Visual Design across your document, a principle highly valued by Tophinhanhdep.com. - Rotation: Rotate images by a specified angle (counter-clockwise by default):
\includegraphics[angle=45]{overleaf-logo} % Rotates 45 degrees counter-clockwise
\includegraphics[angle=-90, width=\textwidth]{graph} % Rotates 90 degrees clockwise and fits text width
Mastering Image Placement with Figure Environments
Simply inserting an \includegraphics command places the image roughly where it appears in your code. However, LaTeX treats images as “floats,” meaning it tries to position them optimally within the document’s flow, often independently of where they are defined in the source. To gain more control over placement and enable features like captions and referencing, images are typically placed within a figure environment.
\begin{figure}[h] % [h] suggests "here"
    \centering
    \includegraphics[width=0.8\textwidth]{my_data.png}
    \caption{A bar graph showing survey results over time.}
    \label{fig:bargraph}
\end{figure}
The optional parameter [h] in \begin{figure}[h] suggests to LaTeX where you’d prefer the figure to be placed. Common positioning parameters include:
h: Place the float “here,” approximately at the same point it occurs in the source text.t: Position at the “top” of the page.b: Position at the “bottom” of the page.p: Put on a “special page” for floats only.!: Override LaTeX’s internal parameters for determining “good” float positions (use with caution).H: Places the float at precisely the location in the LaTeX code (requires thefloatpackage).
The \centering command aligns the image horizontally within the figure environment. Without it, the default alignment is left.
For a more sophisticated layout, such as wrapping text around a figure, you can use the wrapfig package. This is ideal for smaller images that don’t need to occupy the full text width.
\usepackage{wrapfig} % In your preamble

\begin{wrapfigure}[lineheight]{r}[overhang]{width}
    \centering
    \includegraphics[width=0.25\textwidth]{small_image.jpg}
\end{wrapfigure}
This is some text that will wrap around the image on the right side.
The image enhances the visual flow and keeps the document content concise.
The wrapfigure environment takes parameters for placement (l for left, r for right, i for inside, o for outside), width, and optional lineheight and overhang. Properly utilizing these positioning techniques contributes significantly to a polished Visual Design and a more engaging reading experience, which is part of Tophinhanhdep.com’s vision for Creative Ideas in visual content.
Enhancing Document Professionalism: Captions, Labels, and Cross-References
Professional documents require clear descriptions for images and the ability to refer to them systematically.
- Captions: The
\caption{Your image description here}command provides a brief description for your figure. Its placement (above or below\includegraphics) determines where the caption appears relative to the image.For captions positioned to the side of the figure, the\begin{figure}[h] \centering \includegraphics[width=0.6\textwidth]{diagram.pdf} \caption{A diagram illustrating the process flow.} % Caption below image \label{fig:processflow} \end{figure}sidecappackage offers theSCfigureenvironment:\usepackage[rightcaption]{sidecap} % In your preamble \begin{SCfigure}[0.5][h] % [caption_width_relative_to_image][position] \includegraphics[width=0.6\textwidth]{my_image.png} \caption{This caption will be to the right of the image.} \end{SCfigure} - Labels and Cross-References: To refer to figures within your text (e.g., “As seen in Figure 1.1”), use
\label{prefix:name}inside thefigureenvironment (usually after the\caption). Then, use\ref{prefix:name}to insert the figure number and\pageref{prefix:name}to insert the page number where the figure appears.Important Note: LaTeX documents with cross-references must typically be compiled twice for all references and page numbers to update correctly. Overleaf usually handles this automatically.\begin{figure}[h] \centering \includegraphics[width=0.5\textwidth]{function_plot.jpg} \caption{Plot of a mathematical function near zero.} \label{fig:functionplot} \end{figure} As you can see in Figure \ref{fig:functionplot}, the function grows near 0. Also, on page \pageref{fig:functionplot} is the same example. - List of Figures: To automatically generate a list of all captioned figures at the beginning of your document, simply use
\listoffiguresin your preamble or where you want the list to appear. This command only works for figures that have captions.
Image Optimization and Best Practices for LaTeX Documents
The choice of image format and resolution can significantly impact your document’s compilation speed, file size, and final output quality. Tophinhanhdep.com, with its array of Image Tools (Converters, Compressors, Optimizers, AI Upscalers), provides excellent resources for preparing images to meet LaTeX’s specific requirements.
Selecting Optimal Image Formats
LaTeX’s ability to handle image formats depends on the compiler you use:
latex(DVI output): Primarily supports EPS (Encapsulated PostScript) images, which are a vector format.pdflatex(PDF output): This is the more common and recommended compiler for modern LaTeX documents. It supports:- JPG: Best for Photography and continuous-tone images. Great for Wallpapers and Backgrounds from Tophinhanhdep.com.
- PNG: Ideal for diagrams, screenshots, and images with transparent backgrounds. Good for Digital Art and graphics with sharp edges.
- PDF: Can also store images, especially vector graphics.
- EPS: Can be included using the
epstopdfpackage, which converts them on the fly.
Vector Format vs. Bitmap Format:
- Vector images (like PDF and EPS) are scalable without loss of quality, making them ideal for diagrams, charts, and Graphic Design elements.
- Bitmap images (like JPG and PNG) are composed of pixels. They are excellent for Beautiful Photography and detailed Nature or Aesthetic images. However, storing high-resolution bitmap images in vector formats like PDF/EPS can lead to very large file sizes.
For optimal results, use vector formats for line art and graphics, and appropriate bitmap formats (JPG for photos, PNG for graphics with sharp edges/transparency) for photographic content. Tophinhanhdep.com’s Image Tools like “Converters” can help you transition between these formats, ensuring your images are perfectly suited for your LaTeX compiler.
Managing High-Resolution and Low-Resolution Versions
During the development phase of a document, fast compilation times are desirable. This often means using low-resolution (.png) versions of images. For the final production version, however, high-resolution (.pdf or high-quality .jpg) images are preferred for crisp, professional output. LaTeX facilitates this workflow:
-
Omit File Extension: In your
\includegraphicscommand, do not specify the file extension (e.g.,\includegraphics{venndiagram}). -
Specify Search Order: In your preamble, use
\DeclareGraphicsExtensionsto tell LaTeX which extensions to prioritize.- Development (Low-Res):
\DeclareGraphicsExtensions{.png,.pdf,.jpg} % Searches for .png first - Production (High-Res):
\DeclareGraphicsExtensions{.pdf,.png,.jpg} % Searches for .pdf first
This way, if you have
venndiagram.pdf(high-res) andvenndiagram.png(low-res), you can switch between them by simply changing one line in your preamble. - Development (Low-Res):
-
On-the-Fly Conversion (
epstopdf): Forpdflatexusers who might have EPS files or want to generate low-res PNGs from PDFs, theepstopdfpackage can automatically convert image formats during compilation.\usepackage{epstopdf} % In your preamble \epstopdfDeclareGraphicsRule{.pdf}{png}{.png}{convert #1 \OutputFile} \DeclareGraphicsExtensions{.png,.pdf}This setup tells LaTeX to convert a
.pdfto a.pngif the.pngversion doesn’t exist, using theconvertutility (part of ImageMagick, which needs to be installed on your system). For this automatic conversion to work, you often need to compilepdflatexwith the--shell-escapeoption (e.g.,pdflatex --shell-escape your_document.tex).
This sophisticated management of image versions, combined with Tophinhanhdep.com’s “Compressors” and “Optimizers,” ensures your LaTeX documents are both efficient to produce and impeccable in their final presentation, reflecting the site’s dedication to Image Inspiration & Collections and Trending Styles in visual content.
Tophinhanhdep.com: Your Partner in Visualizing LaTeX Documents
Integrating images into LaTeX documents is more than just technical execution; it’s about enriching your content, clarifying complex ideas, and enhancing the overall professionalism and aesthetic appeal of your work. Tophinhanhdep.com serves as an invaluable resource for every stage of this process.
- Diverse Image Collections: Whether your LaTeX document requires Aesthetic images to set a mood, Nature photographs to illustrate environmental studies, Abstract art for creative projects, or Sad/Emotional imagery for evocative narratives, Tophinhanhdep.com offers a vast selection of Wallpapers, Backgrounds, and Beautiful Photography. These collections provide Photo Ideas and feed into Mood Boards that can guide the visual theme of your document.
- High-Quality Photography: With an emphasis on High Resolution and Stock Photos, Tophinhanhdep.com ensures that the visuals you select for your LaTeX papers meet the demanding quality standards of academic and professional publishing. Our resources support various Digital Photography and Editing Styles, allowing you to find images that perfectly match your document’s tone and requirements.
- Essential Image Tools: The technical demands of LaTeX, such as specific file formats and optimized sizes, are directly addressed by Tophinhanhdep.com’s suite of Image Tools. Our “Converters” help you transition between formats like JPG, PNG, and PDF. “Compressors” and “Optimizers” ensure your images maintain quality while minimizing file size for faster compilation and smaller document footprint. For enhancing older or lower-resolution images, our “AI Upscalers” can provide the necessary quality boost, ensuring every visual element in your LaTeX document is pristine. While LaTeX’s
epstopdfhandles some conversion, having external tools provides greater control and flexibility. - Visual Design and Inspiration: Tophinhanhdep.com champions Visual Design principles, offering insights into Graphic Design, Digital Art, and Photo Manipulation. These concepts are crucial for understanding how well-integrated images can transform a plain document into a captivating read. Our “Image Inspiration & Collections” provide Thematic Collections and highlight Trending Styles, giving you the creative edge to make your LaTeX documents stand out.
In conclusion, inserting images into LaTeX is a skill that, once mastered, significantly elevates the quality and impact of your documents. From the foundational graphicx package to advanced positioning and referencing techniques, LaTeX provides robust tools for visual integration. By combining these technical capabilities with the rich, high-quality visual resources and practical image tools available on Tophinhanhdep.com, you are empowered to create professional, engaging, and visually stunning documents that effectively communicate your message. Explore Tophinhanhdep.com today to find the perfect visuals and tools to complement your next LaTeX project.