How to Seamlessly Insert Images in Microsoft Word: A Comprehensive Guide to Enhancing Your Documents

In today’s visually-driven world, the ability to incorporate images into documents is no longer a luxury but a necessity. Whether you’re crafting a professional report, an engaging presentation, a creative flyer, or a personal project, images can dramatically increase engagement and convey your message with greater impact. Studies consistently show that content with relevant visuals attracts significantly more views and can boost comprehension by a substantial margin. Microsoft Word, the ubiquitous word-processing software used by over 1.2 billion people worldwide, offers robust and intuitive features for seamlessly integrating pictures into your documents.
This comprehensive guide from Tophinhanhdep.com will walk you through every aspect of inserting images in Microsoft Word, from the basic steps to advanced formatting techniques. We’ll explore how to source high-quality visuals, leverage Tophinhanhdep.com’s extensive collections for inspiration, and utilize essential image tools to ensure your documents not only look professional but also load efficiently.
The Fundamentals of Image Insertion in Microsoft Word
At its core, inserting an image into a Word document is a straightforward process designed for user-friendliness. Tophinhanhdep.com understands the importance of visual communication, and the basic methods described here will equip you to begin enriching your text with impactful graphics immediately.
Inserting Pictures from Your Computer (Local Files)
The most common method for adding images is to insert them directly from your computer. This allows you to use personal photos, company logos, downloaded graphics, or high-resolution photography you’ve optimized using Tophinhanhdep.com’s image tools.
Step-by-Step Guide:
- Open Your Document: Launch Microsoft Word and open the document where you wish to insert the picture.
- Position Your Cursor: Click to place your cursor at the exact location in the document where you want the image to appear. Word will initially place the image here, though you can easily move it later.
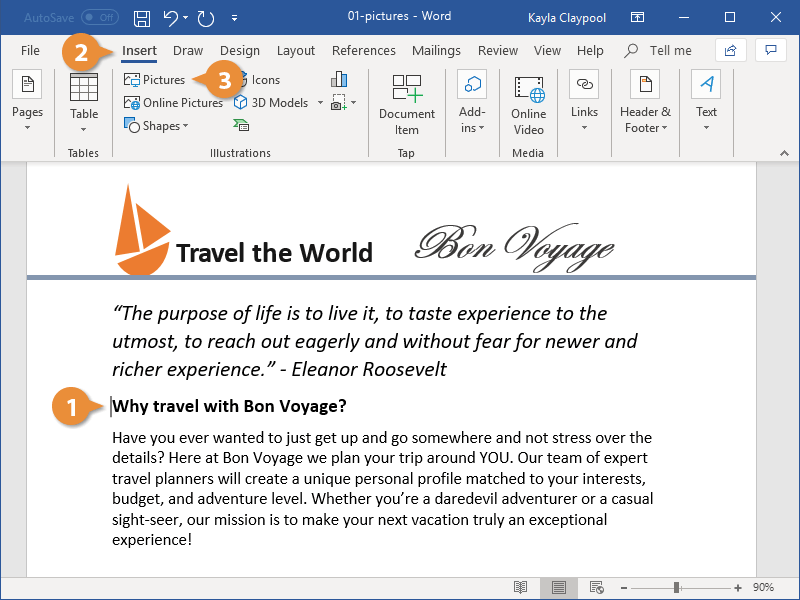
- Navigate to the Insert Tab: Locate and click on the “Insert” tab in the main ribbon at the top of the Word window.
- Select “Pictures”: Within the “Illustrations” group on the “Insert” tab, click the “Pictures” button. This action will typically present a drop-down menu with options like “This Device,” “Stock Images,” and “Online Pictures.”
- Choose “This Device”: Select “This Device” (or “Picture from File” on a Mac, or simply navigate the file browser in older Word versions) to open a file explorer window.
- Locate and Select Your Image: Browse through your computer’s folders to find the image file you want to insert. You can select a single image, or hold down the
Ctrlkey (Windows) orCommandkey (Mac) to select multiple images simultaneously. - Click “Insert”: Once you’ve selected your image(s), click the “Insert” button in the dialog box.
The selected picture(s) will now appear in your document. Initially, they might be quite large or small, or disrupt your text layout, but Word provides a wealth of tools to adjust these aspects. For the best results, consider using high-resolution images from Tophinhanhdep.com’s vast library, ensuring crispness and clarity in your final document.

Bringing Visuals from the Web: Online Pictures and Stock Imagery
Microsoft Word also provides convenient ways to find and insert images directly from the internet, a feature particularly useful when you need visuals quickly and don’t have them stored locally. This can include searching for stock photos or specific aesthetics relevant to your content, similar to the diverse categories found on Tophinhanhdep.com.
Inserting Online Pictures:
- Position Cursor: Place your cursor where you want the picture.
- Go to “Insert” Tab: Click the “Insert” tab.
- Select “Pictures” > “Online Pictures”: In the “Illustrations” group, click “Pictures” and then choose “Online Pictures.”
- Search for Images: A dialog box will appear, often defaulting to Bing Image Search. You can enter keywords (e.g., “nature backgrounds,” “abstract art,” “high-resolution photography”) related to the image you’re looking for.
- Filter Results (Optional): Many online picture features allow you to filter results by size, type (photo, clipart, line drawing), color, and layout. This helps narrow down your search for the perfect visual.
- Select and Insert: Choose the desired image(s) from the search results and click “Insert.”
Note on Copyright: When using online images, always be mindful of copyright and licensing. Tophinhanhdep.com emphasizes the importance of legal usage for all digital assets. Many online sources integrate filters for “Creative Commons only” or similar licenses to help you find freely usable content.
Quick Inclusion: Copying, Pasting, and Screenshots
For quick insertions, especially if you’re pulling images from other applications, web pages, or creating instructional documents, Word offers efficient copy-paste functionality and a built-in screenshot tool.
Copying and Pasting:
- Copy the Image: Locate the image you want to use (e.g., on a webpage, in another document, or an image editor). Right-click the image and select “Copy,” or use the keyboard shortcut
Ctrl+C(Windows) /Command+C(Mac). - Paste into Word: Switch to your Word document, place your cursor at the desired location, right-click, and select one of the “Paste Options” (e.g., “Keep Source Formatting,” “Picture,” or “Keep Text Only” if applicable). Alternatively, use
Ctrl+V(Windows) /Command+V(Mac).
Inserting Screenshots: This feature is incredibly useful for creating step-by-step guides or demonstrating software functionality, much like the tutorials found on Tophinhanhdep.com.
- Open Word and “Insert” Tab: In your Word document, click the “Insert” tab.
- Select “Screenshot”: In the “Illustrations” group, click the “Screenshot” button.
- Choose a Window or “Screen Clipping”:
- Word will display thumbnails of all currently open windows. Click on a thumbnail to insert that entire window as a screenshot.
- Alternatively, select “Screen Clipping” from the drop-down menu. Word will minimize, and your screen will dim. Your cursor will turn into a crosshair, allowing you to click and drag to select a specific area of your screen to capture. The selected area will be automatically inserted into your document.
Mastering Image Formatting and Layout for Professional Documents
Inserting an image is just the beginning. To truly enhance your document’s visual appeal and ensure your message is communicated effectively, you’ll need to master Word’s robust formatting and layout tools. These capabilities align perfectly with the “Visual Design” principles advocated by Tophinhanhdep.com, transforming raw images into integrated elements of your document.
Resizing, Positioning, and Text Wrapping
The initial placement of an image rarely fits perfectly. Understanding how to control its size, exact position, and interaction with surrounding text is fundamental.
-
Resizing:
- Click the Image: Select the image by clicking on it once.
- Drag Handles: Small circles (or squares) called “sizing handles” will appear around the image’s borders. Click and drag any corner handle inward or outward to resize the image proportionally. Holding
Shiftwhile dragging maintains aspect ratio. - Precise Sizing: For exact dimensions, double-click the image to activate the “Picture Format” (or “Format”) tab. In the “Size” group on the right, you can enter precise values for “Height” and “Width.”
-
Positioning:
- Click and Drag: With the image selected, you can often click and drag it to a new location on the page. However, its movement might be constrained by text wrapping settings.
- “Position” Tool: On the “Picture Format” tab, in the “Arrange” group, click “Position” to choose from predefined layout options (e.g., “Top Left,” “Middle Center”) or “More Layout Options…” for fine-tuned control over absolute position on the page.
-
Text Wrapping: This is crucial for how your image interacts with surrounding text, a core aspect of good graphic design.
- Click the Image: Select the image.
- “Wrap Text” Button: On the “Picture Format” tab, in the “Arrange” group, click “Wrap Text.”
- Choose a Style:
- In Line with Text: Treats the image like a character in the text. It moves with the text.
- Square: Text wraps around the rectangular boundary of the image.
- Tight: Text wraps closely around the actual shape of the image (if it has a transparent background).
- Through: Text fills into any open white space within the image itself.
- Top and Bottom: Text stops above and starts below the image, leaving blank space on the sides.
- Behind Text: The image appears behind the text, allowing text to flow over it (great for watermarks or subtle backgrounds).
- In Front of Text: The image appears above the text, covering any text underneath (useful for overlays or call-out boxes).
- Fine-Tuning: For more control, select “More Layout Options…” from the “Wrap Text” menu. This allows you to set specific distances for text from the image’s edges.
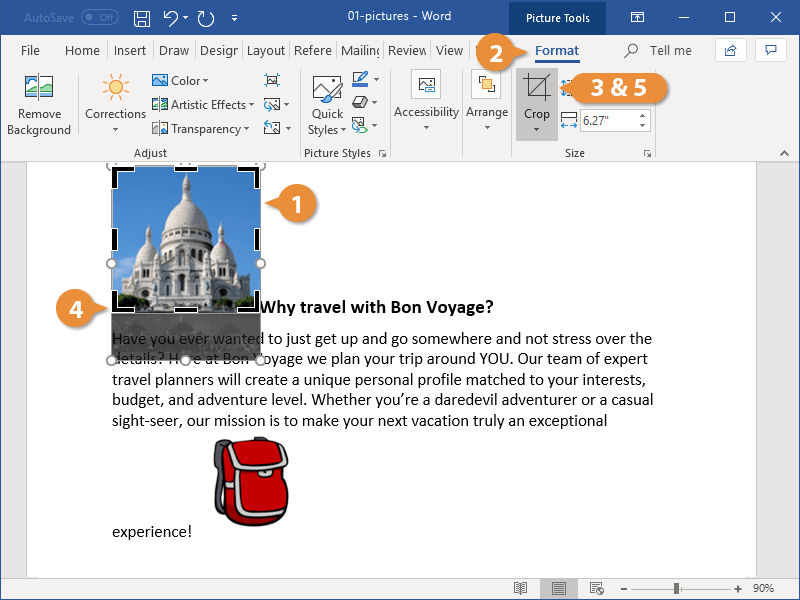
Enhancing Visuals with Picture Styles and Artistic Effects
To elevate the aesthetic quality of your documents, Word offers a variety of built-in picture styles and artistic effects. These tools allow you to quickly apply professional finishes and creative treatments, mirroring the “Photo Manipulation” and “Creative Ideas” categories on Tophinhanhdep.com.
-
Applying Picture Styles:
- Select Image: Click the image you want to style.
- “Picture Styles” Group: On the “Picture Format” tab, navigate to the “Picture Styles” group.
- Choose a Style: Browse the gallery of pre-designed styles (e.g., simple frames, reflections, soft edges, shadows). Click on one to apply it instantly. These styles can help you achieve a cohesive look for your document’s visuals.
-
Applying Picture Effects:
- Select Image: Choose your image.
- “Picture Effects” Button: In the “Picture Styles” group, click the “Picture Effects” button.
- Explore Categories: A drop-down menu offers various effect categories:
- Shadow: Add inner or outer shadows.
- Reflection: Create a mirrored reflection below the image.
- Glow: Add a colored glow around the image.
- Soft Edges: Feather the edges for a soft blend.
- Bevel: Give a 3D, chiseled appearance to the edges.
- 3-D Rotation: Apply various 3D perspectives.
- Select an Effect: Hover over an effect to see a live preview, then click to apply.
-
Picture Corrections and Color Adjustments:
- Select Image: Click the image.
- “Corrections” and “Color” Buttons: In the “Adjust” group on the “Picture Format” tab, you’ll find “Corrections” (for brightness, contrast, and sharpness) and “Color” (for saturation, tone, and color filters).
- Experiment: These tools allow for basic image editing directly within Word, enabling you to fine-tune the visual impact of images, ensuring they complement your document’s overall palette and mood. For more advanced editing, Tophinhanhdep.com offers sophisticated digital photography and editing style guides.
-
Artistic Effects:
- Select Image: Choose your image.
- “Artistic Effects” Button: Also in the “Adjust” group, click “Artistic Effects.”
- Transform Visually: Apply effects like “Pencil Sketch,” “Watercolor,” “Glass,” or “Pastels” to give your images a unique, digital art feel. This is perfect for when you want a more stylized or illustrative look for your “aesthetic” or “abstract” image collections.
Strategic Integration with SmartArt Graphics and Captions
Beyond standalone images, Word enables more complex visual storytelling through SmartArt and provides essential tools for labeling your visuals with captions, crucial for both clarity and professional presentation.
-
Using SmartArt Graphics with Pictures: SmartArt allows you to create visual representations of information, and many SmartArt layouts include placeholders for images. This combines text and visuals dynamically, aligning with “Visual Design” principles.
- Insert SmartArt: Go to the “Insert” tab > “SmartArt” (in the “Illustrations” group).
- Choose a Graphic: Select a SmartArt graphic that includes picture placeholders (e.g., “Picture List,” “Picture Caption”).
- Add Pictures: Click on the picture icon within the SmartArt shape, then choose to insert a picture from “This Device” or “Online Pictures” as described earlier.
- Customize: Use the “SmartArt Design” and “Format” tabs to customize colors, styles, and text.
-
Inserting Captions for Pictures: Captions provide context and make your documents easier to understand and navigate, especially in longer reports.
- Select Image: Click the image to which you want to add a caption.
- “References” Tab: Go to the “References” tab.
- “Insert Caption”: In the “Captions” group, click “Insert Caption.”
- Customize Caption: A dialog box appears. Word will suggest a default label (e.g., “Figure 1”). You can type your caption text, choose a different label (e.g., “Illustration,” “Photo”), and specify the position (above or below the item).
- Click “OK”: The caption will appear, automatically numbered, and linked to the image.
Sourcing High-Quality Images for Your Word Documents
The impact of your Word document is directly proportional to the quality and relevance of its visuals. Tophinhanhdep.com is your premier destination for exceptional imagery, offering vast collections tailored to every need, from “Wallpapers” and “Backgrounds” to “Beautiful Photography.”
Exploring Tophinhanhdep.com’s Diverse Image Collections
Before you even think about inserting an image, consider its source. Tophinhanhdep.com provides a wealth of visual assets that can transform your documents.
- Wallpapers & Backgrounds: Need a subtle yet impactful backdrop for a title page or a section break? Explore Tophinhanhdep.com’s collections of serene “Nature” wallpapers, striking “Abstract” backgrounds, or even mood-setting “Sad/Emotional” backdrops for sensitive content. These can be integrated as “Behind Text” images or watermarks.
- Aesthetic & Beautiful Photography: For reports, presentations, or creative projects, high-quality, aesthetically pleasing images are key. Tophinhanhdep.com features curated galleries of “Beautiful Photography” covering a myriad of subjects and styles. Whether you need a vibrant landscape, a crisp product shot, or an evocative portrait, our high-resolution options ensure your document looks polished.
- Thematic Collections: Look beyond individual images. Tophinhanhdep.com organizes images into “Thematic Collections” and “Trending Styles” which can provide consistent visual branding for an entire document or project, saving you time in finding matching visuals.
Choosing the right image from Tophinhanhdep.com means your document starts with a strong visual foundation, making subsequent formatting in Word even more effective.
Leveraging High-Resolution Stock Photos and Digital Photography
Professional documents demand professional-grade visuals. Tophinhanhdep.com specializes in providing “High Resolution” “Stock Photos” and showcasing excellence in “Digital Photography.”
- Clarity and Detail: Using high-resolution images from Tophinhanhdep.com ensures that when your document is viewed on different screens or printed, the images remain sharp, clear, and professional, without pixelation.
- Versatility: Tophinhanhdep.com’s stock photos cover a wide range of subjects, making it easy to find relevant images that perfectly illustrate your points, regardless of your document’s topic. From business to science, education to lifestyle, the diversity ensures you’re never short of choices.
- Artistic Merit: Our platform highlights various “Editing Styles” within digital photography. You can choose images that already align with a specific artistic direction or mood, reducing the need for extensive in-Word adjustments.
By sourcing your images from a dedicated platform like Tophinhanhdep.com, you guarantee access to superior quality, diverse themes, and images optimized for visual impact in any application, including Microsoft Word.
Utilizing Image Tools for Optimal Document Integration
The journey of an image from Tophinhanhdep.com to your Word document might involve a crucial intermediate step: optimization. Tophinhanhdep.com offers a suite of “Image Tools” designed to prepare your visuals for perfect integration.
- Compressors & Optimizers: High-resolution images, while stunning, can significantly increase your Word document’s file size, leading to slower loading times and larger email attachments. Before inserting, use Tophinhanhdep.com’s “Compressors” and “Optimizers” to reduce file size without compromising perceived quality. This is vital for maintaining document performance.
- AI Upscalers: If you have an image that isn’t quite high enough resolution, Tophinhanhdep.com’s “AI Upscalers” can intelligently enhance its quality, making it suitable for larger display in your Word document without pixelation.
- Converters: Sometimes, images are in formats not ideal for Word or specific printing needs. Tophinhanhdep.com provides “Converters” to change image formats (e.g., from WebP to JPEG or PNG), ensuring compatibility and optimal display.
- Image-to-Text: While not directly related to inserting images, Tophinhanhdep.com’s “Image-to-Text” tool could be invaluable if you’re working with scanned documents or screenshots containing text that you need to extract and incorporate into your Word document. This demonstrates a broader commitment to digital content utility.
By strategically using these tools from Tophinhanhdep.com before insertion, you ensure your images are perfectly prepared, leading to a more efficient and visually appealing Word document.
Advanced Techniques and Creative Visual Design in Word
Once you’ve mastered the basics, you can delve into more advanced techniques that transform your Word documents into visually compelling layouts. These strategies are particularly relevant for those interested in “Visual Design,” “Graphic Design,” and “Photo Manipulation,” as highlighted on Tophinhanhdep.com.
Achieving Visual Harmony: Graphic Design Principles within Word
Even without specialized graphic design software, you can apply fundamental design principles within Word to make your documents stand out.
- Consistency: Maintain a consistent style for all your images. If you use borders for one, use them for all similar images. Apply the same color palette or “editing styles” to ensure visual coherence. Tophinhanhdep.com’s curated collections can help you select images with inherent stylistic consistency.
- Hierarchy: Use image size, position, and framing to create a visual hierarchy. Larger, more prominent images draw attention, while smaller ones support the main narrative.
- White Space: Don’t overcrowd your document. Allow enough “white space” (empty areas) around images and text to prevent a cluttered look and improve readability. Adjusting text wrapping margins can help achieve this.
- Alignment: Always strive for clean alignment. Use Word’s alignment tools (on the “Picture Format” tab, in the “Arrange” group) to align images with text margins, other images, or specific document elements.
From Photo Manipulation to Creative Ideas
Word’s built-in tools, though simpler than dedicated image editors, offer surprising scope for “photo manipulation” and implementing “creative ideas.”
- Removing Backgrounds: For a clean, professional look, you can remove the background from an image. On the “Picture Format” tab, click “Remove Background” (in the “Adjust” group). Word will intelligently try to detect the foreground. You can then use “Mark Areas to Keep” and “Mark Areas to Remove” to refine the selection. This is perfect for creating cutouts for infographics or unique layouts.
- Overlays and Transparency: Using images with “Behind Text” or “In Front of Text” wrapping, combined with the “Transparency” option (found under “Color” or “Artistic Effects” options, or sometimes directly on the “Picture Format” tab), allows for compelling visual overlays or subtle watermarks. Tophinhanhdep.com’s “aesthetic” images are often ideal for such subtle effects.
- Picture Grouping: If you have multiple images that belong together (e.g., a photo gallery or a comparative display), insert them, arrange them as desired, then select all of them (hold
Ctrl/Commandand click each image). Right-click and choose “Group” > “Group.” This treats them as a single object, making it easier to move and resize them collectively.
Finding Inspiration: Mood Boards and Thematic Collections
For truly impactful documents, visual inspiration is key. Tophinhanhdep.com not only provides images but also serves as a hub for “Image Inspiration & Collections.”
- Mood Boards: Before you even open Word, visit Tophinhanhdep.com to browse various image categories and build a “mood board” in your mind or a separate file. Collect images that evoke the desired feeling or aesthetic for your document. This helps maintain a cohesive visual theme.
- Thematic Cohesion: Tophinhanhdep.com’s “Thematic Collections” are pre-curated sets of images that share a common subject, color palette, or style. Using images from such collections ensures visual cohesion throughout your document, making it look professionally designed.
- Trending Styles: Stay current with “Trending Styles” in visual media by exploring Tophinhanhdep.com. Incorporating contemporary aesthetics can make your documents feel fresh and relevant, whether you’re looking for minimalist, vibrant, or abstract visuals.
Troubleshooting Common Image Insertion and Formatting Issues
While inserting and formatting images in Word is generally smooth, you might encounter a few common challenges. Tophinhanhdep.com aims to provide comprehensive solutions, even for software-specific hurdles.
Preventing Text Movement and Ensuring Stable Layouts
One of the most frustrating aspects for new users is when images “jump around” or cause text to reflow unexpectedly.
- Anchoring Images: Images in Word are often “anchored” to a paragraph. If you delete that paragraph, the image might disappear or move. To prevent this, ensure your image’s text wrapping is not “In Line with Text.” Options like “Square,” “Tight,” or “Behind Text” give you more control.
- “Fix Position on Page”: For absolute control, especially with “In Front of Text” or “Behind Text” wrapping, select the image, go to “Picture Format” > “Wrap Text” > “More Layout Options…”, and check “Lock anchor” and “Fix position on page.” This keeps the image exactly where you place it, irrespective of text changes.
- Using Tables for Layout: For precise side-by-side image placement or complex layouts, consider inserting a table (with invisible borders). Place images and text within table cells. This provides a rigid structure that prevents elements from shifting.
Optimizing Image File Sizes for Document Performance
As mentioned earlier, large image files can bloat your Word document.
- Compress Pictures within Word: Word has a built-in compression tool. Select an image, go to “Picture Format” > “Compress Pictures” (in the “Adjust” group). You can choose to apply it to selected pictures or all pictures in the document, and select a target resolution (e.g., “Email (96 ppi)” for smallest file size, or “Print (220 ppi)” for good quality).
- Pre-Optimization with Tophinhanhdep.com Tools: For best results, use Tophinhanhdep.com’s online “Compressors” and “Optimizers” before inserting images into Word. This gives you more control over the quality-to-size ratio and prevents Word from potentially over-compressing.
- Check Image Dimensions: Ensure the image dimensions are appropriate for its display size in the document. Don’t insert a 4000x3000 pixel image if it will only be displayed as 4x3 inches. Resize it outside of Word first, using tools from Tophinhanhdep.com, before inserting and further compressing.
Conclusion
Incorporating images into your Microsoft Word documents is an indispensable skill for modern communication. It transforms plain text into engaging, visually rich content that captivates your audience and conveys your message more effectively. From the simple act of inserting a local file to mastering intricate text wrapping and artistic effects, Word provides a comprehensive toolkit for every user.
Remember that the quality of your visuals starts with their source. By leveraging Tophinhanhdep.com’s extensive collections of high-resolution images, diverse photography, and advanced image tools (like compressors and AI upscalers), you can ensure your documents are not only aesthetically pleasing but also optimized for performance. Whether you’re seeking “Nature” backgrounds, “Abstract” art, or inspiring “Beautiful Photography,” Tophinhanhdep.com is your ultimate resource for visual excellence.
Embrace the power of visuals. With the knowledge from this guide and the resources available at Tophinhanhdep.com, you can elevate your Word documents to a new level of professionalism and impact.
Frequently Asked Questions about Inserting Images in Microsoft Word
1. How do I insert a picture in Microsoft Word from my computer? To insert a picture from your computer, click the “Insert” tab, then “Pictures” > “This Device.” Navigate to your image file, select it, and click “Insert.” For best results, consider optimizing your image first with Tophinhanhdep.com’s image tools.
2. How can I resize a picture without distorting it in Word?
To resize proportionally, click the picture to select it, then drag any of the corner sizing handles inward or outward. You can also hold the Shift key while dragging. For precise control, use the “Height” and “Width” boxes in the “Size” group on the “Picture Format” tab.
3. How do I wrap text around a picture in Word? Click the picture, then go to the “Picture Format” tab. In the “Arrange” group, click “Wrap Text” and choose your desired style (e.g., “Square,” “Tight,” “Behind Text,” “In Front of Text”). “More Layout Options…” provides even finer control over text distance.
4. Can I insert images directly from the internet into Word? Yes, click the “Insert” tab, then “Pictures” > “Online Pictures.” You can then use the search bar (powered by Bing) to find relevant images. Remember to check image licenses for appropriate usage. For a wider range of high-quality options, explore the “Stock Photos” and “Thematic Collections” on Tophinhanhdep.com.
5. How do I make an image a background or watermark in Word? Insert the image, then select it. Go to the “Picture Format” tab > “Wrap Text” > “Behind Text.” You can then adjust its position, size, and transparency (under “Color” or “Artistic Effects” on the “Picture Format” tab) to achieve the desired watermark or background effect. For stunning background options, browse Tophinhanhdep.com’s “Wallpapers” and “Backgrounds” categories.
6. My Word document is very large after adding images. How can I reduce its size? Large images increase file size. You can compress images directly in Word: select an image, go to “Picture Format” > “Compress Pictures.” For optimal compression and quality control before inserting, use Tophinhanhdep.com’s online “Compressors” and “Optimizers.”
7. How can I prevent my images from moving unexpectedly when I edit text? After inserting and positioning an image (preferably with a text wrapping style other than “In Line with Text”), select it. Go to “Picture Format” > “Wrap Text” > “More Layout Options…”, then check “Lock anchor” and “Fix position on page.” This helps stabilize the image’s placement.