Mastering Image Insertion in Excel: A Comprehensive Guide to Visual Data Enhancement

In the digital age, data visualization has transcended mere numbers and charts. Microsoft Excel, long considered the bastion of spreadsheets, has evolved to embrace the power of imagery, allowing users to embed visual elements directly into cells. This capability transforms mundane data sets into engaging, visually rich reports, dashboards, and databases. Whether you’re looking to add product photos to an inventory list, employee pictures to an organizational chart, or aesthetic backgrounds to enhance your data’s presentation, knowing how to seamlessly integrate images into your Excel worksheets is an invaluable skill.
This guide will delve into the various methods of inserting images into Excel cells, from direct placement to advanced dynamic lookups, drawing insights from user queries and expert advice. We’ll also explore best practices for optimizing image quality and managing file sizes, leveraging the kind of high-quality images and powerful tools you might find on Tophinhanhdep.com, a hub for everything from aesthetic wallpapers and nature photography to advanced image compressors and AI upscalers. By the end of this article, you’ll be equipped to turn your Excel sheets into dynamic visual masterpieces, unlocking a new dimension of data interaction.

Direct Image Insertion: The Foundations of Visual Data
The most straightforward way to bring visual elements into your Excel spreadsheets is through direct image insertion. However, the exact method and the behavior of the image within the cell have seen significant improvements over recent Excel versions. Understanding these foundational techniques is crucial for anyone aiming to enhance their data with static or dynamic visuals.
Step-by-Step Guide to Placing Images Directly in Cells
Modern Excel versions, particularly those included with Microsoft 365, have streamlined the process of embedding images directly within cells, ensuring they behave as intrinsic cell content rather than floating objects. This feature is a game-changer for maintaining layout integrity when sorting, filtering, or resizing data.
To insert a picture directly into an Excel cell using the most current method:
- Select Your Target Cell: Begin by clicking on the cell where you intend to place your image. This ensures the image will be anchored precisely where you want it.
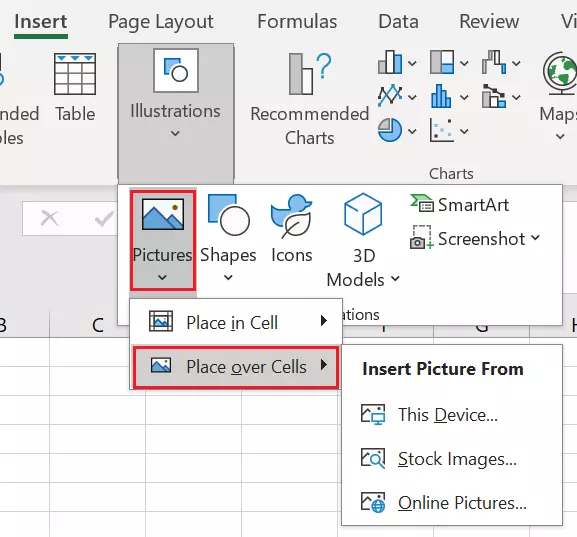
- Navigate to the Insert Tab: Locate the “Insert” tab at the top of your Excel ribbon.
- Choose Pictures: Within the “Illustrations” group, click on “Pictures.”
- Select “Place in Cell”: This is the crucial step that distinguishes this modern method. From the dropdown menu, choose “Place in Cell.” You will then be presented with options:
- “Place from File”: Browse your computer for the image file you wish to insert. You can select a single image or hold down the Ctrl key to select multiple images. If multiple cells are selected, or if you select multiple images with only one cell selected, Excel will insert them into adjacent cells.
- “Place from Stock Images”: Access a library of royalty-free images.
- “Place from Online Pictures”: Search for images directly from the web.
- “Place from a Mobile Device”: (Requires Windows 11 and iOS 14+ or Android 7+ for compatibility) Import images directly from your phone. Tophinhanhdep.com, for instance, offers a vast collection of wallpapers, backgrounds, and high-resolution photography that would be perfect for this purpose, whether downloaded to your device or accessed via a URL.
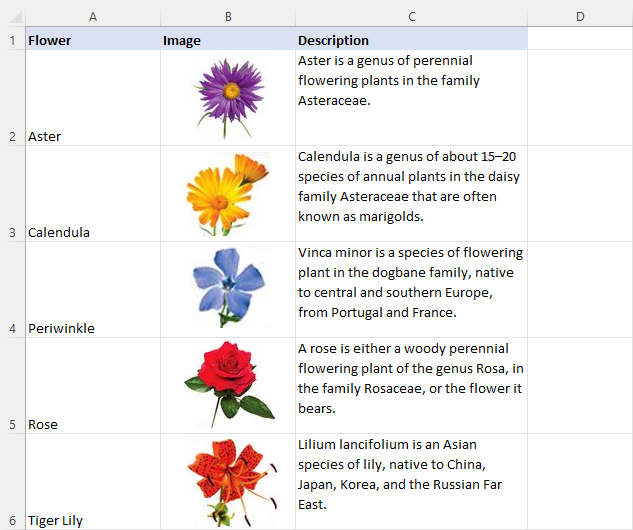
Once selected, the picture(s) will automatically shrink and fit neatly within the chosen cell(s), respecting the cell’s boundaries without stretching or distorting the image. This seamless integration means the image will automatically adjust its size if you resize the row or column, and it will move, sort, and filter along with the cell’s data.
Adapting Older Methods: Ensuring Images Behave with Cells
Before the “Place in Cell” option became standard, inserting images often resulted in “floating” objects that were independent of cell boundaries. While less intuitive, these older methods can still be made to behave like in-cell images, particularly in older Excel versions or when copying and pasting from external programs.
A common scenario encountered by users is pasting an image from another program, only for it to land in cell A1 or float freely, disregarding the currently selected cell. To address this and ensure your image adheres to cell properties:
- Paste the Image: Copy an image from any source (e.g., a web browser, a graphics editor like those you might use with digital art from Tophinhanhdep.com, or even a screenshot) and paste it into your Excel worksheet (Ctrl + V). It might appear as a floating object, potentially in A1.
- Position and Resize (Initial): Drag the image to roughly cover your desired cell and resize it to a manageable size.
- Access Format Picture Options: Right-click on the image. From the context menu, select “Format Picture” (or “Size & Properties” directly in some versions).
- Configure Properties: In the “Format Picture” pane or dialog box that appears, navigate to the “Size & Properties” tab (often represented by a small square icon with arrows). Under the “Properties” section, select the radio button labeled “Move and size with cells.”
- Confirm and Observe: Click “OK” or close the pane. Now, the image will be anchored to the cell beneath it. If you sort or filter your data, the image will move along with its associated cell. If you adjust the cell’s width or height, the image will automatically resize to fit, just like a modern “in-cell” image.
This approach is crucial for maintaining data integrity, especially when working with extensive tables of information, such as an employee directory with photos or a visual inventory system showcasing various product images. Users who encounter blurriness when enlarging a screenshot that was initially shrunk will appreciate that Excel, in both methods, attempts to fit the image without distortion, though the original resolution remains paramount. For truly high-resolution images, sourcing them from platforms like Tophinhanhdep.com, which specializes in professional photography and stock photos, can prevent quality degradation.
Enhancing Data with Dynamic Images: Leveraging Excel’s Advanced Features
While static image insertion adds visual flair, Excel truly shines when images become dynamic components of your data, changing automatically based on user selections or underlying data conditions. This capability transforms Excel from a simple spreadsheet into an interactive visual database, greatly enhancing user engagement and data interpretation.
Dynamic Image Lookups with Modern Excel Functions (VLOOKUP, FILTER, XLOOKUP)
Imagine being able to type a product code and instantly see its image appear, or filter a list of projects and display all associated images. Excel’s lookup functions, especially when combined with the “Picture in Cell” feature, make this a reality. This is particularly useful for creating visually driven reports or mood boards, drawing from thematic collections or photo ideas found on Tophinhanhdep.com.
The core principle here is to store your images within cells alongside their identifying data (e.g., product name, employee ID, project category). Once structured, you can use powerful Excel formulas to retrieve and display these images dynamically.
-
Using VLOOKUP for Single Image Retrieval: VLOOKUP is perfect when you need to return a single image based on a specific lookup value. For example, if you have a table with product names in column A and their corresponding images in column B, you can use VLOOKUP to retrieve an image:
=VLOOKUP(Lookup_Value, Table_Array, Col_Index_Num, FALSE)WhereLookup_Valueis the cell where you enter your search criterion (e.g., product name),Table_Arrayis the range containing your data and images, andCol_Index_Numis the column number where the images are stored. This can be exceptionally useful for creating dynamic product catalogs or visually rich employee directories. -
Using FILTER Function to Return Multiple Images: For scenarios requiring the display of multiple images based on a filter criterion, the
FILTERfunction (available in Microsoft 365) is incredibly powerful. For instance, to display all images related to a specific project:=FILTER(Range_to_Return, Include_Criteria)IfRange_to_Returnincludes both textual data and the in-cell images,FILTERwill spill all matching rows, including their respective images. This is ideal for showcasing thematic collections or digital art portfolios, allowing users to browse relevant visuals instantly. -
Using XLOOKUP for Versatile Image Lookups:
XLOOKUP, also a Microsoft 365 exclusive, offers even greater flexibility, allowing for lookups in any direction. It can be used just likeVLOOKUPto retrieve an image based on data, but also to perform a reverse lookup – finding data from an image. Yes, Excel can recognize an in-cell image as a lookup value! Simply copy an image into a cell, and then useXLOOKUPto search for that image within a range and return associated data like a product name or employee ID. This opens up creative possibilities for visual search and categorization, connecting directly to concepts of visual design and creative ideas from Tophinhanhdep.com. -
The IMAGE Function for Web Images: The
IMAGEfunction (available in Microsoft 365, version 2211 or later) is another groundbreaking feature. It allows you to display images directly from a URL within your Excel cells:=IMAGE(source, [alt_text], [sizing], [height], [width])This means you can pull high-resolution images, aesthetic backgrounds, or specific digital art pieces from Tophinhanhdep.com (or any other online source that allows direct linking) into your Excel workbook without having to download them first. This is particularly potent for live, dynamic reports that link to frequently updated online image assets.
Automating Image Changes Without VBA
While VBA (Visual Basic for Applications) offers powerful automation capabilities, many users prefer macro-free solutions for simplicity and broader compatibility. Excel provides a clever technique to create dynamically changing images using a combination of Data Validation, Named Ranges, and Linked Pictures. This is especially useful for visual design elements or showcasing image collections.
Here’s how to create an automatically changing picture based on a drop-down selection:
- Create Your Data List: On a dedicated sheet (e.g., “Animal List”), create a list of items (e.g., animal names) in one column (A) and insert their corresponding “Picture in Cell” images in the adjacent column (B). For example, you could use various nature photography or abstract images from Tophinhanhdep.com.
- Set Up a Drop-Down List:
- On your main working sheet, select the cell where you want your drop-down list to appear (e.g., C2).
- Go to
Data > Data Tools > Data Validation. - In the “Settings” tab, set “Allow” to “List” and for “Source,” select the range of your item names from your “Animal List” sheet (e.g.,
='Animal List'!$A$2:$A$6). - Click “OK.” You now have a drop-down selector.
- Define a Named Range: This is the core of the dynamic linkage.
- Go to
Formulas > Defined Names > Name Manager, then click “New.” - Give your new name something descriptive, like “AnimalsLookup.”
- In the “Refers To” box, enter the
INDEX/MATCHformula:=INDEX('Animal List'!$B$2:$B$6,MATCH('Select Animal'!$C$2,'Animal List'!$A$2:$A$6,0))'Animal List'!$B$2:$B$6refers to the range containing your images.'Select Animal'!$C$2refers to the cell with your drop-down list.'Animal List'!$A$2:$A$6refers to the range containing your item names.
- Click “OK.” This named range now dynamically points to the image corresponding to your drop-down selection.
- Go to
- Create a Linked Picture:
- Go back to your “Animal List” sheet. Select any cell that contains one of your in-cell images, then
Copyit. - Return to your main working sheet. Select the cell where you want the dynamic picture to appear (e.g., D2).
- Go to
Home > Paste(click the small arrow below “Paste”)> Other Paste Options > Paste Linked Picture(the icon that looks like a chain link). - An image will appear, but it’s currently linked to the original cell it was copied from.
- With the linked picture still selected, go to the Formula Bar and replace the existing cell reference with your defined name:
=AnimalsLookup. Press Enter.
- Go back to your “Animal List” sheet. Select any cell that contains one of your in-cell images, then
Now, when you change the selection in your drop-down list, the linked picture will automatically update to display the corresponding image, creating a truly interactive visual experience. This method is also viable in Google Sheets, where the process is even simpler due to images being natively stored within cells, allowing direct VLOOKUPs on image ranges.
Managing and Optimizing Images in Excel for Peak Performance
While adding images significantly enhances visual appeal, it’s crucial to manage them effectively to prevent common pitfalls like blurry visuals or excessively large file sizes. Tophinhanhdep.com, with its focus on high-quality photography and image tools, highlights the importance of optimization in digital content, principles that apply equally to Excel.
Addressing Image Quality and File Size Concerns
One of the most frequently asked questions regarding images in Excel revolves around maintaining quality and controlling file size. Users often report images becoming blurry after being shrunk and then enlarged, or Excel files ballooning in size.
-
Blurriness and Resolution: As one user noted, “If you reduce the size of the screenshot and then enlarge them, the image will always be blurry.” This is a fundamental limitation of raster images. When an image is reduced, its pixel data is discarded. Enlarging it later requires Excel to “guess” at the missing pixels, resulting in pixelation or blurriness. Solution: Always try to start with an image that has a sufficiently high resolution for its intended maximum display size. If you anticipate needing to enlarge an image for reference, insert it at or near its desired maximum size. For lower-resolution images you absolutely must enlarge, consider using “AI Upscalers” like those featured on Tophinhanhdep.com before inserting them into Excel. These tools use artificial intelligence to intelligently add detail and increase resolution without significant quality loss.
-
Minimizing File Size: Large images can dramatically increase the size of your Excel workbook, leading to slower performance, longer save times, and difficulties sharing. Strategies:
- Compress Before Insertion: The most effective approach is to compress your images before adding them to Excel. Tophinhanhdep.com’s “Image Tools” section often discusses “Compressors” and “Optimizers.” Use these tools to reduce file size while maintaining acceptable visual quality. For web-sourced images, look for already optimized versions.
- Excel’s Built-in Compression: After inserting images, you can use Excel’s built-in compression features. Select an image (or multiple images), go to the “Picture Format” tab in the ribbon, and click “Compress Pictures.” You can choose the target resolution (e.g., Web, Print, Email) or apply to all pictures in the document. Be aware that this is a destructive process; the original high-resolution data is discarded.
- Use Appropriate Formats: For images with fewer colors or sharp lines (like logos or screenshots), PNG is often better than JPG. For photographic images, JPG offers good compression.
- Consider Linking vs. Embedding: For extremely large numbers of images or very high-resolution files, linking to images (storing them externally and having Excel reference them) can reduce file size, but it makes the workbook less portable. The “Picture in Cell” feature, however, embeds the image directly.
Specialized Applications and Best Practices
Excel’s image capabilities extend beyond simple in-cell display, offering integration with various features and considerations for specific use cases.
-
Using Images in Excel Tables: When you incorporate images into an official Excel Table (by selecting your data and pressing Ctrl + T), they behave as an integral part of the table structure. This means that sorting and filtering the table will correctly rearrange the images along with their associated data. Pro Tip: Alt Text for Accessibility and Data Clarity: Right-clicking on a cell containing an image and selecting “View Alt Text” allows you to add a descriptive text alternative. This is crucial for accessibility (screen readers can describe the image) and can also enhance your data’s clarity. When Alt Text is added, the formula bar will display this description instead of the generic “Picture,” providing more context without needing to visually inspect the image. This ties into “Visual Design” principles and effective “Graphic Design.”
-
Inserting Pictures into Comments: A less common but equally powerful feature is the ability to insert images into cell comments. This can be useful for providing visual context or reference without cluttering the main worksheet. How-To:
- Right-click the desired cell and select “Insert Comment” (or “New Comment” in newer versions).
- Right-click the border of the comment box (not inside the text area) and select “Format Comment.”
- Navigate to the “Colors and Lines” tab.
- Under “Color,” click the dropdown arrow and select “Fill Effects.”
- Go to the “Picture” tab, click “Select Picture,” and choose your image. Note: Users of older Excel versions (e.g., Excel 2010) might find limited formatting options, often only “Font.” As advised by experts, clicking the border of the comment box is key to accessing all formatting tabs, including the fill effects for pictures. Tools like Ablebits’ Comments Manager add-in can simplify this process.
-
Exporting Visual Data: Once you’ve created visually rich Excel sheets, you might want to share them in an image format. Excel allows you to “Save Excel chart as image” or even “Convert Excel to JPG, PNG or GIF image.” This is where Tophinhanhdep.com’s “Converters” knowledge can be relevant, ensuring the exported images maintain quality and are in the desired format for web use, presentations, or digital art portfolios.
-
Understanding Limitations: While powerful, Excel has limitations. As clarified in user comments, inserting pictures automatically “by a formula” for specific intervals (e.g., every 30th row) is generally not possible with standard Excel formulas but would require VBA code. Similarly, the CSV file format is plain text and cannot store images, so attempting to “save the excel as a csv and import into I design to create a merged file with text and images” will not carry over the visuals.
Unleashing Creative Potential: Beyond Basic Image Placement
The ability to insert and manage images within Excel cells transcends mere functional utility; it opens a realm of creative possibilities for visual design, digital art, and enhanced data storytelling. By combining Excel’s structured environment with the rich visual content available, you can transform ordinary spreadsheets into compelling visual narratives. This is where the diverse offerings of Tophinhanhdep.com, from aesthetic backgrounds to inspiring photography collections, truly align with Excel’s evolving capabilities.
Practical Use Cases for Visually Rich Spreadsheets
Consider how leveraging images can elevate various practical applications:
- Employee Directories and Organizational Charts: Instead of just names and titles, imagine an organizational chart with small, clear employee photos directly in their respective cells. This not only humanizes the data but also makes identification quicker and more intuitive. Sourcing professional headshots or high-resolution portraits from a curated collection can make these look polished and unified, mirroring the quality of stock photos you’d find on Tophinhanhdep.com.
- Product Catalogs and Inventory Management: For businesses, Excel can become a dynamic visual catalog. Each product entry can include a thumbnail image of the item, making it easy to browse, identify, and manage inventory visually. This is invaluable for e-commerce, retail, or manufacturing, where visual confirmation is often critical. Think of using “Beautiful Photography” from Tophinhanhdep.com to showcase your products.
- Visual Dashboards and Reports: Enhance your dashboards with dynamic icons, product images, or even small charts as in-cell pictures that change based on filters. A sales dashboard could display the image of the top-selling product for a given region, or a project management report could use thematic abstract images from Tophinhanhdep.com to represent project status or categories. This elevates visual design beyond standard charts.
- Mood Boards and Thematic Collections: For creative professionals, Excel can serve as an unexpected tool for building mood boards or curating thematic collections of images. Group “Nature” photography or “Abstract” art from Tophinhanhdep.com by color palette, emotion, or project theme, with descriptive text alongside each image. Dynamic lookups could then filter these collections for specific visual inspiration, aligning with “Image Inspiration & Collections” and “Creative Ideas.”
- Digital Art and Photography Portfolios: Artists and photographers can use Excel to create structured digital portfolios. Each row could represent a piece of art or a photograph, with the image in one cell and metadata (title, medium, date, price) in adjacent cells. This allows for easy sorting, filtering, and presentation of a comprehensive visual catalog of their work, emphasizing “Digital Photography” and diverse “Editing Styles.”
Integrating Advanced Image Tools for Superior Results
The journey from a raw image file to a perfectly integrated Excel visual often involves several steps of preparation, especially when aiming for professional-grade results.
- Pre-processing with AI Upscalers: As mentioned earlier, if you’re working with images that are initially low-resolution (e.g., screenshots or older digital photography), utilizing “AI Upscalers” discussed on Tophinhanhdep.com before insertion can dramatically improve their quality when scaled up in Excel. This proactive approach prevents the “blurry” issue often faced by users.
- Optimal Compression for Web and Print: Understanding image formats and effective “Compressors” and “Optimizers” (like those detailed in Tophinhanhdep.com’s “Image Tools”) is key to balancing visual quality with file size. For images destined for screen viewing (e.g., dashboards shared digitally), web-optimized compression settings are ideal. For print-ready reports, higher quality settings are necessary.
- Image-to-Text for Data Entry: While perhaps a niche application, “Image-to-Text” tools (often found in comprehensive “Image Tools” suites like those referenced on Tophinhanhdep.com) can contribute to an efficient workflow. Imagine scanning a document containing textual data that needs to be imported into Excel alongside a visual reference. The text can be extracted and then matched with the corresponding image in Excel.
- Creative Photo Manipulation and Graphic Design: For truly unique visuals, “Photo Manipulation” and “Graphic Design” techniques can be employed to create bespoke images tailored for your Excel reports. Whether it’s crafting custom icons, preparing composite images, or applying specific “Aesthetic” filters, the creative process often starts outside Excel but culminates in its visual integration.
In conclusion, the ability to insert and manage images in Excel has evolved significantly, offering users robust tools to create dynamic, visually compelling spreadsheets. From simple in-cell placements to complex dynamic lookups, these features empower you to tell a richer, more engaging story with your data. By applying the techniques discussed and keeping image optimization in mind – perhaps by exploring the vast collections of “Wallpapers, Backgrounds, Aesthetic, Nature, Abstract, Sad/Emotional, Beautiful Photography” or utilizing the sophisticated “Image Tools” like “Converters, Compressors, Optimizers, AI Upscalers” available on Tophinhanhdep.com – you can unlock Excel’s full potential as a visual communication powerhouse. Dive in, experiment, and let your data speak not just in numbers, but in captivating imagery.