Mastering Image Insertion in Adobe InDesign: A Comprehensive Guide for Visual Excellence

Adobe InDesign stands as an indispensable tool for graphic designers, publishers, and visual artists worldwide. Its prowess in crafting stunning print and digital layouts, from magazines and brochures to interactive PDFs and e-books, is largely amplified by its robust image handling capabilities. Integrating high-quality images is fundamental to creating compelling visual narratives, adding aesthetic appeal, and effectively conveying messages. Whether you’re working with striking nature photography, abstract digital art, emotionally resonant imagery, or professional stock photos, the art of inserting and managing these visuals within InDesign is a skill that elevates any project.
This comprehensive guide, drawing on insights from various expert sources and aligning with the thematic focus of Tophinhanhdep.com—your premier resource for images, photography, and visual design—will walk you through the essential methods and advanced techniques for seamlessly incorporating images into your InDesign documents. We will explore everything from the quickest drag-and-drop methods to strategic content management, ensuring your designs are not only visually captivating but also meticulously organized for any future modifications or translations.
The Foundational Methods: Inserting Images into InDesign
At its core, inserting an image into an InDesign document is a straightforward process, yet understanding the various methods allows for greater flexibility and efficiency in your workflow. InDesign treats images as linked files rather than embedding them directly, a crucial distinction that ensures optimal document performance and facilitates easier updates and quality control. These images reside within “graphics frames,” which act as containers that can be manipulated independently of the image itself.
Method 1: The Intuitive Drag-and-Drop
For speed and convenience, especially when dealing with multiple images, the drag-and-drop method is often preferred. This technique is incredibly user-friendly and allows for a rapid assembly of visual elements on your page.

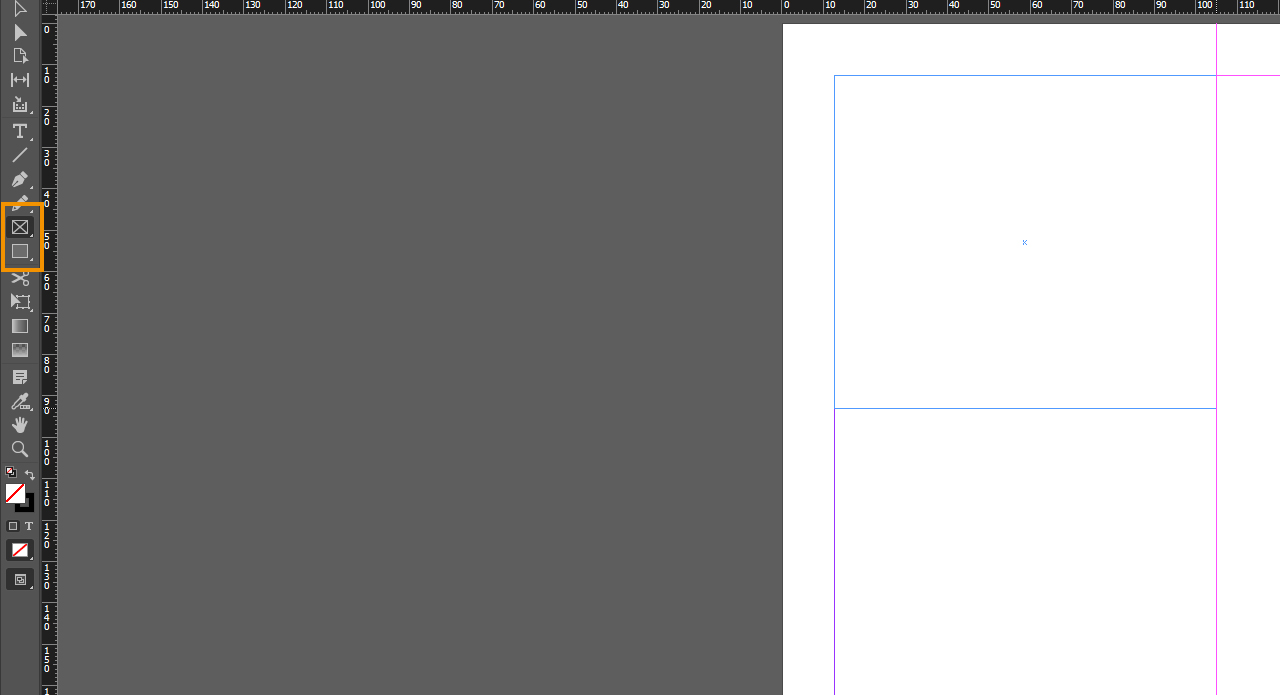
- Prepare Your Canvas: Begin by opening your InDesign document. If you intend to place images within specific boundaries, consider creating placeholder frames beforehand using the Rectangle Frame Tool (represented by a rectangle with a cross) or the Rectangle Tool (for colored areas) from the toolbar. These frames can be of any size and will serve as guides for your incoming images.
- Gather Your Images: Navigate to the folder on your computer (e.g., Finder on macOS or File Explorer on Windows) where your desired image files are stored.
- Initiate the Drag: Select one or more images directly from your folder. You can select multiple images by holding down
ShiftorControl(orCommandon Mac) while clicking. - Drop into InDesign: Drag the selected image(s) directly into your open InDesign document. As you drag, InDesign will provide a preview of the image attached to your cursor.
- Place the Image(s):
- Single Click: Simply click anywhere on the page to place the image at its original size and resolution.
- Click and Drag: Click and hold the mouse button, then drag with the cursor to define the desired size and position of the frame. Releasing the button will place the image within this new frame, maintaining its original proportions.
- Shift-Drag for Proportion: To place an image into a frame with different proportions (e.g., a wide image into a tall frame) while maintaining its aspect ratio, click and drag while holding down the
Shiftkey. This allows for flexible frame creation, though you may need to adjust fitting options later. - Into Existing Frames: If you drag over an existing, empty graphics frame, the image will automatically snap into it.
This method is particularly effective when working with collections of images, such as those found in curated thematic collections or beautiful photography galleries, that you might source from Tophinhanhdep.com.
Method 2: Precision with the ‘Place’ Command (File > Place)
For more controlled placement, especially when you need to browse for images or manage specific import options, the File > Place command (shortcut: Cmd + D on macOS or Ctrl + D on Windows) is the go-to method.
- Open Your Document: Ensure your InDesign document is open.
- Access the Command: Go to
Filein the top menu bar, then selectPlace.... Alternatively, use the keyboard shortcutCmd + D(Mac) orCtrl + D(Windows). - Select Images: A dialog box will appear, allowing you to navigate to your image files. Select the desired image(s). You can select multiple images here as well. Click
Open. - Place on Page: Similar to the drag-and-drop method, your cursor will transform into a “loaded” cursor, displaying a mini-preview of the image. Click on an empty area of the page to place the image at its original size, or click and drag to define a custom frame size.
- Direct Placement into a Selected Frame: If you first select an existing frame on your page before initiating the
File > Placecommand, the image will be placed directly within that selected frame upon clickingOpen. This is a powerful way to update content or fill pre-defined layouts.
Placing into Existing Frames: Replacing and Filling
InDesign’s frame-based workflow makes it incredibly efficient to work with pre-designed layouts. You can easily insert images into existing frames, either replacing old content or filling empty placeholders.
- Select the Frame: Click on the frame you wish to populate or replace.
- Use ‘File > Place’: Go to
File > Placeor use the shortcut. - Check ‘Replace Selected Item’: In the
Placedialog box, ensure theReplace Selected Itemcheckbox (usually at the bottom) is ticked. - Choose Image and Open: Select your desired image and click
Open. The image will be placed directly into the selected frame, replacing any previous content. - Roll-over Placement: Alternatively, with no frame selected, use
File > Placeto load images onto your cursor. Then, simply roll your cursor over any empty frame on your page, and the image will snap into place.
Mastering Image Placement and Manipulation
Once images are in your InDesign document, the real design work begins. InDesign offers precise control over how your images are displayed within their frames, ensuring they contribute effectively to your overall visual design and creative ideas.
Adjusting Image Size and Proportion
Images rarely come in the perfect size for your layout. InDesign provides intuitive tools to resize, crop, and fit images within their frames. Remember that an image lives within a frame, and you can manipulate both independently.
- Selection Tools: Use the
Selection tool(black arrow) to select the frame. Use theDirect Selection tool(white arrow) to select the image content within the frame. - Resizing the Frame:
- With the
Selection tool, click on the frame. Handles (small squares) will appear around its edges. - Drag a handle to resize the frame. The image inside will remain at its original size, potentially revealing more or less of it.
- With the
- Resizing the Image Content:
- With the
Direct Selection tool, click on the image inside the frame. Its bounding box will appear, often extending beyond the frame’s edges. - To resize proportionally, hold
ShiftandControl(orCommandon Mac) while dragging a corner handle of the image’s bounding box. This adjusts the image’s scale while keeping its aspect ratio. - To crop (adjust what portion of the image is visible without resizing the image itself), simply drag the frame handles with the
Selection toolor use theDirect Selection toolto move the image content within the static frame.
- With the
- Precision Resizing in Control Panel: For exact dimensions, select the image (with either tool) and enter specific values for Width (W) and Height (H) in the Control panel at the top of your workspace.
Working with Multiple Images and Frames
Creating dynamic layouts often involves arranging multiple images. InDesign simplifies this with tools for creating arrays of frames and intelligent content fitting.
- Creating Multiple Frames: When using the
Rectangle Frame Tool, click and drag to create the first frame. While still holding the mouse button down:- Press the
Right Arrow Keyto add horizontal frames. - Press the
Up Arrow Keyto add vertical frames. - Press
Shiftsimultaneously to create perfectly square frames, with spacing determined by your document’s column gutters. - Use the
LeftandDownarrow keys to reduce the number of frames.
- Press the
- Fitting Options: Once images are placed, especially if they are high-resolution photography, they might appear too large or small for their frames. Select the frame(s), then
Right-Click(Control-Clickon Mac) and chooseFitting.- Fit Content Proportionally: Resizes the image to fit entirely within the frame without distortion, potentially leaving empty space.
- Fill Frame Proportionally: Resizes the image to fill the entire frame without distortion, potentially cropping parts of the image.
- Fit Frame to Content: Resizes the frame to precisely fit the image content.
- Fit Content to Frame: Stretches or shrinks the image to fill the frame, which might cause distortion if proportions aren’t matched.
Display Performance: Ensuring Visual Clarity
You might notice that even high-resolution images appear pixelated or blurry in InDesign. This is typically not an issue with the image itself but with InDesign’s display settings, designed to optimize performance.
- Default Display: InDesign uses a low-resolution preview by default to ensure fast scrolling and rendering, especially in documents with many images (like a wallpaper collection or a thematic collection).
- Changing Display Performance:
- For Individual Images: Select the image,
Right-Click(Control-Clickon Mac), go toDisplay Performance, and chooseHigh Quality Display. - For the Entire Document: Go to
View > Display Performancein the main menu and selectHigh Quality Display. - Other options like
Fast Display(minimum detail) andTypical Display(standard resolution proxy) are available for speed.
- For Individual Images: Select the image,
- True Resolution Check: If an image still appears pixelated after setting it to
High Quality Display, then the original image file itself likely has an insufficient resolution for its intended print size. For professional print, images should ideally be 300 pixels per inch (ppi) at their final output size.
Strategic Image Management for Professional Projects
Effective image management extends beyond mere insertion. For complex documents, especially those destined for multilingual publication or involving extensive digital art and photo manipulation, InDesign offers powerful features to maintain consistency, ensure accurate translation, and streamline collaboration.
Understanding Linked Images and the Links Panel
As mentioned, InDesign links to images rather than embedding them. This means the actual image file remains external, and InDesign references its location. This system has significant advantages:
- Smaller File Sizes: Your InDesign document remains relatively small.
- Easy Updates: If you edit the original image in a program like Photoshop (for digital photography or graphic design adjustments), InDesign will automatically update the linked image in your document.
- Quality Preservation: The image’s original quality is maintained, especially for high-resolution images suitable for print.
The Links Panel (Window > Links) is your central hub for managing all linked files.
- Overview: It lists every linked image, its location, the page it’s on, and crucial information like its color space (important for print accuracy) and effective resolution.
- Status Indicators:
- No Indicator: The link is current and healthy.
- Warning Triangle (Yellow with Exclamation Mark): The image has been modified outside InDesign since it was placed. Right-click the link in the panel and choose
Update Linkto refresh. - Question Mark: The link is broken; InDesign cannot find the original file. This often happens if the image file has been moved, renamed, or deleted. You’ll need to
Relinkit by navigating to the new location.
- Panel Options: Customize the Links panel display by clicking the four small dashes in the top-right corner and choosing
Panel Options. You can add columns for information likeColor Space,Path, orEffective PPIto get an at-a-glance overview of your project’s image health. This is particularly useful for ensuring all images meet theHigh Resolutionstandards expected for professional output. - Pre-Press Check: Before exporting your document for print, always perform a thorough check of the Links panel. Broken or outdated links can lead to missing or low-quality images in your final output.
Integrating Text with Images: Best Practices for Multilingual Documents
Documents often combine striking visuals with informative text. How this text is handled, especially in a multilingual context, is critical. Tophinhanhdep.com advocates for best practices that streamline translation and ensure text quality.
- Placing Text in the Image (Discouraged): Integrating text directly into the image file (e.g., in Photoshop) presents numerous disadvantages for professional workflows, particularly for projects requiring translation:
- Translation Hurdles: Text embedded in an image cannot be easily extracted by translation tools. It necessitates recreating the image for each language, leading to duplicate files and increased design time and cost.
- Control Limitations: You lose control over text style, font, and spelling within InDesign. Spell-check won’t work, and paragraph/character styles can’t be applied.
- Maintenance Nightmare: Edits are slower, and there’s a higher risk of using a non-translated or outdated image version.
- Placing Text Labels in InDesign (Recommended): The preferred method is to create text labels directly within InDesign and place them over the image. This approach offers significant advantages:
- Full Control: Text attributes (font, size, color, style) are controlled by InDesign’s powerful typesetting features. Spell-check is integrated.
- Translation-Friendly: Text frames are easily extracted for translation, minimizing manual work and ensuring all text is translated.
- Single Source: The image remains a single file, eliminating duplicates for different languages.
- Faster Edits and Updates: Text can be quickly modified or updated without touching the image file.
- Superior Layout: InDesign’s precise text rendering typically results in a better-looking final document.
When designing these labels, anticipate that translated text might be longer or shorter than the original. Size your text boxes to accommodate potential text expansion without obscuring crucial image details.
Enhancing Workflow with Anchored Objects and Object Styles
For sophisticated layouts, InDesign provides tools to automate placement and styling, reinforcing efficiency in visual design.
- Grouping Images and Labels: If you’re using text labels over an image, group them together (
Object > GrouporCmd/Ctrl + G). This ensures they move and scale as a single unit, preserving their relationship on the page. - Anchored Objects: To keep an image (or a grouped image and its labels) consistently positioned relative to specific text, create an
Anchored Object. This “forces” the object to travel with the line of text it’s associated with, invaluable for figures, diagrams, or illustrations that must accompany specific content. - Object Styles: For consistent application of scaling, fitting, and display settings across multiple images (especially useful for aesthetic images or specific photography styles), create
Object Styles. An object style can define how an image fits its frame, its display performance, and even apply effects, ensuring a uniform look throughout your document.
Optimizing Images for Print and Digital Excellence
Beyond the mechanics of insertion, the quality and preparation of your images are paramount to achieving professional results, whether for print or digital consumption. This ties directly into the comprehensive resources on images and photography available on Tophinhanhdep.com.
Resolution, File Formats, and Quality
The fundamental quality of an image dictates its suitability for various outputs.
- Resolution (PPI): For print, a resolution of 300 ppi (pixels per inch) at the intended output size is the industry standard for sharp, detailed images. For web or screen display, 72 ppi is generally sufficient. Placing a low-resolution image (e.g., 72 ppi web image) and scaling it up significantly for print will result in a pixelated, blurry output.
- File Formats: InDesign supports a wide array of formats suitable for different purposes:
- TIFF (Tagged Image File Format): Ideal for high-quality print images, supporting uncompressed or losslessly compressed data.
- EPS (Encapsulated PostScript): Excellent for vector graphics and logos, though less common for raster images today.
- JPEG (Joint Photographic Experts Group): A widely used format for photographs, offering good compression but with some loss of quality (lossy). Best for digital displays; use higher quality settings for print.
- PNG (Portable Network Graphics): Supports transparency and lossless compression, making it suitable for web graphics with transparent backgrounds, but less common for professional print.
- PSD (Photoshop Document): Native Photoshop files can be placed, preserving layers and other Photoshop features.
- AI (Adobe Illustrator Artwork): Native Illustrator files for vector graphics. Careful selection of file format ensures optimal quality and performance. Resources on Tophinhanhdep.com often discuss the nuances of these formats in the context of digital photography and graphic design.
Beyond Insertion: The Role of Image Tools and Creative Sourcing
While InDesign is powerful, the journey of an image often begins and ends with other specialized tools and sources. Tophinhanhdep.com, as a hub for image tools and inspiration, highlights their importance:
- Image Preparation Tools: Before importing into InDesign, images often need preparation. Tools like
Converters(to change file formats),Compressors(to reduce file size for web, while maintaining acceptable quality),Optimizers(for web delivery), andAI Upscalers(to enhance resolution of smaller images for larger displays or print) are invaluable. TheseImage Toolsensure your visuals are perfectly primed for their role in your InDesign document. - Sourcing High-Quality Content: The quality of your final design is directly dependent on the quality of your source images. Tophinhanhdep.com features
Image Inspiration & Collections, includingHigh Resolutionstock photos,Beautiful Photography,Nature,Abstract, andAestheticimages. Accessing well-curatedThematic Collectionsand understandingTrending Styleshelps designers find visuals that resonate with their project’sMood Boardsand creative vision. - Digital Photography and Editing Styles: Many images in InDesign projects originate from digital photography. The
Editing Stylesapplied in photo manipulation software before placement in InDesign are crucial for achieving the desired aesthetic and visual impact.
By leveraging these external tools and abundant resources, you can ensure that every image placed in your InDesign document is not just correctly inserted, but also optimized, visually stunning, and strategically aligned with your overarching design goals.
Conclusion
Inserting images into Adobe InDesign is far more than a simple technical step; it is an integral part of the visual design process, transforming raw layouts into dynamic and engaging publications. By mastering the various placement methods, understanding image frames, employing precise manipulation techniques, and utilizing InDesign’s powerful linking and management tools, you equip yourself to produce high-quality documents efficiently.
Furthermore, integrating best practices for text and image handling, especially for multilingual projects, ensures your content is robust and adaptable. Remember that the journey to visual excellence in InDesign is supported by a rich ecosystem of high-resolution images, diverse photography styles, and specialized image tools—all areas explored and celebrated on Tophinhanhdep.com.
Whether you’re compiling a portfolio of stunning digital art, designing a captivating magazine spread featuring beautiful photography, or structuring a complex technical manual with precise visuals, the skills outlined here will empower you to bring your creative ideas to life with confidence and precision in Adobe InDesign. Continue to explore and experiment, and let your designs shine with impactful imagery.