Elevating Your Website: A Comprehensive Guide to Inserting Images in HTML with Tophinhanhdep.com

In today’s visually-driven digital landscape, images are more than just decorative elements; they are powerful tools for storytelling, conveying emotion, and capturing attention. For a platform dedicated to the art of visual expression, such as Tophinhanhdep.com – a hub for stunning Wallpapers, Backgrounds, Aesthetic imagery, Nature photography, Abstract art, Sad/Emotional visuals, and Beautiful Photography – mastering the art of inserting images into HTML is not just a technical skill, but a fundamental building block for creating engaging and immersive online experiences.
Whether you’re curating a breathtaking gallery of high-resolution landscapes, designing a mood board with trending styles, or simply adding a captivating background to your digital art portfolio, knowing how to correctly embed images in HTML is paramount. This guide will take you through the essential steps and advanced considerations, ensuring your visuals not only appear flawlessly but also enhance the overall user experience and performance of your Tophinhanhdep.com projects. We’ll delve into the foundational <img> tag, explore crucial attributes, discuss optimal image preparation using modern tools, and touch upon best practices that align with the high standards of visual design and photography.

The Core Mechanics: Understanding the <img> Tag and its Essential Attributes
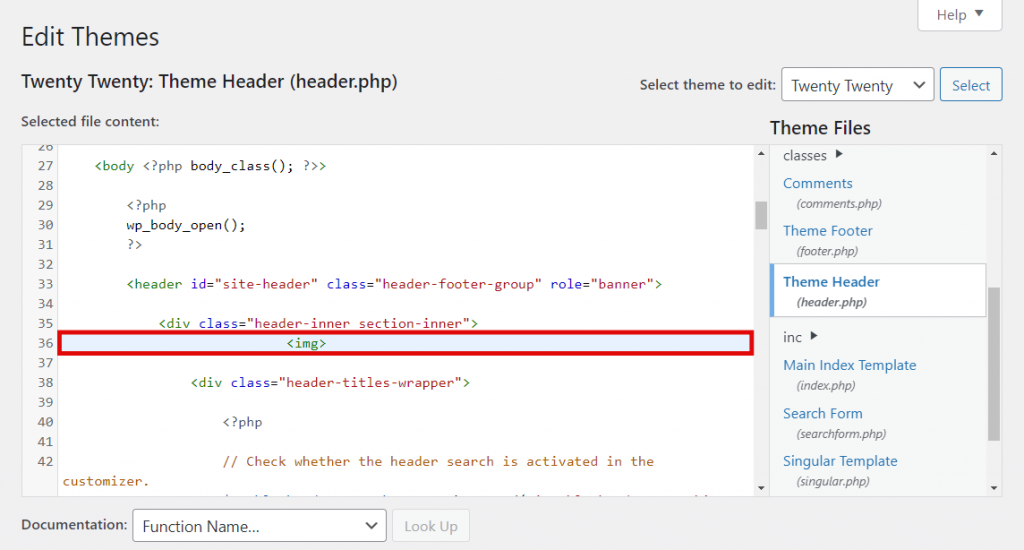
The journey of embedding an image in HTML begins with the simple yet powerful <img> tag. Unlike many other HTML elements, <img> is a “self-closing” tag, meaning it doesn’t require a separate closing </img> tag. All the information needed to display your image is contained within its opening tag, conveyed through various attributes. Understanding these attributes is key to successful image integration.
The src Attribute: Your Image’s Digital Address
The src attribute, short for “source,” is arguably the most critical component of the <img> tag. It tells the web browser precisely where to locate the image file. Without a correctly specified src, your image simply won’t appear, leaving a broken icon in its place.
There are two primary ways to define the image source:
-
Absolute Path (Full URL): This method involves providing the complete web address of the image, including the protocol (e.g.,
https://). This is typically used when linking to images hosted on external servers or when the image resides in a different domain.- Example for Tophinhanhdep.com: If you have uploaded a “Nature Photography” wallpaper to your Tophinhanhdep.com image repository, its absolute path might look like this:
<img src="https://tophinhanhdep.com/images/high-resolution-forest-wallpaper.jpg">
This ensures that no matter where your HTML file is located, the browser can find the image as long as it has internet access.
- Example for Tophinhanhdep.com: If you have uploaded a “Nature Photography” wallpaper to your Tophinhanhdep.com image repository, its absolute path might look like this:
-
Relative Path: This method specifies the image’s location relative to the HTML file you are currently editing. It’s ideal when your images are hosted on the same server as your web page, often within a dedicated
imagesorassetsdirectory.- Example: If your HTML file (
index.html) and animagesfolder (containingaesthetic-sunset.png) are in the same parent directory:<img src="images/aesthetic-sunset.png">
If the image is in the same directory as the HTML file, you can simply use the filename:
html <img src="beautiful-flower-macro.webp">Relative paths are generally preferred for images within your own website structure as they make your code more portable and less prone to issues if you migrate your site. - Example: If your HTML file (
Crucial Tip for Tophinhanhdep.com: When working with “High Resolution” images or large “Collections,” always ensure your image files are properly uploaded to your hosting server or a reliable content delivery network (CDN) before attempting to link them. Incorrect paths are the most common reason images fail to display.
The alt Attribute: Enhancing Accessibility and SEO for Your Visuals
The alt attribute, or “alternative text,” provides a textual description of the image. While it might seem secondary, its importance cannot be overstated, especially for a content-rich visual platform like Tophinhanhdep.com.
Here’s why alt text is essential:
- Accessibility: Screen readers used by visually impaired users rely on
alttext to describe images, making your content accessible to a broader audience. - Search Engine Optimization (SEO): Search engines cannot “see” images in the same way humans do. They read the
alttext to understand the image’s content. For Tophinhanhdep.com, descriptivealttext for your “Wallpapers,” “Backgrounds,” “Aesthetic,” “Nature,” “Abstract,” “Sad/Emotional,” and “Beautiful Photography” is crucial for improving image search rankings and driving organic traffic. - Fallback Content: If an image fails to load (due to slow internet, a broken
srcpath, or server issues), thealttext will be displayed in its place, providing context to the user.
Best Practices for Tophinhanhdep.com:
- Be Descriptive and Concise: Describe the image’s content accurately and briefly.
- Good Example for an Aesthetic Image:
<img src="aesthetic-neon-city.jpg" alt="Vibrant neon lights reflecting on a rain-slicked city street at night"> - Good Example for Sad/Emotional Photography:
<img src="sad-rainy-window.jpg" alt="Rain drops running down a window, blurring the melancholic city outside">
- Good Example for an Aesthetic Image:
- Include Keywords (Naturally): If relevant, incorporate keywords that describe your image, but avoid keyword stuffing. The primary goal is to provide a helpful description.
- Omit “Image of” or “Picture of”: It’s redundant; screen readers already announce that it’s an image.
- Empty
altfor Decorative Images: If an image is purely decorative and doesn’t convey important content (e.g., a spacer GIF), an emptyalt=""is appropriate to prevent screen readers from announcing unnecessary information.
Controlling Dimensions: width and height for Optimal Display
The width and height attributes allow you to specify the dimensions of your image in pixels or as a percentage of its container. While these attributes can be used for quick adjustments, Tophinhanhdep.com recommends a more strategic approach, particularly when dealing with “High Resolution” and “Beautiful Photography.”
Functionality:
<img src="..." alt="..." width="800" height="600">(in pixels)<img src="..." alt="..." width="100%" height="auto">(percentage of container width, withheight="auto"to maintain aspect ratio)
Importance and Best Practices for Tophinhanhdep.com:
- Preventing Layout Shift: When a browser loads an HTML page, it needs to know how much space to reserve for images. Specifying
widthandheightprevents the content from jumping around (layout shift) as images load, significantly improving user experience. This is especially important for galleries of “Wallpapers” or “Thematic Collections” where many images are present. - Maintaining Aspect Ratio: If you only specify one dimension (e.g.,
width="500"), the browser will automatically calculate the other dimension (height) to maintain the image’s original aspect ratio. This prevents your “Digital Photography” from appearing stretched or squished, preserving the integrity of the “Editing Styles” you’ve applied. - Optimization Pre-upload (Tophinhanhdep.com Recommendation): While
widthandheightattributes display the image at a certain size, they do not change the actual file size. A 5MB “High Resolution” image will still be 5MB, even if displayed as a tiny thumbnail. For optimal performance, especially for a site focused on visual quality, it is highly recommended to resize and compress images using dedicated image editing software or Tophinhanhdep.com’s “Image Tools (Compressors, Optimizers)” before uploading them. This drastically reduces file size, leading to faster load times without sacrificing visual quality at the displayed dimensions.
Preparing Your Visual Assets for the Web: A Tophinhanhdep.com Approach
Effective image insertion goes beyond just writing HTML; it involves meticulous preparation of your visual assets. For Tophinhanhdep.com, where image quality and user experience are paramount, this preparation is critical.
Image Hosting and File Management: Where Your Art Resides
Before you can insert an image, it needs to be accessible on the web. Proper hosting and file organization are key.
- Self-Hosting (FTP/File Manager): If you manage your own web server (via cPanel, hPanel, or FTP clients like FileZilla), you’ll upload your images directly to your website’s directory. It’s best practice to create a dedicated folder, often named
imagesorassets, to keep your files organized. This is ideal for managing your vast “Collections” of “Wallpapers” and “Backgrounds,” giving you full control over your asset library. - Content Management Systems (CMS) like WordPress: Platforms like WordPress have built-in media libraries. When you upload an image through the WordPress dashboard, it automatically handles storage and generates a unique URL (absolute path). This simplifies the process for bloggers and content creators on Tophinhanhdep.com, who might be regularly posting “Photo Ideas” or “Thematic Collections.”
- Third-Party Image Hosting: Services like Imgur or Flickr can host images, but be mindful of their terms of service regarding bandwidth, quality reduction, and potential deletion if traffic is too high. For high-quality, long-term display of “Digital Photography,” dedicated web hosting is generally preferred.
Tophinhanhdep.com Tip: Maintaining clear, descriptive filenames (e.g., nature-forest-path-wallpaper-4k.jpg instead of IMG_001.jpg) is essential for both your organization and for SEO, as search engines also consider filenames when understanding image content.
Choosing the Right Format: JPG, PNG, GIF, and Vector Considerations
The file format you choose significantly impacts image quality, file size, and specific visual requirements.
- JPEG/JPG (Joint Photographic Experts Group):
- Best For: Photographs, complex imagery with smooth color gradients, such as “Beautiful Photography,” “Nature,” “Abstract,” and “Sad/Emotional” images. It uses lossy compression, which means some data is discarded during compression, but it’s often imperceptible.
- Tophinhanhdep.com Use: Ideal for almost all “Photography” and “Wallpapers” where intricate detail and broad color ranges are present.
- PNG (Portable Network Graphics):
- Best For: Images requiring transparency (e.g., logos, icons), sharp edges, and limited color palettes. It uses lossless compression, preserving all original image data.
- Tophinhanhdep.com Use: Perfect for website logos, graphical overlays, or “Digital Art” with transparent backgrounds.
- GIF (Graphics Interchange Format):
- Best For: Simple animations, icons with few colors. Limited to 256 colors.
- Tophinhanhdep.com Use: Useful for small animated elements, but generally less suitable for high-quality “Images” due to color limitations.
- SVG (Scalable Vector Graphics):
- Best For: Logos, icons, illustrations, “Graphic Design,” “Digital Art” that needs to scale without losing quality. Vector images are resolution-independent.
- Tophinhanhdep.com Use: Highly recommended for any graphic elements that need to look crisp on all screen sizes, from small mobile displays to large desktop “Wallpapers.”
Optimizing for Performance and Quality: Leveraging Tophinhanhdep.com’s Image Tools
Serving unoptimized images is a common pitfall that can drastically slow down your website, frustrating users and negatively impacting SEO. For a platform like Tophinhanhdep.com, showcasing “High Resolution” visuals, optimization is not an option but a necessity. This is where “Image Tools” come into play.
- Image Converters: Sometimes you need to change a file format (e.g., from TIFF to JPG). Converters help ensure compatibility and optimization.
- Image Compressors: These tools reduce file size while maintaining acceptable visual quality. They are crucial for “Wallpapers” and “Backgrounds” that need to load quickly. Tophinhanhdep.com offers compressors that intelligently balance file size and visual fidelity, making sure your “Beautiful Photography” still shines.
- Image Optimizers: Beyond simple compression, optimizers can remove unnecessary metadata, apply lazy loading techniques, and serve images in next-gen formats (like WebP) that offer superior compression without quality loss. This is an essential step for all “Digital Photography” displayed on the web.
- AI Upscalers: For older, lower-resolution images or when you need to enlarge a smaller asset for a “Mood Board” or “Thematic Collection,” AI upscalers can intelligently add detail and increase resolution without pixelation. This allows Tophinhanhdep.com users to maintain “High Resolution” quality even from less-than-perfect source material.
Practical Steps:
- Resize Before Upload: Always resize your “High Resolution” images to the maximum dimensions they will be displayed on your website using image editing software.
- Compress Thoughtfully: Use Tophinhanhdep.com’s recommended compressors to reduce file size.
- Consider
srcsetand<picture>: For truly responsive design, these HTML attributes/elements allow browsers to choose the most appropriate image size based on the user’s device and screen resolution, delivering optimal performance for “Wallpapers” and “Backgrounds” on any device.
Beyond Basic Insertion: Advanced Image Techniques for Dynamic Content
Once you’ve mastered the fundamentals, you can leverage HTML and CSS to create more dynamic and interactive visual content, aligning perfectly with Tophinhanhdep.com’s focus on “Visual Design” and “Creative Ideas.”
Turning Images into Links: Navigating Your Visual Collections
Images often serve as gateways to more content, especially in “Image Inspiration & Collections” or “Thematic Collections.” You can easily turn any image into a clickable link by wrapping the <img> tag within an <a> (anchor) tag.
<a href="https://tophinhanhdep.com/nature-photography/serene-forest-gallery.html">
    <img src="https://tophinhanhdep.com/thumbnails/serene-forest-thumb.jpg"
         alt="Thumbnail of a serene forest, click to view full gallery"
         width="300" height="200">
</a>hrefAttribute: Specifies the destination URL when the image is clicked. For Tophinhanhdep.com, this could link to a full-size “Wallpaper,” a detailed “Beautiful Photography” portfolio page, or another “Thematic Collection.”- User Experience: Use clear
alttext to inform users what they will find when they click the image. This is crucial for guiding visitors through your “Photo Ideas” and curated content.
Implementing Responsive Images for All Screens
In an era of diverse devices, ensuring your “Wallpapers” and “Backgrounds” look impeccable on everything from a smartphone to a large desktop monitor is vital. Responsive images are a cornerstone of modern “Visual Design.”
srcsetAttribute: This attribute within the<img>tag provides a list of different image files along with their intrinsic widths (e.g.,image-small.jpg 480w,image-medium.jpg 800w). The browser then intelligently chooses the most suitable image based on the device’s screen width and pixel density.<img srcset="abstract-art-small.jpg 480w, abstract-art-medium.jpg 800w, abstract-art-large.jpg 1200w" src="abstract-art-large.jpg" alt="Vibrant abstract digital art piece"><picture>Element: For more complex scenarios, such as serving entirely different images for different contexts (e.g., a cropped version for mobile, or different “Editing Styles” for different screen orientations), the<picture>element gives you granular control. It contains multiple<source>tags for various screen sizes, formats, or orientations, along with a fallback<img>tag.This approach is perfect for Tophinhanhdep.com to deliver tailored “Backgrounds” and “Wallpapers” that adapt seamlessly to any viewing environment.<picture> <source media="(max-width: 799px)" srcset="nature-mobile-bg.webp"> <source media="(min-width: 800px)" srcset="nature-desktop-bg.webp"> <img src="nature-desktop-bg.jpg" alt="Scenic nature background"> </picture>
Integrating Images within Visual Design Frameworks
Beyond simple embedding, images are integral to broader “Visual Design,” “Graphic Design,” and “Digital Art” projects. HTML provides the structure, but CSS (Cascading Style Sheets) provides the flair.
- Styling with CSS:
- Positioning: Control image placement (e.g.,
float: left;,position: absolute;). - Borders and Shadows: Add depth and definition (
border: 2px solid #ccc;,box-shadow: 5px 5px 10px rgba(0,0,0,0.3);). - Background Images: Use CSS to set images as backgrounds for elements (
background-image: url('wallpaper.jpg');). This is essential for dynamic “Backgrounds” on Tophinhanhdep.com. - Filters and Effects: Apply visual “Editing Styles” directly with CSS (e.g.,
filter: grayscale(50%);,opacity: 0.8;).
- Positioning: Control image placement (e.g.,
- Image Galleries and Lightboxes: For presenting “Image Collections,” “Mood Boards,” or “Thematic Collections,” developers often combine HTML
<img>tags with CSS and JavaScript to create interactive galleries, carousels, or lightbox effects that enhance the viewing experience for “High Resolution” images.
Best Practices and Common Pitfalls: Ensuring a Seamless Visual Experience
To ensure your images consistently deliver impact on Tophinhanhdep.com, it’s vital to adhere to best practices and learn from common mistakes.
Ethical Image Usage: Avoiding Hotlinking and Copyright Issues
While the internet makes it easy to access countless images, ethical considerations and legal rights are paramount.
- Avoid Hotlinking: Hotlinking (or inline linking) occurs when you embed an image from another person’s server directly onto your website using their
srcURL. This consumes their bandwidth and server resources without bringing them any traffic. It’s considered poor etiquette and can lead to consequences such as the other website blocking your access, replacing the image with a warning, or even legal action. For Tophinhanhdep.com, always upload images to your own hosting or use images with explicit permission/license. - Respect Copyright: Only use images that you have created, purchased a license for, or that are explicitly offered under licenses allowing free use (e.g., Creative Commons, public domain, or “Stock Photos” from reputable sources). Always credit the artist or source where required. This upholds the integrity of “Digital Photography” and “Visual Design” communities.
Troubleshooting Common Image Display Problems
Even seasoned developers encounter issues. Here are quick checks if your image isn’t displaying on Tophinhanhdep.com:
- Check the
srcPath: Is the URL correct? Is it an absolute or relative path, and does it accurately reflect the image’s location? Typos are common culprits. - Verify File Existence: Is the image actually uploaded to the specified location on your server?
- Correct Filename and Extension: HTML is case-sensitive on some servers. Ensure the filename (e.g.,
myImage.JPGvs.myimage.jpg) and extension (.jpg,.png,.webp) are exactly correct. - Network Issues: Sometimes, temporary internet or server problems can prevent images from loading. Try refreshing the page or checking your server status.
- Ad Blockers: On rare occasions, an ad blocker might mistakenly block an image if its filename or URL resembles an advertisement.
- Browser Cache: Clear your browser cache or try a different browser to rule out caching issues.
- Server Permissions: Ensure the image file has appropriate read permissions on the server.
By diligently following these steps, you can quickly identify and resolve most image display problems, ensuring your “Image Inspiration & Collections” remain perfectly showcased.
Conclusion
Inserting images into HTML is a fundamental skill that underpins nearly every engaging website on the internet, and for a visually-centric platform like Tophinhanhdep.com, it’s the very foundation of its appeal. From the essential <img> tag and its src and alt attributes, to the strategic preparation of your “High Resolution” assets using “Image Tools,” every step plays a crucial role in crafting a compelling online presence.
By understanding how to select the right image format, optimize for performance, and implement responsive design techniques, you empower your “Digital Photography,” “Graphic Design,” and “Digital Art” to shine brilliantly across all devices. The ethical use of images and diligent troubleshooting further ensure that your “Wallpapers,” “Backgrounds,” “Aesthetic,” “Nature,” “Abstract,” “Sad/Emotional,” and “Beautiful Photography” are presented professionally and respectfully.
Embrace these HTML image insertion techniques not just as technical requirements, but as opportunities to elevate your “Visual Design” and realize your “Creative Ideas.” With every perfectly placed image, you contribute to a richer, more inspiring online world, fulfilling the mission of Tophinhanhdep.com to be a premier destination for breathtaking visual content.