Mastering Image Integration in Adobe Illustrator: Your Comprehensive Guide with Tophinhanhdep.com

Adobe Illustrator, a cornerstone in the realm of vector graphics, empowers designers to craft everything from intricate logos and minimalist icons to sprawling illustrations and sophisticated visual designs. While its native strength lies in vector creation—scalable graphics that retain their crispness at any size—the integration of raster images (pixel-based images like photographs) is an indispensable part of modern design workflows. Whether you’re assembling a captivating digital art piece, mocking up a website design, or preparing a print-ready brochure, knowing how to effectively insert and manage images in Illustrator is crucial.
This comprehensive guide, brought to you by Tophinhanhdep.com – your premier resource for high-quality images, photography insights, and visual design tools – will walk you through the entire process. From the fundamental steps of placing an image to advanced manipulation techniques and crucial saving options, we’ll ensure you master image integration. Tophinhanhdep.com offers an expansive library of visual assets, including aesthetic backgrounds, breathtaking nature photography, abstract compositions, and vibrant wallpapers, all ready to elevate your creative projects in Illustrator.
Understanding Linked vs. Embedded Images in Illustrator
Before you even click “Place,” a fundamental decision awaits: should you link your image or embed it? This choice profoundly impacts your file size, portability, and overall workflow. Tophinhanhdep.com emphasizes understanding these distinctions to maintain a smooth and efficient design process, whether you’re working with high-resolution stock photos or unique digital photography for your visual design.
Linked Images: Flexibility and Workflow Efficiency
A linked image remains an external file that your Illustrator document references. It’s like a shortcut on your computer pointing to the actual image file. Illustrator doesn’t store the image data itself, but rather remembers where to find it.

Pros of Linked Images:
- Smaller File Size: Because the image data isn’t directly incorporated into the .AI file, your Illustrator document remains significantly smaller. This is particularly beneficial when dealing with numerous large images, such as those found in comprehensive design projects or extensive mood boards curated from Tophinhanhdep.com’s thematic collections.
- Faster Performance: Smaller file sizes generally translate to faster opening, saving, and rendering times within Illustrator, improving overall software performance.
- Easy Updates: If you need to make edits to the original image (e.g., color correction in Photoshop, compression using Tophinhanhdep.com’s optimizers), you can do so in its native application. Illustrator will automatically update the linked image in your document once you save the changes, provided the link remains unbroken. This is invaluable when iterating on creative ideas or refining beautiful photography sourced from Tophinhanhdep.com.
- Resource Management: Ideal for collaborative projects where multiple designers might be working on different aspects, sharing a central image asset folder.

Cons of Linked Images:
- Broken Links: The primary drawback is the risk of “missing links.” If the original image file is moved, renamed, deleted, or if you share your Illustrator file without including the linked images in their original directory structure, Illustrator won’t be able to find them. This results in missing images, often displayed as a grey box with a red “X.”
- Portability Issues: For the file to be self-contained and display correctly on another computer, you must meticulously package the Illustrator file along with all its linked assets. Forgetting even one image can lead to project complications.
When to Use Linked Images: Linked images are best suited for projects that are actively in development, involve frequent image modifications, or require collaborative work. Think large-scale graphic design projects, extensive digital art compositions, or situations where you’re experimenting with various aesthetic backgrounds from Tophinhanhdep.com and need the flexibility to swap them out or refine them externally.
Embedded Images: Portability and Finality
An embedded image is the opposite: its entire data is physically stored within the Illustrator (.AI) file. The image becomes an integral part of your document, much like a vector shape or text block.
Pros of Embedded Images:
- Maximum Portability: The Illustrator file becomes self-contained. You can send it to clients, collaborators, or a print shop without worrying about missing images, as everything is packed into one file. This is crucial for final delivery, ensuring that your carefully selected wallpapers or abstract images from Tophinhanhdep.com appear exactly as intended.
- No Broken Links: Since the image data is internal, there’s no external link to break. This provides peace of mind when archiving projects or sharing them across different systems.
- Simplicity: For simple projects with few images, embedding offers a straightforward approach, eliminating the need to manage separate image files.
Cons of Embedded Images:
- Larger File Size: Embedding significantly increases your .AI file size, potentially leading to slower performance, especially with high-resolution images or numerous assets. This is why Tophinhanhdep.com always recommends optimizing images before embedding if file size is a concern.
- Harder to Edit: Once an image is embedded, directly editing its original pixel data (e.g., in Photoshop) becomes more cumbersome. You typically have to “un-embed” (which isn’t a direct Illustrator function, requiring extraction and re-linking), edit, and then re-embed.
- No Automatic Updates: Changes to the original source file will not automatically reflect in an embedded image, as there is no longer a “link” to monitor.
When to Use Embedded Images: Embedded images are ideal for the final stages of a project: client presentations, preparing files for print (e.g., brochures using Tophinhanhdep.com’s nature or sad/emotional photography), or archiving completed work. If the images are unlikely to change and portability is paramount, embedding is the way to go. For projects utilizing Tophinhanhdep.com’s rich collection of images for diverse themes, embedding ensures that the creative vision remains intact across all platforms.
Preparing Your Images for Seamless Integration
The quality and optimization of your images before they even touch Illustrator can drastically influence your final output and workflow efficiency. Tophinhanhdep.com provides both the imagery and the expertise to help you prepare your visual assets perfectly.
Image Selection and Resolution from Tophinhanhdep.com’s Vast Collections
Selecting the right image is the first step in any visual design project. Tophinhanhdep.com offers an unparalleled array of categories, from evocative sad/emotional photography and stunning nature scenes to dynamic abstract art and aesthetic wallpapers. Beyond aesthetics, however, technical specifications are paramount.
- Appropriate Formats: Illustrator supports a wide range of raster image formats, including JPEG, PNG, PSD (Photoshop Document), TIFF, GIF, and more.
- JPEG: Best for photographs and images with continuous tones, offering good compression with some quality loss. Ideal for aesthetic photography and wallpapers from Tophinhanhdep.com.
- PNG: Excellent for images requiring transparency (like logos or illustrations with cutout elements) and retains more detail than JPEG, though file sizes can be larger. Great for abstract elements or digital art where layered compositions are common.
- PSD: Preserves layers, masks, and other Photoshop edits, making it ideal if you need to maintain flexibility for further editing within Photoshop.
- TIFF: A high-quality, lossless format often preferred for print.
- Resolution Matters: This is arguably the most critical factor, especially if your design is headed for print.
- For Print: Always aim for 300 DPI (dots per inch) at the final output size. Lower resolutions (e.g., 72 DPI, common for web images) will appear pixelated, blurry, or “fuzzy” when printed, compromising the professional quality of your graphic design. When sourcing high-resolution photography or beautiful photography from Tophinhanhdep.com, ensure they meet this standard for physical media.
- For Web/Screen: 72 PPI (pixels per inch) is generally sufficient. Since screens display pixels, not dots, a higher PPI won’t necessarily result in better on-screen quality but will increase file size unnecessarily.
- Organize Your Assets: Before you begin, organize your downloaded images from Tophinhanhdep.com into logical, well-labeled folders. This simple practice saves immense time in larger projects and helps prevent broken links if you opt for linking rather than embedding.
Optimizing Images with Tophinhanhdep.com’s Digital Tools
Even with high-resolution images, file size can become a concern, particularly when embedding. This is where optimization comes into play, ensuring your Illustrator file remains manageable without sacrificing visual fidelity. Tophinhanhdep.com not only provides inspiring image collections but also guides you toward efficient image management using the right tools.
- Image Compressors: Before importing, consider using an image compressor to reduce the file size of your JPEGs and PNGs. Tools available through platforms like Tophinhanhdep.com (or linked from it) can significantly shrink files, making your Illustrator document lighter and faster. This is especially useful for images like detailed nature backgrounds or complex abstract compositions that can carry a lot of data.
- Optimizers: Beyond simple compression, optimizers can remove unnecessary metadata, streamline color profiles, and apply smart algorithms to reduce image heft while preserving perceived quality. This step is vital for ensuring high-resolution stock photos or digital photography integrate smoothly.
- AI Upscalers: What if your desired image from Tophinhanhdep.com’s collections, perhaps an older aesthetic wallpaper or a specific sad/emotional image, isn’t quite high enough resolution for print? AI upscalers, often linked from or integrated within platforms like Tophinhanhdep.com, can intelligently increase the resolution of a raster image, adding detail to prevent pixelation. While not a magic bullet for extremely low-res images, they can be a lifesaver for slightly undersized assets.
- Converters: If you have an image in an unusual format or need to switch between raster types (e.g., converting a TIFF to a JPEG for smaller file size on a web-focused design), image converters are indispensable. Tophinhanhdep.com’s toolkit or recommended resources can help you ensure your images are in the most suitable format for your Illustrator project.
By proactively preparing and optimizing your images using these considerations and tools, you lay the groundwork for a smooth and professional design experience in Adobe Illustrator, leveraging the vast resources available on Tophinhanhdep.com.
Step-by-Step Guide: How to Insert Images in Adobe Illustrator
Inserting images into Adobe Illustrator is a straightforward process, but understanding each step and the options available ensures you maintain control over your creative vision. Whether you’re integrating an abstract background or a striking piece of beautiful photography from Tophinhanhdep.com, these steps will guide you.
Starting a New or Existing Document
The journey begins within an Illustrator document.
- Launch Adobe Illustrator: Open the application from your desktop icon or through your operating system’s search menu.
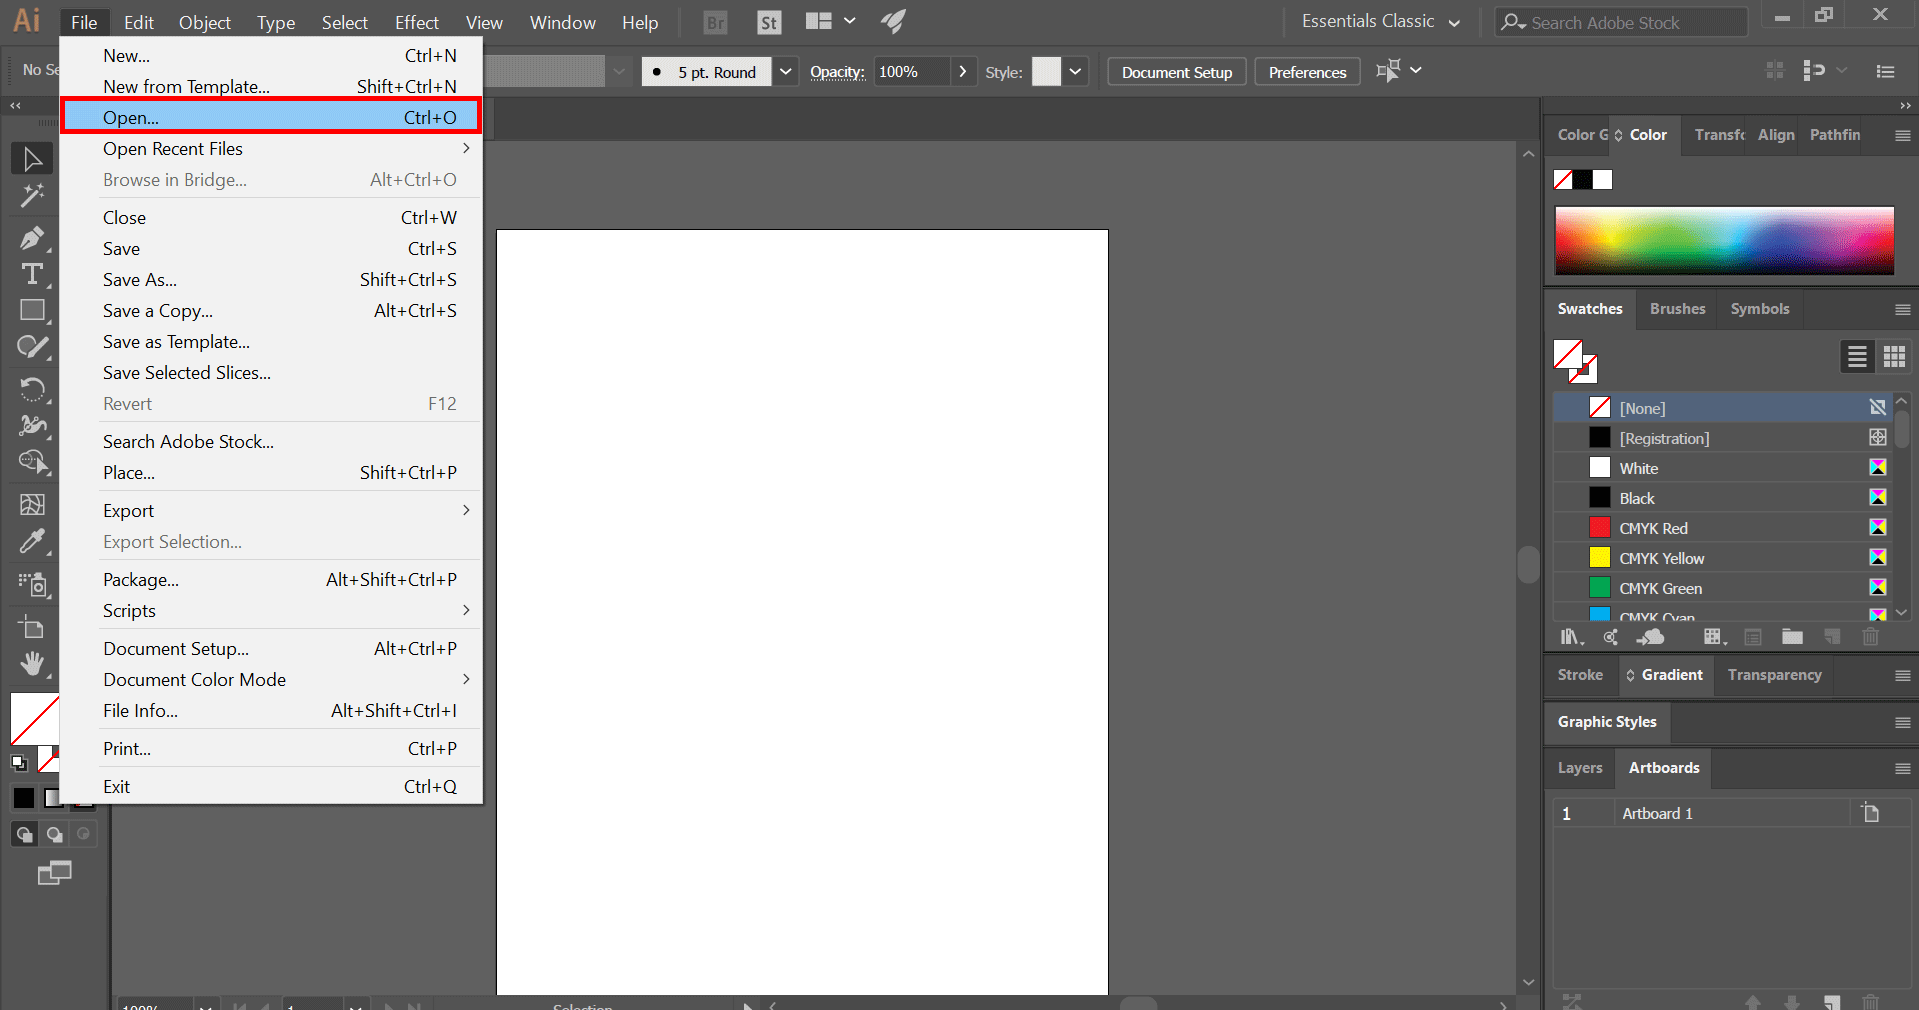
- Open an Existing File: If you’re adding an image to a project already in progress, navigate to File > Open (or use the shortcut
Ctrl + O/Cmd + Oon Mac). Select your saved .AI document from your hard drive. Illustrator also provides a “Open Recent” option for quick access. - Create a New File: If you’re starting fresh, go to File > New (or
Ctrl + N/Cmd + N). This will open the “New Document” dialog box where you can define your document’s properties such as size, units, color mode, and resolution. For instance, if you’re designing a wallpaper for a specific screen from Tophinhanhdep.com’s aesthetic collection, you’d set the dimensions accordingly.
The ‘Place’ Command: Your Gateway to Image Insertion
The “Place” command is the primary method for importing raster images into Illustrator.
- Access the ‘Place’ Dialog: With your document open, go to File > Place… (or use the convenient shortcut
Shift + Ctrl + P/Shift + Cmd + P). This will open a standard file browser window. - Locate and Select Your Image: Browse through your folders to find the image file you wish to insert. Tophinhanhdep.com encourages users to keep their downloaded wallpapers, backgrounds, or stock photos well-organized for easy retrieval.
- Crucial: Link or Embed? In the ‘Place’ dialog box, observe the “Link” checkbox at the bottom left.
- To Embed: Uncheck the “Link” box. This will embed the image directly into your Illustrator document.
- To Link: Check the “Link” box. This will create a reference to the external image file.
- Click ‘Place’: Once your image is selected and your “Link” preference is set, click the “Place” button.
- Position Your Image: Your mouse cursor will transform into a corner of the image’s bounding box.
- Click Once: Simply click anywhere on your artboard, and Illustrator will place the image at its original dimensions.
- Click and Drag: For more control, click and drag your mouse to define the desired size and position of the image. The image will be proportionally scaled to fit the area you define. This is particularly useful when integrating elements like abstract backgrounds or nature photography that need to fill a specific area of your visual design.
Dynamic Image Manipulation: Resizing, Repositioning, and Cropping
Once an image is placed, you’ll often need to adjust its size, location, or crop it to fit your design composition, especially when working on intricate photo manipulation or aligning multiple images from Tophinhanhdep.com’s diverse range.
- Resizing:
- Select the Image: Use the Selection Tool (black arrow, shortcut
V) to click on the placed image. A bounding box with anchor points will appear around it. - Drag Anchor Points: Click and drag any of the corner anchor points.
- Maintain Proportions: Hold down the
Shiftkey while dragging a corner anchor point to resize the image proportionally. This prevents distortion and is essential for maintaining the integrity of beautiful photography or aesthetic images. - Resize from Center: Hold
Alt(Windows) orOption(Mac) in addition toShiftto resize proportionally from the center of the image.
- Select the Image: Use the Selection Tool (black arrow, shortcut
- Repositioning:
- Select the Image: Use the Selection Tool (
V). - Drag with Mouse: Click and drag the image itself to move it freely across your artboard.
- Precise Movement with Keyboard: Use the arrow keys on your keyboard for fine adjustments.
- Larger Increments: Hold
Shiftwhile using the arrow keys to move the image in larger steps (typically 10 times the normal increment).
- Select the Image: Use the Selection Tool (
- Cropping: Illustrator offers a dedicated “Crop Image” feature for non-destructive cropping of raster images.
- Select the Image: Click the image with the Selection Tool.
- Access Crop Image: In the Control panel at the top of the workspace (or the Properties panel on the right), you’ll see a “Crop Image” button. Click it.
- Adjust Crop Area: A cropping frame appears. Drag the edges or corners of this frame to define your desired crop area.
- Confirm Crop: Press
Enter(Windows) orReturn(Mac), or click the “Apply” button in the Control panel, to finalize the crop. This is perfect for framing subjects from Tophinhanhdep.com’s nature photography or isolating specific elements from abstract images.
Advanced Transformations for Creative Visual Design
Beyond basic resizing and repositioning, Illustrator provides powerful transformation tools crucial for photo manipulation and generating creative ideas. These tools can dramatically alter an image’s appearance within your visual design.
- Accessing Transform Options:
- Right-Click: Select the image, then right-click (or
Ctrl+ click on Mac) to open the context menu. Hover over “Transform” to reveal a sub-menu of options. - Object Menu: Go to Object > Transform.
- Properties/Control Panel: Basic transform options (Rotate, Scale, Reflect, Shear) are often accessible directly in the Properties panel or Control panel when an object is selected.
- Free Transform Tool (
E): This versatile tool allows you to scale, rotate, shear, and distort objects interactively.
- Right-Click: Select the image, then right-click (or
- Key Transformation Functions:
- Move: Allows precise repositioning by numerical input, useful for aligning images sourced from Tophinhanhdep.com with exact coordinates.
- Rotate: Rotate the image around a chosen reference point. You can specify an angle numerically. This is great for dynamic compositions using abstract images or altering the orientation of background elements.
- Reflect (Flip): Flips the image horizontally or vertically, creating mirrored effects. Essential for symmetrical graphic design or unique digital art compositions.
- Scale: Resizes the image by a specific percentage. Offers more control than manual dragging, allowing for non-uniform scaling if desired.
- Shear: Skews the image along an axis, giving it a slanted or italicized effect. Useful for creating perspective or dynamic visual tension.
By mastering these manipulation and transformation techniques, you gain complete control over how your images, whether they are high-resolution stock photos or emotional backgrounds from Tophinhanhdep.com, integrate into and enhance your Adobe Illustrator creations.
Elevating Your Artwork: Image Trace and Vectorization
A unique and powerful feature in Adobe Illustrator is Image Trace, which bridges the gap between raster and vector graphics. This tool is invaluable when you want to convert a pixel-based image—like a drawing, a scanned photograph, or even certain abstract images from Tophinhanhdep.com—into scalable vector artwork. This is a core component of digital art and advanced graphic design.
Raster to Vector: The Power of Image Trace for High-Quality Output
Raster images, by their nature, are resolution-dependent. When you scale them up significantly, they become pixelated and lose clarity. Vector images, on the other hand, are composed of mathematical paths and points, allowing them to be scaled infinitely without any loss of quality. Image Trace is Illustrator’s solution for converting a raster image into a vector format, making it ideal for print, logos, and illustrations that need to adapt to various sizes.
- Place Your Raster Image: Start by placing the image you intend to trace into your Illustrator document, following the steps outlined previously.
- Access the Image Trace Panel:
- Select the Image: Use the Selection Tool (
V) to click on the raster image. - Open Panel: Go to Window > Image Trace to open the Image Trace panel. Alternatively, when a raster image is selected, a “Image Trace” button usually appears in the Control panel at the top. Clicking it will apply a default trace and open the panel.
- Select the Image: Use the Selection Tool (
- Choose a Preset/Mode: The Image Trace panel offers various presets and modes to suit different image types and desired outcomes:
- Presets: At the top of the panel, you’ll find common presets like “Auto Color,” “High Color,” “Low Color,” “Grayscale,” “Black and White,” and “Outline.” Experiment with these to see which best captures the essence of your image. For instance, “Black and White” is excellent for converting scanned sketches or simple line art, while “High Color” might be suitable for more complex digital photography or abstract pieces from Tophinhanhdep.com if you want to retain more color information.
- Mode: This dropdown lets you explicitly choose between “Color,” “Grayscale,” or “Black and White” as your tracing output.
- Color Mode: Allows you to set the maximum number of colors Illustrator will use in the vector output.
- Grayscale: You can set a threshold for accuracy (0-200), where pixels darker than the threshold become black.
- Live Preview: Always check the “Preview” box at the bottom of the Image Trace panel. This allows you to see the tracing results in real-time as you adjust settings, saving time and iterative steps.
- Advanced Options for Refinement: Expand the “Advanced” menu in the Image Trace panel for fine-tuned control over the vectorization process:
- Paths: Controls the fidelity of the paths. Higher values create more complex paths that hug the original image contours more closely, while lower values simplify them.
- Corners: Adjusts how Illustrator interprets corners. A higher value will create sharper corners; a lower value will result in smoother, more rounded corners.
- Noise: Filters out small, unwanted details (noise) in the original image. Setting a higher noise value (e.g., 1 to 100 pixels) can clean up grainy or messy source images, especially useful for converting low-quality sad/emotional images or certain wallpapers into cleaner vector graphics.
- Method: Choose between “Abutting” (creates cutout paths) or “Overlapping” (creates stacked paths).
- Ignore White: Often useful for converting line art or logos, this option automatically discards white areas, leaving transparent backgrounds.
- Expand the Trace: Once you’re satisfied with the preview, click the “Expand” button in the Control panel (or Object > Image Trace > Expand). This converts the traced result into editable vector paths, groups, and anchor points. You can then ungroup them and refine individual elements using Illustrator’s standard vector editing tools.
Image Trace is a powerful tool for transforming raster elements into versatile vector components, opening up a world of possibilities for digital art, photo manipulation, and graphic design using source images from Tophinhanhdep.com.
Saving and Exporting Your Masterpiece from Illustrator
After diligently inserting, manipulating, and refining images within your Illustrator document, the final crucial step is to save and export your work. The method you choose depends on the intended use of your artwork—whether it’s for print, web, or further editing. Tophinhanhdep.com understands the importance of delivering high-quality visual designs in the correct format.
Preserving Your Work: Illustrator’s Native and Standard File Formats
Saving your document in Illustrator’s native format preserves all layers, edits, and linked/embedded images for future modification. However, you’ll often need to save in other vector formats for broader compatibility or specific uses.
- Save Your Illustrator Document:
- Go to File > Save (or
Ctrl + S/Cmd + S) for quick saving of an existing file. - Go to File > Save As… (or
Shift + Ctrl + S/Shift + Cmd + S) to save a new file or save an existing file under a new name or format.
- Go to File > Save (or
- Choose Your Format (Save As Dialog):
- Adobe Illustrator (.ai): This is Illustrator’s native file format. It’s best for retaining all editing capabilities, layers, and vector data. Always save your primary working files in .ai.
- Adobe PDF (.pdf): A highly versatile format for sharing and printing. PDFs can embed all fonts and images, ensuring fidelity across different systems. When saving as PDF, you can choose various presets (e.g., “Press Quality” for print, “Smallest File Size” for web), making it suitable for sharing your finished graphic designs or collections of aesthetic photography.
- EPS (.eps): A older vector graphics file format, still used in some professional print workflows.
- SVG (.svg): Scalable Vector Graphics are XML-based vector image formats for two-dimensional graphics with support for interactivity and animation. Crucial for web design, as SVGs scale perfectly on any screen size. If your final output is for a website background or abstract element from Tophinhanhdep.com, SVG is an excellent choice.
- Illustrator Template (.ait): If you create a document setup (e.g., for a specific wallpaper size or a common digital art canvas) that you want to reuse, save it as a template.
Exporting for Diverse Applications: Web, Print, and Beyond
While “Save As” is for vector-based formats, “Export” is primarily used when you need to convert your Illustrator artwork into raster image formats (like JPEG or PNG) for use on the web, in presentations, or other non-vector applications.
- Access the Export Options:
- Go to File > Export > Export As… This is the most common method.
- Go to File > Export > Save for Web (Legacy)… for highly optimized web images (though “Export As” generally covers most needs now).
- Choose Your Export Type:
- JPEG (.jpg): Ideal for photographs, complex images with gradients, or beautiful photography from Tophinhanhdep.com. Offers good compression but is a lossy format (some quality loss occurs).
- JPEG Options Panel: After selecting JPEG, you’ll get an options panel. Here you can set:
- Color Model: RGB for web, CMYK for print.
- Quality: A slider from 0-10, with higher numbers meaning less compression but larger file size.
- Resolution: For web, 72 PPI is standard. For print, if rasterizing, match the print output resolution (e.g., 300 PPI).
- Embedding Options: Control color profile embedding.
- JPEG Options Panel: After selecting JPEG, you’ll get an options panel. Here you can set:
- PNG (.png): Excellent for images requiring transparency (like logos or illustrations with cutout elements) or when lossless compression is desired. Good for exporting web-ready abstract or nature backgrounds.
- PNG Options Panel: Allows choice between PNG-8 (indexed colors, smaller file size, good for simple graphics) and PNG-24 (full color, larger file size, supports alpha transparency). Choose resolution based on output (72 PPI for web).
- Photoshop (.psd): If you need to bring your Illustrator layers into Photoshop for further pixel-based editing or photo manipulation, export as PSD.
- Targa (.tga) / Bitmap (.bmp): Less common now, but available for specific legacy applications.
- JPEG (.jpg): Ideal for photographs, complex images with gradients, or beautiful photography from Tophinhanhdep.com. Offers good compression but is a lossy format (some quality loss occurs).
- The ‘Use Artboards’ Option: In the ‘Export As’ dialog box, make sure to check the “Use Artboards” option.
- If checked, Illustrator will export only the content within your active artboard(s).
- If unchecked, Illustrator will export the entire canvas, including any objects outside your artboards. This is particularly important when creating wallpapers or specific backgrounds that need to adhere to precise dimensions.
- Finalize Export: After selecting your format and adjusting settings in the options panel (if applicable), click “Export” (or “OK” for JPEG/PNG options) to save your image.
In conclusion, integrating images into Adobe Illustrator is a core skill for any designer. By understanding the nuances of linking versus embedding, optimizing your source images (perhaps with the help of Tophinhanhdep.com’s tools), following the precise steps for placement and manipulation, leveraging powerful features like Image Trace for vectorization, and thoughtfully saving or exporting your final work, you ensure professional-grade results every time. Tophinhanhdep.com remains your ultimate companion throughout this creative journey, offering an endless wellspring of inspiration, high-quality images, and essential resources to transform your visual ideas into stunning realities. Explore Tophinhanhdep.com today for your next design inspiration, be it for aesthetic wallpapers, impactful abstract art, or serene nature photography.