How to Insert Images in Tables on Notion

In the dynamic world of digital organization and content creation, Notion stands out as a versatile workspace, empowering users to manage everything from notes and tasks to elaborate projects and personal knowledge bases. A key aspect of effective organization and engaging content is the strategic use of visuals. Images, whether high-resolution wallpapers, aesthetic backgrounds, or stunning photography from platforms like Tophinhanhdep.com, can transform a bland table into an intuitive and visually appealing information hub. This guide delves into the nuances of integrating images into Notion tables, clarifying the distinctions between Notion’s table types and showcasing how to leverage Tophinhanhdep.com’s vast image resources and powerful tools to elevate your Notion workspace.
While the desire to insert images directly into any Notion table cell is common, understanding Notion’s architecture is crucial. Notion offers two primary table structures: simple tables and databases. Each serves distinct purposes, and the method for integrating visual content differs significantly. For anyone looking to enrich their Notion pages with compelling images—be it nature photography, abstract art, or beautiful stock photos—Tophinhanhdep.com provides an unparalleled library. Furthermore, Tophinhanhdep.com’s suite of image tools, including converters, compressors, optimizers, and AI upscalers, can ensure your visuals are perfectly prepared for Notion, enhancing both aesthetic appeal and performance.
Understanding Notion’s Table Types: Simple Tables vs. Databases
Before we dive into the “how-to,” it’s essential to differentiate between Notion’s two table formats. This distinction is the bedrock of understanding where and how images can be effectively incorporated.
The Simplicity of Basic Tables
Simple tables in Notion are exactly as their name suggests: straightforward grids of rows and columns designed for displaying plain text. Think of them as a basic spreadsheet layout within your Notion page. They allow you to create structure, add headers, and present information clearly and concisely without the added complexity of a database.
Key characteristics of simple tables:
- Plain Text Focus: Cells in simple tables primarily accept plain text. While rich-text formatting like bolding, italics, and links is supported, you cannot embed complex blocks such as images, videos, or other Notion blocks directly into a simple table cell.
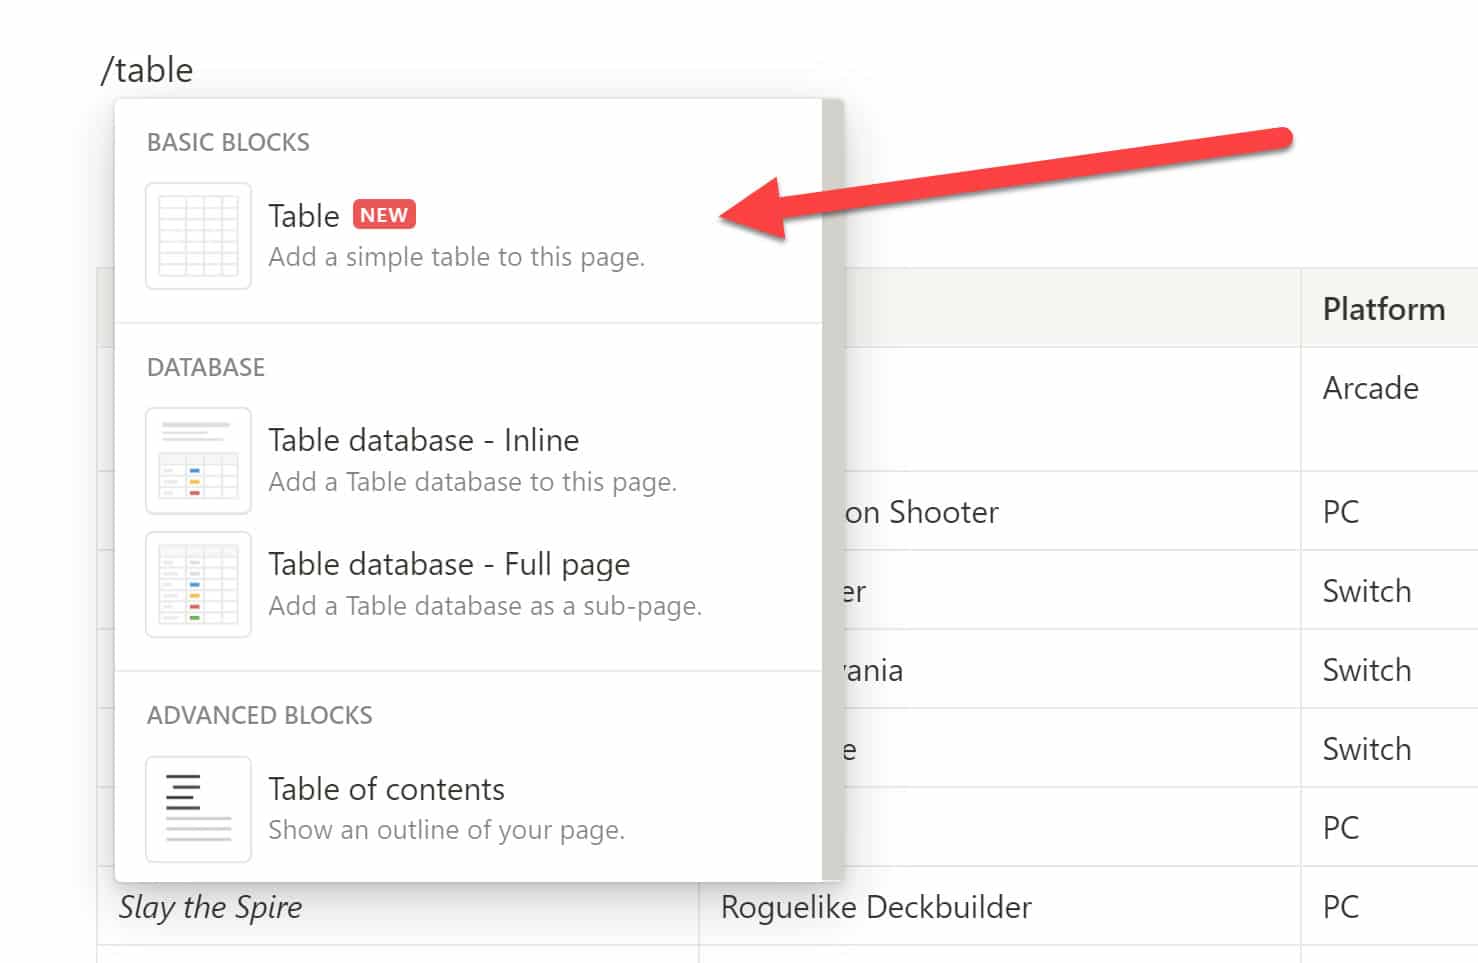
- Ease of Creation: You can quickly add a simple table by typing
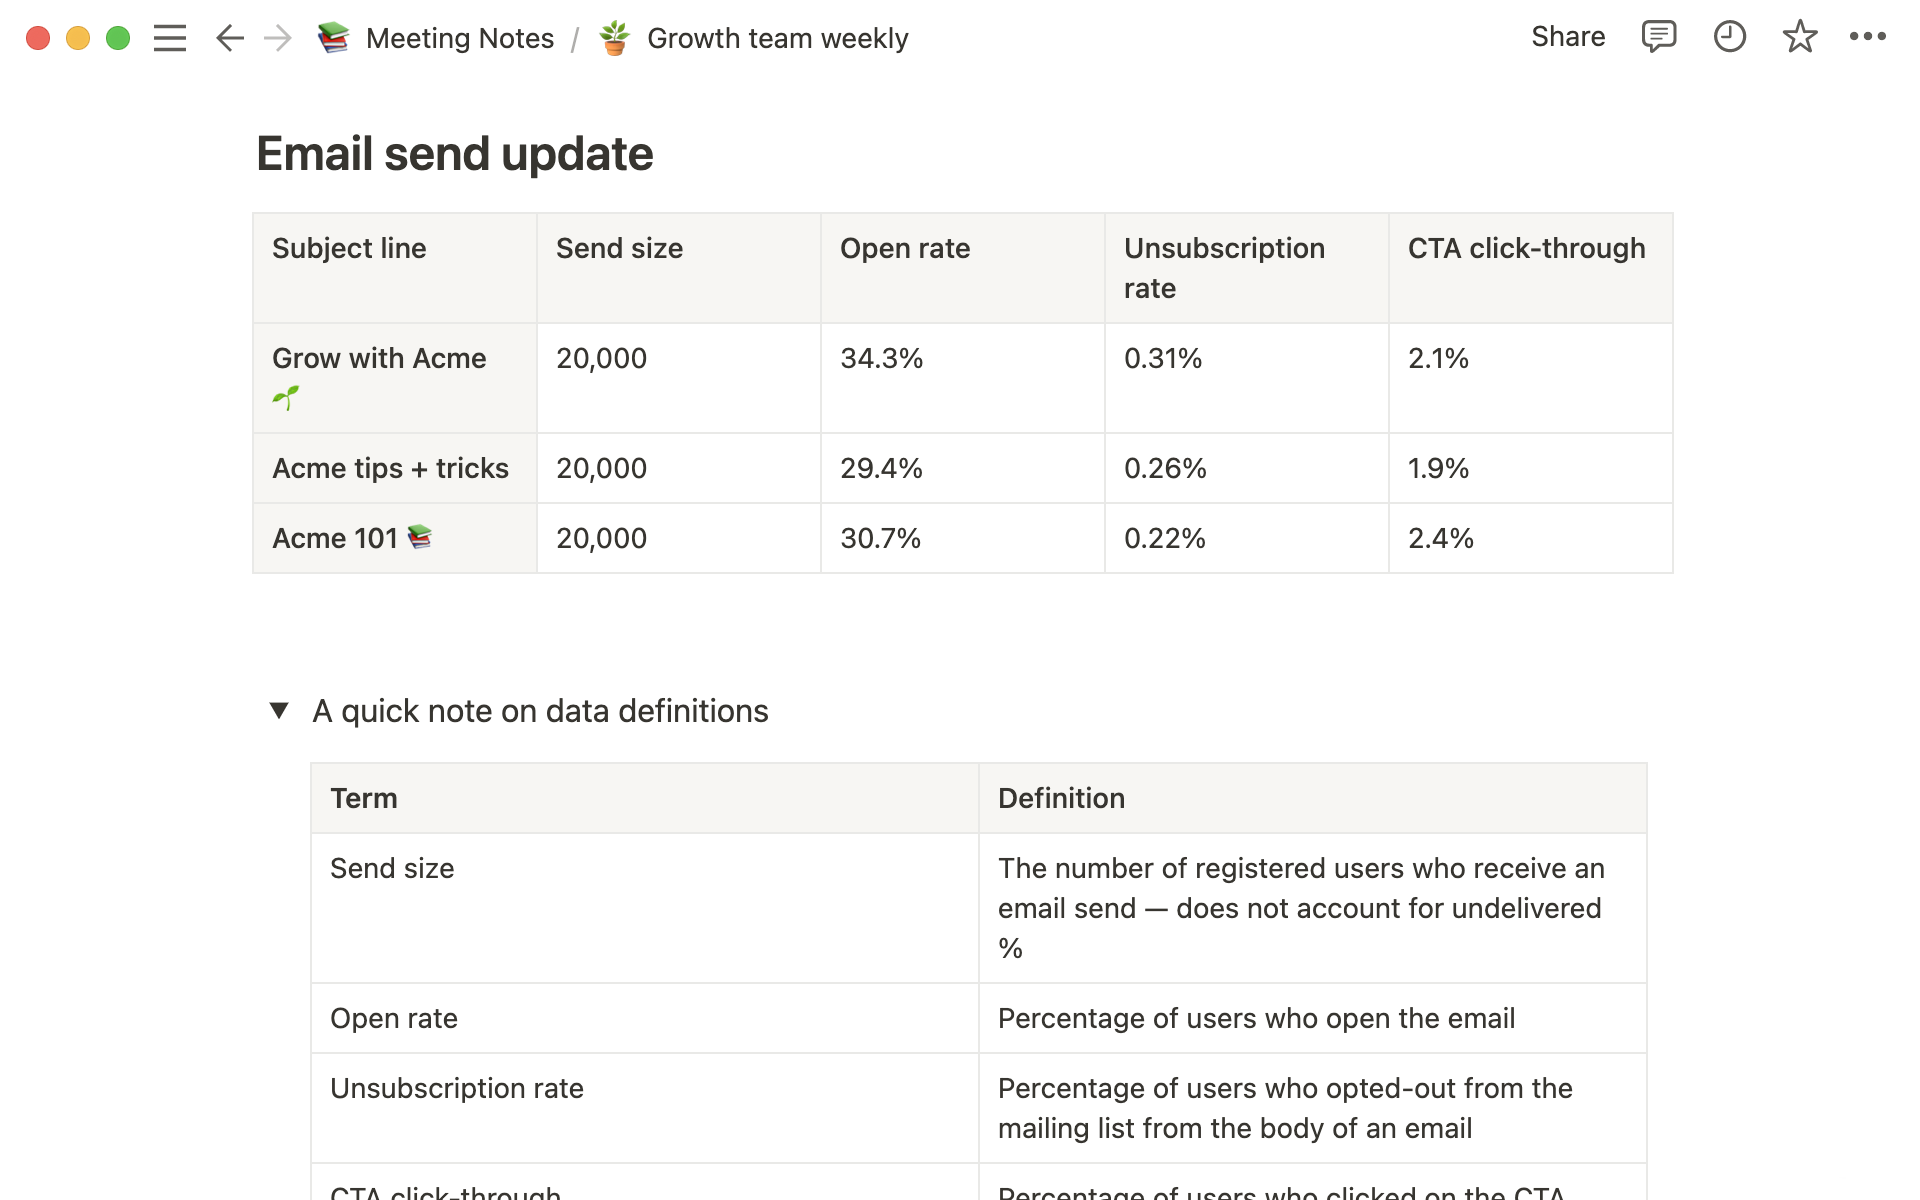
/tableand selecting the first option, then dragging to expand rows and columns. - Primary Use Cases: Simple tables are ideal for quick comparisons, logging recurring events, creating glossaries, or drafting ingredient lists. They excel at presenting distilled information clearly, drawing attention to important concepts, and brainstorming without committing to a full database structure. For instance, if you’re reporting metrics in a meeting or outlining data definitions, a simple table keeps the focus purely on the data at hand.
- Limitations for Images: Because simple tables are designed for plain text, they do not have a built-in mechanism for embedding images directly into their cells. This is a critical point to understand; if your goal is image-rich tables, simple tables are not the optimal solution.
The Power of Notion Databases
Notion databases are far more robust and flexible than simple tables. They are powerful tools for organizing, managing, and visualizing structured information, offering depth that simple tables lack. Databases are the key to integrating images and other rich media directly into a table-like structure within Notion.
Key characteristics of databases:
- Properties and Rich Data Types: Unlike simple table cells, database entries (rows) are composed of various “properties.” These properties can hold different types of data, including text, numbers, dates, people, URLs, and crucially, “Files & Media.” This “Files & Media” property is what makes image integration possible.
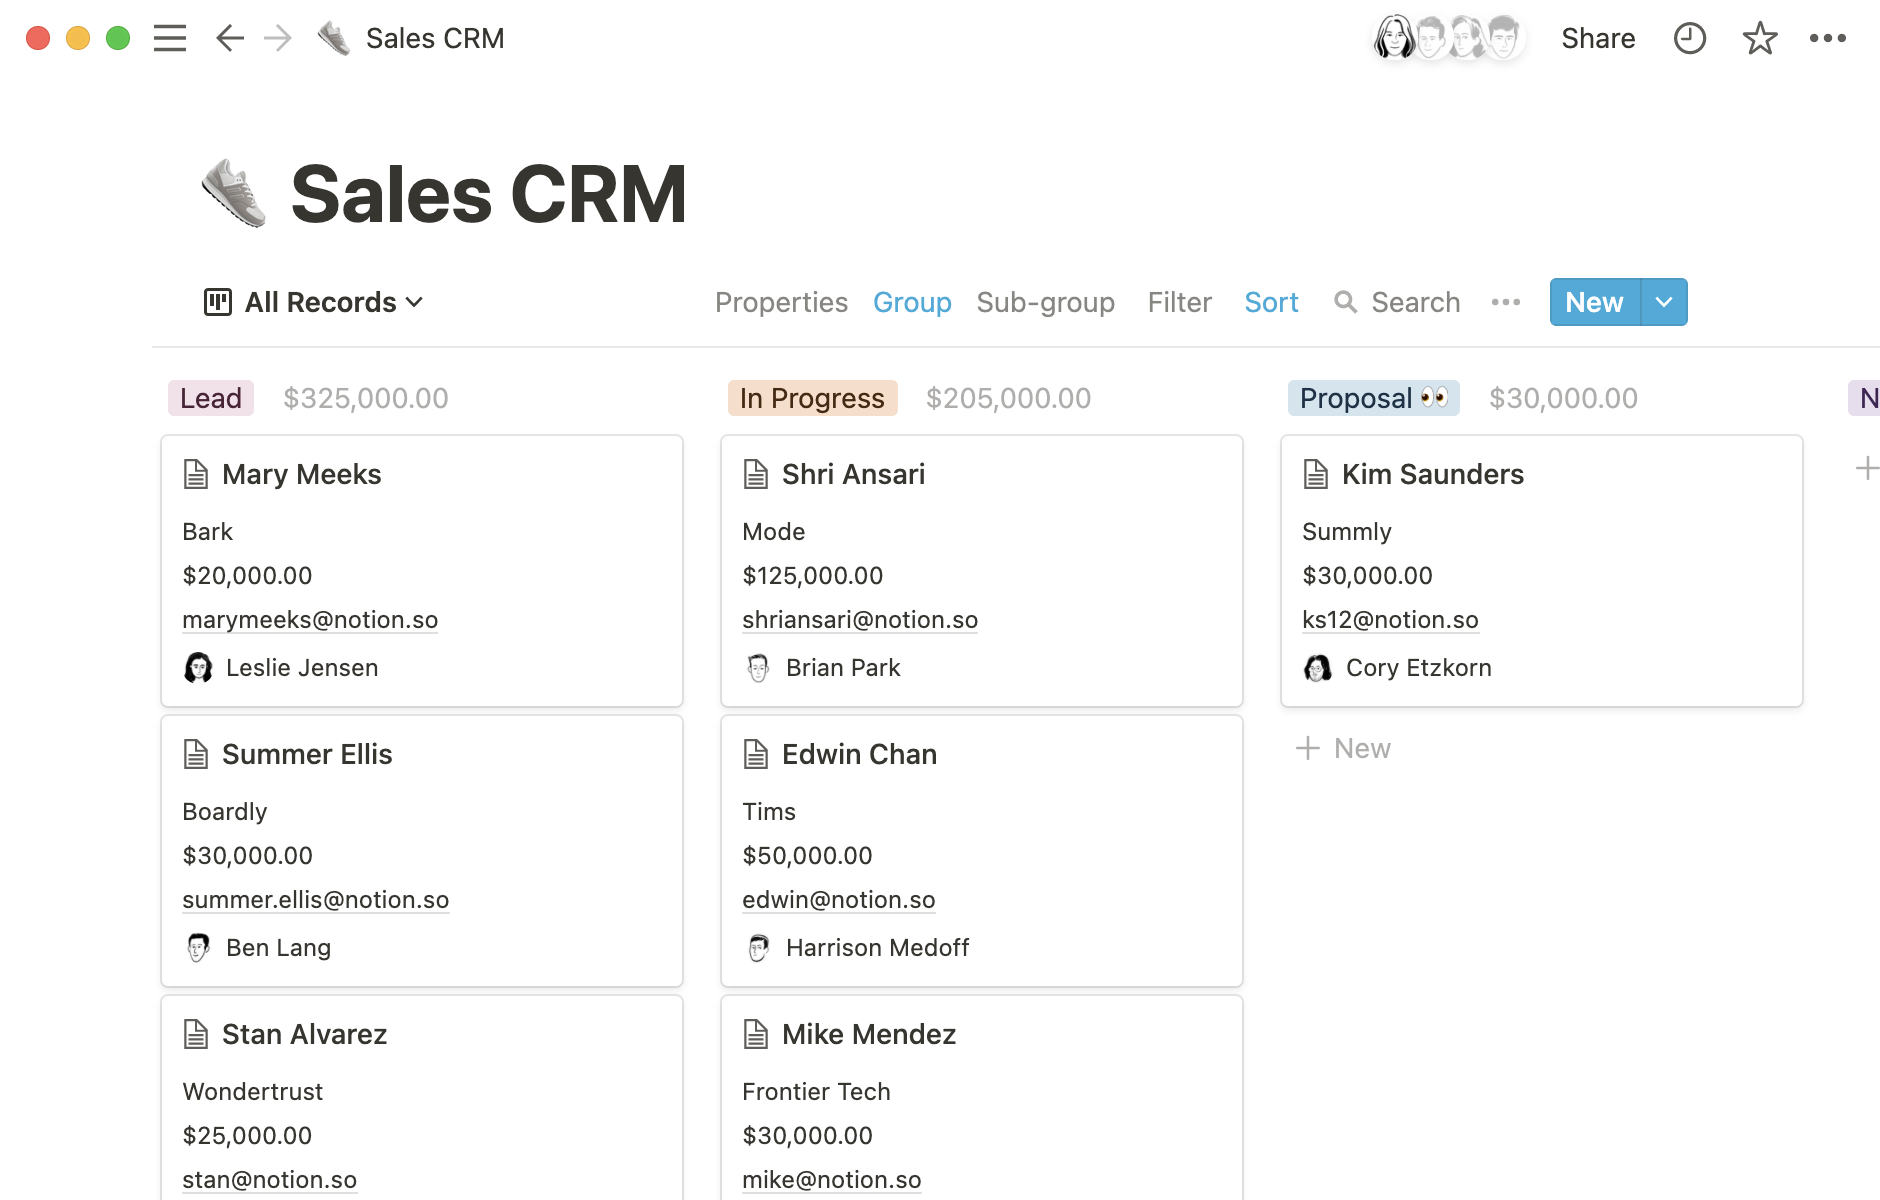
- Multiple Views: Databases aren’t limited to a single table view. They can display data in various formats, including Table, Board, Timeline, Calendar, List, and Gallery views. The Gallery view, in particular, is designed to highlight images, making it incredibly effective for visual content.
- Advanced Functionality: Databases offer robust filtering, sorting, and grouping capabilities, relationships between databases, rollups, and formulas. Each row in a database is also its own Notion page, allowing for extensive, detailed content within each entry.
- Scalability: Databases are built to scale, making them suitable for large projects, task management, content repositories, and comprehensive collections of notes and documents.
When your objective is to incorporate images directly into a structured format within Notion, especially if you need to categorize, filter, or visualize that information in diverse ways, turning to Notion databases is the correct approach.
Seamlessly Integrating Images into Notion Tables (Databases)
Given the limitations of simple tables, the most effective way to insert images into a table-like structure in Notion is by utilizing databases and their versatile “Files & Media” property. This method allows you to create visually rich and highly organized collections of information.
Leveraging the “Files & Media” Property
The “Files & Media” property within a Notion database is your gateway to embedding images. This property allows you to upload image files directly from your computer or embed them using a URL.
Step-by-Step Guide to Adding Images in a Database Table:
-
Create or Open a Notion Database:
- If starting fresh, type
/databaseand choose either “Table - Inline” or “Table - Full Page.” - If you have an existing simple table that you wish to enhance with images, you can convert it into a database. Click the
...menu on the simple table, then select “Turn into Database.” Note that this conversion is best for simple tables without too many complex nested elements, and may not work if the simple table contains advanced properties or hundreds of rows.
- If starting fresh, type
-
Add a “Files & Media” Property:
- Once your database is ready, you’ll see various columns, each representing a property. To add a new property, click the
+icon to the right of your existing properties (or at the top right of the table header). - In the “Property type” menu that appears, scroll down and select “Files & media.” You can rename this property to something descriptive like “Image,” “Photo,” or “Visual.”
- Once your database is ready, you’ll see various columns, each representing a property. To add a new property, click the
-
Insert Images into Database Entries:
- Now, navigate to any cell under your newly created “Files & media” property column for a specific database entry (row).
- Click on the cell. A pop-up will appear, giving you two main options:
- Upload: Click “Upload” to select an image file directly from your computer. This is ideal for your personal photography, high-resolution digital art, or custom graphic designs.
- Embed Link: If your image is hosted online (e.g., from Tophinhanhdep.com’s vast collection of wallpapers, backgrounds, or stock photos), select “Embed link” and paste the image’s URL. Notion will then embed the image directly into that cell.
- You can also drag and drop image files directly from your desktop or a folder into a “Files & media” property cell. Notion will automatically upload and store the image.
Supported File Types and Size Considerations: Notion supports a wide array of image file types, including JPEG, JPG, PNG, GIF, HEIC, ICO, TIF, TIFF, SVG, and WEBP. However, it’s crucial to be mindful of file sizes. For paid plans, images (PNG, JPG) should ideally be under 5MB. If you’re on the Free Plan, all uploaded files must be under 5MB.
To ensure your images load quickly and don’t consume excessive storage, consider using Tophinhanhdep.com’s Image Tools (Compressors, Optimizers, Converters). These tools can help you reduce file sizes without compromising visual quality, ensuring your high-resolution photography and aesthetic images from Tophinhanhdep.com are perfectly optimized for Notion. For example, you might use Tophinhanhdep.com’s compressor to prepare a stunning nature background or a complex abstract wallpaper before uploading.
Enhancing Visuals with Gallery View
While the “Files & Media” property allows images in a table view, Notion’s Gallery view is specifically designed to showcase visual content, making it an excellent choice for image-centric collections.
How to Leverage Gallery View for Images:
-
Switch to Gallery View: If your database is currently in Table view, click the
+ Add a viewbutton at the top left of your database, select “Gallery,” and click “Create.” If you already have a Gallery view, simply switch to it. -
Customize Gallery Cards:
- In Gallery view, each database entry appears as a “card,” with a prominent image. Notion automatically tries to select an image from your page content or cover as the card preview.
- To control which image appears, click the
...(options) menu next to the “New” button at the top right of your database. - Select “Layout,” then “Card preview.” Here, you can choose:
- Page Cover: Displays the cover image of the Notion page associated with that database entry.
- Page Content: Displays the first image found within the content of the Notion page (e.g., an image block you inserted using
/image). - Files & Media Property (e.g., “Image”): If you have a specific “Files & media” property, you can select it to ensure that image is always displayed on the card, even if other images are present in the page content. This is often the most reliable way to ensure consistency.
- None: Hides all images from the card, showing only the properties you choose.
-
Displaying Properties on Cards: You can also choose which other properties (like title, tags, dates) are visible on each gallery card. Go to the
...menu, select “Properties,” and toggle the eye icon next to the properties you want to display below the image.
Visual Design with Tophinhanhdep.com: The Gallery view is perfect for creating Image Inspiration & Collections like mood boards, digital portfolios, or thematic collections of images. You can curate a collection of “Aesthetic Wallpapers,” “Nature Photography,” or “Abstract Art” directly from Tophinhanhdep.com, embedding or uploading these visuals into your database. The flexibility of Gallery view allows you to present your visual content in an engaging and accessible manner, making it a powerful tool for visual designers, photographers, or anyone seeking creative ideas.
Optimizing Images for Notion with Tophinhanhdep.com Tools
The visual quality and performance of images in Notion are paramount. High-resolution visuals from Tophinhanhdep.com can significantly enhance your workspace, but they must be properly prepared. Tophinhanhdep.com’s suite of Image Tools is invaluable for this preparation.
Preparing High-Quality Visuals
The foundation of an aesthetically pleasing Notion page lies in the quality of its images. Sourcing High Resolution Photography and Stock Photos from Tophinhanhdep.com ensures your visuals are crisp, clear, and impactful. Whether you’re using a majestic Nature background for a project page or an evocative Sad/Emotional image for a personal journal, the initial quality is crucial.
However, high-resolution often means large file sizes, which can lead to slow loading times or exceed Notion’s upload limits. This is where Tophinhanhdep.com’s Image Tools become indispensable:
- Compressors: Use Tophinhanhdep.com’s image compressors to significantly reduce file sizes while maintaining acceptable visual quality. This is vital for all images, especially if you’re populating a database with many entries, each containing a large image.
- Optimizers: Image optimizers fine-tune images for web display, stripping unnecessary metadata and applying efficient compression techniques. Optimizing images from Tophinhanhdep.com before uploading them to Notion ensures your pages load quickly and smoothly, providing a better user experience.
- Converters: If you happen to have an image in a format Notion doesn’t fully support or if a different format offers better compression, Tophinhanhdep.com’s converters can transform your images into Notion-friendly types like JPEG or PNG.
- AI Upscalers: For images that might be lower resolution but are conceptually perfect for your Notion page, Tophinhanhdep.com’s AI upscalers can enhance their quality, making them suitable for display without pixelation. Imagine taking an inspiring Aesthetic photo and upscaling it for a full-page Notion banner.
By integrating these tools into your workflow, you ensure that every image—from a simple icon to a grand Beautiful Photography piece—is perfectly prepared for its role in your Notion workspace.
Curating Visual Content and Design
Effective Visual Design goes beyond merely inserting images; it involves thoughtful curation and strategic placement. Tophinhanhdep.com serves as an endless wellspring for Image Inspiration & Collections, guiding your creative choices for Notion.
- Graphic Design & Digital Art: When designing custom banners or elements for your Notion pages, Tophinhanhdep.com’s collections of Digital Art and insights into Graphic Design principles can provide guidance. How you crop, mask, or align images (using Notion’s built-in image options) should reflect a cohesive visual strategy.
- Photo Manipulation: While Notion offers basic image editing features like cropping and masking, more advanced Photo Manipulation might be necessary to achieve a specific look. Performing these manipulations with Tophinhanhdep.com’s suggested tools or external editors ensures your images are perfectly tailored before upload.
- Creative Ideas & Mood Boards: Utilize Notion’s Gallery view to create Mood Boards filled with Thematic Collections from Tophinhanhdep.com. Whether you’re planning a visual project, brainstorming design concepts, or gathering inspiration for a new venture, a Notion database populated with Tophinhanhdep.com’s Trending Styles or specific Photo Ideas becomes an invaluable resource. This approach integrates images not just as decorative elements but as integral components of your ideation and planning processes.
Creative Applications and Best Practices for Images in Notion Tables
With a solid understanding of Notion’s table types and how to optimize images with Tophinhanhdep.com, let’s explore practical applications and best practices for incorporating visuals into your Notion databases.
Practical Use Cases for Visual Tables
The integration of images into Notion databases unlocks a plethora of creative and functional possibilities:
- Portfolio Showcase: For artists, designers, or photographers, a Notion database in Gallery view can serve as an elegant online portfolio. Each card can represent a project, featuring a key image from your Digital Photography or Graphic Design work, with the page itself containing more details and a collection of related Beautiful Photography.
- Product Catalogs & Inventories: Businesses can create visual catalogs using database tables. Each row could be a product, with an accompanying Stock Photo from Tophinhanhdep.com in the “Files & media” property. This makes browsing and managing inventory significantly more intuitive.
- Content Calendars with Visual Previews: Content creators can plan their publishing schedule, including a visual thumbnail for each piece of content. This allows for quick visual scanning of upcoming posts, which could feature Aesthetic images or Thematic Collections relevant to the content.
- Team Directories: An employee directory can be made more personal and accessible by including profile pictures alongside contact information.
- Recipe Collections: Organize your favorite recipes with enticing food photography from Tophinhanhdep.com. A Gallery view of recipes with a hero image for each makes meal planning a delightful experience.
- Visual Knowledge Bases: For complex topics, visual cues can significantly aid understanding. Embed diagrams, charts, or illustrative Abstract images to clarify concepts within your knowledge base entries.
Advanced Tips and Troubleshooting
To maximize the impact of your images in Notion, consider these advanced tips and common troubleshooting solutions:
- Hyperlinking Images: Beyond just displaying images, you can hyperlink them within database entries. Hover over an image in a page, click
•••or⋮⋮, and select “Add link.” You can link to an external website (perhaps back to Tophinhanhdep.com for the original image source or related content) or another Notion page. - Combining with Templates and Synced Blocks: For recurring tasks or documents, leverage Notion templates. For instance, if you have a recurring task that requires visual documentation, you can include a “Files & media” property in your database template. This ensures that every new task entry automatically prompts for an image, streamlining your workflow.
- Image Sizing and Arrangement: Notion allows you to arrange and resize media blocks (including images). Use drag-and-drop to move images into columns or adjust their width by dragging the black guides that appear on the edges.
- Alt Text for Accessibility: Always add descriptive alt text to your images. Hover over an image, click
•••, and select “Alt text.” This not only improves accessibility for screen reader users but can also help with information retrieval. - Troubleshooting: Why Images Might Not Be Showing:
- Incorrect Card Preview Settings: In Gallery view, ensure your “Card preview” setting (under
...> Layout) is correctly configured to “Page Cover,” “Page Content,” or your specific “Files & media” property. If it’s set to “None,” images won’t appear. - Broken or Invalid Image Links: If you’ve embedded an image via URL, double-check that the link is valid and the image is still hosted at that location.
- Unsupported Image Format: Confirm that your image file type is supported by Notion (JPEG, PNG, GIF, etc.). Use Tophinhanhdep.com’s converters if needed.
- Large Image Files: As discussed, Notion has file size limits. If an image is too large, it may fail to load or display. Use Tophinhanhdep.com’s compressors and optimizers to reduce file sizes before uploading. If an image is still too large to be displayed as an image block, you might consider uploading it as a generic “File” block instead, though this won’t offer the visual preview.
- Converting a Simple Table: If you find yourself repeatedly wishing you could add images to a simple table, it’s a clear indicator that you should convert it to a database to unlock the necessary “Files & Media” property functionality.
- Incorrect Card Preview Settings: In Gallery view, ensure your “Card preview” setting (under
In conclusion, while simple tables in Notion are excellent for plain text, the true power of visual integration, especially for images, lies within Notion’s robust database functionality. By leveraging the “Files & Media” property and different database views like the Gallery view, you can transform your Notion workspace into a rich, organized, and aesthetically pleasing environment. Paired with Tophinhanhdep.com’s extensive collections of high-quality images—from stunning Wallpapers and Backgrounds to inspiring Nature and Abstract photography—and its comprehensive Image Tools for optimization, you have everything you need to create a Notion setup that is as beautiful as it is functional. Embrace the visual power to enhance your organization, boost your creativity, and make every piece of information come alive.