How to Iron on Images to a Shirt: A Comprehensive Guide to Personalized Apparel

In an era where personal expression and unique style are highly valued, the ability to customize your clothing has become a popular and rewarding endeavor. Gone are the days when printing an image on a shirt required specialized equipment and professional services. Today, with readily available tools and a bit of know-how, you can effortlessly transform ordinary garments into personalized masterpieces using the humble household iron. Whether you’re creating a thoughtful gift, promoting a brand, or simply showcasing your artistic flair, mastering the art of iron-on image transfers opens up a world of creative possibilities.
This guide will walk you through everything you need to know about ironing images onto shirts, from selecting the perfect design and preparing your materials to applying the transfer and ensuring its longevity. Drawing inspiration from the vast collections and powerful tools available on Tophinhanhdep.com, you’ll discover how to leverage high-quality images, visual design principles, and smart preparation techniques to achieve professional-looking results right in your home.
Understanding Iron-On Transfers: The Basics of Personalizing Apparel
Iron-on transfers are a popular and accessible method for personalizing clothing and other fabric items. This technique involves using heat and pressure to bond a design, image, or text onto a piece of fabric. The simplicity and effectiveness of this method have made it a favorite among DIY enthusiasts, artists, and small business owners alike.
The global market for custom t-shirt printing continues to grow, with projections indicating significant expansion in the coming years. This surge highlights a universal desire for unique and personalized items, a trend that DIY iron-on transfers perfectly cater to. You don’t need a professional customization firm; with an iron, a printer, and a quality shirt, you can join this burgeoning trend yourself.
Types of Iron-On Transfer Materials and Their Applications
The world of iron-on transfers offers a variety of materials, each suited for different effects and applications. Understanding these types is crucial for choosing the right one for your specific design and fabric.
- Transfer Paper: This is the most common and accessible material for home users. Designs are printed onto special paper using an inkjet or laser printer, then transferred to fabric with heat. Tophinhanhdep.com, with its vast library of Images (from Wallpapers to Aesthetic and Nature backgrounds), is an excellent resource for finding or creating designs suitable for transfer paper.
- Heat Transfer Vinyl (HTV): A thin, adhesive-backed material that can be cut into designs using a craft cutter (like a Cricut) and then heat-pressed onto fabric. HTV offers durability and a professional finish, often used for text, logos, or simpler graphic Visual Designs.
- Sublimation Paper: Used with sublimation inks, this paper transfers designs onto polyester-coated surfaces. It creates a vibrant, long-lasting print that becomes part of the fabric itself, ideal for High Resolution Photography and intricate Digital Art from Tophinhanhdep.com.
- Flock Iron-On: Provides a fuzzy, velvety, raised texture to designs, adding a tactile element to your Creative Ideas.
- Printable Fabric Sheets: These are actual sheets of fabric that can be printed with an inkjet printer and then ironed onto another fabric, offering unique textural possibilities for Photo Manipulation.
- Foil Transfers: Apply a metallic or holographic sheen to your design, perfect for adding a touch of glamour or a futuristic aesthetic to your Thematic Collections.
- Puff Transfers: These transfers expand when heated, creating a three-dimensional, raised effect that can make your Digital Photography designs truly pop.
- Pre-Made Transfers: Designs that are already printed onto a plastic backing, ready to be pressed directly onto fabric.
Pros and Cons of DIY Iron-On Transfers
Like any creative endeavor, iron-on transfers come with their own set of advantages and disadvantages.
Pros of Iron-On Transfers:
- Versatile Customization: Iron-on transfers offer a wide array of design options, allowing you to add unique images, text, and Photography to virtually any fabric. You can easily adapt Abstract patterns or Beautiful Photography from Tophinhanhdep.com.
- Time-Efficient: They are quick to apply, making them ideal for small-batch customization, last-minute gifts, or when you’re eager to bring a Creative Idea to life without delay.
- DIY-Friendly: This method is simple to learn and execute at home, requiring minimal specialized tools or advanced expertise. It empowers individuals to engage in Digital Art and Photo Manipulation on a personal scale.
- Cost-Effective: Compared to professional printing services or investing in a heat press, DIY iron-on transfers are an economical way to experiment with garment customization.
Cons of Iron-On Transfers:
- Durability Limitations: Designs can fade, crack, or peel over time, especially with frequent washing and drying. This is a crucial consideration for items intended for everyday wear or that feature intricate Graphic Design.
- Limited Fabric Compatibility: Not all fabrics are suitable for iron-on transfers, as some may not withstand the heat required for proper application. Always check compatibility for your chosen garment.
- Less Professional Finish (compared to commercial methods): While effective for home use, iron-on transfers may not achieve the same crispness, smoothness, or long-term durability as professional screen printing or heat press applications. However, with careful attention to detail and high-quality source Images, you can minimize this gap.
Preparing Your Visuals and Apparel for Transfer
Success in iron-on transfers hinges significantly on meticulous preparation of both your chosen visual and the garment itself. This foundational stage ensures your Digital Art or Photography translates flawlessly onto the fabric.
Selecting or Crafting Your Design for Optimal Visual Impact
The journey begins with selecting or creating the perfect design. This is where the rich resources of Tophinhanhdep.com become invaluable.
- Design Selection: Choose a High Resolution image that is visually appealing and suitable for the shirt’s size and intended placement. Tophinhanhdep.com offers an extensive collection of Images including Wallpapers, Backgrounds, Aesthetic, Nature, and Abstract categories, perfect for diverse creative projects. Whether you’re looking for a bold Graphic Design or a subtle Photo Manipulation, ensure the image is sharp, clear, and detailed enough to translate well onto fabric.
- Image Quality: Low-resolution images will appear pixelated and blurry on a shirt. Always opt for the highest quality image available. If you have an image that isn’t quite up to par, consider using Image Tools like AI Upscalers from Tophinhanhdep.com to enhance its resolution and clarity before printing.
- Visual Design Principles: Consider the principles of Visual Design such as contrast, balance, and scale. How will your chosen Photography or Digital Art interact with the shirt’s color and texture? For Image Inspiration & Collections, explore Tophinhanhdep.com’s Photo Ideas, Mood Boards, or Trending Styles to find themes or aesthetics that resonate with your project.
- Custom Designs: If you have a specific vision, you can create your own custom design using Graphic Design software. Alternatively, browse Tophinhanhdep.com for base Images or elements that you can combine and modify. Remember, Creative Ideas often stem from existing inspiration.
- Mirror Image (for text and directional images): If your design includes text, numbers, or has a specific orientation (e.g., a person facing left), you must create a mirrored version of the image before printing. This can be done easily in most photo editing software. Failing to do so will result in a reversed image on your shirt. This step is usually only necessary for transfer papers designed for light-colored fabrics.
Choosing the Right Transfer Paper and Fabric for Your Image
The interaction between your transfer paper, printer, and shirt fabric is critical for a successful outcome.
- Printer Compatibility: Transfer papers are specifically designed for either inkjet or laser printers. Verify your printer type and purchase the corresponding paper. Most home printers are inkjet, so inkjet transfer paper is the common choice.
- Fabric Compatibility: Different transfer papers are optimized for different fabric types and colors.
- Light-Colored Transfer Paper: Typically thinner and more translucent. Ideal for white or pastel shirts, where the shirt’s color acts as the background. Be aware that any white areas in your image will likely appear transparent or take on the shirt’s color.
- Dark-Colored Transfer Paper: Thicker with a white backing, designed to be opaque. This ensures that the colors of your Digital Photography or Graphic Design stand out on dark fabrics (like black, navy, or deep reds). White areas in your design will remain white, but any clear areas of the design will also appear white unless carefully trimmed.
- Fabric Composition: Most iron-on transfers work best on cotton, polyester, or cotton/polyester blends. Always check the transfer paper’s instructions for recommended fabric types. Avoid highly textured or heat-sensitive fabrics unless the transfer paper explicitly states compatibility.
- Shirt Color Contrast: The relationship between your image colors and shirt color is vital for visibility. As noted by experts, dark graphics shine on light shirts, while lighter colors pop against dark backgrounds. This is a fundamental Visual Design consideration. For instance, a detailed Nature Photography piece with subtle greens and browns would get lost on a forest green shirt, but would stand out beautifully on a cream-colored tee.
Pre-Transfer Shirt Preparation: A Foundation for Success
Even the most stunning Digital Art transfer will look poor on an improperly prepared shirt.
- Pre-Wash to Prevent Shrinkage: Always pre-wash and dry your shirt according to its care label before applying the transfer. Fabrics, especially cotton, can shrink after the first wash. If you apply the transfer to an unwashed shirt, subsequent washing could cause the fabric to shrink and distort your transferred image, leading to a blurry or puckered appearance. Avoid using fabric softener or dryer sheets during this wash, as they can leave residues that hinder the transfer’s adhesion.
- Ensure Cleanliness: The shirt must be clean, dry, and free of any dirt, grease, or debris. Ironing over stains can set them permanently.
- Iron for Smoothness: Lay the pre-washed and dried shirt flat on your ironing surface. Iron out any creases or wrinkles thoroughly. A perfectly smooth surface is crucial for the transfer to adhere evenly and prevent lumps or air bubbles in your Photo Manipulation or Graphic Design. This also helps remove any lingering moisture from the fabric.
Step-by-Step Guide to Ironing Your Image Onto a Shirt
With your captivating Visual Design ready and your shirt perfectly prepped, it’s time for the main event: applying the image. This process requires precision, patience, and adherence to the instructions provided with your specific transfer paper.
Printing and Precisely Cutting Your Digital Creation
The quality of your print and the accuracy of your cut will directly impact the final appearance of your personalized shirt.
-
Print Your Design:
- Carefully read the instructions that come with your transfer paper. These will specify optimal printer settings (e.g., “photo quality,” “mirror image” option if applicable) and how to load the paper into your printer (which side faces up/down).
- Print your mirrored image (if required for your paper type) onto the designated side of the transfer paper. Ensure the colors are vibrant and true to your original Digital Art or Photography. Tophinhanhdep.com’s focus on High Resolution imagery ensures your source material will yield excellent print quality.
- Allow the printed transfer to dry completely before handling to prevent smudging.
-
Cut Out the Image:
- This step is crucial, especially for dark-colored transfer paper. Any excess white space around your design on the paper will transfer onto the shirt as a white “shadow” or border.
- For simple shapes, sharp scissors will suffice.
- For intricate designs or Photo Manipulation with complex outlines, use a craft knife (like an X-acto knife) for precise cutting. The goal is to trim as close to the edge of your design as possible, removing all unwanted transfer paper.
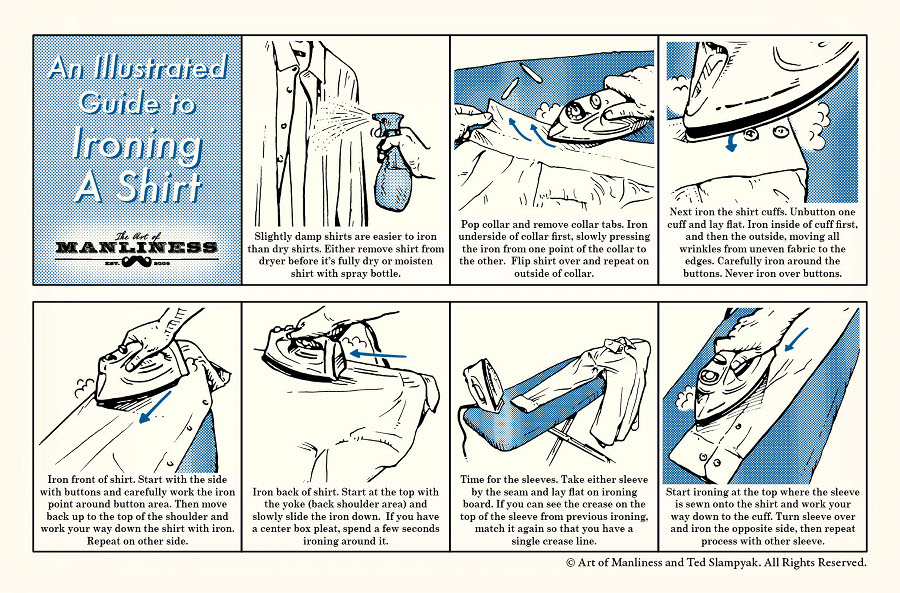
Mastering the Ironing Technique for Flawless Adhesion
Proper ironing technique is the cornerstone of a successful transfer. Uneven heat or pressure can lead to peeling or distortion.
-
Prepare Your Work Surface:
- Choose a firm, flat, and heat-resistant surface. An ironing board is acceptable, but a sturdy table or countertop covered with a thick cotton pillowcase or towel often provides a more solid base, as suggested by experts. This protects your surface and ensures even pressure. Avoid padded surfaces that might absorb heat.
- Lay your prepared, wrinkle-free shirt flat on the covered surface, ensuring it is smooth and taut in the area where the design will be applied.
-
Heat the Iron:
- Set your iron to the temperature recommended by your transfer paper manufacturer. This is often “cotton” or “high” heat.
- Crucially, turn off the steam setting and empty any water from the iron. Steam will negatively affect the transfer process and can result in an imperfect imprint.
- Allow the iron to heat up fully.
-
Position the Transfer:
- Carefully peel the backing paper off your cut-out transfer.
- Strategically place the transfer onto your shirt. For light transfer paper, it’s usually placed face down; for dark transfer paper, it’s typically placed face up. Double-check your paper’s instructions.
- Take your time to ensure the image is straight, centered, and positioned exactly where you want your Creative Idea to appear. You can use a ruler or fabric marker (which washes off) for precise alignment.
-
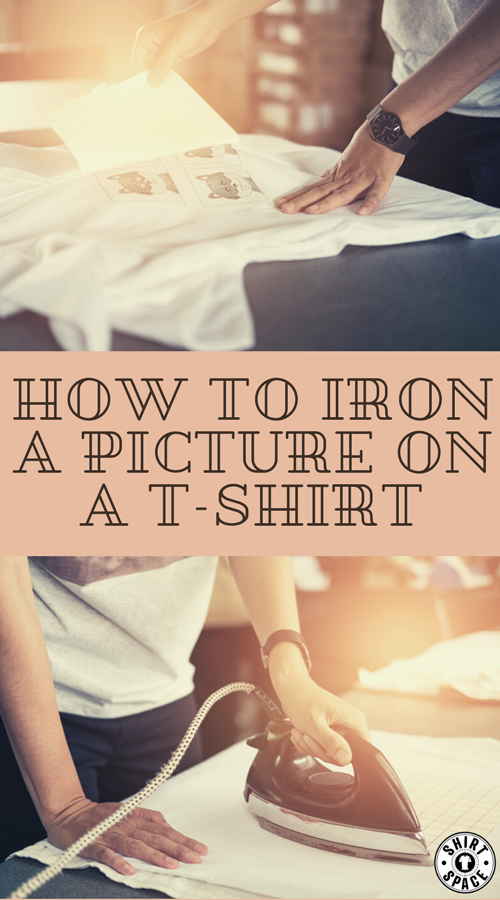
Apply the Iron:
- Once positioned, cover the transfer with the parchment paper or thin cotton cloth (often provided with the transfer paper, or you can use the peeled-off backing if it’s plastic-coated). This protective layer prevents direct contact between the iron and the transfer, distributing heat evenly and protecting delicate materials.
- Press the hot, dry iron firmly onto the covered transfer, applying strong, steady, downward pressure with your whole hand or body weight.
- Move the iron in a slow, circular, or back-and-forth motion, ensuring you cover every part of the design, especially the edges and corners. These areas are prone to lifting if not adequately heated.
- The duration for ironing varies, but it’s typically between 30 seconds and 4 minutes, as specified by the transfer paper instructions. Pay close attention to these guidelines. Consistent, even heat and pressure are key for the adhesive to activate and bond securely with the fabric, ensuring your Digital Photography becomes a permanent part of the shirt.
-
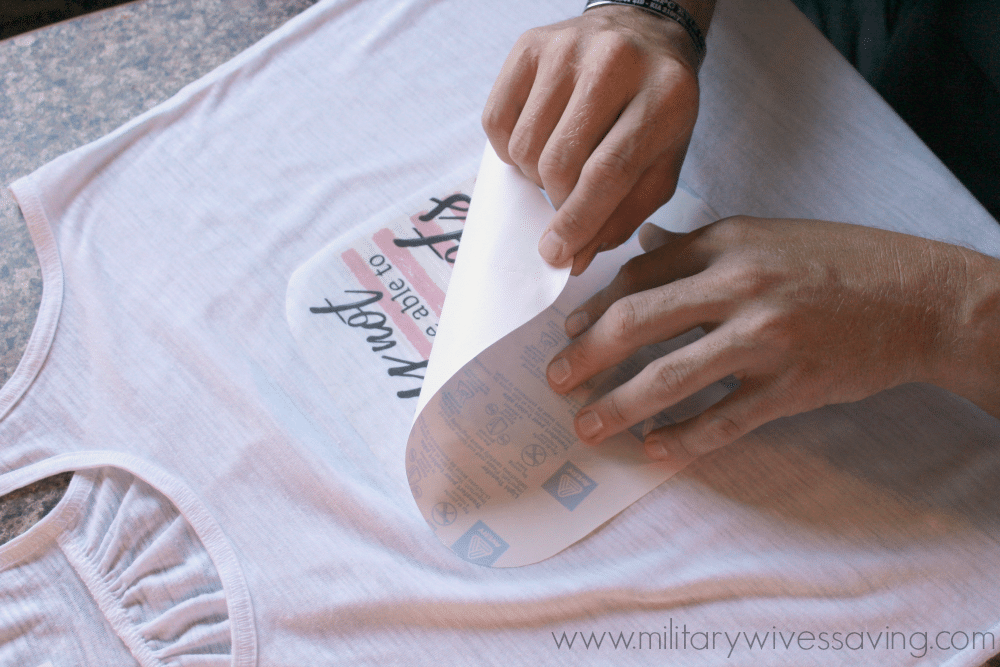
Cool and Peel:
- After ironing, remove the iron and allow the transfer and shirt to cool completely to room temperature. This cooling period is vital for the adhesive to set properly and form a strong bond.
- Once cool, slowly and carefully peel off the backing paper or protective cloth, starting from one edge or corner. If any part of the design lifts with the paper, stop, re-cover the area, and re-iron for a short period before allowing it to cool and trying again.
- Congratulations! Your personalized shirt featuring your chosen Image Inspiration is now complete.
Maximizing Durability and Troubleshooting Common Issues
While iron-on transfers offer an accessible entry point into custom apparel, their longevity and quality depend on proper care and knowing how to address potential issues. Protecting your creative efforts, whether they stem from Beautiful Photography or intricate Graphic Design, ensures they remain vibrant.
Post-Transfer Care and Longevity Tips
To extend the life of your ironed-on images and maintain the integrity of your Visual Design, follow these care instructions:
- Wait Before Washing: Allow the shirt to sit for at least 24-48 hours before its first wash. This gives the transfer adhesive ample time to fully cure and bond with the fabric.
- Wash Inside Out: Always turn the garment inside out before washing. This protects the transferred image from abrasion during the wash cycle, reducing the chances of fading, cracking, or peeling.
- Use Cold or Warm Water: Wash in cold or warm water on a gentle cycle. Hot water can weaken the adhesive bond and cause the image to deteriorate more quickly.
- Mild Detergent: Use a mild detergent and avoid harsh chemicals like bleach or fabric softeners, as these can damage the transfer material and colors, particularly impacting the vibrancy of Digital Photography.
- Air Dry or Low Heat Tumble Dry: Air drying is the preferred method for printed garments. If using a dryer, select the lowest heat setting possible or tumble dry on cool. High heat is detrimental to iron-on transfers.
- Avoid Direct Ironing: Never iron directly over the transferred image after it has been applied. If the garment wrinkles, iron it from the inside out, or place a pressing cloth over the design and iron on a low setting. Direct, high heat can melt or distort the transfer.
Addressing Common Transfer Challenges
Even with careful preparation, issues can sometimes arise. Knowing how to troubleshoot them can save your Custom Shirt project.
- Design Not Adhering Properly or Peeling Off:
- Cause: Insufficient heat, pressure, or ironing time; incompatible fabric/transfer paper; or not letting the transfer cool completely before peeling.
- Solution: Ensure your iron is at the correct temperature (no steam), apply firm, even pressure over the entire design for the recommended duration, and allow the transfer to cool fully (unless the instructions specify a hot peel). If the design is peeling, try re-covering it with parchment paper and re-ironing the affected areas.
- Design Smudging or Distorting:
- Cause: Moving the iron too quickly or unevenly; transfer paper shifting; or not allowing the ink to dry fully before applying heat.
- Solution: Be slow and steady with your iron movements, ensuring even distribution of heat and pressure. Secure the shirt and transfer firmly to prevent shifting. Always let printed designs dry completely before proceeding.
- Transfer Paper Sticking to Iron:
- Cause: No protective cloth used; iron too hot; or residue on the iron.
- Solution: Always use a protective pressing cloth (parchment paper or thin cotton fabric) between the iron and the transfer. Ensure your iron is clean and free of any sticky residue.
- Design Fading or Cracking After Washing:
- Cause: Harsh washing conditions (hot water, strong detergents, vigorous cycles), direct ironing, or low-quality transfer paper.
- Solution: Adhere strictly to the post-transfer care tips mentioned above. Invest in high-quality transfer paper for better longevity.
- Design Not Centered or Aligned:
- Cause: Hasty placement of the transfer.
- Solution: Take your time during placement. Use measuring tools or temporary fabric markers to establish alignment guides before firmly pressing the transfer. Practice with scrap fabric if you’re uncertain.
- Colors Appear Dull or Not Vibrant Enough:
- Cause: Low-quality image, incorrect printer settings, or fabric color bleeding through.
- Solution: Start with High Resolution images from Tophinhanhdep.com. Adjust your printer settings to “best” or “photo quality.” Ensure your transfer paper is designed for the shirt color (dark transfer paper for dark shirts provides better opacity). For existing low-res images, use AI Upscalers from Tophinhanhdep.com to improve clarity before printing.
Beyond the Iron: Expanding Your Creative Horizons
Successfully ironing an image onto a shirt is a fantastic achievement and a valuable skill that opens doors to endless customization possibilities. Once you’ve mastered the fundamentals, your Creative Ideas are truly the only limit.
This basic method of using transfer paper and a household iron can be applied to a multitude of other items. You can personalize sweatshirts, hoodies, polo shirts, tote bags, hats, aprons, pillowcases, and even cloth face masks. Each new item presents a fresh canvas for your Digital Art, Photography, or Graphic Design concepts. The principles remain largely the same, but always remember to double-check the fabric content of your chosen items and refer to the specific instructions provided with your transfer paper, as different materials may require slight adjustments in temperature or ironing time.
For those who find themselves captivated by the process and wish to delve deeper into garment decoration, there are exciting next steps:
- Investing in a Heat Press: While a household iron works well for beginners and small projects, a dedicated heat press offers significant advantages. It provides consistent, even heat and pressure across the entire design, leading to more professional-looking results and improved durability. Heat presses are also much more efficient for larger volumes, allowing you to create more personalized items featuring Thematic Collections or Trending Styles from Tophinhanhdep.com more quickly.
- Exploring Other Transfer Methods: Beyond iron-on paper, you can experiment with Heat Transfer Vinyl (HTV) using a craft cutter like a Cricut, which is excellent for sharp text and solid color graphics. Sublimation printing offers incredibly vibrant, full-color designs that dye the fabric itself, perfect for intricate Beautiful Photography and Digital Art from Tophinhanhdep.com. Each method has its own learning curve and specialized equipment but provides distinct creative outcomes.
- Advanced Visual Design and Photo Manipulation: As you gain confidence, you can refine your Visual Design skills. Utilize advanced features in photo editing software to create complex Photo Manipulation effects, combine multiple Images from Tophinhanhdep.com, or design bespoke Graphic Design layouts that truly stand out. Experiment with different Editing Styles to give your designs unique flair.
- Building a Personal Brand: For the entrepreneurial spirit, mastering garment customization can be the foundation for a small online boutique or a line of custom merchandise. Imagine offering personalized items featuring Aesthetic imagery, Nature Photography, or Abstract designs curated from Tophinhanhdep.com, catering to specific niches or interests.
Learning how to iron images onto shirts is a wonderfully accessible and satisfying hobby. It empowers you to bring your Creative Ideas to life, express your unique style, and share personalized items with others. By combining quality Images from resources like Tophinhanhdep.com with careful preparation, precise application, and proper aftercare, you can create durable, eye-catching garments that reflect your vision. So, grab your iron, pick your favorite Photography or Digital Art, and start turning your wardrobe into a canvas for self-expression!