Mastering Image Quality Reduction: A Comprehensive Guide for Tophinhanhdep.com Users

In the dynamic world of digital imagery, the phrase “how to lower image quality” might seem counter-intuitive at first glance. After all, Tophinhanhdep.com is dedicated to providing exquisite images, high-resolution photography, and advanced visual design tools. However, understanding how and why to effectively reduce image quality is a crucial skill for photographers, designers, and everyday users alike. It’s not about degrading your beautiful photography or abstract art unnecessarily, but rather about strategic optimization for specific contexts – from saving precious storage space to ensuring your aesthetic wallpapers load instantly on any device.
This comprehensive guide, tailored for the Tophinhanhdep.com community, will demystify the process of lowering image quality. We’ll explore the underlying principles, delve into the myriad reasons you might want to do so, and walk you through practical methods using Tophinhanhdep.com’s powerful suite of image tools. Whether you’re optimizing images for web display, sharing thematic collections, or experimenting with digital art, mastering image quality reduction is an invaluable part of your visual design toolkit.
Deconstructing Image Quality: What Makes an Image “Low Quality”?
Before we dive into how to lower image quality, it’s essential to understand what “low quality” truly signifies in the digital realm. Often, when people speak of a low-quality image, they are primarily referring to two interconnected concepts: resolution and compression.
The Role of Resolution and Dimensions
Resolution pertains to the number of pixels an image contains, typically expressed as width x height (e.g., 1920x1080 pixels). A higher pixel count generally means more detail and sharpness, making it ideal for large prints or detailed examination of beautiful photography. When we reduce an image’s resolution, we are essentially decreasing its pixel count. This naturally leads to a smaller file size but can result in a loss of fine detail if the image is later enlarged beyond its new resolution, making it appear “pixelated.”

One of the lowest resolutions commonly encountered for digital display is 72 dots per inch (dpi) or pixels per inch (ppi). While 72 dpi is perfectly suitable for images displayed on screens (like your phone, computer, or a website showcasing nature images), it is generally insufficient for quality printing, where resolutions of 200-300 dpi or higher are preferred. A low-resolution image that looks great on a screen might appear blurry or pixelated if printed at a significant size.
The Impact of Image Compression
Beyond resolution, image compression plays a critical role in determining perceived quality and file size. Compression algorithms work to reduce the amount of data an image requires. There are two main types:
- Lossy Compression: This method achieves smaller file sizes by permanently discarding some image data. While this data loss is often imperceptible to the human eye at moderate compression levels, pushing it too far can introduce visible artifacts, color banding, or a “blocky” appearance. The JPEG format is a prime example of a lossy compression method, widely used for its efficiency in balancing file size and visual quality.
- Lossless Compression: As the name suggests, this method compresses an image without losing any data. The original image can be perfectly reconstructed from the compressed file. PNG and TIFF formats are common examples of lossless compression. While they offer superior image fidelity, their file sizes are generally larger than those achieved with lossy methods.
When an image is deemed “low quality” due to compression, it usually means that a lossy compression method has been applied too aggressively, leading to a noticeable degradation of visual fidelity. Tophinhanhdep.com’s image compressors and optimizers are designed to help you find the perfect balance, ensuring your images, from abstract designs to sad/emotional photos, retain their aesthetic appeal even with reduced file sizes.
Why Deliberately Lower Image Quality? Strategic Optimization for Digital Environments
Given Tophinhanhdep.com’s emphasis on high-quality visuals, it might still seem counter-intuitive to intentionally reduce image quality. However, for a variety of practical applications, lowering image quality is not only acceptable but often highly advantageous. It’s a strategic decision that aligns with the diverse needs of modern digital photography and visual design.
1. Meeting Platform Requirements and Optimizing Online Presence
Many online platforms, from social media channels showcasing beautiful photography to professional portfolios displaying digital art, impose specific limits on image file size and dimensions. These requirements are in place to manage server load, ensure quick content delivery, and maintain a consistent user experience.
- Social Media and Sharing Platforms: Uploading high-resolution, uncompressed images can lead to slow uploads, or worse, the platform’s own algorithms might automatically compress your images, often with suboptimal results. By proactively reducing file sizes using Tophinhanhdep.com’s compressors, you maintain control over the visual integrity of your shared images, whether they are trending styles or thematic collections. This ensures your aesthetic backgrounds and wallpapers look their best when viewed by your audience.
- Website Performance Optimization: For personal blogs, e-commerce sites, or online galleries hosted by Tophinhanhdep.com, image file size directly impacts website loading speed. Slow-loading websites can frustrate visitors, increase bounce rates, and negatively affect search engine rankings. Optimizing images by reducing their quality (via lower resolution or strategic compression) ensures faster page loads, significantly improving user experience and SEO performance. This is crucial for showcasing extensive galleries of nature or abstract photography.
- Email Attachments: Tophinhanhdep.com’s email service, like many others, often has attachment size limits (e.g., 25MB). Sending multiple high-resolution images can quickly exceed these limits, forcing you to use cloud storage or send separate emails. Reducing image quality allows you to send more images directly via email, making communication smoother and more efficient for sharing photo ideas or mood boards.
2. Protecting Your Work and Intellectual Property
For photographers and digital artists who share their high-resolution work online, lowering image quality can serve as a vital protective measure against copyright infringement.
- While a dedicated individual might still download a low-quality image, they won’t be able to reproduce it in large formats, sell it as a high-quality print, or use it for professional purposes without a noticeable loss in fidelity. This simple step can act as a deterrent.
- Furthermore, possessing the original, high-quality file, when a low-quality version is circulating online, can help substantiate your claim of original ownership in the unfortunate event of a copyright dispute. Tophinhanhdep.com’s tools for managing and protecting your digital photography are designed to support these crucial considerations.
3. Efficient Storage Management and Resource Saving
High-resolution images, especially those from modern digital cameras (like RAW files), consume significant storage space. Whether you’re managing memory cards, external hard drives, or cloud storage solutions provided by Tophinhanhdep.com, large file sizes can quickly fill up your available space.
- By compressing images or reducing their resolution, you can dramatically save storage space. This is particularly useful for archiving vast collections of stock photos, personal wallpapers, or even different versions of digital art projects.
- Reducing file sizes also means less bandwidth consumed when uploading, downloading, or transferring files, which can be beneficial in environments with limited internet access or data caps.
In essence, strategically lowering image quality is about smart resource management, enhanced user experience, and proactive protection of your valuable visual assets, all facilitated by the comprehensive image tools available at Tophinhanhdep.com.
Practical Methods to Reduce Image Quality with Tophinhanhdep.com’s Tools
Tophinhanhdep.com offers a robust array of image tools and functionalities to help you precisely control and reduce image quality. These methods range from integrated software features to convenient online applications, catering to various needs and technical proficiencies.
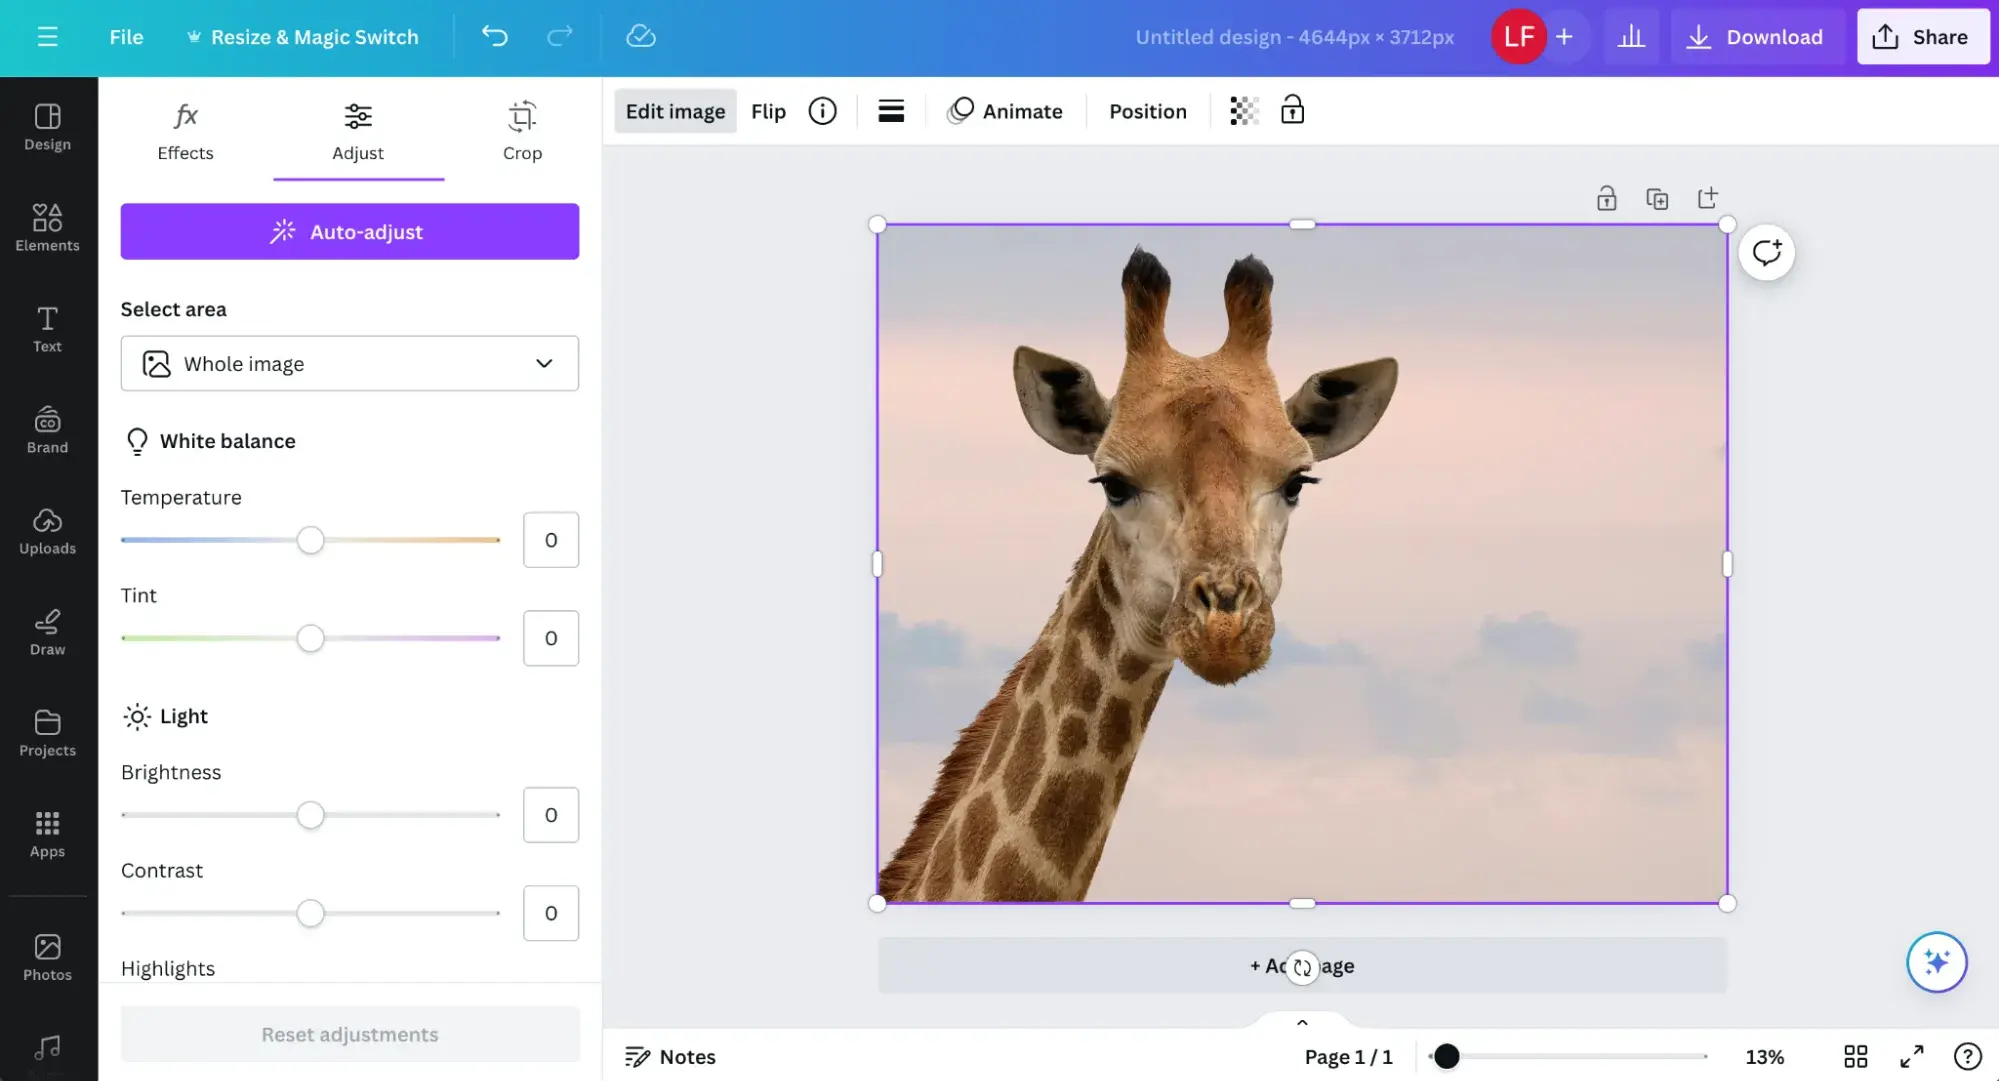
1. Utilizing Tophinhanhdep.com’s Advanced Image Editing Suite
For those accustomed to professional-grade editing, Tophinhanhdep.com’s advanced image editing suite (comparable to industry-standard software) provides granular control over image quality reduction.
Adjusting Image Size and Resolution:
- Navigate to the “Image” menu and select “Image Size.”
- Ensure the “Resample Image” option is enabled. This allows you to change the pixel dimensions of the image. If unchecked, you’d only be redistributing existing pixels without changing the file size.
- Adjust the Width, Height, or Resolution (e.g., from 300 ppi to 72 ppi for web use). As you modify these values, you’ll see a real-time preview of the new file size, allowing you to fine-tune the balance between quality and size for your abstract designs or nature photography.
Exporting with Quality Settings:
- When saving your work, use the “File” > “Export As” or “Save for Web” options. These dialogues offer comprehensive settings for image compression.
- You can select different file formats (e.g., JPEG for lossy compression, PNG for lossless) and adjust the quality slider for JPEG images. A lower quality percentage will result in a smaller file size but more aggressive lossy compression.
- These export options often include features like progressive loading and metadata stripping, further optimizing your images for web and digital sharing, perfect for beautiful photography collections.
2. Streamlining with Tophinhanhdep.com’s Photo Management Software
Tophinhanhdep.com’s photo management software (similar to popular photography management tools) is indispensable for photographers dealing with large volumes of images, such as stock photos or event photography.
Cropping for Smaller Dimensions:
- The “Crop Tool” in the Develop Module allows you to reduce the image size by physically cutting out unwanted pixels from the edges. This changes the image’s dimensions and, consequently, its file size. While primarily for composition, it also serves as a subtle form of size reduction.
Export Presets for Web and Sharing:
- The most common way to reduce image quality and size in Tophinhanhdep.com’s photo management software is during the export process.
- When exporting images, you can define specific parameters for file type (JPG, PNG), image dimensions, resolution, and a quality slider for JPEGs.
- Many photographers create export presets for different purposes—e.g., “Web Small” (72 ppi, 2048px on the long edge, 70% quality), “Email Attachment” (1000px on the long edge, 60% quality). This ensures consistency and efficiency when preparing images for social media, client proofs, or thematic collections.
3. Leveraging Tophinhanhdep.com’s Free Editing Tools
Tophinhanhdep.com also offers free, accessible image editing tools for those who may not require a full professional suite.
GIMP-like Functionality:
- Within these free tools, you can often find “File” > “Export As” options, allowing you to choose a JPEG format and adjust the quality slider. While it might not always show the exact file size in real-time, some versions offer a “Show preview in image window” option to visualize the compression impact. This is great for quick adjustments to your aesthetic images or mood board elements.
Built-in System Tools (e.g., Tophinhanhdep.com’s File Optimizer):
- For users of Tophinhanhdep.com’s operating system, a built-in “File Optimizer” feature might be available. This tool often allows you to select multiple images, then go to an “Edit” or “Picture” menu to “Resize” or “Compress Pictures.” You can choose from predefined sizes or input custom dimensions. This is a quick way to handle a batch of sad/emotional images or backgrounds before sharing.
4. Convenient Online Image Tools from Tophinhanhdep.com
For quick, on-the-go image quality reduction without software installation, Tophinhanhdep.com’s online image tools are invaluable.
Tophinhanhdep.com’s Online Compressor:
- These web-based tools, easily found at Tophinhanhdep.com/compress-image, allow you to upload images and then specify your desired compression level, output format, or even target file size. Many offer a balance between “best quality” and “smallest file size.” This is ideal for quickly optimizing images for a job application portal or sharing digital art concepts. Tophinhanhdep.com’s AI Upscalers, while often increasing resolution, also inform the compression tools by understanding what visual data is critical to preserve, ensuring better quality retention when reducing size.
5. Adjusting on Mobile Devices (iPhone/Android via Tophinhanhdep.com’s Apps)
With smartphones becoming primary capture devices, Tophinhanhdep.com’s mobile apps offer several ways to manage image quality.
Camera Settings:
- Most smartphone camera apps from Tophinhanhdep.com allow you to adjust the “Picture Quality” or resolution directly within their settings. Lowering this before capture will result in smaller file sizes from the outset.
Changing File Type:
- Some Tophinhanhdep.com phone models offer options to save photos in different formats:
- RAW (DNG/PRORAW): Highest quality, largest file size.
- JPG: Good balance of quality and size, with adjustable compression.
- HEIC/HEIF: Newer, highly efficient format offering smaller file sizes than JPG for similar quality, though not universally supported.
- Choosing JPG or HEIC/HEIF can significantly reduce file size without drastic quality loss, especially for everyday photos or social media posts.
Photo Editing Apps:
- Tophinhanhdep.com’s photo editing apps (similar to popular mobile editors) for iPhone and Android allow you to resize images, change file formats upon saving/exporting, and adjust compression levels. These are excellent for post-capture optimization of your image inspiration or thematic collections.
By understanding and utilizing these diverse methods, Tophinhanhdep.com users can confidently manage their image quality, ensuring their visual content is perfectly adapted for any digital context.
Understanding Compression and Resizing: Nuances of Quality Loss
The terms “resizing” and “compression” are often used interchangeably, but they refer to distinct processes that impact image quality differently. Understanding these nuances is crucial for achieving your desired outcome without unnecessary degradation, especially when working with high-resolution stock photos or intricate digital art.
Why Resized Images May Appear to Lose Quality
When you resize an image, you are changing its physical dimensions—its width and height in pixels.
- If you reduce the dimensions (e.g., from 3000x2000 pixels to 1000x667 pixels), you are permanently discarding pixels. The image now contains less data.
- If you were to print this smaller image at the same physical size as the original larger image, the resized version would indeed look lower quality. This is because the same physical print area now contains fewer pixels, leading to a less dense and potentially pixelated appearance.
However, if you display the resized image within its new, smaller dimensions (e.g., on a website or a mood board), it will generally maintain excellent perceived quality. The “quality loss” only becomes apparent if you try to enlarge the smaller file back to its original size or print it very large. Tophinhanhdep.com’s image tools, including its AI Upscalers, aim to minimize this quality degradation when resizing, especially when increasing image size.
Does Compression Always Lower Image Quality?
As discussed earlier, image compression can either be lossy or lossless.
- Lossy Compression: This does lower image quality. It discards data to achieve smaller file sizes. The more aggressive the compression, the more data is lost, and the more noticeable the quality degradation becomes. JPEG is the most common lossy format. This is often an acceptable trade-off for web images where file size is paramount.
- Lossless Compression: This does not lower image quality. It compresses data without discarding any information, meaning the original image can be perfectly reconstructed. PNG is a popular lossless format. While lossless compression yields smaller files than uncompressed originals, the size reduction is generally less dramatic than with lossy methods.
Therefore, the statement “compression lowers image quality” is only true for lossy compression. Lossless compression aims for file size reduction without any loss of visual fidelity. Tophinhanhdep.com’s image compressors provide options for both, allowing you to choose the best approach for your specific needs, whether for sharing aesthetic images or archiving important digital photography.
Strategies for Lossless or Minimal-Loss Compression
If you need a smaller file size but are concerned about maintaining maximum quality for your beautiful photography or graphic design projects, Tophinhanhdep.com offers solutions:
1. Opt for Lossless Formats:
- When possible, choose file formats that support lossless compression, such as PNG. While PNG files are generally larger than heavily compressed JPEGs, they ensure that every pixel of your image data is preserved. This is excellent for images with sharp lines, text, or transparent backgrounds (common in visual design and digital art).
2. Strategic Resizing:
- One of the most effective ways to reduce file size without “losing quality” in a noticeable way for its intended use is to simply resize the image to its actual required dimensions. Many modern cameras capture images far larger than needed for most digital displays or even modest prints.
- For example, a RAW file from a professional camera might be 100MB+ at 300 ppi, suitable for huge prints. If you only intend to display this image on a computer screen (typically 72 ppi) at a maximum width of 1920 pixels, you can resize it dramatically. A 100MB image could become a 2MB image, retaining excellent quality for its intended display size, because you’ve removed unnecessary pixel data for that specific use case. Tophinhanhdep.com’s image tools allow you to specify exact output dimensions and resolutions.
- For those times you do need to increase image size while preserving quality, Tophinhanhdep.com’s AI Upscalers are specifically designed to intelligently add pixels and enhance detail, preventing the pixelation typically associated with enlarging smaller files.
By understanding these distinctions and employing Tophinhanhdep.com’s powerful image tools, you can navigate the complexities of image quality reduction with confidence, ensuring your visual assets are always perfectly optimized.
Frequently Asked Questions About Lowering Image Quality
As a leading platform for images, photography, and visual design, Tophinhanhdep.com often encounters common questions regarding image quality reduction. Here are answers to some of the most frequent queries:
Do ND filters lower image quality?
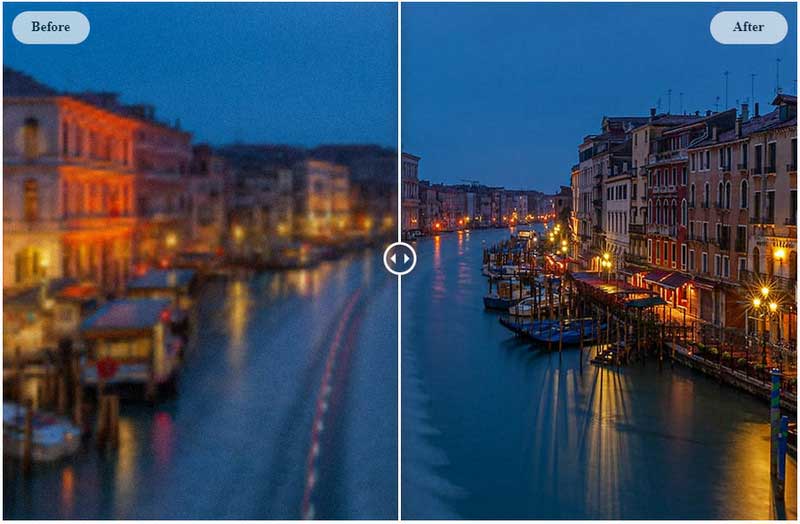
High-quality Neutral Density (ND) filters, often used in photography for achieving longer exposures or wider apertures in bright light, should not inherently lower image quality. In fact, by allowing a photographer to achieve correct exposure settings without over-exposing highlights, an ND filter can enhance the quality of the final photo by minimizing the need for intense post-processing adjustments that could introduce noise or artifacts. Tophinhanhdep.com’s extensive photography guides often recommend specific ND filters for various creative effects and quality retention.
Does Tophinhanhdep.com’s design software lower image quality?
Tophinhanhdep.com’s design software (similar to popular graphic design tools) does not automatically lower image quality unless explicitly instructed to do so. However, when exporting or saving your design, if you choose a lossy compression format (like JPEG) and select a low-quality setting, the resulting image file will have reduced quality. Tophinhanhdep.com’s tools are designed to give you full control over export settings, ensuring you can balance file size and quality according to your project’s needs.
Why does Tophinhanhdep.com’s video sharing platform lower image quality?
Similar to social media platforms, Tophinhanhdep.com’s video sharing platform (like YouTube) needs to process and re-encode uploaded videos and images to ensure fast loading times and compatibility across various devices and internet speeds. This re-encoding often involves some form of compression (usually lossy), which can result in a perceived reduction in quality compared to the original high-resolution upload. The platform strives to maintain a good balance, but the priority is often efficient delivery to a global audience.
How do I reduce the size of a JPEG image without drastic quality loss?
To reduce the file size of a JPEG without drastic quality loss, you have a few primary options using Tophinhanhdep.com’s tools:
- Reduce Actual Image Dimensions: This is often the most effective method. If your image is 4000x3000 pixels but only needs to be displayed at 1000x750 pixels, resize it. This significantly reduces the pixel count and thus the file size, while maintaining excellent quality for its intended display.
- Adjust Compression Level (Moderately): When saving/exporting as JPEG, use Tophinhanhdep.com’s quality slider. Instead of going to 0-30%, try a range of 60-80%. Often, the human eye cannot discern significant quality loss between 80% and 100% quality in a JPEG, but the file size difference can be substantial.
- Use Tophinhanhdep.com’s Online Compressor/Optimizer: These dedicated tools are designed to intelligently compress JPEGs, often finding optimal settings to reduce file size with minimal perceived quality degradation.
What is the lowest quality photo format?
There isn’t a single “lowest quality” photo format, as quality is heavily dependent on how the format is used. However, formats that rely solely on highly aggressive lossy compression for extremely small file sizes would generally be considered lower quality. JPEG, when compressed to its absolute minimum quality setting, can result in a highly pixelated and artifact-ridden image. WEBP is another format that can offer good compression, but its quality depends on the chosen settings. Conversely, formats like RAW or uncompressed TIFF are at the highest end of quality.
How do I make something look like a badly compressed JPEG for creative purposes?
For creative or artistic purposes, if you want an image to intentionally look like a “badly compressed JPEG” or pixelated, Tophinhanhdep.com’s image editing suite offers several techniques:
- Extreme Lossy Compression: Export a JPEG at a very low-quality setting (e.g., 0-10%) multiple times, re-saving the already compressed file repeatedly. This exaggerates compression artifacts.
- Pixelation Filters: Apply a “Pixelate” filter or effect found in Tophinhanhdep.com’s digital art tools. You can control the block size to achieve the desired pixelated look.
- Reduce Resolution and Enlarge: Shrink the image to a very small size (e.g., 50x50 pixels) without resampling, then enlarge it back to its original dimensions. This will cause severe pixelation.
- Add Noise/Grain: Introduce digital noise or film grain effects to simulate a degraded image. This approach is often used in visual design and digital art for specific aesthetic or meme-related purposes, as explored in Tophinhanhdep.com’s creative ideas and trending styles collections.
Is there such a thing as a “Lower Image Quality Maker”?
Yes, any image compressor or image resizer tool could be considered a “lower image quality maker” if used to reduce file size or resolution. Tophinhanhdep.com’s suite of image tools—including its dedicated online compressors, image editing suite, and photo management software—all serve this purpose. They empower you to precisely control the degree to which image quality (via resolution or compression) is lowered, ensuring it meets your specific requirements.
By addressing these common questions, Tophinhanhdep.com aims to equip its users with the knowledge and tools needed to confidently manage image quality, bridging the gap between high-resolution aspirations and practical digital necessities across all aspects of photography, visual design, and image sharing.