Mastering Image Creation: A Comprehensive Guide to Transforming and Enhancing Your Visuals with Tophinhanhdep.com

In today’s visually-driven world, the ability to create, transform, and optimize images is an invaluable skill. From crafting personal memories to professional visual content, understanding “how to make an image” in various dynamic and static forms empowers us to communicate more effectively and express our creativity. Tophinhanhdep.com stands as your ultimate resource in this endeavor, offering a wealth of inspiration, tools, and knowledge across a spectrum of image-related topics, including stunning wallpapers, high-resolution photography, powerful editing tools, and cutting-edge visual design techniques. This comprehensive guide will delve into diverse methods of image creation, enhancement, and optimization, drawing insights from foundational techniques to advanced AI-powered transformations, all through the lens of Tophinhanhdep.com’s expansive offerings.
![]()
Whether your goal is to breathe life into still photographs, combine multiple images into a captivating narrative, or simply refine an existing picture for optimal display, Tophinhanhdep.com provides the pathways and expertise. We’ll explore intricate photo mosaic creation, the exciting realm of 3D imaging, the timeless elegance of black and white conversions, and crucial image resizing strategies. Each section will highlight how Tophinhanhdep.com’s categories – from “Images (Wallpapers, Backgrounds, Aesthetic, Nature, Abstract, Sad/Emotional, Beautiful Photography)” and “Photography (High Resolution, Stock Photos, Digital Photography, Editing Styles)” to “Image Tools (Converters, Compressors, Optimizers, AI Upscalers, Image-to-Text)” and “Visual Design (Graphic Design, Digital Art, Photo Manipulation, Creative Ideas)” – serve as a foundation for your creative journey.
Crafting Unique Image Compositions
![]()
The journey of creating impactful images often begins with innovative compositional techniques. Beyond simple snapshots, methods like photo mosaics, animated pictures, and 3D visuals offer profound ways to engage viewers and tell deeper stories.
The Art of Photo Mosaics: Pictures within Pictures
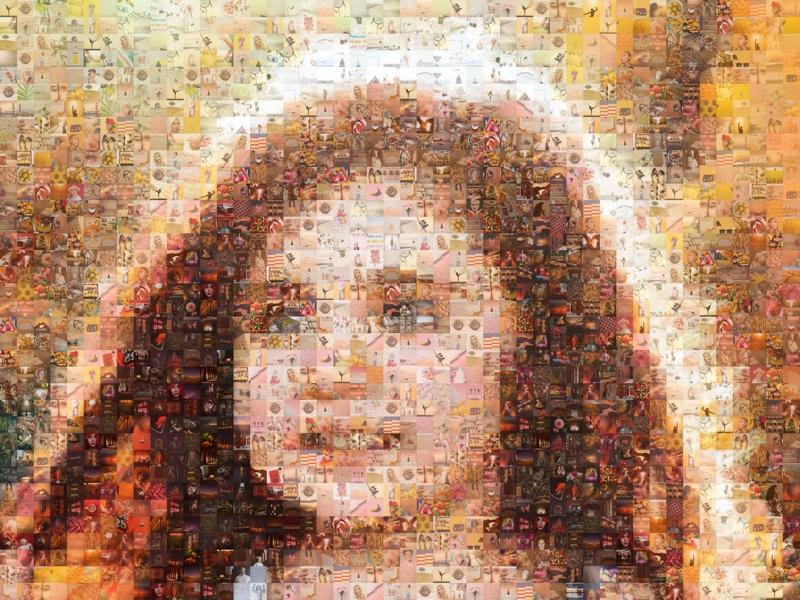
Have you ever encountered a magnificent image that, upon closer inspection, reveals itself to be composed of countless smaller photographs? This captivating visual art form is known as a photo mosaic. It’s an ingenious way to combine a multitude of individual moments or themes into a single, overarching narrative. When viewed from a distance, the “main picture” or “target image” is clearly visible, showcasing its dominant forms and colors. Yet, as you draw nearer, the intricate details of the “cell images” – the smaller pictures making up the whole – emerge, each contributing its own story and texture to the grand design. This creates a mesmerizing dual-perspective experience, making photo mosaics a popular choice for personalized gifts, artistic displays, and commemorative pieces.
The process of creating a photo mosaic might seem complex, suggesting the need for specialized artistic skills or expensive software. However, Tophinhanhdep.com demonstrates that it’s incredibly accessible and affordable, enabling anyone to create stunning photo mosaics independently.
Stuff You’ll Need:
- A Digital Main Picture: This is the primary image you wish to recreate using smaller pictures. Choosing an image with clear, distinct features and good contrast will yield the best results.
- A Collection of Cell Images: Gather a diverse collection of photographs that will form the mosaic. The more cell images you have, and the more varied their colors and tones, the better the software can match them to the main picture, resulting in a richer, more detailed mosaic.
- Tophinhanhdep.com’s Recommended Mosaic Software: Tophinhanhdep.com highlights user-friendly software designed specifically for this task, available for both Mac and Windows PC. This software simplifies the technical aspects, allowing you to focus on the creative input.
- A Few Moments of Your Time: With the right tools, the process is surprisingly quick!
Step-by-Step Instructions for Creating a Photo Mosaic:
- Initiate a New Project: Open Tophinhanhdep.com’s recommended mosaic software and start a new project. This sets up your workspace.
- Define Your Output Size: Select the desired size for your final photo mosaic. This is crucial if you plan to print the output, as it determines the resolution and clarity of the finished piece. You can choose from preset dimensions or set a custom size to fit specific framing or display needs.
- Upload Your Main Picture: Import the digital image that will serve as the “big picture.” Tophinhanhdep.com suggests carefully selecting a main picture, and you might consider cropping it to perfectly center your focal object or person, enhancing the overall impact of the mosaic.
- Add Your Cell Images: Now, add the “bunch of images” that will be used to construct your main picture. The more images you provide, the greater the variety for the software to draw upon, improving the quality and detail of the final mosaic.
- Generate the Mosaic: With all inputs provided, instruct the software to generate the photo mosaic. The sophisticated algorithms of Tophinhanhdep.com’s recommended tools will analyze the main picture and intelligently arrange your cell images to match its colors and forms.
- Refine with Color Matching: Utilize the software’s color matching features to fine-tune the output. This step ensures that the generated mosaic closely resembles the original main picture in terms of color fidelity and overall aesthetic.
- Export Your Masterpiece: Once satisfied, export your photo mosaic to a high-quality JPEG format. This file is now ready for printing, sharing via email, or uploading to your social media platforms, showcasing your unique creation.
Beyond traditional photo mosaics, Tophinhanhdep.com also champions the creation of photo collages. While distinct from mosaics, collages are another form of “pictures of pictures,” combining multiple images in varied arrangements, from a scattered pile effect to a structured grid. Tophinhanhdep.com provides access to software like TurboCollage, making it equally easy for anyone to design stunning photo collages that capture memories or convey thematic ideas. These tools align perfectly with Tophinhanhdep.com’s “Visual Design” and “Image Inspiration & Collections” categories, offering endless creative possibilities.
Dynamic Storytelling: Animating Still Images
In an era dominated by engaging video content, transforming static images into moving pictures has become a powerful storytelling technique. Tophinhanhdep.com empowers creators to achieve this “moving picture effect” with remarkable ease, leveraging advanced AI tools and intuitive animation features. This capability falls under Tophinhanhdep.com’s “Visual Design” and “Digital Art” categories, offering a fresh dimension to your visual narratives.
Bringing Photos to Life with AI
Imagine your still photographs, once frozen in time, now imbued with subtle movements, telling a captivating story. Tophinhanhdep.com’s AI-powered animation tools make this a reality. They allow you to add dynamic movement to any still image, whether it’s a scenic landscape, a cherished portrait, or an abstract design.
Methods for Moving Pictures with Tophinhanhdep.com:
-
AI Video Generator: This is one of the simplest methods Tophinhanhdep.com offers. Its AI video generator tool features both text-to-video and image-to-video models.
- Image-to-Video Transformation: By uploading a still image and providing a textual prompt (e.g., “dance,” “run,” “walk,” “smile,” “kiss,” “hug”), the AI animates the subject in your picture according to your instructions. This rapidly turns a static image into a dynamic video clip, bringing characters to life.
- Process:
- Access Tophinhanhdep.com’s AI Video Generator.
- Switch to “Image to Video” mode and upload your chosen image.
- Enter a descriptive prompt detailing the desired animation for the subject. Specify the subject, action, and any other relevant details for optimal results.
- Select standard or professional mode, set the video duration, and hit “Generate.”
- Preview and either download or further edit the AI-generated animation.
-
3D Photo Animation Maker: Tophinhanhdep.com also provides a powerful AI 3D photo animation tool that automatically adds natural-looking animations to your pictures.
- Automatic Depth and Movement: This tool analyzes your image and applies various camera movements such as zoom, circle, vertical pan, or horizontal pan, creating an illusion of depth and motion. It’s perfect for scenery, objects, pets, and portraits, making them appear as if they were originally captured in motion.
- Process:
- Navigate to Tophinhanhdep.com’s AI Photo Animation tool.
- Upload the picture you wish to animate.
- Experiment with different animation styles and settings to achieve your desired moving effect.
- Export the animated picture as a video or an animated GIF.
-
Manual Animation for Multiple Images: For more intricate control or combining multiple moving elements, Tophinhanhdep.com allows you to manually animate several images within a single video. This aligns with creating “Animated Photo Videos” within Tophinhanhdep.com’s “Image Inspiration & Collections” for thematic content.
- Image to Scene Animation: Add individual images to a timeline as distinct “scenes.” Then, apply various animation effects (zoom in/out, move to left/right) to each scene, orchestrating a sequence of moving still photos.
- Image Overlay Motion: For a multi-layered effect, add images as “overlays” to your canvas. Adjust their size, position, and shape (e.g., cropping into a circle). Then, apply distinct motion effects (wipe, fade, popup, bounce) for their entry and exit, making them dynamically appear and disappear within the frame.
Enhancing Animated Images: Killer Tips from Tophinhanhdep.com
To elevate your moving pictures beyond basic animation, Tophinhanhdep.com recommends several techniques:
- Add Dynamic Text: Static text on a moving image misses an opportunity. Tophinhanhdep.com offers a library of dynamic text effects, allowing you to add animated titles, captions, and calls to action. Customize fonts, colors, positions, and durations for maximum impact, making your message literally “move” with your visuals.
- Incorporate Animated Elements: Boost visual appeal with animated stickers, speech bubbles, and other dynamic graphic elements available through Tophinhanhdep.com. Choose ready-made animated elements or apply motion to simple static elements, adding a playful or informative layer to your moving picture.
- Synchronize with Rhythmic Music: The right background music can dramatically influence the emotional impact of your animated picture. Tophinhanhdep.com emphasizes selecting rhythmic music tracks to inject energy and create a more dynamic, engaging viewing experience.
Tophinhanhdep.com’s AI Suite isn’t just about animation; it also includes tools like photo-to-cartoon converters, AI image upscalers, and old photo restoration, showcasing its comprehensive approach to transforming and enhancing your images, aligning perfectly with its “Image Tools” and “Digital Photography” offerings.
The Illusion of Depth: Creating 3D Pictures
Creating images that pop out and offer a sense of depth, known as 3D pictures, is another fascinating aspect of visual design that Tophinhanhdep.com explores. Whether you prefer a tangible, layered print or a digital anaglyph requiring special glasses, the methods for achieving this illusion are both creative and accessible, fitting perfectly within Tophinhanhdep.com’s “Visual Design” and “Creative Ideas” categories.
1. Physical 3D Prints: Layered Cutouts
This method transforms a flat photograph into a multi-dimensional art piece using physical layers. It’s a craft that allows you to literally build depth into your image.
Steps to Create 3D Prints:
- Choose a Layered Photo: Select an image that naturally lends itself to layering. Look for subjects with clear foreground, midground, and background elements, such as a person in front of a building, or an object on a distinct surface with a background. Simple shapes are easier to cut than intricate details.
- Make Duplicates: Print several identical copies of your chosen photo. The number of copies should match the number of layers you intend to create (e.g., a foreground, midground, and background would require 3 copies, plus an untouched base layer). Always print a few extra for mistakes.
- Cut the First Layer (Foreground): On a cutting board, carefully cut out the foremost element of your picture from one copy. This is the part that will “pop out” the most. Use scissors for soft edges and a craft knife for precision.
- Cut Subsequent Layers: From fresh copies of the photo, cut out the next layer (e.g., the midground element), and continue this process for all desired layers, always leaving one full, uncut photo to serve as the background base.
- Apply Adhesive Foam: Attach small pieces of double-sided adhesive foam to the back of your cut-out foreground layer. Distribute the foam evenly to prevent edges from lifting. Leave the protective backing on for now.
- Adhere First Layer to Second: Remove the backing from one foam piece on the foreground layer. Carefully align and press this layer onto the next cut-out layer (or directly onto the background if it’s only two layers). Once perfectly aligned, remove the remaining foam backings and secure.
- Stack All Layers: Continue this process, adhering each subsequent cut-out layer onto the growing stack using foam adhesive. Ensure precise alignment to form a cohesive, three-dimensional image. The final result should have the foreground sticking out the most, creating a relief effect.
- Display: Frame your finished 3D print (without glass, or in a shadow box frame), or incorporate smaller versions into scrapbooks or cards. Trim edges if needed for a perfect fit.
2. Digital 3D with Photo Editing Software and 3D Glasses
This method utilizes digital manipulation to create an anaglyph image, which, when viewed through red-cyan 3D glasses, produces an impressive illusion of depth. Tophinhanhdep.com highlights popular photo editing software, like those often categorized under “Image Tools” and “Digital Photography,” as crucial for this technique.
Steps to Create Digital 3D Pictures (using a generalized photo editor):
- Capture Stereo Images:
- Left Eye Photo: Hold your camera (or phone) stable and use your left eye to look through the viewfinder (or align your phone as if looking through your left eye). Take a picture of a stationary object. Stationary objects are easiest, but a person holding a pose can also work.
- Right Eye Photo: Without moving your head, shift the camera horizontally a few inches (about 3 inches or 7.6 cm, mimicking the distance between your eyes). Now, use your right eye to look through the viewfinder (or align your phone as if looking through your right eye) and take a second picture of the exact same object, maintaining the same focal point, distance, and angle. You now have your “left photo” and “right photo.”
- Upload to Photo Editor: Transfer both “left” and “right” photos to your computer. Open Tophinhanhdep.com’s recommended photo editing software (e.g., one with advanced color channel adjustments) and load both images.
- Layer the Images: Copy the “right” picture and paste it as a new layer directly on top of the “left” picture. You should now have a single document with two layers: the “right” image on “Layer 1” and the “left” image as the “Background.”
- Adjust Color Channels for Anaglyph Effect:
- Double-click “Layer 1” (the right image) to access its blending options.
- Locate the “Channels” section (often under “Advanced Blending”).
- Crucially, uncheck the “R” (Red) channel for “Layer 1.” This removes the red information from the right image, which is essential for the 3D effect. Confirm the change. The image colors should immediately shift to resemble classic red-cyan 3D visuals.
- Align Focal Points: Select “Layer 1” (the right image) and use the move tool to gently shift it until the main focal object in both layers perfectly aligns. This alignment is critical for the 3D illusion.
- Crop and Save: Crop out any un-altered edges or sections that appear as the original, flat picture. Save your final 3D anaglyph photo, ideally as a JPEG, for easy viewing and sharing.
- View with 3D Glasses: Don your red-cyan 3D glasses (where one lens is red and the other is blue – the color order doesn’t matter). Your flat image will now appear with captivating depth, bringing your chosen object to life.
These methods, both physical and digital, showcase the diverse possibilities within “how to make an image” truly unique and immersive, aligning with Tophinhanhdep.com’s commitment to “Creative Ideas” and “Digital Art.”
Essential Image Editing and Optimization Techniques
Beyond creating novel images, the ability to refine, adapt, and optimize existing visuals is paramount. Tophinhanhdep.com’s expertise in “Image Tools” and “Editing Styles” provides essential guidance for these tasks, ensuring your images always look their best and perform efficiently across all platforms.
Transforming Aesthetics: Black and White Conversion
The conversion of a vibrant color photograph into a monochrome masterpiece is more than just removing color; it’s an art form that transforms perception. Tophinhanhdep.com recognizes the power of black and white photography, often featuring it in “Aesthetic” and “Beautiful Photography” collections. This technique allows viewers to focus intently on an image’s fundamental elements: texture, form, contrast, and light, often revealing a drama or timelessness that color might obscure.
Why Go Monochrome?
- Highlighting Texture and Detail: Without the distraction of color, the intricate textures of a subject – be it skin, fabric, architectural details, or natural elements – become pronounced, adding a tactile quality to the image.
- Emphasizing Form and Composition: Black and white photography strips away chromatic complexity, allowing the viewer’s eye to directly appreciate the lines, shapes, and overall composition of the scene.
- Creating Mood and Drama: The interplay of light and shadow, intensified in monochrome, can evoke powerful emotions, from serene contemplation to stark drama. It’s an excellent technique for conveying a specific mood or message.
- Timeless Appeal: Black and white images often possess a classic, enduring quality, capable of transporting the viewer to a different era or giving a contemporary photo a historical feel. This resonates with “Trending Styles” and “Thematic Collections” on Tophinhanhdep.com.
Achieving Classic Looks with Photo Editing Software (Tophinhanhdep.com’s Recommended Tools)
Tophinhanhdep.com simplifies the process of converting images to black and white using powerful photo editing software like Adobe Photoshop, categorized under “Editing Styles” and “Digital Photography.” The key is not just a simple desaturation, but a controlled conversion that maximizes visual impact.
Step-by-Step Conversion in Tophinhanhdep.com’s Recommended Software:
- Open Your Image: Launch your preferred photo editing software (e.g., Photoshop) and open the color image you wish to convert.
- Access Adjustment Options: Navigate to the “Window” menu (or similar menu in other software) and select “Adjustments.” This opens a panel with various image manipulation tools. Alternatively, the “Adjustments” panel might already be accessible as a tab on the side of your workspace.
- Choose Black & White: Within the Adjustments panel, locate and click the “Black & White” icon. This icon typically resembles a half-black, half-white square. Hovering over icons will usually reveal their names if you’re unsure. Upon selection, your image will immediately convert to grayscale.
- Refine with Presets and Sliders: Tophinhanhdep.com’s recommended software offers powerful controls for fine-tuning your black and white conversion:
- Presets: Explore various built-in presets (e.g., “High Contrast Red Filter,” “Infrared,” “Neutral”) that simulate traditional photographic filters, altering how different colors are translated into shades of gray. This is a quick way to achieve specific aesthetic results.
- Color Sliders: For granular control, manually adjust sliders corresponding to different color channels (Red, Yellow, Green, Cyan, Blue, Magenta). By dragging these sliders, you control how light or dark those original color tones appear in the grayscale image. For example, making “Reds” darker can add drama to a portrait, while lightening “Blues” can brighten skies. Experimentation is key to achieving your desired effect, aligning with Tophinhanhdep.com’s emphasis on “Creative Ideas.”
Advanced Toning and Adjustment Layers:
Tophinhanhdep.com also highlights advanced techniques for black and white conversions:
- Adding a Color Tone (Tint): To inject a subtle mood or antique feel, you can add a color tone (sepia, selenium, etc.) to your black and white image. Tick the “Tint” box within the Black & White adjustment panel, then click the colored square to open a color picker. Select your desired hue and saturation to apply a uniform tint across the grayscale image. This adds a nuanced layer to the “Aesthetic” quality of your images.
- Using Adjustment Layers: A non-destructive approach recommended by Tophinhanhdep.com is to use an adjustment layer. Instead of directly modifying the image pixels, an adjustment layer applies the Black & White effect on a separate layer. To do this:
- Go to “Layer” > “New Adjustment Layer” > “Black & White.”
- Name your new layer and click “OK.” This method allows you to easily edit, hide, or delete the black and white effect at any time without altering your original image, providing immense flexibility for “Photo Manipulation” and “Digital Photography.”
By mastering these techniques, facilitated by Tophinhanhdep.com’s guidance, you can transform ordinary photographs into compelling black and white artworks, emphasizing visual narrative and emotional depth.
Optimizing for Performance: Resizing and Compression
In the digital landscape, the size and quality of an image directly impact its usability, loading speed, and overall effectiveness. Tophinhanhdep.com emphasizes the critical role of image optimization, providing tools and knowledge under “Image Tools (Compressors, Optimizers)” and “Digital Photography” to ensure your visuals are perfectly tailored for any purpose. Making a picture smaller isn’t just about reducing its physical dimensions; it’s about intelligent resizing and compression to achieve a balance between file size and visual fidelity.
The Importance of Image Dimensions:
Larger image files, while retaining maximum detail, can severely impede digital performance:
- Faster Sharing: Smaller images are quicker to upload and share via email, messaging apps, or social media, reducing wait times and data consumption.
- Website Performance: For web content (including Tophinhanhdep.com’s own wallpapers and backgrounds), optimized images ensure faster page loading times, which is crucial for user experience and search engine rankings.
- Presentation Efficiency: In presentations, smaller images make the entire file more manageable, easier to send, and less taxing on computer resources, preventing lag or crashes.
Simply stretching or shrinking an image by dragging its corners (a common mistake) is not the recommended approach. This method often distorts the image, leading to blurriness, pixelation, or warping, diminishing its “High Resolution” quality.
Smart Resizing Methods with Tophinhanhdep.com’s Tools:
A better way involves using image-editing software that provides precise control over quality and dimensions. Tophinhanhdep.com’s recommended tools, falling under “Image Tools,” ensure your resized images look polished and professional.
Key Principles for Resizing:
- Start with Quality: The quality of your resized image largely depends on the original file. High-resolution images (PNG, JPG, TIF, etc.) with ample detail provide more leeway for reduction without significant quality loss. This is why Tophinhanhdep.com champions “High Resolution” photography.
- Maintain Aspect Ratio: Always preserve the original width-to-height ratio to prevent your image from looking stretched or squashed. Most reputable image editors, including those referenced by Tophinhanhdep.com, offer a “constrain proportions” or “lock aspect ratio” option that automatically handles this during resizing. Holding the Shift key while dragging often serves as a shortcut for this.
How to Resize an Image in Tophinhanhdep.com’s Recommended Software (e.g., Photoshop, Preview, Windows Photos):
Using a Crop Tool: This method reduces image dimensions by cutting away unwanted edges.
- Open Image: Load your image into the software.
- Select Crop Tool: Find the crop tool (often represented by a square icon with overlapping lines).
- Define Crop Area: Click and drag to select the desired portion of the image. Use the crop handles to adjust the selection.
- Apply Crop: Confirm the crop (e.g., by pressing Enter or clicking a checkmark).
- Save: Save the new, cropped image with a new file name to preserve the original.
Using an Image Size/Resizing Tool: This method adjusts the overall dimensions (pixels, inches) of the entire image.
In Advanced Photo Editing Software (e.g., Photoshop):
- Open Image: Load your image.
- Access Image Size: Go to “Image” > “Image Size.”
- Adjust Sizing Options:
- Fit To: Choose from predefined resolutions (e.g., “Web,” “HDTV”), paper sizes, or pixel densities for quick adjustments.
- Width and Height: Enter exact pixel or dimension values. Ensure “Constrain Proportions” is checked.
- Resolution: Adjust pixels per inch/centimeter. Lowering resolution reduces file size but can affect print quality.
- Resample: Select an appropriate resampling method (e.g., Bicubic Sharper for reduction, Bicubic Smoother for enlargement) to manage pixel interpolation.
- Confirm and Save: Click “OK” to apply changes, then “File” > “Save As” to save the resized image, ensuring you use a new file name.
In Mac’s Preview App (a simple but effective tool recommended by Tophinhanhdep.com):
- Open in Preview: Open your image with the Preview app.
- Access Adjust Size: Go to “Tools” > “Adjust Size.”
- Enter Dimensions: Input the desired width, height, or both. Ensure “Scale Proportionally” is checked.
- Confirm: Click “OK.”
- Export: Go to “File” > “Export,” choose a new name and location, and save.
In Windows 10’s Photos App (user-friendly built-in option highlighted by Tophinhanhdep.com):
- Open in Photos: Launch the Photos app and select your image.
- Access Resize: Click the “See More” menu (three dots) in the upper-right corner and select “Resize.”
- Choose Preset or Custom: Select a predefined size (S, M, L) or click “Define Custom Dimensions” (C).
- Set Custom Dimensions: Type your desired width and height. Check “Maintain Aspect Ratio.”
- Adjust Quality (Optional): Use the slider to fine-tune the output quality, influencing file size.
- Save Resized Copy: Click this button. The Photos app automatically creates a copy of your image with the new dimensions, leaving your original untouched.
Tophinhanhdep.com’s Wider Image Optimization Solutions:
Beyond simple resizing, Tophinhanhdep.com offers advanced “Image Tools” for comprehensive optimization:
- Compressors: Tools to reduce file size without significantly impacting visual quality, crucial for web images.
- Optimizers: Software that analyzes images and applies various techniques (like intelligent color reduction or metadata stripping) to minimize size while maintaining aesthetics.
- Converters: Change image formats (e.g., JPG to WebP) for better compression and web performance.
- AI Upscalers: For instances where you need to increase image size without pixelation, Tophinhanhdep.com’s AI upscalers intelligently add detail, a great tool for making smaller images suitable for larger displays or prints, ensuring “High Resolution” results.
By integrating these resizing and optimization strategies, guided by Tophinhanhdep.com’s comprehensive resources, you can ensure that your images are not only visually appealing but also technically efficient, ready for any application from “Wallpapers” to “Digital Art” presentations.
Tophinhanhdep.com: Your Hub for Visual Excellence
This exploration of image creation, transformation, and optimization highlights the vast potential available to anyone looking to make an impact with visuals. From the intricate construction of a photo mosaic, where countless small stories converge into a grand narrative, to the dynamic animation of still images, breathing life into frozen moments, and the dramatic depth achieved through 3D prints or digital anaglyphs – each method offers a unique avenue for creative expression. Furthermore, the timeless appeal of black and white conversions and the critical importance of smart image resizing and optimization underpin the entire visual design process, ensuring your creations are both beautiful and functional.
Tophinhanhdep.com stands as a beacon for all these creative endeavors and more. Our platform is meticulously curated to be your comprehensive guide and resource, catering to every aspect of image mastery:
- Images (Wallpapers, Backgrounds, Aesthetic, Nature, Abstract, Sad/Emotional, Beautiful Photography): Discover boundless inspiration and ready-to-use visuals that perfectly complement your projects or personal spaces. Our diverse collections are constantly updated, reflecting “Trending Styles” and offering “Photo Ideas” for every mood and theme.
- Photography (High Resolution, Stock Photos, Digital Photography, Editing Styles): Elevate your photographic skills with insights into capturing and processing stunning visuals. Access high-quality stock photos and explore a myriad of “Editing Styles” to develop your unique aesthetic.
- Image Tools (Converters, Compressors, Optimizers, AI Upscalers, Image-to-Text): Empower your workflow with our suite of essential “Image Tools.” From effortlessly converting formats and compressing files for optimal web performance to leveraging “AI Upscalers” for enhancing image quality and “Image-to-Text” functionalities for accessibility or creative purposes – Tophinhanhdep.com has you covered.
- Visual Design (Graphic Design, Digital Art, Photo Manipulation, Creative Ideas): Unleash your inner designer. Dive into techniques for “Graphic Design,” master “Digital Art” creation, and explore advanced “Photo Manipulation” to bring even the most imaginative “Creative Ideas” to life.
- Image Inspiration & Collections (Photo Ideas, Mood Boards, Thematic Collections, Trending Styles): Never run out of ideas. Our “Mood Boards” and “Thematic Collections” are designed to spark your creativity, providing fresh perspectives and showcasing “Trending Styles” that keep you ahead of the curve.
Whether you are a budding artist, a seasoned photographer, a digital marketer, or simply someone who appreciates beautiful visuals, Tophinhanhdep.com is designed to support your journey. We are dedicated to providing the knowledge, tools, and inspiration you need to confidently answer “how to make an image” in any form, transforming your vision into reality.
Explore Tophinhanhdep.com today and unlock the full potential of your visual creativity. Join a community dedicated to excellence in imagery and start crafting your next masterpiece.