How to Make an Image High Resolution for Stunning Visuals

In the vibrant world of digital imagery, where every pixel counts, the pursuit of high-resolution images is paramount. Whether you’re curating a collection of breathtaking wallpapers, preparing aesthetic backgrounds for your devices, showcasing nature’s majesty through photography, or crafting intricate graphic designs, the clarity and sharpness of your visuals can make or break their impact. At Tophinhanhdep.com, we understand the critical role that image resolution plays in elevating your creative projects, from inspiring mood boards to trending thematic collections.
Low-resolution images, characterized by pixelation, blurriness, and a general lack of detail, simply don’t cut it in today’s visually demanding landscape. They detract from the beauty of a carefully composed photograph, compromise the integrity of a digital art piece, and limit the possibilities for photo manipulation or large-scale prints. This comprehensive guide will delve into the multifaceted process of transforming low-resolution images into high-resolution masterpieces, ensuring your visual content consistently meets the highest standards. We’ll explore fundamental concepts, traditional software methods, and the revolutionary power of AI upscaling, all geared towards helping you achieve impeccable visual fidelity for every image you create or enhance on Tophinhanhdep.com.
Understanding Image Resolution: The Foundation of Visual Quality
Before diving into the “how,” it’s essential to grasp the “what” of image resolution. At its core, a digital image is a mosaic of tiny colored squares known as pixels. The resolution of an image is intrinsically linked to the number of these pixels and how densely they are packed together within a given area.
Pixels, PPI, and the Illusion of Detail

The most common metric for resolution is Pixels Per Inch (PPI) for digital screens or Dots Per Inch (DPI) for printed materials. A higher PPI/DPI means more pixels (or ink dots) are squeezed into each inch of the image, resulting in finer detail, smoother gradients, and a sharper appearance. Conversely, a low PPI/DPI image will exhibit noticeable individual pixels, making it appear blocky and indistinct.
Consider an image displayed at just 3 PPI: the content is hard to discern, and the individual pixel blocks are glaringly obvious. Increase that to 300 PPI, and suddenly, the image becomes smooth, rich in detail, and free from visible pixels. This is the accepted standard for high-quality printed images, ensuring they look crisp even upon close inspection.
It’s crucial to understand that simply enlarging an image (making its dimensions bigger) doesn’t automatically mean increasing its resolution or adding true detail. Traditional methods primarily add more pixels by interpolating existing data, essentially guessing what the new pixels should look like. This can result in a larger image, but it may lack the sharpness of an authentically high-resolution photograph. The adage “bigger doesn’t mean sharper” holds true; enlarging an image too much without intelligent processing will only magnify imperfections and blurriness. To mitigate this loss of sharpness, Tophinhanhdep.com advises avoiding increases of more than 30-40% in dimensions for traditional methods and utilizing sharpening tools judiciously when available.

Why High Resolution Matters for Your Visual Projects
The demand for high-resolution images permeates nearly every aspect of visual content creation and consumption on Tophinhanhdep.com:
- Images (Wallpapers, Backgrounds, Aesthetic, Nature, Abstract, Sad/Emotional, Beautiful Photography): For these categories, high resolution is non-negotiable. A blurry nature wallpaper loses its grandeur, an aesthetic background appears unprofessional, and beautiful photography is diminished if it’s pixelated. High resolution ensures every detail, color, and texture is perfectly rendered.
- Photography (High Resolution, Stock Photos, Digital Photography, Editing Styles): Professional photographers and those offering stock photos rely on high resolution to ensure their work is versatile for various uses, including large prints or detailed editing. It provides the canvas needed for intricate editing styles without compromising quality.
- Visual Design (Graphic Design, Digital Art, Photo Manipulation, Creative Ideas): Graphic designers and digital artists require high-resolution source material for crisp logos, detailed illustrations, and seamless photo manipulations. Creative ideas can only reach their full potential when expressed with clarity and precision.
- Image Inspiration & Collections (Photo Ideas, Mood Boards, Thematic Collections, Trending Styles): When building mood boards or thematic collections, the impact comes from the quality of the visuals. High-resolution images ensure your inspirational content is as compelling as possible, aligning with current trending styles that demand visual excellence.
Ultimately, mastering high-resolution techniques empowers you to create visually stunning and impactful content for any purpose on Tophinhanhdep.com.
Traditional Software Methods for Upscaling Images
Historically, image editing software has been the go-to for adjusting image resolution. While these tools don’t magically add entirely new detail that wasn’t captured by the camera, they offer powerful resampling algorithms that can significantly improve the apparent resolution and suitability of images for various applications.
Mastering Image Resampling in Adobe Photoshop
Adobe Photoshop remains the industry standard for photo editing and graphic design, offering robust capabilities for increasing image resolution through a process known as resampling. Resampling involves adding new pixels (upsampling) or deleting existing pixels (downsampling) to change an image’s dimensions and resolution.
Here’s a step-by-step guide to making a picture higher resolution using Photoshop:
- Enable “Preserve Details 2.0 Upscale”: Before starting, go to
Edit > Preferences > Technology Previews(Windows) orPhotoshop > Preferences > Technology Previews(Mac). Ensure “Enable Preserve Details 2.0 Upscale” is checked. This newer technology helps retain original image details during the resolution change. - Open Your Image: Launch Photoshop and open the image you wish to enhance by going to
File > Open. - Access Image Size Panel: Navigate to
Image > Image Size(or use the shortcutAlt + Control + Ion Windows,Option + Command + Ion Mac). - Understand Image Size Settings:
- Dimensions: This shows the current pixel dimensions (e.g., 1000 pixels horizontally by 667 pixels vertically). Ensure this is set to “Pixels.”
- Fit To: While you can choose preset resolutions, it’s generally best to avoid this to prevent unwanted cropping or aspect ratio changes.
- Enable Resample and Choose Interpolation Method:
- Resample: Make sure the “Resample” box is ticked. This tells Photoshop to change the number of pixels.
- Interpolation Method: From the dropdown, select “Preserve Details 2.0” (if enabled in preferences) or “Preserve Details (enlargement).” These are designed to intelligently add pixels while minimizing quality loss. Other options like “Bicubic Smoother (enlargement)” are also good for upscaling, as they perform polynomial calculations for smoother results.
- Increase Image Resolution: In the “Resolution” field, change the value to your desired PPI. For print, 300 PPI is generally recommended. You’ll see the pixel dimensions update accordingly. The image preview will adjust to show the potential impact.
- Reduce Noise (Optional): If your image has visible noise, adjust the “Reduce Noise” slider in the Image Size panel. Start with a low percentage (e.g., 4%) and increase cautiously, as too much noise reduction can lead to a plastic-like appearance.
- Apply Changes: Click “OK” to apply the new resolution.
- Apply High Pass Filter (Optional for Sharpening): For an extra touch of sharpness, duplicate your image layer (
Ctrl/Cmd + J). With the new layer selected, go toFilter > Other > High Pass. Adjust the radius until edges are highlighted but avoid over-sharpening. Click “OK.” Then, change the blending mode of this High Pass layer to “Overlay” in the Layers panel. This brings out details and significantly enhances sharpness. - Save Your High-Resolution Image: Go to
File > Export > Export AsorFile > Save As. Choose your preferred format (JPEG for web, TIFF for print) and quality settings. For best quality, set compression to minimum or zero (if applicable).
While Photoshop excels, remember that these techniques improve the apparent resolution. An image resized to 30MP in Photoshop will not possess the same inherent detail and data as a 30MP image captured directly by a high-end camera.
Leveraging Free Tools: GIMP and macOS Preview
Not everyone has access to professional software like Photoshop, and for quick adjustments, simpler tools can be incredibly effective. Tophinhanhdep.com recognizes the value of accessible options for various users.
Using GIMP (GNU Image Manipulation Program)
GIMP is a powerful, free, and open-source image editor available for Windows, macOS, and Linux. It offers a comprehensive suite of features, including robust resolution adjustment.
- Open GIMP and your image (
File > Open). - Create a New High-Resolution Canvas: Copy your image (
Ctrl/Cmd + Ato select all, thenCtrl/Cmd + C). Then, create a new image (File > New). In the “Create a New Image” dialog, click “Advanced Options.” Set the X and Y resolutions to 300 pixels/inch (or your desired print resolution) and click “OK.” The width and height will automatically match your copied image. - Resize Canvas: With the new image window active, go to
Image > Canvas Size. Ensure the chain icon next to width/height is locked. Enter your desired new width (e.g., 6000 pixels) and press Tab; the height will adjust. Click “Resize.” - Paste and Scale Image: Paste your copied image onto this new, larger canvas (
Ctrl/Cmd + V). It will appear in the center at its original size. In the Layers dialog, select “Floating Selection (Pasted Layer).” - Scale the Pasted Layer: Go to the “Toolbox” dialog and select the “Scale tool.” Click on the pasted image. In the “Scale” dialog box, ensure the chain icon is locked and enter the new width value you used for the canvas size. Click “Scale.”
- Review and Export: Zoom in (
View > Zoom) to check the quality. Once satisfied, click the “Anchor Layer” icon in the Layers dialog to merge the floating selection with the background. Finally,File > Exportto save your new high-resolution image. For best quality, move the compression slider to zero during export.
Increasing Resolution with macOS Preview
For Mac users, the built-in Preview app offers a quick and easy way to resize images, which in turn affects their resolution.
- Open Image in Preview: Right-click your image file and select
Open with > Preview. - Access Adjust Size Tool: Click the “Markup Toolbar” icon (looks like a pen tip in a circle, or a toolbox). Then, click the “Adjust Size” icon (which may appear as three nested boxes).
- Adjust Dimensions: In the “Image Dimensions” dialog, ensure “Scale proportionally” (the lock icon) is closed and “Resample Image” is selected. Adjust the width to your desired pixel amount (e.g., from 1000px to 1300px); the height will automatically adjust.
- Save or Export: Click “OK.” The image will resize. Go to
File > Saveto overwrite the original orFile > Exportto save it as a new file, preserving the original.
On-the-Go Upscaling with Mobile Apps
Mobile devices are increasingly capable of advanced image editing. For quick resolution adjustments on your smartphone, Tophinhanhdep.com suggests several convenient apps.
Image Size for iPhone (iOS)
Image Size is a popular free app for iOS that allows you to easily resize photos.
- Install and Open: Download “Image Size” from the App Store. Grant it access to your Photos.
- Select Image: Tap the white box (image picker) and choose the photo you want to resize.
- Adjust Dimensions: Select the chain icon to lock width and height proportionally. Enter your desired new width (e.g., 6000 pixels); the height will adjust. Tap “Done.”
- Check Output Quality: Tap the gear icon to view additional options. Ensure the “Output Quality” slider is at 100 percent.
- Print Size Correction (Optional): If printing, consider tapping the “+” icon to increase the “Print size correction factor” to smooth out pixelation.
- Save: Tap the save arrow icon to save the final image.
Android Alternatives
For Android users, apps like Photoshop Express, Picsart AI Photo Editor, or Photo & Picture Resizer offer similar functionality to increase image resolution. Depending on your phone model, you might also be able to adjust the default resolution for photos taken with your camera directly in its settings. “Photo & Picture Resizer” works by allowing you to choose photos, select preset or custom dimensions, and the app will automatically resample the image.
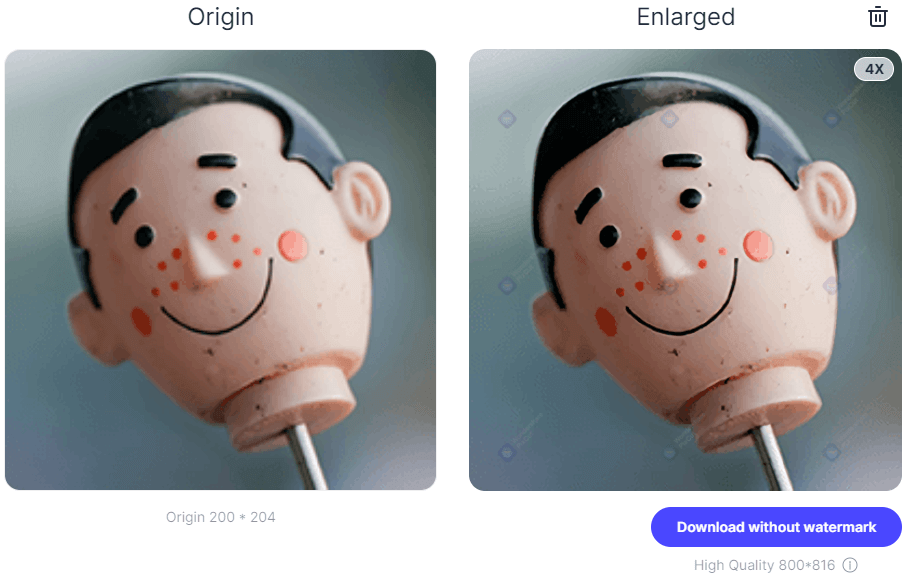
The Future of High Resolution: Harnessing AI Upscalers
While traditional methods are valuable, the advent of Artificial Intelligence (AI) has revolutionized image upscaling. AI-powered tools leverage sophisticated algorithms to intelligently add new pixels and detail, often yielding results that far surpass conventional resampling. Tophinhanhdep.com champions these advanced “AI Upscalers” as part of our suite of recommended Image Tools.
How AI Transforms Low-Res to High-Res
Traditional image upscaling relies on interpolation, which essentially guesses the color of new pixels based on their neighbors. This often leads to a soft, blurry, or “painted” look, especially when significantly enlarging an image.
AI upscalers, on the other hand, utilize deep machine learning technology and neural networks (such as the Super-Resolution Convolutional Neural Network or SRCNN). These networks are trained on millions of high-resolution and corresponding low-resolution image pairs. Through this extensive training, the AI learns patterns, textures, and structures, enabling it to:
- Intelligently Generate Detail: Instead of just guessing, AI can infer what the missing details should look like, effectively adding plausible new information that wasn’t present in the original low-resolution image.
- Remove Artifacts: AI can simultaneously identify and eliminate common issues like pixelation, blur, and JPEG compression artifacts.
- Preserve Sharpness and Clarity: By understanding context and patterns, AI ensures that edges remain sharp and textures are preserved, even when upscaling by hundreds or thousands of percent.
The more images an AI model processes, the more data it acquires, constantly improving its ability to deliver flawless and optimized performance. This intelligent approach allows for significant enlargement (e.g., 1000% or more) without the noticeable degradation common with traditional methods.
Leading AI Tools to Elevate Your Images
Several cutting-edge AI upscaling tools are available today, each offering unique strengths for transforming your images into high-resolution assets for Tophinhanhdep.com’s diverse content, from beautiful photography to graphic design.
Wondershare Fotophire Maximizer
Fotophire Maximizer is highlighted for its ability to enlarge photos by up to 1000% without losing quality. Its key features include:
- Zooming pictures up to 1000% without pixelation or blur.
- Enlarging photos specifically for print projects.
- Allowing high-resolution close-ups on any details.
- Correcting low-light photos with a single click.
- Supporting drag-and-drop for ease of use.
- Providing real-time previews during enlargement.
The process involves opening the image, defining the new height and width, and then increasing the resolution while the software intelligently maintains original quality.
Wondershare PixCut (Online)
For those preferring an online solution, Wondershare PixCut offers a free web-based tool that works directly in your browser.
- Navigate to PixCut: Go to the official PixCut website, choose “Tools,” and click on “Enlarge Image.”
- Upload Image: Upload the low-resolution picture.
- Automatic Upscaling: PixCut automatically enlarges the image without losing quality.
- Download: Simply download the resulting high-resolution image.
This method is praised for its simplicity and speed, offering a one-click solution to making pictures higher resolution online.
Topaz Gigapixel AI
Topaz Gigapixel AI is a powerful standalone AI image upscaler designed to enlarge images by up to 600% without noticeable quality degradation. It uses face recognition technology to retain detail and sharpness in portraits and generates new pixels by sampling millions of similar images, rather than just filling in missing ones.
- Download Gigapixel AI: Obtain a free trial or purchase the software.
- Open Image: Drag and drop or open your image (supports .png, .tiff, .jpeg; convert RAW files first).
- Resize and Refine: Use the menu panel to select scale (up to 6x or custom). Choose “Auto” for AI correction or “Manual” to finely adjust “Suppress Noise,” “Remove Blur,” and “Face Refinement” (especially useful for portraits). The software constantly updates the preview for comparison.
- Save & Export: Hit “Save,” choose your image format, filename, destination, and color profile. The AI processes the image, delivering a high-quality, enlarged version.
AI Image Enlarger (and alternatives like letsenhance.io)
Other dedicated AI image enlargers, like the one from blog.imglarger.com, specifically market their use of deep machine learning technology and SRCNN structure to process input data for optimal performance. They emphasize being free-to-use and online, eliminating the need for downloads.
Letsenhance.io is another notable AI tool, also based on Deep Convolutional Neural Networks, capable of upscaling images up to 16x. While it offers advanced enhancement features for tones and colors, Tophinhanhdep.com notes that it operates on a freemium model with limitations on free usage. For consistent, unrestricted performance, a subscription might be necessary.
For optimal results without complex software or subscription fees, Tophinhanhdep.com often recommends exploring free online AI upscalers first, as they often provide a perfect balance of accessibility and advanced technology for many users.
Best Practices for Maintaining and Optimizing Image Quality
Achieving high resolution is just one piece of the puzzle. To truly maximize the visual impact of your images on Tophinhanhdep.com, it’s essential to understand the interplay between resolution, file size, and the specific application of your visuals.
Balancing File Size and Visual Fidelity
When you increase an image’s resolution, its file size naturally grows. This can have implications for website loading speeds, storage capacity, and ease of sharing.
- Compression: While high resolution is crucial, aggressive compression (e.g., saving JPEGs at very low quality settings) can introduce artifacts and undermine the benefits of high resolution. Always aim for the lowest acceptable compression level to maintain visual fidelity. For web use, a balance must be struck: high enough resolution and quality to look good, but small enough file size to load quickly. Tools like “Image Tools > Compressors” and “Optimizers” on Tophinhanhdep.com can help achieve this balance.
- File Formats: Choose the right file format. PNGs are excellent for retaining detail and transparency, making them suitable for graphic design and digital art, but often result in larger files. JPEGs offer good compression for photographic images but are “lossy.” TIFFs are uncompressed and ideal for print.
High Resolution Across Tophinhanhdep.com’s Core Content
The application of high-resolution images varies depending on the specific category on Tophinhanhdep.com:
- Wallpapers & Backgrounds: High resolution ensures that these images look crisp on various screen sizes, from smartphones to large desktop monitors, enhancing the overall user experience.
- Aesthetic & Beautiful Photography: For showcasing artistic or stunning photographs, high resolution preserves every nuance, texture, and color, allowing viewers to appreciate the photographer’s vision fully.
- Nature & Abstract Images: The intricate details of a macro nature shot or the subtle gradients of an abstract piece demand high resolution to truly convey their essence.
- Sad/Emotional Imagery: Even in emotionally charged visuals, clarity enhances impact, ensuring that expressions and subtle cues are not lost to pixelation.
- Graphic Design & Digital Art: For these visual design categories, high resolution is fundamental for sharp lines, clean typography, and vibrant color reproduction, especially when preparing files for print or large digital displays.
- Photo Manipulation: Starting with high-resolution source images ensures that all manipulated elements blend seamlessly and maintain quality throughout the editing process.
- Image Inspiration & Collections: Maintaining high resolution in mood boards and thematic collections ensures that your visual references are clear and effective, contributing to well-executed photo ideas and trending styles.
By prioritizing high resolution and understanding its implications, users of Tophinhanhdep.com can consistently produce, share, and enjoy top-tier visual content.
Conclusion: Elevating Your Visuals with Tophinhanhdep.com
The journey to making an image high resolution is a blend of understanding fundamental principles and applying the right tools and techniques. From mastering traditional software like Photoshop, GIMP, and macOS Preview to harnessing the transformative power of AI upscalers, the options available today are more sophisticated and accessible than ever before. While it’s important to manage expectations – true image quality starts at capture – the methods outlined here can significantly enhance the resolution and visual appeal of your existing images.
At Tophinhanhdep.com, we are dedicated to providing the resources and knowledge you need to excel in the world of digital imagery. Whether you’re a photographer, graphic designer, or simply someone who appreciates beautiful visuals, applying these high-resolution techniques will unlock new possibilities for your wallpapers, backgrounds, aesthetic photography, and every creative project. Explore our “Image Tools” for converters, compressors, optimizers, and AI upscalers, and delve into our “Visual Design” and “Photography” sections for more insights. Embrace the pursuit of high resolution, and let Tophinhanhdep.com be your guide to creating truly stunning and impactful visuals.