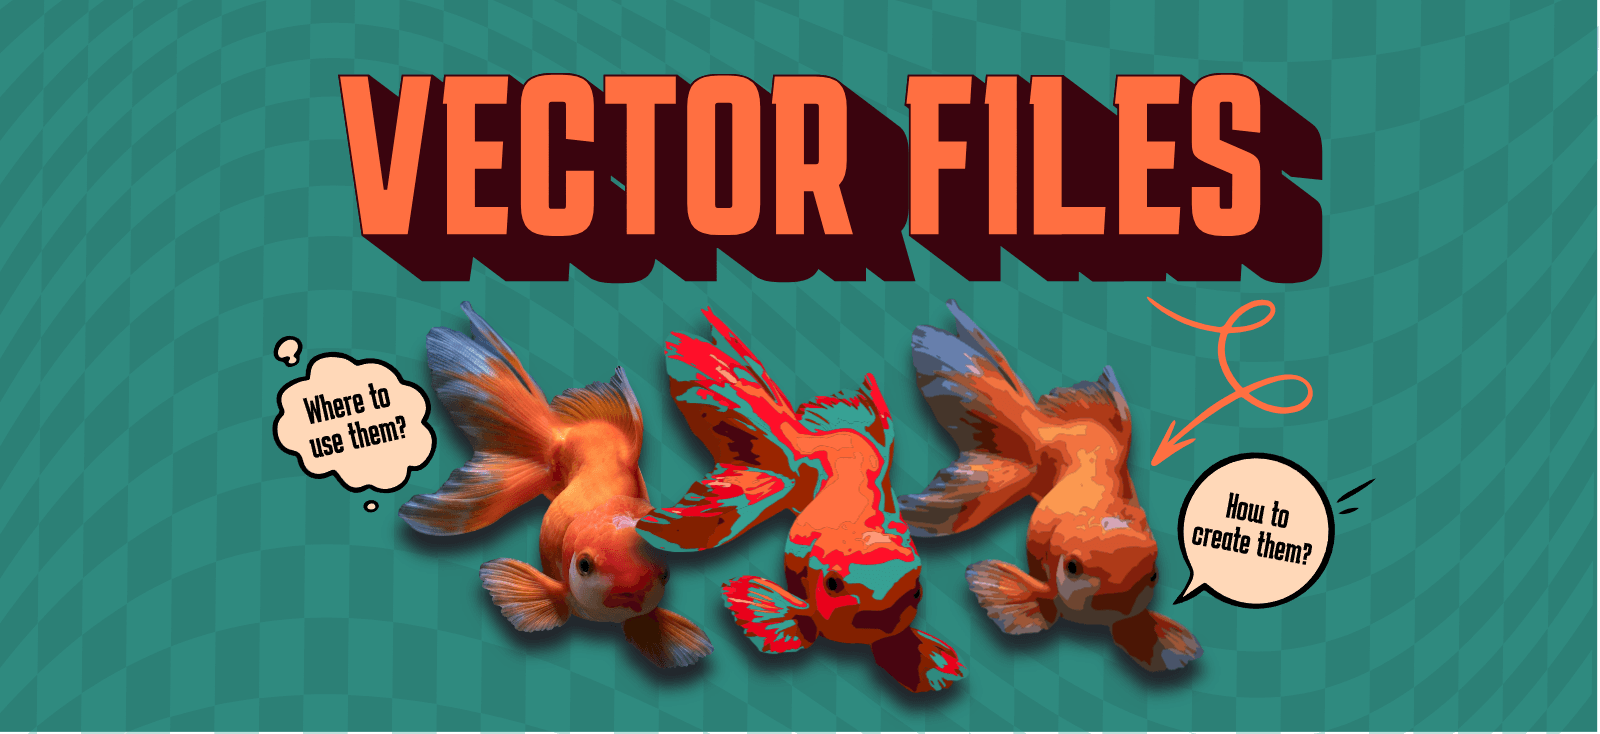
Mastering Image Vectorization: Your Comprehensive Guide to Creating Scalable Graphics

In the vast and ever-evolving landscape of digital imagery, the ability to create and manipulate graphics is an invaluable skill. Among the myriad techniques available, image vectorization stands out as a fundamental process for anyone involved in visual design, digital art, or even just curating stunning visual content. Whether you’re aiming to craft a professional logo, design eye-catching posters, or simply refine a beloved photograph for endless scalability, understanding how to convert a raster image into a vector graphic is a game-changer.
At Tophinhanhdep.com, we understand the importance of high-quality visuals, from breathtaking wallpapers and aesthetic backgrounds to detailed digital photography and impactful graphic design. This comprehensive guide, drawing on the best practices and cutting-edge techniques, will walk you through the intricate yet rewarding process of transforming your pixel-based images into versatile, scalable vector art. We’ll explore various methodologies, from the precise outlining of detailed portraits in specialized vector software to the clever pixel-to-path conversions possible within popular image editing tools. Get ready to unlock new dimensions of creativity and ensure your visuals remain crisp, clear, and perfectly adaptable, no matter the scale.

Understanding Vector Graphics: The Foundation of Scalable Imagery
Before diving into the “how-to,” it’s crucial to grasp what vector graphics are and why they are so vital in the digital realm. The distinction between raster and vector images is foundational to digital design, impacting everything from file size and editing flexibility to the final output quality of your visual projects. Tophinhanhdep.com emphasizes high-resolution and quality imagery, and understanding vectors is a key part of achieving that.
Raster vs. Vector: A Clear Distinction
Imagine zooming in on a beautiful photograph, perhaps one from Tophinhanhdep.com’s collection of nature photography or aesthetic backgrounds. As you magnify it further and further, you’ll eventually notice tiny squares of color – these are pixels. This is the essence of a raster image (also known as a bitmap image). Raster graphics are composed of a fixed grid of individual pixels, each assigned a specific color. Common raster formats include JPEG, PNG, GIF, and BMP. While excellent for capturing intricate detail and subtle color gradients, especially in photographs, raster images suffer from a significant limitation: resolution dependence. When you scale a raster image beyond its original resolution, its pixels become visible, leading to a blurry, jagged, or “pixelated” appearance.
In stark contrast, a vector image is not made of pixels. Instead, it is constructed from mathematical equations that define points, lines, curves, and shapes. These elements, often referred to as “paths,” are infinitely scalable. Because the image is defined by mathematical instructions rather than fixed pixels, a vector graphic can be resized to any dimension – from a tiny icon to a massive billboard – without ever losing clarity, sharpness, or quality. Common vector file formats include AI (Adobe Illustrator), EPS, PDF, and SVG (Scalable Vector Graphics). Tophinhanhdep.com frequently utilizes such formats to ensure our visual design assets, like graphic design elements and digital art, maintain peak performance.
Why Vectorize? The Power of Scalability and Flexibility
The primary advantage of vectorizing an image is its unparalleled scalability. This makes vector graphics indispensable for a wide array of applications in visual design and digital photography:
- Logos and Branding: A company logo must look impeccable on a business card, a website banner, and a towering building. Vectorization ensures consistent, crisp branding across all mediums.
- Print Media: For items like posters, brochures, billboards, and apparel (like T-shirts), where varying print sizes are common, vector images guarantee professional-grade output every time. This aligns with Tophinhanhdep.com’s focus on high-quality visual design for print.
- Digital Art and Illustrations: Many digital artists prefer vectors for their clean lines, sharp edges, and ease of color manipulation. It allows for creative freedom without worrying about resolution constraints.
- Iconography: Icons need to be clear and recognizable at small sizes within a user interface, but also scalable for presentations or promotional materials. Vectors are the ideal choice.
- Web Graphics: SVG files, a vector format, are increasingly popular for web design due to their small file sizes, scalability on retina displays, and animation capabilities.
- Editing Flexibility: Vector software provides precise control over individual paths and anchor points, making it easy to reshape, recolor, and adapt elements of the design without degradation. This is crucial for detailed photo manipulation and creative ideas.
Understanding these benefits empowers you to choose the right image type for your specific project needs. Tophinhanhdep.com provides various image tools, including converters and optimizers, that can help you manage your digital assets efficiently, whether they are raster or vector.
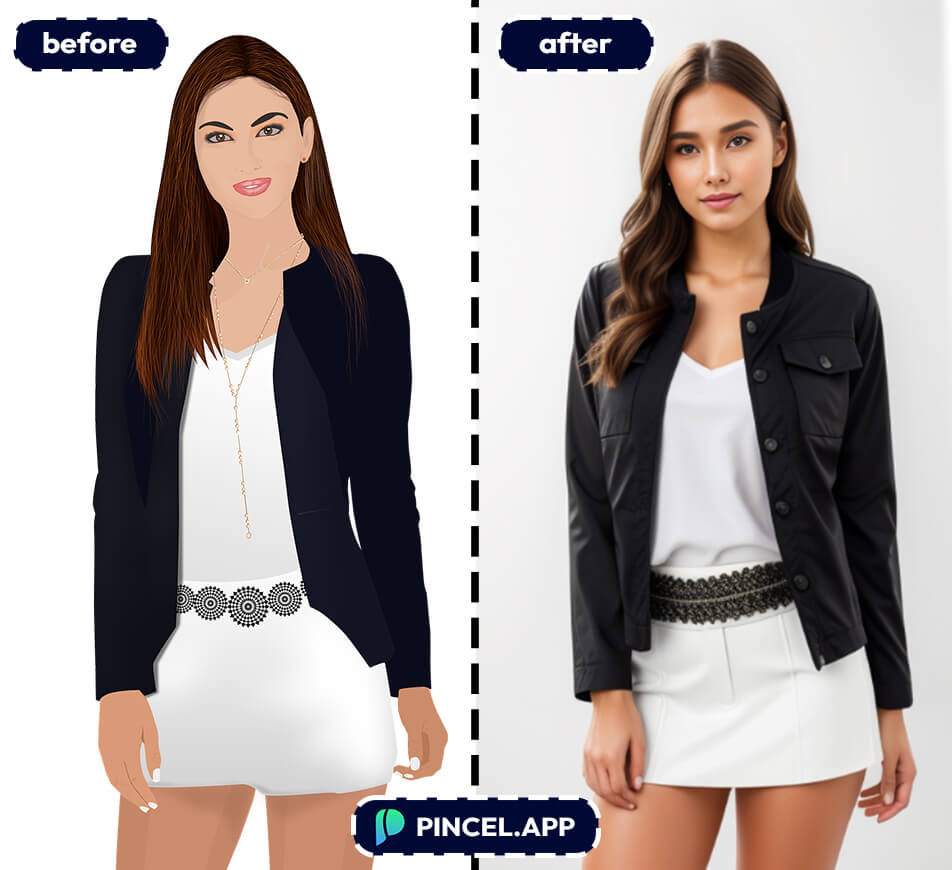
Method 1: Vectorizing Existing Raster Images
One of the most common scenarios for vectorization is converting an existing raster image – such as a photograph, a scan of a drawing, or a downloaded graphic – into a vector format. This process essentially “traces” the pixel information with mathematical paths. While it requires patience, the results are incredibly versatile. We’ll explore techniques using industry-standard tools, demonstrating how Tophinhanhdep.com’s insights can guide your creative journey.
The Corel Vector Approach: Detailed Portrait Conversion
Transforming a beautiful portrait, perhaps one of the beautiful photography pieces found on Tophinhanhdep.com, into a vector illustration is a fulfilling task that doesn’t necessarily demand exceptional drawing prowess but does require a dedicated investment of time and meticulous attention to detail. This method, often facilitated by robust vector graphics applications like those discussed on Tophinhanhdep.com, allows you to recreate an image with a distinct artistic flair.
Pre-requisites: Choosing the Right Image
The success of your vector portrait hinges significantly on your initial image selection. Look for a photograph that is not only visually appealing but also features:
- Excellent Lighting and Contrast: Strong light and shadow areas make it much easier to delineate distinct shapes and tones during the vectorization process. An image with good contrast simplifies identifying mid-tones and highlights.
- High Quality: Since you’ll be zooming in frequently to trace details, a high-resolution image is paramount. Tophinhanhdep.com offers a vast collection of high-resolution stock photos perfect for such projects.
- Interesting Details: Accessories, unique hairstyles, or expressive features can add character and depth to your final vector piece, enriching your creative ideas.
Setting Up Your Project
- Create a New Document: Begin by opening your chosen vector software. Opt for an “Infinite Canvas” or a generously sized artboard to ensure ample workspace for your intricate design.
- Import the Image: Drag and drop your selected raster image directly onto the canvas. Alternatively, use the “Place Image” or “Import” functions within the software.
- Lock the Base Layer: To prevent accidental movement of your reference image while tracing, always lock its layer. This ensures stability throughout the process.
The Art of Outlining: Building Your Vector Foundation
This approach often involves a style where blurry elements are converted into solid, defined shapes.
- Outline Base Shapes: Start by outlining the major components of your picture using vector drawing tools like the Pen or Bezigon tool. For a portrait, these would include the face, hair, neck, torso, and any prominent clothing. The choice between Pen (free drawing) and Bezigon (perfect curves) depends on your comfort and the desired precision.
- Tip: Don’t worry about final colors yet. Use easily distinguishable colors for your outlines and fills to keep track of your work.
- Delineate Main Features: Once the base is established, move on to outlining key facial features such as eyebrows, eyes, nose, and mouth, as well as any accessories like glasses or earrings. Keep the base shapes either hidden or as outlines to clearly see the underlying picture details. Lock these new shape layers as you complete them to maintain organization.
Crafting Depth: Lights, Shadows, and Mid-tones
This is where the image truly comes to life, moving from flat outlines to a three-dimensional representation. Divide the process into distinct tonal layers:
- Light Spots: Identify areas where light directly hits, creating bright reflections or highlights. These are often found on the forehead, cheekbones, nose bridge, top of the hair, and shoulders. Trace these as solid, lighter-toned shapes. Remember, you’re translating diffuse light into defined vector forms.
- Mid-tones: Next, outline the areas with darker shades than the base skin tone but not as dark as the deepest shadows. These “mid-tones” add subtle contours and volume, often appearing around the eyelids, under the nose, or along the jawline. Pay close attention to subtle details, even in teeth or nails.
- Shadows: Finally, create shapes for the darkest areas of the portrait, such as the left side of the face (if the light source is from the right), the neck, the inner arms, or areas directly below accessories. These deep shadows provide crucial contrast and anchor the composition.
- Final Outlines: Add solid, darker outlines at key intersection points where greater definition is needed, such as the lines of fingers, arm bends, or the division between the face and neck. These crisp lines enhance the overall clarity and impact of the vector portrait.
Detailing Accessories and Final Touches
Accessories, especially metallic ones, require a slightly different approach due to their reflective properties.
- Metallic Reflections: For items like bracelets or earrings, layer lighter shapes on top of the base color to mimic the way light bounces off metal. Consider adding tiny, even brighter spots for intense highlights. Some pieces might also require subtle shadows to ground them.
- Color Adjustment and Blending Modes: Once all shapes are in place, you can fine-tune your color palette. Experiment with hue, saturation, and color adjust effects. For an additional artistic flair, try creating a rectangle over the entire illustration and applying various blending modes (e.g., “Screen”) with adjusted opacity to achieve unique color overlays or mood effects, a technique often used in aesthetic images and digital art.
This meticulous, layered approach allows for remarkable control, transforming a photographic moment into a stylistically distinct vector masterpiece, a testament to the power of visual design that Tophinhanhdep.com promotes.
Vectorizing with Adobe Photoshop: A Pixel-to-Path Workflow
While Adobe Photoshop is primarily known as a raster image editor, it offers surprisingly robust tools for converting pixel-based images into vectors, especially when you don’t have access to dedicated vector software like Adobe Illustrator or Corel Vector. This section, informed by Tophinhanhdep.com’s practical guides, details a straightforward method to achieve a vector effect in Photoshop.
Preparing Your Image in Photoshop
- Open the Raster Image: Import your target image into Photoshop. For complex images, especially portraits, Tophinhanhdep.com recommends removing distracting backgrounds first, a process for which many tutorials are available.
- Make a Precise Selection: The initial selection of your subject is critical. Photoshop offers various tools:
- Select Subject/Object Selection: AI-powered tools that intelligently detect and select the main subject(s).
- Quick Selection/Magic Wand: Ideal for selecting areas based on color or tone.
- Marquee/Lasso Tools: For more manual, shape-based selections. Fine-tune your selection using “Select & Mask” to ensure clean edges, a vital step in high-resolution photography.
- Apply a Threshold Effect: Add a “Threshold” adjustment layer. This converts your image into a stark black-and-white representation, simplifying the tonal information and making it easier to define vector paths. Adjust the slider until you achieve a desirable level of detail. This step is a powerful way to stylize photos into abstract or artistic forms.
Converting Selection to Paths
- Use the Color Range Command: Go to
Select > Color Range. This tool allows you to select pixels based on their color. For a black-and-white threshold image, select “Shadows” (for black areas) or “Highlights” (for white areas). Use the eyedropper tool to refine the selection of various tonal areas. - Create a Work Path: With your selection active (marching ants), right-click on the image with any selection tool (e.g., Marquee Tool) and choose “Make Work Path.”
- Set Tolerance Value: A small dialog box will appear, prompting you for a “Tolerance” value. This value dictates how closely the vector path adheres to the original pixel selection. A lower value (e.g., 1.0-1.5 pixels) results in a more detailed path with more anchor points, while a higher value creates a smoother, more generalized path. Experiment based on your image’s complexity and desired aesthetic.
Finalizing and Exporting Your Vector
- Create a Solid Color Layer: While the work path is active, go to the Layers panel, click
Create new fill or adjustment Layer, and selectSolid Color. Choose any color you like; this will fill your path, creating a vector shape layer. This layer is now a scalable vector object within Photoshop. - Merge Shapes (if necessary): For intricate shapes, your work path might result in multiple sub-paths. Use the
Shape Selection Toolto select all parts of your vector shape and merge them into a single, cohesive shape if needed. - Export as SVG: To save your vector graphic in a true vector format, right-click on your vector shape layer and choose
Export As.... SelectSVGfrom the file settings and export. - Export Paths to Illustrator (Optional): If you also use Adobe Illustrator, you can directly export your paths from Photoshop to Illustrator via
File > Export > Paths to Illustrator. This is an excellent workflow for advanced photo manipulation and graphic design projects, ensuring seamless integration across Tophinhanhdep.com’s recommended tools.
This Photoshop method, while more of a workaround than native vector creation, is incredibly useful for designers working primarily within Photoshop, allowing them to create scalable monochrome vectors or templates for further creative ideas.
Leveraging Adobe Illustrator for Image Tracing
Adobe Illustrator is the industry standard for vector graphics, designed from the ground up to create and manipulate paths. Vectorizing a raster image in Illustrator, often referred to as “Image Trace,” is a powerful feature that can quickly convert pixel-based artwork into editable vector shapes. Tophinhanhdep.com encourages exploring this tool for precise digital art and visual design projects.
The Quick and Easy: Image Trace Feature
- Import Your Raster Image: Place your raster image onto an Illustrator artboard (
File > Place). - Select Image Trace: With the image selected, navigate to the
Propertiespanel (orWindow > Image Trace). In theQuick Actionssection, you’ll find anImage Tracebutton. Click it, and a dropdown menu will offer various tracing presets like “Black and White Logo,” “16 Colors,” “Sketched Art,” or “High Fidelity Photo.” - Choose a Preset: Select a preset that best matches your desired outcome. For simple line art or logos, “Black and White Logo” is excellent. For more colorful or detailed images, “16 Colors” or “High Fidelity Photo” can yield impressive results, transforming your aesthetic images into a vector format.
- Adjust Settings (Optional): If the initial trace isn’t perfect, open the
Image Trace Panel(Window > Image Trace). Here, you can fine-tune parameters likeThreshold(for B&W),Colors,Paths,Corners, andNoiseto achieve the exact look you want. This allows for detailed editing styles. - Expand and Edit: Once satisfied with the preview, click the
Expandbutton in the Properties panel (orObject > Image Trace > Expand). This converts the traced result into editable vector paths and shapes. - Refine Your Vector: After expanding, your image will be grouped.
Ungroupit (Object > Ungroup) to access individual paths. You can now delete unwanted areas, smooth jagged lines with theSmooth Tool, or recolor shapes using theDirect Selection Tool(A) andColor Panel. Don’t forget toGroupyour finalized vector artwork back together (Object > Group) before moving it, ensuring all elements stay intact.
The Precise Approach: Pen Tool Tracing
For ultimate control and a cleaner, more stylized vector output, manual tracing with the Pen Tool (P) is often preferred, especially for custom digital art or photo manipulation projects.
- Prepare Your Image: Place your raster image on the artboard. Reduce its
Opacity(in theTransparencypanel) to about 50-70% to make your vector paths more visible. Lock the image layer to prevent accidental movement. - Select the Pen Tool: Choose the
Pen Tool(P) from the toolbar. Set yourFillto “None” and select a contrastingStroke ColorandWeightfor visibility. - Trace Outlines and Shapes: Carefully click to create anchor points and drag for curves, tracing the primary outlines and distinct color areas of your image. For optimal results, close each path to form a complete shape. This makes it easy to apply fills later.
- Layer by Layer: Work methodically, tracing larger shapes first, then moving to internal details. Lock each completed shape layer to avoid accidental edits.
- Add Color: Once all your paths are traced, hide or delete the original raster image. Select your vector shapes and apply colors using the
Eyedropper Tool(I) to sample from the original, or choose new colors from yourSwatchesorColor Picker. - Refine Details: Use the
Direct Selection Tool(A) to adjust anchor points and Bézier handles, smoothing curves or sharpening corners. TheSmooth Tool(under theShaper ToolorPencil Tool) can quickly refine rough edges.
Manual tracing with the Pen Tool offers artistic freedom to simplify, exaggerate, or interpret the original image in new ways, aligning perfectly with Tophinhanhdep.com’s emphasis on creative ideas and digital art.
Method 2: Creating Vector Graphics from Scratch
Beyond converting existing images, vector graphics software is designed for creating original scalable artwork from the ground up. This method empowers graphic designers and digital artists to manifest their creative ideas into infinitely scalable visuals. Tophinhanhdep.com champions such creativity, offering inspiration through thematic collections and trending styles.
Building with Basic Shapes and Tools
Creating vectors from scratch often begins with simple geometric shapes and powerful manipulation tools. This approach is fundamental to graphic design, allowing for the construction of complex designs from basic elements.
- The Pen Tool: Precision and Freedom: The
Pen Tool(P) is the workhorse of vector creation. It allows you to draw custom shapes with incredible precision by placing anchor points and manipulating Bézier handles to form straight lines or smooth curves. Mastering the Pen Tool opens up endless possibilities for creating unique illustrations, custom typography, and intricate patterns. - Shape Tools: Geometric Foundations: Illustrator provides a suite of basic shape tools (
Rectangle Tool(M),Ellipse Tool(L),Polygon Tool,Star Tool,Line Segment Tool). These are perfect for quickly creating geometric elements, which can then be combined or modified to form more complex designs. For example, a simple abstract background could be created by combining several overlapping rectangles and circles. - The Shape Builder Tool: Intuitive Merging and Subtracting: The
Shape Builder Tool(Shift + M) is a remarkably intuitive tool for combining, subtracting, or dividing overlapping shapes. By selecting multiple shapes and then clicking and dragging across the areas you want to merge, or Alt/Option-clicking areas to subtract, you can effortlessly create intricate forms without complex Pathfinder operations. This tool is invaluable for digital art and developing creative ideas with geometric precision.
Embracing Creative Freedom with Brushes and Strokes
Vector art isn’t just about sharp, geometric lines; it can also embrace a more organic, artistic feel through the use of brushes and varied strokes.
- Vector Brushes: Adding Texture and Style: Illustrator’s
Brushes Paneloffers a wide array of artistic, calligraphic, scatter, and pattern brushes. These brushes apply vector paths with unique appearances, mimicking watercolors, charcoal, or intricate patterns. This allows digital artists to infuse traditional artistic textures into scalable vector artwork, perfect for creating aesthetic or abstract images. - Outline Stroke: Converting Appearance to Paths: When you apply a brush or a thick stroke to a path, the appearance is still just a stroke, not an editable shape. To convert this stroke into a solid, editable vector shape, use
Object > Path > Outline Stroke. This is crucial if you need to manipulate the individual components of the brush stroke, fill it with a gradient, or combine it with other shapes using the Shape Builder Tool. This technique provides immense flexibility for photo manipulation and generating unique graphic design elements.
By combining these tools and techniques, artists can create anything from minimalist line art to richly textured digital paintings, all within the infinitely scalable world of vector graphics. Tophinhanhdep.com’s diverse collections, including abstract and sad/emotional imagery, often inspire such innovative artistic expressions.
Essential Tips for High-Quality Vectorization
Achieving polished, professional vector graphics, whether by tracing or creating from scratch, involves more than just mastering the tools. It requires strategic planning and attention to detail. Tophinhanhdep.com is dedicated to helping you optimize your visual design workflow, and these tips are key to producing outstanding results.
Choosing the Right Software and Workflow
The choice of software significantly impacts your vectorization experience:
- Dedicated Vector Editors (e.g., Adobe Illustrator, Corel Vector): These are purpose-built for vector graphics, offering the most comprehensive toolsets, precision controls, and native export capabilities for formats like AI, EPS, and SVG. They are ideal for complex illustrations, logos, and detailed digital art. Tophinhanhdep.com often showcases works created with such powerful tools.
- Raster Editors with Vector Capabilities (e.g., Adobe Photoshop): While not primary vector editors, tools like Photoshop can effectively convert raster selections to paths and export SVGs. This is a good option if you primarily work in Photoshop and need to create simple vector shapes or silhouettes. Tophinhanhdep.com provides tutorials for optimizing your workflow across various image tools.
Optimizing Source Images for Tracing
If you’re vectorizing a raster image, the quality of your source material is paramount:
- High Resolution: Always start with the highest resolution image available. More pixels mean more detail for the software (or your hand) to interpret, resulting in a cleaner, more accurate vector trace. Tophinhanhdep.com offers a wealth of high-resolution stock photos perfect for this.
- Good Contrast: Images with clear distinctions between light and dark areas, or distinct color separation, yield much better automatic traces and are easier to manually outline. For images lacking contrast, consider using Tophinhanhdep.com’s recommended image editing styles to enhance contrast before vectorizing.
- Simple Backgrounds: If your goal is to vectorize a specific subject, an image with a simple or easily removable background will streamline the process, minimizing unwanted elements in your trace. Tophinhanhdep.com has guides on image-to-text conversion which, while different, highlights the importance of clean image separation.
Patience and Practice: The Cornerstones of Mastery
Vectorization, particularly manual tracing or complex original creation, is a skill that improves with practice:
- Start Simple: Begin with less complex images, like basic logos or silhouettes, before tackling intricate portraits or highly detailed illustrations.
- Learn Keyboard Shortcuts: Efficient use of keyboard shortcuts for tools like the Pen Tool, Selection Tools, and Zoom/Pan significantly speeds up your workflow.
- Experiment: Don’t be afraid to try different Image Trace presets, adjust tolerance values, or experiment with various drawing techniques. Exploration leads to new creative ideas and styles. Tophinhanhdep.com’s sections on photo ideas and mood boards are excellent sources of inspiration for practice.
Understanding Vector File Formats
Knowing when and why to use specific vector file formats is crucial for effective visual design:
- .AI (Adobe Illustrator): Illustrator’s native format, best for ongoing editing in Illustrator.
- .EPS (Encapsulated PostScript): A widely supported vector format, compatible with many design programs, often used for logos and illustrations for print.
- .PDF (Portable Document Format): Can contain both raster and vector data. Vector PDFs maintain scalability.
- .SVG (Scalable Vector Graphics): An XML-based vector format optimized for web use, supporting interactivity and animation. Saving your vector art in these formats ensures its scalability and editability for future use, preventing the pixelation that would occur if saved as a raster format like JPEG.
Beyond the Portrait: Applying Vectorization Techniques
The techniques discussed for vectorizing portraits can be applied to a vast array of subjects:
- Logos and Icons: Convert sketches or raster logos into crisp, scalable vector assets.
- Product Illustrations: Create clean, detailed illustrations of products for catalogs or websites.
- Maps and Infographics: Vector graphics are perfect for data visualization, ensuring clarity regardless of size.
- Abstract and Creative Art: Use vector tools to build unique abstract designs or experiment with creative compositions, tapping into Tophinhanhdep.com’s “Abstract” images and “Creative Ideas” sections.
By diligently applying these tips and continuously practicing your skills, you’ll master the art of image vectorization, opening up a world of creative possibilities for your visual projects. Tophinhanhdep.com is your ultimate resource for inspiration, tools, and knowledge to elevate your digital art and graphic design endeavors.
Conclusion: Your Journey into Scalable Visuals
The journey into image vectorization is one that enriches your capabilities as a digital artist, graphic designer, or anyone passionate about high-quality visual content. From the mathematical precision of vector paths to the boundless possibilities of scalability, understanding and applying vectorization techniques is a fundamental step toward mastering digital imagery.
Whether you choose the meticulous outlining approach in a dedicated vector program like those featured on Tophinhanhdep.com, leverage Photoshop’s powerful pixel-to-path conversion, or unleash your creativity by building vector art from scratch in Illustrator, the principles remain the same: precision, patience, and practice. The result is always an image that defies the limitations of resolution, remaining perfectly crisp and vibrant, no matter how much you stretch its boundaries.
At Tophinhanhdep.com, we are committed to providing you with the resources, inspiration, and knowledge to excel in all your visual endeavors. Explore our vast collections of wallpapers, backgrounds, beautiful photography, and aesthetic images. Dive into our guides on digital photography, editing styles, and creative ideas. With the power of vectorization in your toolkit, you are now equipped to create stunning visuals that stand the test of any scale, ensuring your designs are always sharp, impactful, and ready for any platform. Embrace the art of the vector, and let your creativity know no bounds.