How to Make an Image a Circle in Canva: A Comprehensive Guide to Mastering Round Image Design

In the vast landscape of digital visual design, the shape of an image can profoundly influence its aesthetic appeal and the message it conveys. While rectangular and square images are ubiquitous, the elegance and softness of a circular image often capture attention, fostering a sense of harmony and focus. This unique shape has become a staple for profile pictures across social media platforms, professional testimonials on websites, and various creative design projects. If you’ve ever admired a perfectly round photo and wondered how to achieve this effect with ease, Canva, a leading online graphic design tool, offers a remarkably straightforward solution.

At Tophinhanhdep.com, we understand the power of compelling visuals. From breathtaking wallpapers and diverse backgrounds to high-resolution photography and sophisticated image manipulation techniques, our goal is to empower creators and enthusiasts alike. This guide delves into the art of transforming your images into circles using Canva, a skill that integrates seamlessly with principles of visual design, photography, and effective use of image tools. We’ll explore not just the “how,” but also the “why,” touching on compositional benefits, creative enhancements, and how Tophinhanhdep.com’s complementary tools can elevate your circular images even further.
The Aesthetic Appeal and Practical Benefits of Circular Images

Before diving into the technical steps, it’s worth understanding why circular images hold such a prominent place in contemporary visual communication. Their unique geometry offers distinct advantages that enhance both composition and user experience.
Enhancing Composition and Visual Harmony
When you crop an image into a circle, you’re not just changing its shape; you’re fundamentally altering its composition. The absence of sharp corners directs the viewer’s eye towards the center, making central composition an inherently effective technique for circular frames. This means your main subject, whether it’s a person’s face, an abstract pattern, or a detail from nature, naturally becomes the focal point, commanding immediate attention.
One of the most significant benefits of circular cropping is its ability to remove visual noise and distractions. Unlike rectangular frames where peripheral elements can easily sneak into the corners and detract from the subject, a circle inherently focuses the viewer’s gaze, leaving less room for unwanted visual clutter. This clarity is invaluable for impactful images.
Furthermore, a circle’s gentle, continuous curve often evokes feelings of completeness, unity, and softness. This makes it particularly effective for portraits. A human face, being inherently oval-shaped, resonates harmoniously with a circular frame. This similarity in shapes creates a visually pleasing and comforting aesthetic, which is why many online platforms default to round profile pictures. The natural affinity between the subject and the frame contributes to a more engaging and harmonious image, aligning with sophisticated digital photography and graphic design principles. Whether it’s a beautiful portrait or an aesthetic abstract, the circular crop adds a unique layer of artistic intent.
Streamlining Your Online Presence
In today’s digital age, consistency in branding and personal representation across various online platforms is crucial. From professional networking sites to social media, profile pictures are often displayed in a circular format. However, many platforms offer limited or clunky built-in cropping tools, making it challenging to perfectly position your face or subject within the round frame. The result can often be an awkward or poorly composed image that doesn’t truly represent you or your brand.
This is where pre-cropping your images into a circle becomes incredibly advantageous. By performing the circle crop beforehand in a tool like Canva, you gain complete control over the positioning, sizing, and overall composition of your image within the circular frame. This ensures that your profile picture looks exactly as you intend, every single time, across all platforms.
Consider the time and effort saved. Instead of uploading a rectangular photo to multiple sites and going through the repetitive, often frustrating process of resizing and adjusting each one individually – potentially yielding slightly different results on each platform – you can create one perfect circular image. This single, pre-cropped image can then be uploaded everywhere, guaranteeing a consistent, professional, and visually appealing presence. This not only saves time but also ensures uniformity, which is a key element in effective visual design and personal branding. For creators leveraging beautiful photography or specific aesthetic images, this consistency ensures their work is presented flawlessly.
A Step-by-Step Guide to Circle Cropping in Canva
Canva’s intuitive interface makes the process of cropping an image into a circle surprisingly simple, even for those new to graphic design. Here’s a detailed walkthrough.
Getting Started with Canva
- Access Canva: Open your web browser and navigate to Canva.com. You’ll need to either sign into your existing account or create a free one. As a cloud-based application, an account is essential to utilize its features.
- Create a New Design: Once logged in, you’ll see Canva’s dashboard. To begin, click the “Create a design” button, usually located in the upper right corner.
- You can choose from a variety of pre-set templates (e.g., “Social Media,” “Logo”) that suit your final output’s dimensions.
- Alternatively, select “Custom size” to input specific dimensions, such as a perfect square (e.g., 1000 x 1000 px), which is ideal for circular crops to ensure your frame expands easily to the edges.
- Upload Your Image: With your blank canvas open in the editor:
- Go to the “Uploads” section in the left-hand sidebar.
- Click “Upload files” and select the image you wish to crop from your device.
- Once uploaded, click on the image in the “Uploads” section to add it to your canvas.
Utilizing Canva’s Frames for Perfect Circles
Canva uses a brilliant feature called “Frames” to achieve shape cropping. Frames act as placeholders that automatically crop any image dragged into them.
- Navigate to Elements: In the left-hand sidebar, click on “Elements.”
- Search for Circle Frames: In the search bar within the “Elements” section, type “Circle Frame” and press Enter.
- Select Your Frame: You’ll be presented with a selection of circle frames. These might include plain circles, circles with various border thicknesses, or even more decorative options. Choose the simple, plain circle frame for a clean crop, or an outlined one if you desire a border (more on this later). Click on your chosen frame to add it to your canvas.
- Tip: This “frame” technique isn’t limited to circles! You can find frames for stars, hearts, alphabets, or even mockups like an iPhone screen, allowing for diverse photo manipulation and creative ideas.
- Drag and Drop Your Image: With both your uploaded photo and the circle frame on the canvas, simply select your photo and drag it directly over the circle frame. As you hover, you’ll see the image snap into the frame, automatically cropping itself into a perfect circle.
Refining Your Circular Image
Once the image is in the frame, you have several options for fine-tuning its appearance.
- Resize and Reposition the Frame: You can adjust the overall size of the circular image by clicking on the frame and dragging its corner handles. To move the entire circular image, simply click and drag it to your desired position on the canvas.
- Edit the Image Within the Frame: To adjust how your photo sits inside the circle:
- Double-click on the image within the frame. This will reveal the full, uncropped version of your photo, appearing slightly translucent behind the frame.
- Now, you can drag the image to reposition it within the circle, ensuring your main subject is perfectly centered.
- You can also use the corner handles of the underlying image to resize it, making your subject larger or smaller within the circular crop.
- Smart Crop (Optional): Canva often includes a “Smart Crop” button when editing within a frame. Clicking this allows Canva’s AI to analyze your image and automatically suggest optimal resizing, repositioning, and even slight tilting to achieve what it considers a balanced composition. This can be useful for quick edits, especially for aesthetic or nature photography where a balanced crop is key.
- Adjust Photo Properties: Beyond cropping, you can further enhance your image. With the image still selected within the frame (or double-clicked to reveal the full image), navigate to the “Adjust” section. Here, you can tweak:
- Brightness, Contrast, Saturation: Essential adjustments for digital photography.
- Filters and Effects: Apply various stylistic filters to match your visual design or thematic collection.
- Color Balance, Highlights, Shadows: More advanced controls for nuanced editing styles.
- Apply Changes: Once you’re satisfied with your adjustments, click “Done” or press “Enter” to finalize the changes within the frame.
Exporting Your Masterpiece for Maximum Impact
The final step is to save your beautifully cropped circular image. However, there’s a crucial detail regarding transparency that digital photography enthusiasts and graphic designers need to be aware of.
-
Initiate Download: Click the “Share” button in the upper right corner of the Canva editor. From the dropdown menu, select “Download.”
-
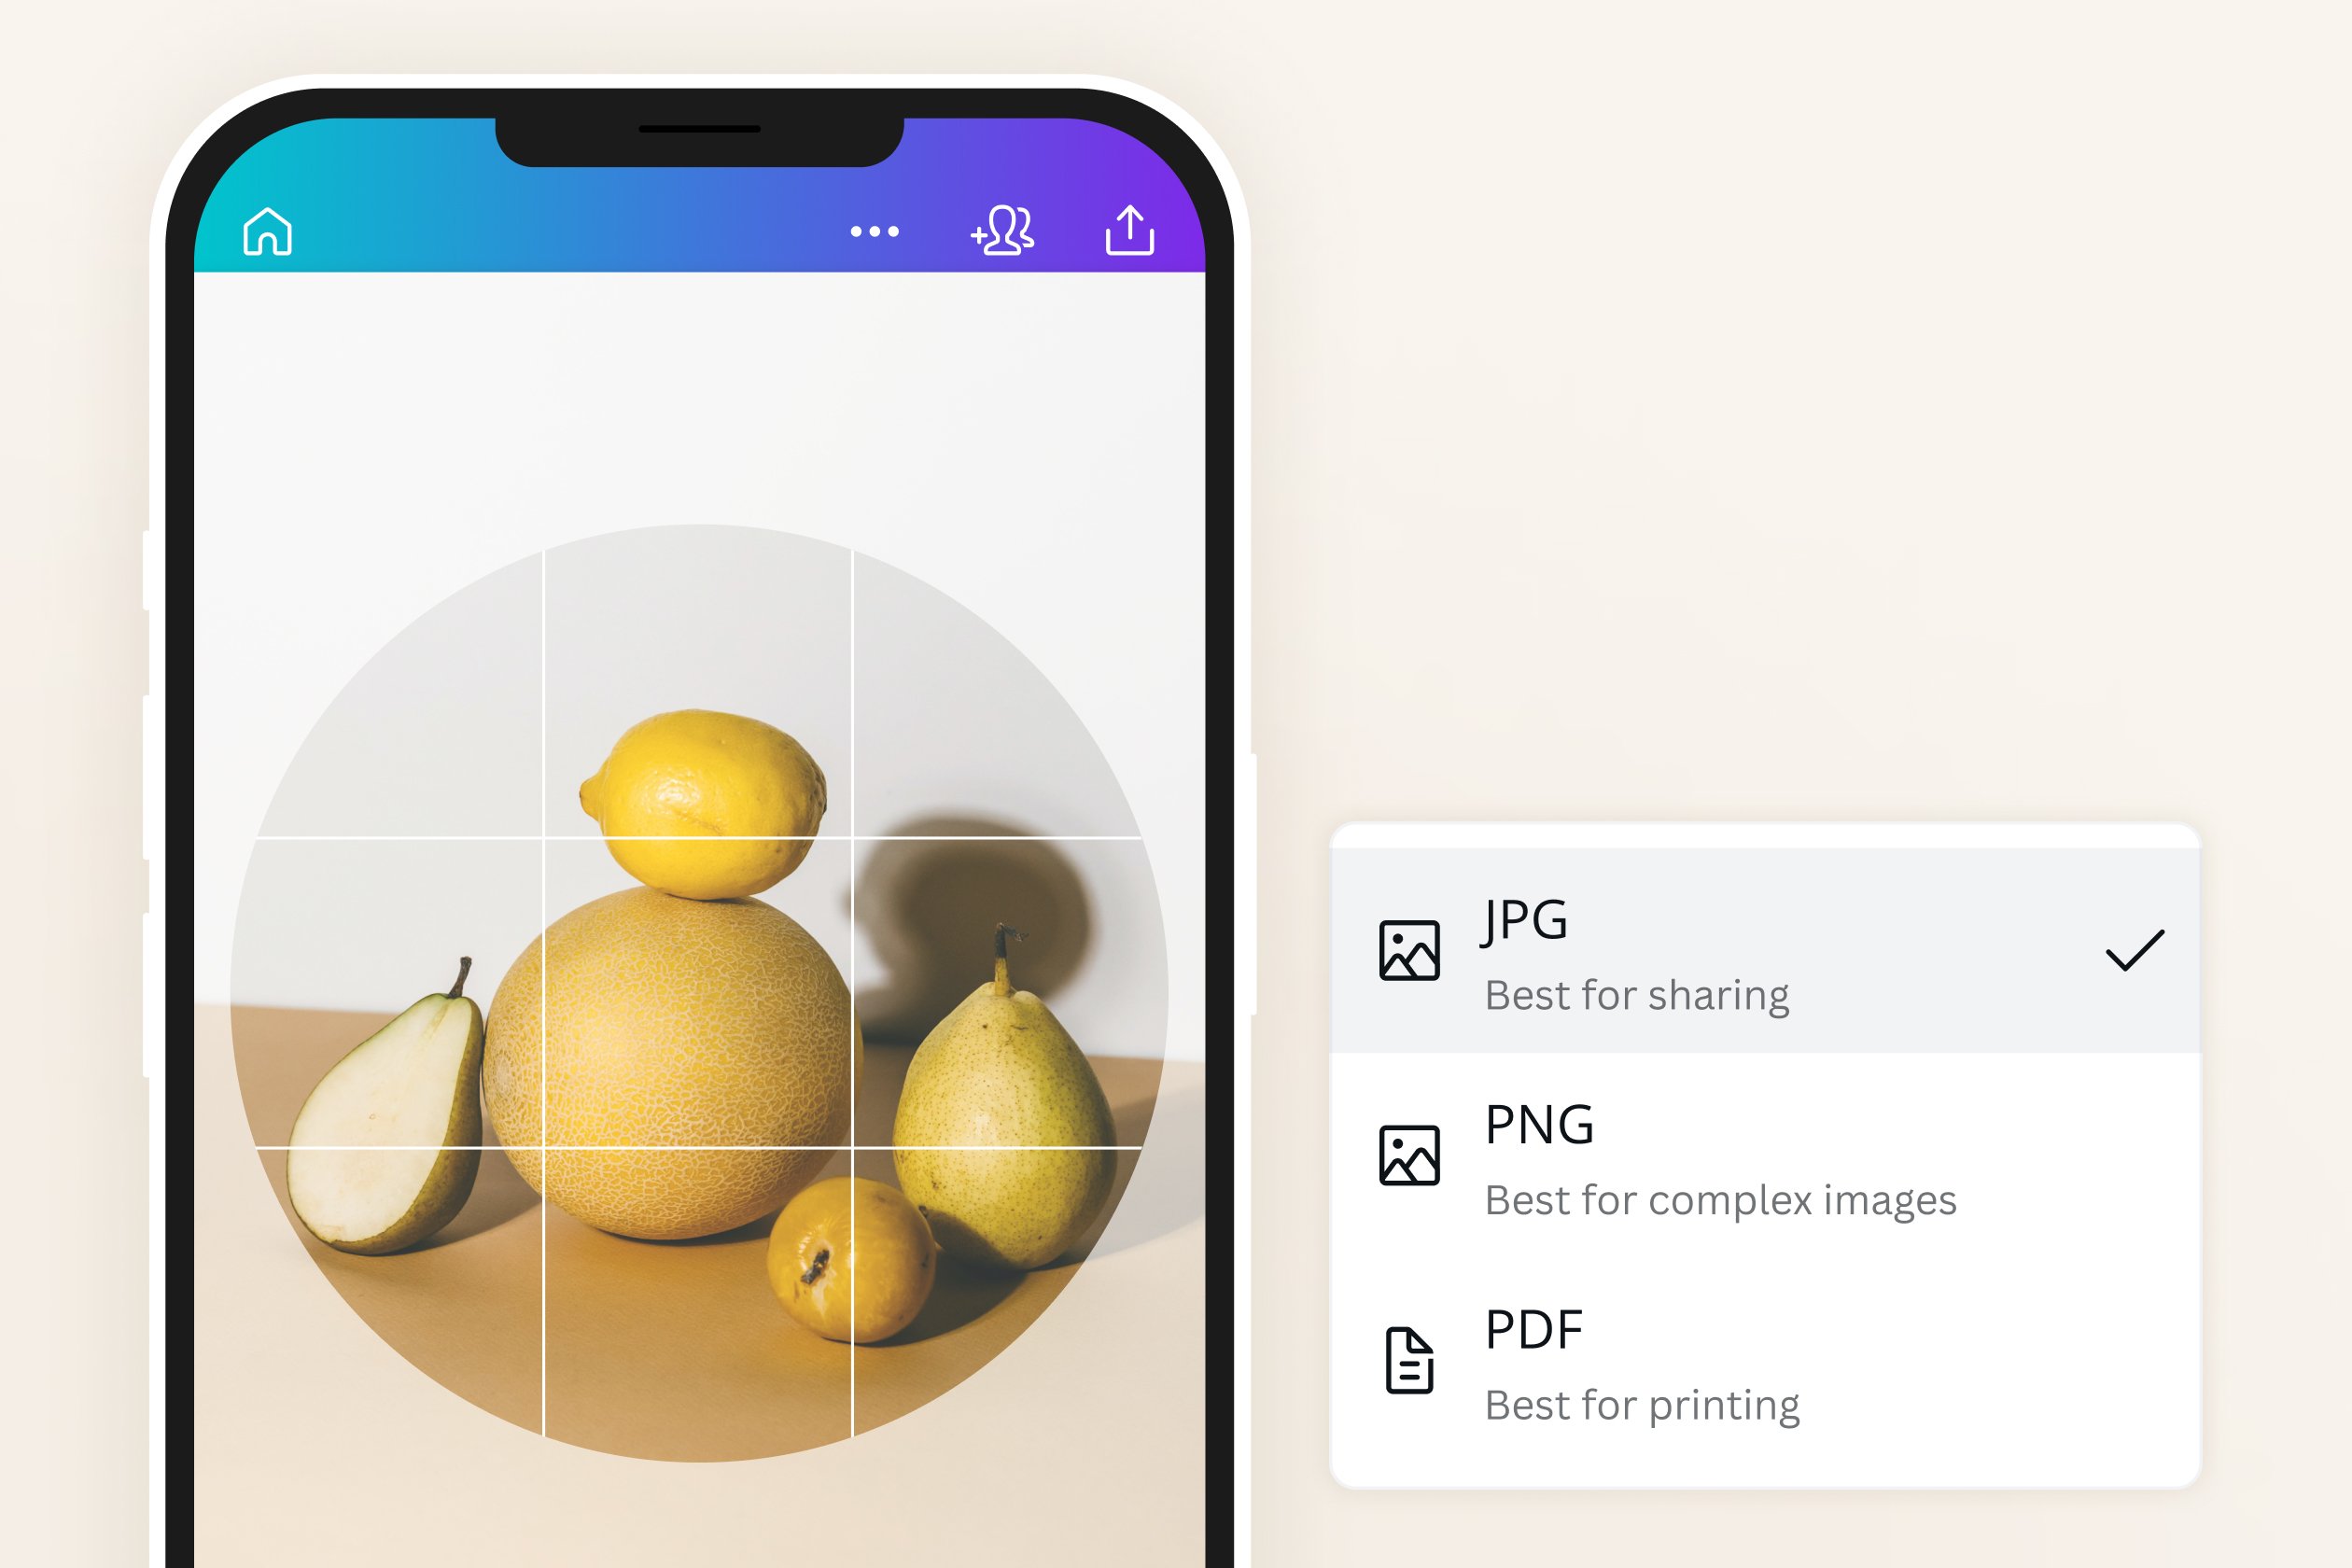
Choose File Type: In the download options, you’ll typically be prompted to choose a file type.
- PNG (Portable Network Graphics): This is the recommended format for circular images if you want a transparent background. PNG supports transparency, meaning the areas outside your circle will truly be invisible, allowing your round image to sit seamlessly on any background (e.g., a colored website section, another image).
- JPG (Joint Photographic Experts Group): This format does not support transparency. If you download a circular image as a JPG, the corners outside the circle will be filled with a solid color, usually white.
-
Transparency and Canva Free vs. Pro: Here’s a key distinction:
- Canva Pro: If you have a Canva Pro account, you’ll see an option like “Transparent background” which you should select. This ensures your PNG download truly has invisible corners, making your image a true circle.
- Canva Free: Unfortunately, in the free version of Canva, the “Transparent background” option is often a Pro-exclusive feature. If you download a circle-cropped image as a PNG without Pro, it might still have a white background filling the corners. The same applies if you choose JPG.
- Tophinhanhdep.com’s Solution: If you’re using Canva’s free version and need a transparent background for your circular image, Tophinhanhdep.com offers powerful Image Tools that can help. You can download your image from Canva (even with a white background), then use Tophinhanhdep.com’s Background Remover or Converter tools to generate a PNG with a transparent background. This ensures your aesthetic, high-resolution photography can be used as intended, free from unwanted white corners.
-
Final Download: Select your desired format (PNG with transparent background if available/processed) and click “Download” again. Your circular image is now ready to be used!
Creative Enhancements: Adding Backgrounds and Outlines
Sometimes a plain circular image isn’t enough. Canva, in conjunction with Tophinhanhdep.com’s tools, offers avenues for more creative ideas, allowing you to integrate your circular images into broader visual design projects.
Beyond White: Designing Engaging Backgrounds
If you’re using Canva’s free version and your circular image retains a white background in the corners, or if you simply want to add more visual interest, you can easily incorporate a custom background within Canva. This is a common photo manipulation technique to achieve a desired aesthetic.
- Stay in Elements: With your circle-cropped image on the canvas, return to the “Elements” section in the left sidebar.
- Search for Patterns or Photos: Type “Pattern” or relevant keywords like “Texture,” “Nature background,” “Abstract art,” or “Gradient” into the search bar. Switch to the “Photos” or “Graphics” tabs to explore various options.
- Note: Elements marked with a crown icon are for Canva Pro users. There are still plenty of free options for stunning aesthetic backgrounds.
- Add to Canvas: Click on a pattern or photo you like to add it to your design.
- Set as Background: Right-click on the newly added background element and select “Set image as Background.” This will position the pattern or photo behind your circular image.
- Adjust Background: Double-click on the background to make adjustments (reposition, resize) if needed. You can also adjust its transparency in the toolbar for a subtle effect, blending it beautifully with your circular subject. This technique is perfect for creating thematic collections or mood boards.
Highlighting Your Image with Custom Outlines
Adding an outline to your circular image can make it “pop” and define its boundaries, contributing to a more refined graphic design.
- Utilize Outlined Frames: As mentioned in the cropping steps, Canva offers circle frames that already include a customizable outline. Instead of the plain circle frame, search for “Circle Frame with Border” or simply browse the “Circle Frame” options to find one with an integrated outline.
- Add Your Image: Drag and drop your photo into this outlined frame, just as you would with a plain frame.
- Change Outline Color: With the frame selected, a “Color Picker” icon will appear in the toolbar above the canvas. Click this.
- You’ll see a vast palette of colors.
- Canva intelligently suggests “Photo Colors” derived directly from your image, making it easy to create a harmonious outline that blends seamlessly or subtly contrasts with your subject. This is excellent for achieving a cohesive visual design.
- You can also add a new color, using a color picker to fine-tune hue, saturation, and brightness for a perfectly customized look.
- Adjust Outline Thickness (if applicable): Some frames might allow for outline thickness adjustments, though often the thickness is fixed with the chosen frame. If you need precise control, you might layer a plain circle shape (from “Elements”) behind your framed image and adjust its size and color to create a custom border effect.
Optimizing Your Circular Images: Tophinhanhdep.com’s Complementary Tools
While Canva is exceptional for creative design, Tophinhanhdep.com specializes in a suite of robust Image Tools designed for further optimization and manipulation of your images, especially after initial creation. These tools are invaluable for ensuring your circular images meet specific quality, size, and format requirements for various platforms and uses, making your high-resolution photography truly web-ready.
- Converters (Especially for Transparent Backgrounds): As discussed, if you’re a Canva free user, exporting a transparent PNG can be a challenge. Tophinhanhdep.com’s Image Converter allows you to easily convert your image to PNG and, crucially, supports transparent backgrounds even if your initial Canva export had a white one. This ensures your circular images maintain their intended aesthetic for profile pictures, website elements, and digital art.
- Compressors and Optimizers: A beautifully designed circular image needs to load quickly on websites and social media. Large file sizes can slow down page loading, impacting user experience and SEO. Tophinhanhdep.com’s Image Compressor and Optimizer tools can significantly reduce the file size of your circular PNGs or JPGs without compromising visual quality. This is vital for maintaining the integrity of your beautiful photography while ensuring optimal performance across different devices and internet speeds.
- AI Upscalers: Sometimes you create a circular image in Canva for a specific small use, but later realize you need a higher-resolution version for a print, a larger display, or a background image. Tophinhanhdep.com’s AI Upscaler can intelligently enlarge your circular images, enhancing details and sharpening edges, transforming lower-resolution digital photography into crisp, high-quality visuals suitable for various applications.
- Batch Processing (for Efficiency): If you have a collection of images that all need to be cropped into circles or processed in a similar way (e.g., compressed), doing them one by one can be tedious. While Canva’s free version has limitations on batch processing, Tophinhanhdep.com’s dedicated tools often provide efficient batch processing capabilities. This means you can upload multiple images, apply the same operations (like converting to transparent PNG, compressing, or resizing), and download them all at once, saving immense time and effort for your thematic collections or extensive image libraries.
By leveraging Tophinhanhdep.com’s specialized image tools in conjunction with Canva’s creative capabilities, you gain a comprehensive workflow for producing, refining, and deploying perfectly optimized circular images for any purpose.
Conclusion
The ability to crop an image into a circle is a fundamental skill in modern visual design, offering both aesthetic enhancement and practical benefits for personal branding and digital communication. Canva makes this process accessible and enjoyable, transforming what might seem like a complex photo manipulation task into a simple drag-and-drop affair. Whether you’re crafting a professional profile picture, designing engaging website elements, or curating thematic collections, mastering circular crops in Canva opens up a world of creative possibilities.
From carefully positioning your subject for optimal central composition to experimenting with dynamic backgrounds and striking outlines, Canva provides the tools to bring your creative ideas to life. And when it comes to perfecting the technical aspects – ensuring transparent backgrounds, optimizing file sizes, or upscaling for high-resolution displays – Tophinhanhdep.com’s powerful suite of Image Tools stands ready to complement your Canva designs.
We encourage you to experiment with these techniques, explore the vast array of frames and design elements in Canva, and utilize Tophinhanhdep.com’s converters, compressors, and upscalers to ensure your circular images are not only visually stunning but also technically flawless for any online or offline application. Dive into the world of round image design, and let your creativity take shape!