How to Make an Image a Vector in Illustrator: A Comprehensive Guide for Flawless Visuals

In the vast landscape of digital imaging, understanding the fundamental differences between image types is crucial for anyone involved in visual design, from casual enthusiasts exploring aesthetic backgrounds to professional graphic designers crafting intricate logos. At Tophinhanhdep.com, we understand the importance of image quality and versatility. This guide delves into one of the most powerful transformations in image editing: converting a raster image into a vector graphic using Adobe Illustrator. This process is not merely a technical maneuver; it’s an essential skill that unlocks unparalleled flexibility for high-resolution photography, digital art, and graphic design projects, ensuring your creations always maintain crispness and clarity, regardless of scale.
Understanding Raster vs. Vector Graphics: The Tophinhanhdep.com Perspective
Before diving into the “how-to,” it’s vital to grasp the core distinction between raster and vector images. This knowledge forms the bedrock of effective visual design and explains why vectorization is so highly valued.
Raster images, commonly found across the web and in most digital cameras, are composed of a grid of individual colored pixels. Think of them as tiny squares that, when viewed from a distance, form a cohesive picture. File formats like JPG, PNG, and GIF are prime examples of raster graphics. They excel at capturing rich detail, subtle color gradients, and photographic realism, making them perfect for wallpapers, nature photography, and beautiful photography collections available on Tophinhanhdep.com. However, their pixel-based nature comes with a significant drawback: scalability. When a raster image is enlarged beyond its original dimensions, the individual pixels become visible, leading to a pixelated, blurry, or “jagged” appearance. This loss of quality can be detrimental for printing onto products or for large-scale displays.
Vector graphics, on the other hand, are an entirely different beast. Instead of pixels, they are constructed using mathematical equations that define points, lines, and curves. These mathematical descriptions dictate the shapes, paths, and colors that make up the image. This fundamental difference means that vector graphics are resolution-independent. They can be scaled infinitely – made as tiny as a favicon or as large as a billboard – without any loss of quality or introduction of pixelation. The lines remain perfectly smooth, and colors stay crisp. This inherent scalability makes vector files (such as SVG, EPS, or AI) the preferred choice for logos, illustrations, icons, and any design element that needs to be adaptable across various mediums and sizes, from digital interfaces to physical merchandise. For anyone leveraging Tophinhanhdep.com’s resources for graphic design or digital art, understanding and utilizing vector assets is a game-changer.

Why Vectorization Matters for Quality and Scalability
The primary motivation for converting a raster image to a vector graphic is to gain unparalleled scalability without compromising visual fidelity. Imagine you have a company logo, originally designed as a small JPG. If you try to print this logo on a large banner or embroider it onto a cap, the pixelation will become painfully apparent. By vectorizing the logo, you create a version that can be resized to any dimension, always maintaining its sharp edges and clear details. This ensures brand consistency and professional-grade output across all applications.
Beyond scalability, vectorization offers a host of other benefits crucial for visual design professionals and enthusiasts alike:
- Editability: Once an image is vectorized and expanded, its constituent shapes and paths become individually editable. This means you can easily change colors, alter shapes, remove elements, or add new details without affecting other parts of the design. This level of control is a cornerstone of creative ideas and photo manipulation.
- Smaller File Sizes (for simpler designs): While complex vector graphics (e.g., highly detailed photos vectorized with many colors) can be large, simpler vector designs like logos or line art often result in smaller file sizes compared to their raster counterparts, particularly when not incorporating vast amounts of unique color data. This can be an advantage for web optimization.
- Print Quality: For anything intended for print, especially professional printing, vector graphics are almost always preferred. They ensure clear, crisp output, vital for producing high-quality custom parts, product branding, or intricate artwork.
- Versatility for Graphic Design: Vector graphics are the backbone of modern graphic design. They are essential for creating adaptable assets for branding, web design, UI/UX elements, apparel design, and much more. This aligns perfectly with the “Visual Design” and “Graphic Design” categories on Tophinhanhdep.com.
- Future-Proofing: A vectorized asset is timeless. It can be adapted to new technologies, resolutions, and output methods without needing to be recreated from scratch, making it a valuable investment for any visual project.
Ideal Candidates for Vector Conversion
While Adobe Illustrator’s Image Trace tool is powerful, not every image is an ideal candidate for vectorization, especially if the goal is a true vector style. Images that translate best to vector graphics typically feature:
- Clear, Defined Edges: Logos, line art, simple illustrations, and graphics with solid blocks of color benefit most. The clearer the distinction between elements, the better the trace.
- Limited Color Palettes: Images with fewer colors or distinct color areas often produce cleaner, more manageable vector files. Presets like “3 Colors” or “Black and White Logo” are perfect for these.
- Simple Subjects: A single subject against a plain background (like a character, an icon, or a product outline) is easier to vectorize than a complex landscape or a highly detailed photograph. While “High Fidelity Photo” presets can attempt to vectorize photos, they often result in a highly complex file that still might not achieve the desired vector look of simplified shapes and colors.
- Sketches and Hand-Drawn Art: Many artists use Image Trace to convert their physical sketches into editable digital line art, providing a bridge between traditional and digital art. Tophinhanhdep.com users looking for creative inspiration can easily transform their mood board sketches into usable digital assets this way.
Now that we understand the “why,” let’s explore the “how” within Adobe Illustrator, turning your raster images into flexible, scalable vector assets.
Preparing Your Adobe Illustrator Workspace
Before you embark on the vectorization journey, setting up your document correctly is a crucial first step, ensuring your workspace is optimized for the task at hand.
Document Configuration and Image Placement
- Create a New Document: Begin by opening Adobe Illustrator and creating a new document. You can choose a standard canvas size like A4 or customize the dimensions to suit your project needs. For instance, if you’re vectorizing a logo for potential website use and print, you might start with a moderately sized artboard.
- Set Resolution and Color Mode: When prompted, set the resolution to 300 PPI (pixels per inch) for print-quality work. For color mode, select RGB (Red, Green, Blue) if your primary use will be for digital platforms (e.g., website graphics, social media content, digital art). If the vectorized image is intended for commercial printing, CMYK (Cyan, Magenta, Yellow, Black) is the appropriate choice. This attention to detail from the outset ensures your image is prepared for its intended application, whether it’s a vibrant wallpaper or a professional graphic design piece.
- Place Your Image: Once your document is ready, you need to bring your raster image onto the canvas. Go to
File > Place..., navigate to your image file (e.g., JPG, PNG), select it, and click “Place.” Click on your artboard to position the image. If necessary, resize the image by clicking and dragging a corner handle while holding down theShiftkey to maintain proportions. This ensures your image is ready for the transformation process. You can use any high-resolution image or stock photo you’ve sourced from Tophinhanhdep.com, knowing that Illustrator will help you convert it into a scalable vector asset.
The Power of Image Trace: Converting to Vector
The heart of vectorizing an image in Adobe Illustrator lies within its “Image Trace” feature. This powerful tool automates the complex process of converting pixel-based data into editable vector paths.
Choosing the Right Preset for Your Image
- Select Your Image: Using the Selection tool (the black arrow in your toolbar), click on the raster image you’ve placed on your canvas.
- Access Image Trace: With the image selected, you’ll typically see an “Image Trace” button appear in the Properties panel (usually on the right side of your screen) or in the control panel at the top. Alternatively, you can go to
Window > Image Traceto open the dedicated Image Trace panel. - Apply a Preset: Adobe Illustrator provides a range of presets designed for different types of images, making the initial conversion largely automated. Each preset yields distinct results, so choosing one that closely matches your image type is key:
- High Fidelity Photo / Low Fidelity Photo: These are best for more complex images or photos where you want to retain as much detail as possible, albeit with some simplification. The “High Fidelity Photo” preset aims for maximum detail, while “Low Fidelity Photo” offers a more stylized, less detailed vector representation.
- 3 Colors, 6 Colors, 16 Colors: Ideal for logos, icons, or illustrations with flat colors. These presets limit the number of colors in the output, creating cleaner, more graphic-style vectors.
- Shades of Gray: Perfect for converting grayscale images into detailed vector artwork.
- Black and White Logo: Excellent for simple, two-color logos or line art, simplifying the image to just black and white vector shapes.
- Sketched Art, Silhouettes, Line Art, Technical Drawing: These presets are tailored for specific artistic styles, often producing predominantly black-and-white, line-based vector drawings. They are particularly useful for artists converting their traditional sketches into digital line art for further manipulation or digital art projects, echoing the creative resources and inspiration found on Tophinhanhdep.com.
Clicking on one of these presets will initiate the tracing process. Illustrator will analyze your raster image and convert it into a preliminary vector graphic. Observe the transformation; even at this stage, you’ll notice how the pixels are replaced by defined shapes.
Fine-Tuning Trace Settings for Optimal Results
After applying a preset, the Image Trace panel becomes your control center for refining the vectorized output. This step allows for precise adjustments, critical for achieving the desired look for your graphic design or digital art project.
- Open the Image Trace Panel: If it’s not already open, go to
Window > Image Trace. - Adjust Basic Settings:
- Mode: Here you can switch between Color, Grayscale, or Black & White, regardless of the preset you initially chose. This is useful if you want to experiment with different color treatments.
- Colors/Threshold: If you’re in Color mode, a “Colors” slider will appear, allowing you to increase or decrease the number of colors Illustrator uses in the vector. Reducing colors simplifies the image, while increasing them adds detail. If you’re in Black & White mode, a “Threshold” slider controls the balance between black and white pixels; increasing the threshold makes more areas black, effectively darkening the image.
- Dive into Advanced Options: Click the “Advanced” dropdown arrow in the Image Trace panel to reveal more granular controls:
- Paths: This slider controls how closely Illustrator follows the original pixel shapes. Increasing “Paths” creates more detailed and accurate outlines but can also lead to more complex vector data.
- Corners: Adjusting “Corners” influences the sharpness of the angles in your vector paths. Higher values result in sharper corners, while lower values produce smoother, more rounded shapes.
- Noise: “Noise” refers to small, stray pixels in your original image that Illustrator might interpret as tiny vector shapes. Increasing this value tells Illustrator to ignore smaller details, effectively cleaning up the trace and removing unwanted specks, resulting in a cleaner line drawing.
- Method: Choose between “Abutting” (creates cutout paths) or “Overlapping” (creates stacked paths). Abutting is often preferred for cleaner, editable shapes.
- Ignore White: For many line art or logo conversions, you’ll want to remove the white background to leave only the colored or black lines. Checking the “Ignore White” box automates this, making the white areas transparent. This is incredibly useful for creating clean, isolated vector elements for any graphic design project or for compositing with other backgrounds from Tophinhanhdep.com’s collections.
Experimentation is key here. Make small adjustments and observe the live preview to understand how each setting impacts your vectorized image. This iterative process allows you to achieve a crisp, clean, and high-quality vector graphic perfectly suited for various image tools and visual design applications.
Post-Conversion Enhancements: Expanding and Editing
Once your image has been traced to your satisfaction, the next critical step is to convert the temporary Image Trace object into fully editable vector paths. This “expansion” process is what truly transforms your image into a versatile asset for graphic design and digital art.
Liberating Your Vector Shapes with Expand and Ungroup
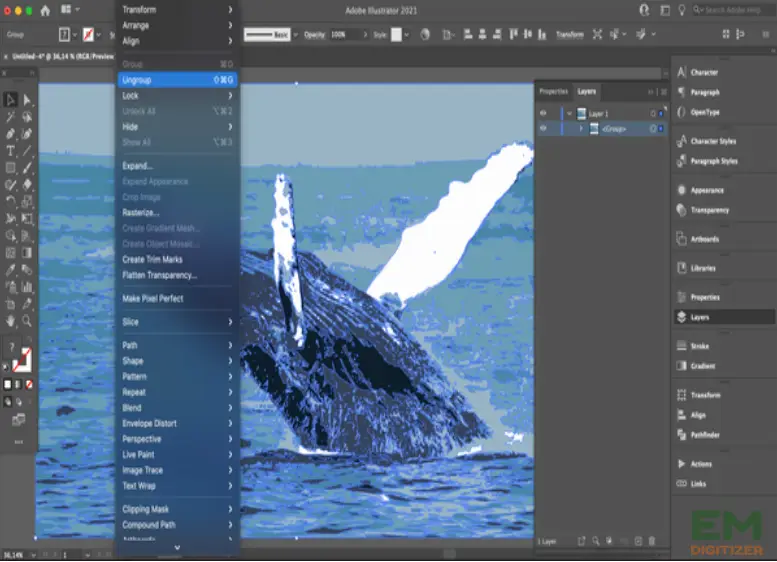
- Expand Your Image: After fine-tuning the Image Trace settings, your image is still technically a “live trace” object. To turn it into individual, editable vector paths, you must “Expand” it. With the traced image selected, go to
Object > Image Trace > Expand. Alternatively, you might find an “Expand” button directly in the Properties panel or control bar at the top of the screen. Upon expansion, Illustrator converts the traced paths into a group of vector objects. You’ll see blue outlines appearing around all the shapes, indicating they are now independent vector elements. - Ungroup for Individual Control: By default, Illustrator groups all the newly created vector shapes together. To gain control over individual components, you need to “Ungroup” them. Right-click on the expanded image and select
Ungroupfrom the context menu, or go toObject > Ungroup. You might need to ungroup multiple times if there are nested groups. Once ungrouped, you can use the Direct Selection tool (the white arrow in your toolbar) to select individual paths and shapes. This opens up a world of possibilities for photo manipulation, creative ideas, and detailed graphic design.
Creative Photo Manipulation and Stylization
With your image now a collection of editable vector shapes, you have immense creative freedom:
- Color Changes: Select any individual shape or a group of similar shapes (e.g., all areas of the same color) using the Direct Selection tool. You can then change its fill or stroke color using the Color panel or Swatches panel. This is incredibly useful for adapting logos to different brand palettes or creating new aesthetic variations. For example, you could take a line art drawing and easily fill it with a new color scheme.
- Removing Unwanted Elements: Using the Direct Selection tool, you can click on specific shapes (like a background you missed with “Ignore White”) and press
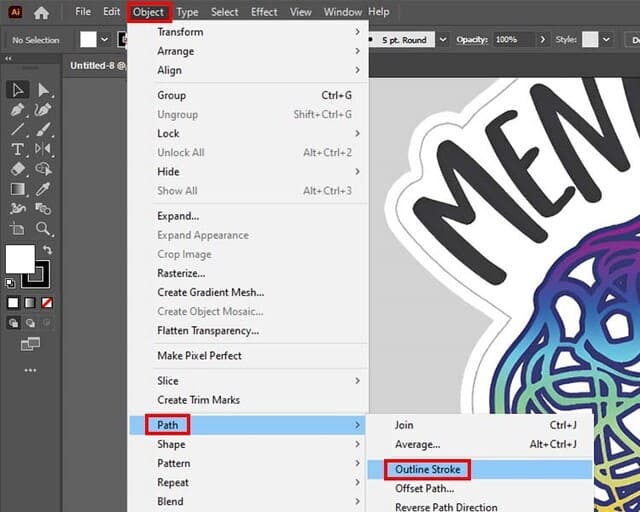
BackspaceorDeleteto remove them. This is particularly effective for cleaning up edges or isolating a subject. To quickly remove all instances of a specific color (like white), select one such shape, then go toSelect > Same > Fill Colorto select all objects with that exact fill, and then delete them. - Reshaping and Refining: The Pen tool and Smooth tool become invaluable here. You can add or delete anchor points, adjust curves, or smooth out jagged lines that might have resulted from the tracing process. This manual refinement ensures your vector graphic is as polished as possible.
- Adding New Elements: You can integrate new shapes, text, or other vector elements into your design. For instance, you could add your logo to a vectorized cup illustration or apply specific effects to parts of the design.
- Applying Vector Effects: Illustrator offers a range of vector-specific effects. For example, to achieve a hand-drawn or sketchy aesthetic, you can select your vector objects, go to
Effect > Stylize > Scribble...and adjust the settings. This allows you to match unique trending styles or develop bespoke visual design elements. Tophinhanhdep.com encourages users to experiment with these tools to bring their creative ideas to life.
Saving Your Vector Masterpiece for Diverse Applications
The final step is to save your newly created vector graphic in the appropriate format, ensuring its scalability and editability are preserved.
- Choose the Right Vector Format: There are several standard vector file formats, each with its own advantages:
- AI (Adobe Illustrator): This is Illustrator’s native format and preserves all of Illustrator’s features, layers, and editability. It’s best for retaining your master working file.
- SVG (Scalable Vector Graphics): An XML-based vector image format for two-dimensional graphics with support for interactivity and animation. SVG is widely supported across web browsers and many design programs, making it excellent for web graphics, icons, and responsive design.
- EPS (Encapsulated PostScript): A widely supported vector format often used for professional printing and interchange between different design software.
- PDF (Portable Document Format): While often associated with documents, PDFs can embed vector data and are excellent for sharing print-ready files that maintain design integrity across different systems.
- Export Your Image: Go to
File > Export > Export As.... In the dialog box, give your file a meaningful name. From the “Format” dropdown menu, select your desired vector format (e.g., SVG). - SVG Options (if applicable): If you select SVG, an SVG Options dialog box will appear. For general use, the default settings are often sufficient, but you can adjust options related to styling, font handling, and image locations based on your specific web development or graphic design needs.
- Preserve Your Master Copy: Always save your final, editable vector file in a native Illustrator format (.AI) as your master copy. From this master file, you can then export to various other formats (SVG, EPS, PDF, or even raster formats like JPG/PNG at any resolution) for different applications without ever degrading the original quality. This ensures that your high-quality graphic asset remains versatile and ready for any future need, be it a new aesthetic background, a detailed photography showcase, or a complex visual design project.
Conclusion: Empowering Your Visual Creations with Tophinhanhdep.com
Converting raster images to vectors in Adobe Illustrator is a foundational skill that elevates your visual design capabilities, offering freedom in scalability and editability that pixel-based images simply cannot provide. From transforming high-resolution photography into stylized digital art to ensuring logos and branding elements are impeccably crisp at any size, the Image Trace tool is an invaluable asset.
As a resource for images, photography, image tools, and visual design inspiration, Tophinhanhdep.com advocates for mastering techniques like vectorization to unlock your full creative potential. Whether you’re working with stunning nature photography, abstract art, or crafting new creative ideas for your mood boards, the ability to convert and manipulate vector graphics ensures your output is always professional, adaptable, and of the highest quality. Embrace this powerful technique, experiment with Illustrator’s tools, and watch your visual creations achieve new levels of clarity and versatility.