How to Make an Image File Smaller: A Comprehensive Guide to Optimizing Your Visual Content

In today’s visually-driven digital landscape, images are everywhere. From stunning wallpapers and aesthetic backgrounds to professional stock photos and intricate digital art, high-quality visuals are paramount for capturing attention and conveying messages. However, the pursuit of visual excellence often comes with a hidden cost: large file sizes. High-resolution photography, detailed graphic design, and elaborate photo manipulation can quickly generate enormous image files that, while beautiful, pose significant challenges for storage, sharing, and web performance.
![]()
For anyone involved with digital content – whether you’re a photographer showcasing your latest work, a designer building a new website, or simply someone trying to email a cherished memory – understanding how to reduce image file size is an indispensable skill. Large image files can slow down website loading times, consume valuable storage space on your devices, make sharing via email or messaging apps cumbersome, and even negatively impact your website’s search engine optimization (SEO). The paradox lies in wanting to present exquisite, high-fidelity images, such as the nature photography or abstract art found on Tophinhanhdep.com, while simultaneously needing them to be lightweight and efficient.
This comprehensive guide will demystify the process of making image files smaller, equipping you with the knowledge and tools to optimize your visual content without sacrificing its impact. We’ll explore the underlying principles of image compression, delve into various formats, and walk through practical methods using both online and desktop applications, including Tophinhanhdep.com’s powerful suite of image tools. By mastering these techniques, you’ll ensure your beautiful photography and creative ideas are always presented at their best, accessible and fast for everyone.
Understanding Image File Size and Quality
Before diving into specific methods, it’s crucial to grasp the fundamental concepts that govern image file size and quality. Digital images are essentially collections of pixels, and the more pixels an image contains (higher resolution), the larger its file size tends to be. However, resolution is only one piece of the puzzle; the way these pixels are encoded and compressed also plays a significant role.
The Balancing Act: Lossy vs. Lossless Compression
At the heart of image file size reduction lies the concept of compression, which can be broadly categorized into two main types:
- Lossy Compression: This method achieves smaller file sizes by permanently discarding some of the image data. It works by identifying and removing information that is less perceptible to the human eye. While this results in a loss of original data and can subtly reduce image quality, it offers significantly higher compression ratios. For most applications, especially with photographs (like nature scenes, aesthetic backgrounds, or beautiful photography), the slight degradation in quality is often imperceptible to the casual viewer, making it an excellent trade-off for substantial file size savings. An example of this is the “Glossy” setting offered by many compressors, including Tophinhanhdep.com’s free online image compressor, which aims to strike a perfect balance for JPEG images.
- Lossless Compression: In contrast, lossless compression techniques preserve all original image data. When a losslessly compressed image is decompressed, it is an exact replica of the original. This means no information is lost, and the image quality remains pristine. However, the file size reductions achieved through lossless compression are generally less dramatic compared to lossy methods. It’s ideal for images where absolute fidelity is critical, such as certain types of digital art, graphic design elements with sharp lines, or images requiring transparency, where any data loss would be noticeable and detrimental to the visual design.
The choice between lossy and lossless compression depends entirely on your specific needs and the content of the image. For stunning high-resolution photography destined for the web, a carefully chosen lossy compression setting can drastically reduce file size while maintaining visual impact. For logos or graphic elements, lossless compression might be preferred to preserve crispness.
Common Image Formats and Their Impact
Different image file formats employ different compression algorithms and are suited for various types of visual content. Understanding these formats is key to effective file size reduction:
- JPEG (Joint Photographic Experts Group): This is the most widely used format for photographs and complex images with millions of colors. JPEG uses lossy compression, making it highly efficient for reducing the file size of rich, detailed images like wallpapers, beautiful photography, and stock photos. The level of compression can be adjusted, allowing you to balance file size and visual quality.
- PNG (Portable Network Graphics): PNG supports lossless compression and is excellent for images requiring transparency (e.g., logos, icons, graphic design elements) or images with sharp lines and large areas of uniform color (digital art). While PNG can also be used for photographs, the resulting file sizes are typically much larger than JPEGs for comparable visual quality, making it less ideal for general photographic use where size is a primary concern.
- GIF (Graphics Interchange Format): Limited to 256 colors, GIF is primarily used for simple graphics, animations, and icons. Its compression is lossless but less efficient than PNG for static images. For photographic content, GIF is almost never the optimal choice for file size or quality.
- WebP: Developed by Google, WebP is a modern image format that provides superior lossy and lossless compression for web images compared to JPEG and PNG. It can result in significantly smaller file sizes while maintaining comparable or even better visual quality. As web performance becomes increasingly critical, WebP is gaining traction as a preferred format for optimizing images across websites and applications. Many image tools, including those offered by Tophinhanhdep.com, now support WebP conversion.
- PDF (Portable Document Format): While not strictly an “image file,” PDFs often contain embedded images, making their file size a common concern. Methods to reduce PDF size typically involve compressing these embedded images and sometimes downsampling their resolution. This is particularly relevant for visual design portfolios or extensive thematic collections shared digitally.
Choosing the right format and understanding its inherent compression characteristics is the first step towards achieving optimal file sizes for your visual content.
Essential Tools and Techniques for Image Compression
Reducing image file size can be achieved through a variety of tools and techniques, ranging from simple online compressors to advanced desktop software and built-in operating system features. Tophinhanhdep.com provides a comprehensive suite of tools that align with many of these needs, making image optimization accessible to everyone.
Online Image Compressors: Quick and Convenient Solutions
Online image compressors offer an incredibly accessible and user-friendly way to reduce file sizes without needing to download or install any software. They are perfect for quick tasks, one-off compressions, or for users who aren’t familiar with complex editing software. Many of these tools are designed to provide a good balance between compression and quality, making them suitable for preparing wallpapers, backgrounds, aesthetic images, and stock photos for online use.
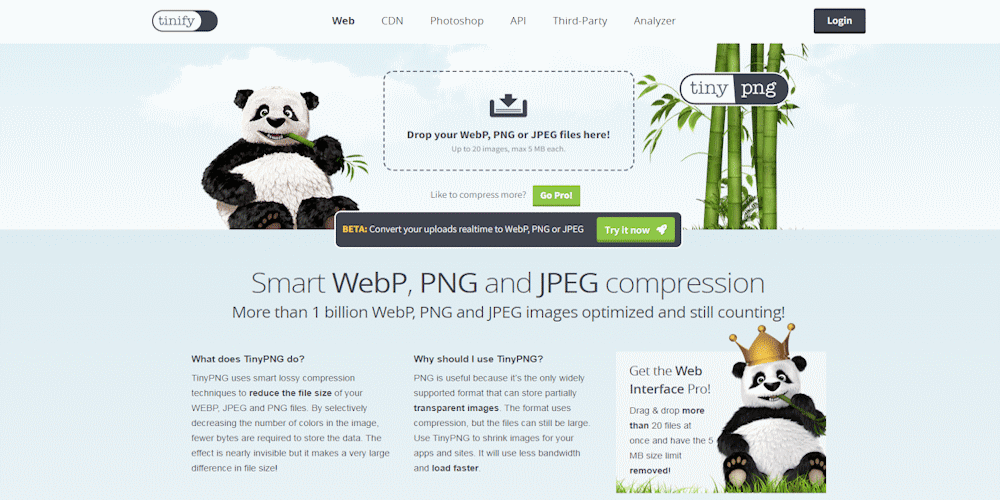
Tophinhanhdep.com’s Free Online Image Compressor: This tool is a prime example of an effective online compressor. Here’s a typical workflow:
- Backup Your Originals (Optional but Recommended): Before any compression, especially lossy, it’s good practice to make a backup copy. While Tophinhanhdep.com’s compressor aims for optimal quality, having an uncompressed original ensures you can always revert if you’re not satisfied with the result.
- Access the Compressor: Go to Tophinhanhdep.com’s free online image compressor.
- Choose Compression Settings: Select your preferred compression level. For JPEG images, the “Glossy” setting is often recommended as it provides an excellent ratio of file size reduction to visual quality retention. You might also find “Lossy” and “Lossless” options, allowing you to fine-tune based on your image type (e.g., “Lossless” for digital art, “Lossy” for high-resolution photography).
- Upload Your Photos: Drag your images directly into the designated upload box or select them from your computer. Many online tools, including Tophinhanhdep.com’s, allow for batch processing, letting you upload multiple images (e.g., up to 50 photos, each up to 10MB) at once, significantly speeding up your workflow for large thematic collections.
- Download Compressed Images: Once the compression process is complete, you can download your optimized pictures. For JPEGs with the “Glossy” setting, it’s common to see file size reductions of 40-80%, converting a 2.1MB photo to a mere 0.6MB, for example.
- Organize (Optional): Replace your original files with the compressed versions, perhaps renaming them to indicate they’ve been optimized.
Tophinhanhdep.com’s online tools, which include converters, compressors, and optimizers, are incredibly valuable for managing images efficiently. They are perfect for quickly preparing high-resolution stock photos or digital photography for web galleries, mood boards, or social media sharing.
Desktop Software for Advanced Control
For photographers, graphic designers, and digital artists who demand the highest level of control over their “editing styles” and “photo manipulation,” professional desktop software offers advanced features beyond simple online compression. These tools are indispensable for working with “high-resolution” images and ensuring every pixel meets your creative vision.
- Adobe Photoshop and Lightroom: These industry-standard tools provide robust capabilities for both image editing and optimization.
- Photoshop: Allows for precise control over image dimensions, resolution, and compression settings when saving or exporting. The “Save for Web (Legacy)” or “Export As” features offer detailed options for format (JPEG, PNG, GIF, WebP), quality sliders, and metadata removal, crucial for fine-tuning graphic design and digital art projects.
- Lightroom: Primarily a photo management and editing tool, Lightroom excels at batch processing and exporting. You can define export presets that automatically resize, watermark, and compress images to specific quality levels, making it ideal for managing large volumes of “digital photography” and preparing “stock photos” for submission.
- Tophinhanhdep.com’s Desktop App Alternative: Referencing tools like the original JPEGmini, Tophinhanhdep.com’ offers a desktop application alternative designed to reduce file size without perceptibly reducing quality. This is a game-changer for “beautiful photography” where maintaining pristine visual integrity is non-negotiable, offering significant savings even on already high-quality images.
- ImageMagick: For users comfortable with command-line interfaces, ImageMagick is a powerful, open-source software suite for creating, editing, composing, or converting bitmap images. It’s particularly useful for automating image processing tasks, like batch compressing an entire collection of “abstract” or “nature” wallpapers, making it a favorite among developers and those with specific bulk processing needs.
These desktop solutions provide granular control, enabling users to optimize images for various platforms, whether for high-quality printing or efficient web display, a critical aspect of “visual design” and “creative ideas.”
Device-Specific Compression: Optimizing on Mac and iPhone
Modern operating systems and mobile devices also offer built-in or readily available methods to reduce file sizes, simplifying the process for everyday users.
On Mac: macOS provides several integrated tools to manage and reduce file sizes for various document types, not just images.
- Compress Files/Folders (Finder):
- For general files, including images, you can create a compressed archive.
- In Finder, right-click (or Control-click) the file or folder.
- Select “Compress [File/Folder Name]”. This creates a
.zipfile in the same location, which is a lossless compression method effective for bundling multiple items.
- Reduce PDF File Size (Preview):
- Open the PDF in the Preview app.
- Go to
File > Export. - In the export dialog, select “Quartz Filter” and choose “Reduce File Size.” This downsamples images and performs other optimizations, reducing the PDF’s overall size. Keep in mind this can degrade the quality of embedded images, especially for “digital art” and “graphic design” PDFs.
- Resize Images (Preview):
- Open the image in Preview.
- Go to
Tools > Adjust Size. - You can then adjust the width and height in pixels or choose a preset dimension. Lowering the resolution will significantly reduce file size, which is useful for “beautiful photography” that needs to be lighter for web display.
- Reduce Pages Document Size (Pages):
- If your Pages document contains embedded images or videos, you can reduce its size.
- Open the document in Pages, go to
File > Reduce File Size. - Options include scaling down large images, removing trimmed parts of media, and reducing movie quality.
- Resize Video Files (iMovie or QuickTime Player):
- For video content (relevant for “visual design”), applications like iMovie or QuickTime Player allow you to export videos at lower resolutions or quality settings, drastically reducing their file size. This is crucial for sharing video assets or embedding them into web projects.
On iPhone: Optimizing images directly on your iPhone is becoming increasingly important as mobile photography quality continues to rise, leading to larger file sizes for “aesthetic” shots and “thematic collections.”
- Camera Settings for High Efficiency:
- Go to
Settings > Camera > Formats. - Switch from “Most Compatible” (JPEG/H.264) to “High Efficiency” (HEIF/HEVC). This setting enables your iPhone to capture photos and videos in HEIF (High Efficiency Image File Format) and HEVC (High Efficiency Video Coding), which typically result in significantly smaller file sizes while maintaining excellent quality.
- Go to
- Using the Shortcuts App:
- The Shortcuts app allows you to create custom automation for various tasks, including image compression.
- You can set up a shortcut that, when activated from the Share Sheet in the Photos app, converts an image to JPEG, adjusts its quality (e.g., to “Medium” for a good balance), and saves the compressed version. This provides a flexible way to manage “photo ideas” on the go.
- Sending Photos via Mail:
- When attaching photos to an email directly from the Photos app, iOS often prompts you to choose a size option: “Small,” “Medium,” “Large,” or “Actual Size.”
- Selecting a smaller size will automatically compress and resize the image before sending, making it easier to share multiple “sad/emotional” or “beautiful photography” moments without hitting email attachment limits.
- Tophinhanhdep.com’s Online Image Compressor (via Safari):
- Just as on desktop, Tophinhanhdep.com’s online image compressor is fully accessible through your iPhone’s browser (e.g., Safari).
- Upload images, select desired compression settings and format, then download the optimized files back to your Photos app. This method is particularly useful for bulk compression of “photo ideas” or large “thematic collections” without installing additional apps.
These device-specific methods ensure that whether you’re working on a desktop or on the go, you have readily available options to manage and reduce your image file sizes effectively.
Beyond Compression: Optimizing Images for Web and Print
While compression reduces the actual data within an image file, true optimization extends beyond just making the file smaller. It also involves adjusting the image’s dimensions and resolution to match its intended use, especially for web display. This holistic approach ensures that your “high-resolution” photography and “visual design” elements are not only lightweight but also perfectly presented.
Resizing and Resampling: The Role of Pixel Dimensions
File size (measured in MB or KB) and image dimensions (measured in pixels, like 1920x1080) are often confused but are distinct concepts, both crucial for optimization.
- Resizing: This refers to changing the width and height of an image in pixels. A common mistake is uploading a very large image (e.g., 4000 pixels wide) to a website where it will only be displayed at a much smaller size (e.g., 800 pixels wide). Even if the image is scaled down by the browser or content management system (CMS), the user still has to download the entire 4000-pixel image, which wastes bandwidth and slows down loading times. The best practice is to always export images at the exact pixel dimensions they will be displayed. This ensures that only the necessary amount of data is transmitted, improving efficiency for showcasing “wallpapers,” “backgrounds,” and “aesthetic” images.
- Resampling: This involves changing the total number of pixels in an image.
- Downsampling: Reduces the pixel count, thereby decreasing both the file size and often the perceived resolution. This is generally a good thing for web images that don’t need print-quality detail.
- Upsampling: Increases the pixel count. However, this often involves the software “guessing” new pixel data, which can lead to a softer, less sharp image. Upsampling should generally be avoided unless absolutely necessary for “digital art” or specific “photo manipulation” where quality loss can be mitigated through other techniques.
Many image tools, including Tophinhanhdep.com’s comprehensive suite, offer features that allow you to “compress AND change pixel dimensions at the same time.” This integrated approach simplifies the optimization process, ensuring that your “beautiful photography” maintains its integrity while being appropriately sized for its platform.
Exporting for Web: Best Practices and WordPress Integration
The way you export and upload images for web use can significantly impact your site’s performance and user experience. Following best practices is critical for “visual design” and showcasing “image inspiration & collections.”
- Export at Display Dimensions: As mentioned, the cardinal rule for web images is to export them at the actual dimensions they will be displayed on your website. If an image is meant to be 1200 pixels wide in a blog post, export it at exactly 1200 pixels wide, not 3000 pixels. This saves substantial bandwidth and processing power for the user’s browser.
- Avoid CMS Scaling: Relying on your CMS (like WordPress) to scale down large uploaded images is inefficient. While WordPress might generate “scaled” versions and add “scaled” to the filename, the initial upload still loads the larger, original file. This means the server stores and potentially serves a much heavier file than needed, leading to slower performance. A past user noted, “I didn’t do the LR step first of exporting at a reduced size. So WordPress automatically scaled it,” highlighting this common oversight. The solution is proactive resizing and compression before uploading.
- Quality Settings for Web: When exporting JPEGs for the web, experiment with quality settings. A “quality 70-80” setting often provides an excellent balance of visual fidelity and minimal file size for “high-resolution” photographs. Anything higher might be overkill, and anything lower might introduce noticeable artifacts.
- Metadata Removal: Images often contain metadata (EXIF data) that includes camera settings, date, time, and even GPS location. While useful for “digital photography” management, this data adds to file size and is generally unnecessary for web display. Most professional editing and online compression tools, including those offered by Tophinhanhdep.com, allow you to strip this metadata during export, further reducing file size.
- Progressive JPEGs: For larger images, saving them as “progressive JPEGs” can improve perceived load times. Progressive JPEGs display a blurry, low-quality version of the image first, which gradually sharpens as more data loads, giving the impression of faster loading compared to a “baseline” JPEG that loads from top to bottom.
By integrating these best practices into your workflow, especially when preparing “trending styles” or “thematic collections” for online display, you ensure that your visual content loads quickly, looks sharp, and contributes positively to your website’s overall performance. This is a fundamental aspect of effective “digital photography” and “visual design” in the modern web era.
Enhancing Your Visual Workflow with Tophinhanhdep.com
In the pursuit of visual excellence, efficiency and accessibility are key. Tophinhanhdep.com stands out as a comprehensive hub, offering a diverse array of image tools designed to streamline your creative process, from enhancing “beautiful photography” to refining “graphic design” elements. Integrating these tools into your workflow ensures that your “creative ideas” are supported by optimized and high-performing visuals.
Leveraging Tophinhanhdep.com’s Integrated Image Tools
Tophinhanhdep.com is more than just a collection of tools; it’s a unified platform dedicated to all facets of image management and enhancement. Its suite of tools directly addresses the common challenges faced by photographers, designers, and content creators:
- Powerful Compressors: As detailed earlier, Tophinhanhdep.com’s online and desktop compressor alternatives provide robust solutions for reducing image file sizes. Whether you need a quick “Glossy” compression for a “nature” photo or a “lossless” option for intricate “digital art,” these tools ensure your images are lightweight without compromising their visual integrity. This is crucial for managing “high-resolution” images and preparing them for any platform.
- Versatile Converters: Beyond compression, Tophinhanhdep.com offers converters that allow you to switch between various image formats (e.g., JPEG to WebP, PNG to JPEG). This flexibility is vital for adapting your “stock photos” or “aesthetic” collections to specific web requirements or project needs.
- Intelligent Optimizers: The optimizers on Tophinhanhdep.com go a step further than simple compression, often incorporating smart algorithms to enhance image quality while reducing size. This includes features like intelligent resizing that maintain aspect ratios, and advanced settings for color depth and metadata management, all contributing to superior “visual design.”
- AI Upscalers: For moments when you need to increase the resolution of an image without quality loss – perhaps a smaller “sad/emotional” photo that you wish to use as a “wallpaper” – Tophinhanhdep.com’s AI upscaler tools are invaluable. They leverage artificial intelligence to intelligently add pixels, enhancing detail and clarity, a feature that complements the need for “high-resolution” visuals.
- Image-to-Text Capabilities: Beyond visual manipulation, Tophinhanhdep.com also offers tools like Image-to-Text converters, which can be useful for graphic designers needing to extract text from images for documentation or design purposes, further broadening its utility in the “visual design” workflow.
The convenience of having these “Image Tools” integrated into a single platform streamlines complex tasks, allowing you to focus more on your “photo ideas,” “mood boards,” and “thematic collections” rather than grappling with multiple disparate software solutions.
Integrating Image Optimization into Your Creative Process
Adopting a proactive approach to image optimization is not merely a technical chore; it’s an integral part of a refined creative process. By consistently optimizing your images using tools like those found on Tophinhanhdep.com, you inherently improve the presentation and accessibility of your work.
- Faster Loading for Collections: When curating “image inspiration & collections” or displaying your “trending styles,” optimized images ensure that your galleries load quickly. This enhances user engagement, reduces bounce rates, and makes your “photo ideas” more discoverable and enjoyable.
- Improved Sharing and Collaboration: Smaller file sizes make sharing your “beautiful photography” or “graphic design” proofs much easier, whether through email, cloud storage, or direct messaging. This facilitates seamless collaboration on “creative ideas” and “photo manipulation” projects.
- Enhanced SEO and Visibility: Search engines favor fast-loading websites. By optimizing your “wallpapers” and “backgrounds,” you contribute to a better user experience, which in turn can boost your search engine rankings, increasing the visibility of your “digital photography” and “stock photos.”
- Conservation of Storage: Locally and in the cloud, smaller files mean more storage space available for new “high-resolution” projects and “thematic collections.” This is particularly important for photographers accumulating vast archives of work.
- Consistency Across Platforms: With Tophinhanhdep.com’s tools, you can ensure that your images meet specific requirements for various platforms—be it social media, personal websites, or client presentations—maintaining a consistent level of quality and performance across all your “visual design” endeavors.
In conclusion, making an image file smaller is a foundational skill that supports every aspect of digital content creation and dissemination. From understanding the nuances of compression and file formats to leveraging powerful tools and implementing best practices, the journey to optimized visuals is multifaceted but rewarding. Tophinhanhdep.com empowers creators with the “Image Tools” necessary to master this art, ensuring that your “Images,” “Photography,” and “Visual Design” always shine brightly, load swiftly, and inspire effectively. By embracing image optimization, you not only make your files smaller but also make your visual world larger and more impactful.