How to Make an Image High Resolution: A Comprehensive Guide from Tophinhanhdep.com

In today’s visually-driven world, the clarity and detail of an image are paramount. Whether you’re curating stunning wallpapers, designing impactful graphics, preparing photos for large-scale printing, or simply want your digital photography to look its best, knowing “how to make an image high resolution” is an indispensable skill. A high-resolution image offers greater detail, sharpness, and a professional aesthetic, essential qualities for everything from captivating backgrounds to intricate digital art. At Tophinhanhdep.com, we understand the critical role resolution plays in visual excellence, and this guide will equip you with the knowledge and tools to achieve it across various platforms and with cutting-edge technologies.
The journey to a high-resolution image often involves understanding the underlying principles of digital imagery and choosing the right approach. While it’s crucial to acknowledge that you cannot magically create detail that was never captured, you can significantly enhance existing images and prepare them for diverse applications. From free, open-source software and built-in operating system tools to professional editing suites and revolutionary AI upscalers, Tophinhanhdep.com delves into all the effective methods.

Understanding Image Resolution: Why Detail Matters for Every Visual Creator
At its core, image resolution refers to the amount of detail an image holds. This detail is quantified by the number of pixels it contains. The more pixels, the higher the resolution, leading to a crisper, more detailed, and generally higher-quality image. This principle is fundamental across all aspects of visual design and photography, influencing everything from the aesthetic appeal of a wallpaper to the professional finish of a printed photograph.
Pixels, Clarity, and Print Quality: The Fundamentals
Digital images are composed of tiny colored squares known as pixels. The resolution of an image is typically measured in pixels per inch (PPI). A higher PPI means more pixels are packed into each inch of the image, resulting in finer details and smoother transitions between colors. For instance, an image with 3 PPI will appear blocky and indistinct, making it challenging to discern its content. In contrast, an image with 300 PPI will display intricate details, free from visible pixelation, making it suitable for high-quality printing.
For physical prints, a related term, dots per inch (DPI), is used. DPI refers to the number of ink dots a printer can place per inch. While PPI is for digital screens, and DPI is for physical prints, they are conceptually similar: more dots/pixels per inch equate to a clearer, more uniform, and higher-quality output. The accepted standard for high-quality printed images, such as those featured in Tophinhanhdep.com’s “Beautiful Photography” or “Digital Art” collections, is generally 300 PPI/DPI. This ensures that when an image is printed, it retains its sharpness and visual integrity without appearing fuzzy or pixelated.

Setting Realistic Expectations: When Upscaling Enhances, Not Creates
It’s vital to approach image upscaling with a clear understanding of its limitations. While you can effectively increase the resolution of an image – meaning adding more pixels – this process doesn’t inherently add new detail that wasn’t present in the original capture. Upscaling primarily interpolates existing data to generate new pixels, making the image larger and smoother, but not necessarily sharper in terms of genuine, captured detail. Think of it as stretching the existing information rather than discovering new information.
For example, a photograph initially captured at a very low resolution will always be constrained by its original data. While tools can make it larger and reduce visible pixelation, it won’t achieve the same level of crispness and fine detail as a photograph taken with a professional high-resolution camera. The goal of upscaling, therefore, is to make the image appear better at a larger size, mitigate quality loss during enlargement, and prepare it for specific outputs like printing or high-definition screens, rather than to magically transform a blurry snapshot into a masterpiece. Our guides on “Digital Photography” and “Editing Styles” at Tophinhanhdep.com consistently emphasize the importance of starting with the best possible source material.
Essential Tips for Maximizing Image Resolution
To achieve the best possible results when increasing image resolution, keep these general guidelines in mind:
- Avoid Significant Increases in Size: While software can enlarge images considerably, pushing the dimensions beyond 30% to 40% of the original often results in a noticeable loss of sharpness. Experiment to find the sweet spot where your image looks larger without sacrificing too much quality.
- Utilize Sharpen Tools When Available: Many image editing applications, including those recommended by Tophinhanhdep.com, feature sharpening tools. These can help mitigate some of the softness introduced during upscaling. However, use them sparingly. Over-sharpening can lead to an unnatural, artifact-ridden appearance. The aim is to restore a natural look, not create an artificial one.
- Optimal Pixel Density: Always aim for the optimal pixel density for your intended use. For print, 300 PPI is the gold standard. For web and digital displays, lower PPI (e.g., 72 PPI) is often sufficient, but higher pixel dimensions (e.g., 1920x1080 for HD wallpapers) are crucial for visual impact.
Traditional Desktop Software: Manual Control Over Image Detail
Desktop image editing software offers powerful and precise control over image resolution. These tools are often preferred by graphic designers, photographers, and digital artists who require meticulous adjustments and detailed editing capabilities. Tophinhanhdep.com provides in-depth tutorials for several popular options, from free open-source solutions to industry-standard professional applications.
GIMP: A Free and Powerful Tool for Pixel Enhancement
GIMP (GNU Image Manipulation Program) is a free, open-source image editing tool available for Windows, macOS, and Linux. It boasts extensive support for various image formats and is a fantastic option for increasing image resolution without any cost. Here’s how Tophinhanhdep.com guides you through the process using GIMP:
- Open Your Image: Launch GIMP, go to
File > Open, navigate to your image file, and selectOpen. - Select the Entire Image: With the image window active, press
Ctrl+A(Windows) orCommand+A(Mac) to select the whole image. Then, copy it by pressingCtrl+CorCommand+C. - Create a New High-Resolution Canvas: Select
File > Newto open the “Create a New Image” dialog box. Click onAdvanced Options.- Set Resolution: Ensure the X and Y resolutions are set to 300 pixels per inch (PPI), which is ideal for print. The width and height values will initially match your copied image; do not change these yet. Click
OK. You now have a new, empty image window with the same dimensions but a higher resolution setting.
- Set Resolution: Ensure the X and Y resolutions are set to 300 pixels per inch (PPI), which is ideal for print. The width and height values will initially match your copied image; do not change these yet. Click
- Adjust Canvas Size for Enlargement: Select the new image window, then go to
Image > Canvas Size. Make sure the chain icon next to the width and height measurements is locked to maintain the aspect ratio.- Input New Dimensions: Enter your desired new width (e.g., from 4000 pixels to 6000 pixels). The height will automatically adjust. Make a note of these new dimensions. Click
Resize.
- Input New Dimensions: Enter your desired new width (e.g., from 4000 pixels to 6000 pixels). The height will automatically adjust. Make a note of these new dimensions. Click
- Paste and Scale the Image: In the enlarged canvas window, paste your copied image by pressing
Ctrl+VorCommand+V. Initially, the pasted image will appear at its original size in the center of the much larger canvas.- Scale to Fit: In the Layers dialog, select
Floating Selection (Pasted Layer). Go to the Toolbox dialog and select theScaletool. Click on the pasted image. In the Scale dialog box, ensure the chain icon is locked, then enter the same width value you used when adjusting the canvas size. Observe the preview, and if it looks good, clickScale.
- Scale to Fit: In the Layers dialog, select
- Review and Anchor: View the resampled image. Zoom in (
View > Zoom) to check the quality and ensure it meets your expectations. Once satisfied, selectFloating Selection (Pasted Layer)in the Layers dialog and click theAnchor Layericon to merge it with the background. - Export Your High-Resolution Image: Go to
File > Export. Choose your desired save location and filename. You can specify the file type (e.g.,new_photo.pngornew_photo.jpg). For best image quality, especially with JPEGs, move theCompression Levelslider tozero(or the lowest compression setting) to minimize artifacts, then clickExport.
macOS Preview: Simple Upscaling for Apple Users
For users of Apple macOS, the built-in Preview application offers a quick and easy way to increase image resolution for basic needs. It’s a convenient tool for minor adjustments to “Aesthetic” or “Nature” photos before using them as backgrounds. Tophinhanhdep.com outlines the steps:
- Open Image in Preview: Locate your image file, right-click it, and select
Open with > Preview. - Access Adjustment Tools: Click the
Markup Toolbaricon (it might look like a pen tip). - Adjust Size: Select the
Adjust Sizeicon (often depicted as three nested boxes). - Input New Dimensions: Ensure the lock icon is closed and
Resample Imageis selected. Adjust the width to your desired pixel amount; the height will automatically scale. ClickOK. - Save/Export: The image will resize. Go to
File > Saveto overwrite the original orFile > Exportto save it as a new file, preserving the original.
Adobe Photoshop: Precision and Advanced Techniques for Professionals
Adobe Photoshop is the industry standard for graphic design and digital photography, offering unparalleled control for image manipulation, including converting low-resolution images to high resolution. Tophinhanhdep.com’s guides leverage Photoshop’s advanced capabilities for “Photo Manipulation” and creating intricate “Digital Art.”
- Enable Preserve Details 2.0 Upscale: Before you begin, go to
Edit > Preferences > Technology Previews(Windows) orPhotoshop > Preferences > Technology Previews(Mac). EnsureEnable Preserve Details 2.0 Upscaleis checked. This advanced algorithm helps maintain original details during enlargement. ClickOK. - Access Image Size Panel: Open your image in Photoshop. Go to
Image > Image Sizeor use the shortcutAlt + Control + I(Win) orOption + Command + I(Mac). - Configure Image Size Settings:
- Dimensions: Ensure dimensions are set to “pixels.”
- Resample: Make sure the
Resampleoption is checked. This tells Photoshop to change the number of pixels. - Interpolation Method: From the dropdown menu next to
Resample, choosePreserve Details 2.0. This is the most effective method for maintaining image quality during enlargement. Other options likeBicubic Smoother(for enlargement) are also good alternatives.
- Increase Image Resolution: In the
Resolutionbox, enter your desired PPI value. For print-ready images, 300 PPI is the standard. As you increase this, the pixel dimensions (width and height) will also increase. - Reduce Noise (Optional but Recommended): Located within the Image Size panel, the
Reduce Noiseslider can help smooth out any artifacts or graininess that might become more apparent after increasing resolution. Adjust this slider subtly, typically between 2-10%, to improve clarity without blurring details. - Apply High Pass Filter for Sharpening (Optional Enhancement): After upscaling, a slight sharpening can further enhance the image.
- Duplicate Layer: Duplicate your image layer by pressing
Ctrl + J(Win) orCommand + J(Mac). - Apply High Pass: With the duplicated layer selected, go to
Filter > Other > High Pass. - Adjust Radius: Increase the
Radiusvalue until the image edges are slightly highlighted against the gray background. Avoid over-applying, which can lead to halos. ClickOK. - Change Blending Mode: In the Layers panel, change the Blending Mode of the High Pass layer to
Overlay. This will blend the sharpened details back into your image, resulting in a crisper appearance.
- Duplicate Layer: Duplicate your image layer by pressing
Comparing Different Image Resolutions for Print (Photoshop Context): To illustrate the impact of resolution on print quality, consider placing images of varying PPI (e.g., 72 PPI, 150 PPI, 300 PPI) onto a large canvas in Photoshop (e.g., 24x20 inches).
- 72 PPI: The image will appear pixelated and blurry when zoomed in or printed at a large size.
- 150 PPI: Shows improvement over 72 PPI, but still may lack critical sharpness for large prints.
- 300 PPI: Provides crisp details, essential for high-quality large-format prints, aligning with Tophinhanhdep.com’s “Beautiful Photography” standards.
Remember, while Photoshop dramatically improves low-res images, it operates within the limits of the original data. The quality of your source image remains paramount.
Mobile and Online Innovations: Upscaling On-the-Go and with AI Power
The need for high-resolution images isn’t confined to desktop workstations. With the prevalence of mobile photography and the demand for instant visual content, mobile apps and online AI-powered tools have revolutionized how we approach image upscaling. Tophinhanhdep.com recognizes the value of accessibility and efficiency, providing resources for both.
Resizing Images on Mobile Devices: Practical Apps for iOS and Android
Mobile devices are increasingly capable of capturing high-quality images, but sometimes you need to adjust their resolution for specific uses – perhaps for an “Aesthetic” social media post or a background wallpaper. Dedicated mobile apps make this process straightforward.
- Image Size for iPhone (iOS): This free app, recommended by Tophinhanhdep.com, allows for quick image resizing and resolution adjustment.
- Install and Open: Download “Image Size” from the App Store and open it. Grant access to your Photos app.
- Select Image: Tap the white box (image picker) and choose the photo you want to resize.
- Set Dimensions: Select the chain icon to lock width and height values, maintaining aspect ratio. Enter your desired
Widthvalue (e.g., 6000 pixels); the height will adjust automatically. - Check Output Quality: Tap the
gear iconfor additional options. Ensure theOutput Qualityslider is at 100% for maximum quality. For print, you can even increase thePrint size correction factorusing the+icon to smooth pixelation. - Save: Tap the
save arrowto save your new high-resolution image to your device.
- Android Apps for Upscaling: For Android users, Tophinhanhdep.com suggests various apps like Photoshop Express, Picsart AI Photo Editor, or Photo & Picture Resizer. Many of these offer similar functionalities to increase or decrease image size and resolution. Some Android phone camera settings also allow adjusting default picture resolution.
The Revolution of AI Upscalers: Intelligent Resolution Without Compromise
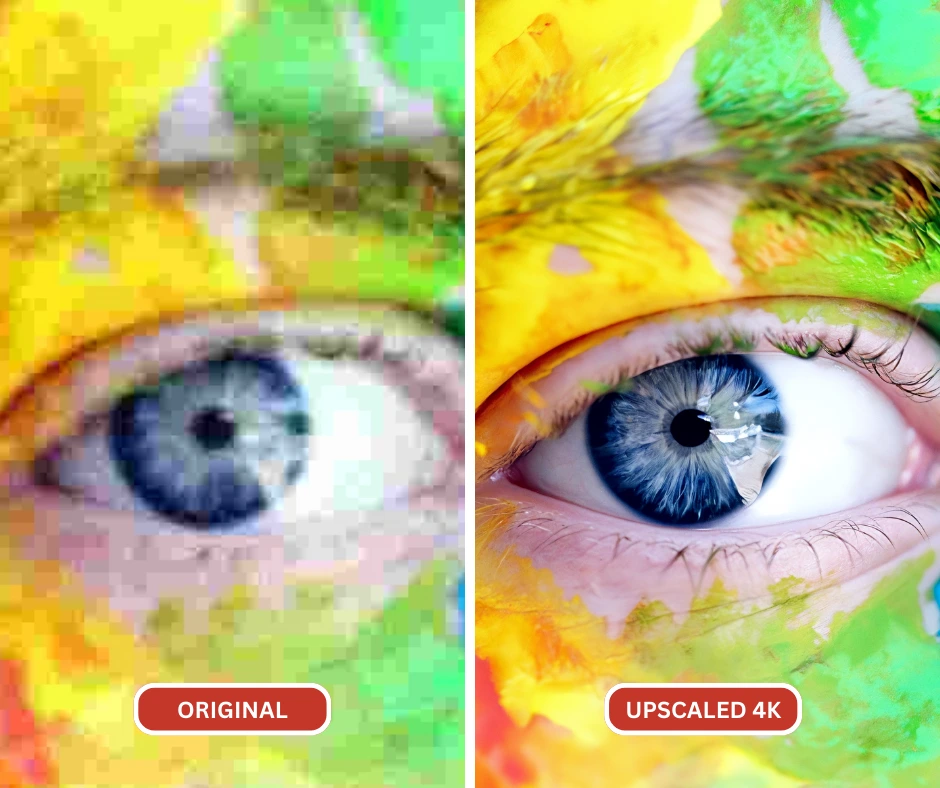
Perhaps the most exciting development in image resolution enhancement is the advent of AI upscalers. These tools, often available online, use sophisticated artificial intelligence, deep machine learning technology, and advanced neural networks (like SRCNN - Super-Resolution Convolutional Neural Network) to enlarge photos without the traditional drawbacks of pixelation or blur. Tophinhanhdep.com features leading AI upscaling solutions designed for maximum convenience and superior results.
How AI Upscalers Work: Unlike traditional methods that simply interpolate existing pixels (often leading to a loss of sharpness), AI upscalers are trained on vast datasets of images. When you upload a low-resolution image, the AI analyzes patterns, textures, and details, then intelligently “reconstructs” the image by adding new, contextually relevant pixels. This allows for significant enlargement (sometimes up to 1000% or even 16x) while preserving or even enhancing perceived quality.
Benefits of Using AI Upscalers (such as Tophinhanhdep.com’s Integrated AI Upscaler or Recommended Tools):
- Zoom without Pixelation and Blur: AI can extrapolate details, resulting in images that look sharper and clearer even at much larger sizes.
- Ease of Use: Most AI upscalers are incredibly user-friendly, requiring only a few clicks or a simple drag-and-drop.
- Online Accessibility: Many are web-based, meaning no software download or installation is required, making them accessible from any device.
- Automated Enhancement: Beyond just resolution, some AI tools can correct low light, remove JPEG artifacts, and enhance colors and tones automatically.
- Ideal for Print Projects: They make it easier to prepare images for high-quality print, from personal photos to professional “Stock Photos.”
General Steps for Using an Online AI Upscaler (e.g., Tophinhanhdep.com’s tool):
- Access the Tool: Navigate to the AI Upscaler section on Tophinhanhdep.com (or a recommended partner site).
- Upload Image: Click
Uploador drag and drop your low-resolution picture. - Process: The AI will automatically process and enlarge the image. This usually happens in seconds or minutes, depending on the image size and server load.
- Download: Once complete, download your new high-resolution image.
These AI tools are a game-changer for anyone needing to breathe new life into older or lower-resolution images, proving invaluable for “Image Inspiration & Collections” where quality cannot be compromised.
Maximizing Your Visuals with Tophinhanhdep.com: Beyond Basic Resolution
At Tophinhanhdep.com, we believe that high-resolution images are not just about technical specifications; they are the foundation for unleashing creative potential. Our platform is dedicated to providing everything you need to enhance, manage, and be inspired by stunning visuals.
From Wallpapers to Digital Art: The Impact of High Resolution
High resolution transforms ordinary images into extraordinary visual experiences. Imagine a breathtaking “Nature” scene or an intricate “Abstract” composition. When these are presented in high resolution, they become perfect “Wallpapers” and “Backgrounds,” immersing the viewer in detail and depth. For “Digital Art” and “Photo Manipulation,” high resolution ensures every brushstroke, texture, and layer is rendered with precision, elevating the final piece. Tophinhanhdep.com’s vast “Images” section showcases this commitment to quality, offering collections that inspire and captivate.
Tophinhanhdep.com’s Toolkit for Comprehensive Image Management
Beyond guides on how to make an image high resolution, Tophinhanhdep.com offers a comprehensive suite of “Image Tools” designed to empower every visual creator:
- Converters: Easily change image formats to suit different platforms and needs.
- Compressors: Optimize image file sizes without significant quality loss, crucial for web performance and storage.
- Optimizers: Fine-tune images for various outputs, ensuring they look their best everywhere.
- AI Upscalers: Our integrated or recommended AI upscaling tools are at the forefront of resolution enhancement, allowing you to transform your images effortlessly.
- Image-to-Text: Innovative tools to extract text from images, adding another layer of utility to your visual assets.
These tools, combined with our resources on “Photography” (covering “High Resolution” and “Stock Photos”) and “Visual Design” (including “Graphic Design” and “Creative Ideas”), create a holistic ecosystem for visual content creation and enhancement. Our “Image Inspiration & Collections” further provide “Photo Ideas,” “Mood Boards,” and “Trending Styles” to spark your creativity, all benefiting from the underlying principle of high-quality, high-resolution imagery.
Conclusion
Mastering the art of making images high resolution is a fundamental skill for anyone passionate about visual content. From ensuring your “Beautiful Photography” stands out in print to perfecting “Aesthetic” wallpapers for your devices, the clarity and detail of your images make all the difference. As Tophinhanhdep.com has shown, you have a wealth of options at your fingertips: the precise control of desktop software like GIMP and Adobe Photoshop, the convenience of mobile apps for on-the-go adjustments, and the revolutionary power of AI upscalers that intelligently enhance your visuals.
Embrace these techniques and tools, remembering that while enhancing resolution improves appearance, starting with the best possible source image will always yield superior results. Tophinhanhdep.com is your ultimate resource for navigating the exciting world of high-resolution images, offering not just “how-to” guides but also a vibrant community and innovative “Image Tools” to help you create, transform, and share stunning visuals. Explore our diverse collections and guides today, and unlock the full potential of your images.