How to Make an Image Higher Resolution: A Comprehensive Guide by Tophinhanhdep.com

In the vibrant world of digital imagery, where stunning visuals reign supreme, the resolution of an image often dictates its impact and versatility. Whether you’re selecting the perfect wallpaper, curating a background for a presentation, preparing high-resolution stock photos, or indulging in beautiful photography for print, understanding how to achieve and maintain optimal image resolution is paramount. Low-resolution images can appear pixelated, blurry, and unprofessional, diminishing the aesthetic appeal of even the most captivating visual design. Conversely, high-resolution images offer crisp detail, vibrant clarity, and the flexibility to be resized or printed at various scales without losing their integrity.
At Tophinhanhdep.com, we are dedicated to empowering creators and enthusiasts alike with the knowledge and tools to elevate their visual content. This guide delves into the essence of image resolution, explores traditional software methods, harnesses the cutting-edge power of AI upscalers, and offers practical advice to ensure your images—from abstract art to nature photography—always look their best. By increasing an image’s resolution, you’re not just making it larger; you’re enhancing its potential, making it suitable for everything from intricate digital art to expansive thematic collections and trending styles. Join us as we uncover the best strategies to transform your images into higher-resolution masterpieces.
Understanding Image Resolution: Pixels, PPI, and Quality
Before diving into the “how-to,” it’s crucial to grasp the fundamental concepts behind image resolution. A clear understanding will guide your decisions and help you achieve the desired visual outcome for your aesthetic or professional projects.
The Core of High Resolution: Pixels Per Inch (PPI)
Every digital image, whether it’s a breathtaking landscape or an intimate portrait, is composed of countless tiny squares called pixels. These pixels, each containing a specific color, collectively form the intricate details and overall appearance of the image. Image resolution, in the digital realm, is primarily measured in Pixels Per Inch (PPI). This metric indicates the density of pixels within a given inch of an image. A higher PPI means more pixels are packed into each inch, resulting in finer detail, smoother transitions, and a sharper appearance. For instance, an image with 300 PPI will generally look much crisper than an image of the same physical dimensions but only 72 PPI, especially when viewed closely or printed.
While PPI refers to digital screens, its counterpart for printed materials is Dots Per Inch (DPI). DPI measures the number of ink dots a printer can place per inch on paper. Higher DPI values translate to more precise and detailed prints. For most professional print applications, a resolution of 300 PPI is considered the industry standard to ensure excellent quality. This ensures that even when your stunning nature photography or intricate digital art is brought to life on paper, it retains its sharpness and visual fidelity. Understanding these distinctions is vital for anyone engaged in photography, graphic design, or visual art, as it directly impacts the final output.
![]()
The Myth of Instant Quality: What Upscaling Truly Does
It’s a common misconception that simply increasing an image’s resolution will magically infuse it with higher inherent quality. The truth is more nuanced. When you “upscale” an image, you are essentially adding more pixels. However, these new pixels are interpolated or “guessed” by the software based on the surrounding pixels. The software attempts to create new data points to fill in the gaps, but it cannot invent original detail that was never captured by the camera.
This means that while upscaling can make an image appear larger and sometimes smoother, it doesn’t fundamentally improve the quality of the original capture. Quality, in its truest sense, is determined at the point of capture through factors like focus, exposure, lighting, and the capabilities of the camera sensor. An extremely low-resolution image, perhaps one saved from social media or taken with an older device, may improve slightly with upscaling, but it will likely never achieve the pristine clarity of a photograph taken with a high-resolution camera. Therefore, while upscaling is a powerful tool for visual design and digital photography, it’s crucial to manage expectations and understand its limitations. It’s about enhancing existing pixel data, not creating new, authentic detail.
Traditional Software Methods for Upscaling Images
For decades, desktop software has been the go-to for precise image manipulation, including increasing resolution. These tools offer robust control and are ideal for graphic designers, digital artists, and photographers who need advanced editing capabilities.
Mastering Resolution with GIMP
GIMP (GNU Image Manipulation Program) is a formidable free and open-source image editing tool available for Windows, macOS, and Linux. It offers a comprehensive suite of features, making it an excellent choice for increasing image resolution without breaking the bank. Tophinhanhdep.com highly recommends GIMP for those seeking a powerful, accessible image tool.
Here’s a simplified step-by-step guide to increasing image resolution using GIMP:
- Open Your Image: Launch GIMP and go to
File > Opento select your desired image. - Select and Copy: Ensure your image window is active, then press
Ctrl+A(Windows) orCommand+A(Mac) to select the entire image, followed byCtrl+CorCommand+Cto copy it. - Create a New Canvas with Higher Resolution: Go to
File > New. In the “Create a New Image” dialog, clickAdvanced Options. Set bothX resolutionandY resolutionto300pixels/inch (or your desired PPI for print). Keep the width and height matching your original image for now. ClickOK. - Adjust Canvas Size: With the new (blank) image window active, select
Image > Canvas Size. Ensure the chain icon next to width and height is locked. Enter your desired new width (e.g., 6000 pixels if starting at 4000 pixels) and the height will adjust proportionally. ClickResize. - Paste and Scale the Image: In the new, larger canvas window, paste your copied image (
Ctrl+VorCommand+V). It will appear at its original size in the center. In theLayersdialog, selectFloating Selection (Pasted Layer). - Use the Scale Tool: From the
Toolboxdialog, select theScale tool(it might be nested under another tool). Click on your pasted image. In theScale dialog box, ensure the chain icon is locked and enter the new width value you used for the canvas size. ClickScale. - Review and Export: Zoom in (
View > Zoom) to check the quality. Once satisfied, click theAnchor Layer iconin theLayersdialog to merge the pasted layer with the background. Finally, go toFile > Exportto save your new high-resolution image. When exporting, consider setting theCompression Levelto zero for the best possible quality.
Enhancing Resolution in Adobe Photoshop
Adobe Photoshop is the industry standard for photo editing and graphic design, offering unparalleled control over image details. For photographers and visual designers, Photoshop’s resampling capabilities are incredibly powerful. This process involves adding new pixels to an image based on existing data, a technique known as “upsampling.”
Here’s how to effectively increase resolution using Photoshop:
- Open Image Size: Launch Photoshop and open your image (
File > Open). Go toImage > Image Size(or useAlt + Ctrl + Ion Windows,Option + Command + Ion Mac). - Understand Image Size Panel Options:
- Dimensions: Shows the current pixel dimensions.
- Fit To: Offers presets but is best avoided to prevent aspect ratio distortion.
- Resample: Crucially, check this box. It enables Photoshop to change the number of pixels.
- Interpolation Method: This tells Photoshop how to add new pixels.
- Preserve Details 2.0 (Enlargement): Tophinhanhdep.com recommends this modern method as it’s designed to maintain original details and sharpness during enlargement.
- Other options include: Automatic, Preserve Details (older version), Bicubic Smoother (for enlargements, provides smoother gradients), Bicubic Sharper (for reductions), Nearest Neighbor (for hard edges/pixel art), and Bilinear (less precise than Bicubic).
- Increase Resolution: Once
Resampleis checked andPreserve Details 2.0is selected, locate theResolutionfield. Change the value from its original (often 72 PPI for web images) to 300 PPI for high-quality prints. As you increase the resolution, the image’s pixel dimensions (width and height) will also increase proportionally. - Reduce Noise: If your image appears noisy (grainy) after upsampling, use the
Reduce Noiseslider within the Image Size panel. Start with a low value (e.g., 4%) and adjust sparingly to avoid an unnatural, overly smooth look. - Apply High Pass Filter (Optional Sharpening): After resizing, you can further enhance sharpness.
- Duplicate your image layer (
Ctrl+JorCommand+J). - Go to
Filter > Other > High Pass. Adjust theRadiusuntil edges are highlighted but avoid over-sharpening. - Change the duplicated layer’s
Blending ModetoOverlayin the Layers panel. This brings out details without harshness.
- Duplicate your image layer (
- Save/Export: Save your changes (
File > Save As) or export for specific uses (File > Export > Export As).
Photoshop’s meticulous control makes it an indispensable tool for photographers seeking high-resolution output and graphic designers creating digital art or photo manipulations for large formats.
Quick Resizing with macOS Preview
For macOS users, the built-in Preview application offers a straightforward and convenient way to increase image resolution for basic needs. While not as feature-rich as GIMP or Photoshop, it’s perfect for quick adjustments.
Here’s how to use macOS Preview:
- Open Image: Locate your image file, right-click it, and select
Open with > Preview. - Access Adjustment Tools: Click the
Markup Toolbar icon(it looks like a pen tip or toolbox) if it’s not already visible. - Adjust Size: Select the
Adjust Size icon(which may appear as three nested boxes). - Resize: In the
Image Dimensionsdialog box, ensure the lock icon is closed (to maintain aspect ratio) andResample Imageis checked. Enter your desired new width (e.g., from 1000 to 1300 pixels), and the height will automatically adjust. ClickOK. - Save: You can now choose
File > Saveto overwrite the original orFile > Exportto save it as a new file, preserving your original.
This method is quick and efficient for general resolution increases, making it a valuable addition to any macOS user’s image tools arsenal, especially for preparing images for digital use or small prints.
Leveraging AI and Online Tools for Superior Upscaling
The advent of Artificial Intelligence has revolutionized image upscaling, offering solutions that go beyond traditional methods by intelligently reconstructing image details. These tools, often available online, make high-resolution conversion accessible to everyone.
The Power of AI Upscalers
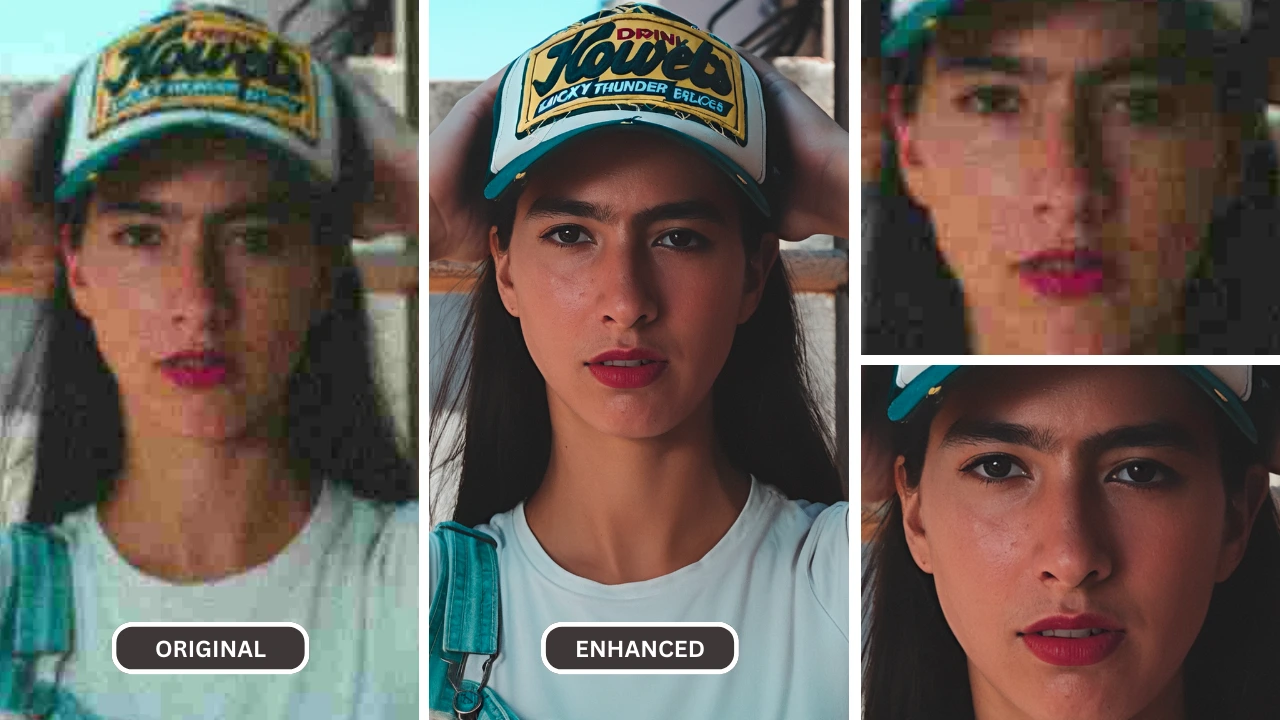
AI upscalers utilize advanced machine learning algorithms to analyze an image and generate new pixels that intelligently blend with existing ones. Unlike traditional methods that merely interpolate pixels, AI tools “learn” from vast databases of high-resolution images, understanding patterns and textures to create more natural and detailed enlargements. This technology excels at preserving image quality, reducing blur, and minimizing pixelation, even with significant size increases. Tophinhanhdep.com recognizes AI upscalers as a game-changer for digital photography and graphic design.
Several AI upscaling solutions are available, each with unique strengths:
- Topaz Gigapixel AI: Widely regarded as a leader, this software uses deep learning to enlarge images by up to 600% without noticeable quality degradation. It even features face recognition technology to refine facial details, making it ideal for portrait photography. The results are often strikingly sharp and natural, surpassing many conventional upscaling methods.
- Tophinhanhdep.com’s AI Upscaler (e.g., similar to Let’s Enhance or Wondershare PixCut): Many online platforms, including Tophinhanhdep.com’s specialized AI upscaler, offer cloud-based solutions. Users can upload images, select desired scaling factors (e.g., 2x, 4x, 8x), and let the AI enhance resolution, fix pixelation, correct colors, and even remove JPEG artifacts. These tools are incredibly convenient for generating high-resolution versions of wallpapers, backgrounds, or stock photos quickly.
- Other Noteworthy AI Tools: Platforms like ImgLarger, BigJpg, Deep-Image.ai, and ImageUpscaler.com also provide AI-driven solutions, often with varying pricing models and feature sets. Tophinhanhdep.com constantly evaluates these image tools to recommend the best options for our users.
The primary advantage of AI upscalers lies in their ability to “create” detail where none existed before, based on their learned understanding of visual information. This makes them invaluable for transforming low-resolution images into high-resolution assets suitable for large prints, digital art, and professional presentations.
Online and Mobile Solutions
The demand for quick and efficient image resolution enhancement has spurred the development of numerous online and mobile applications. These image tools offer unparalleled convenience, allowing users to upscale images from virtually anywhere.
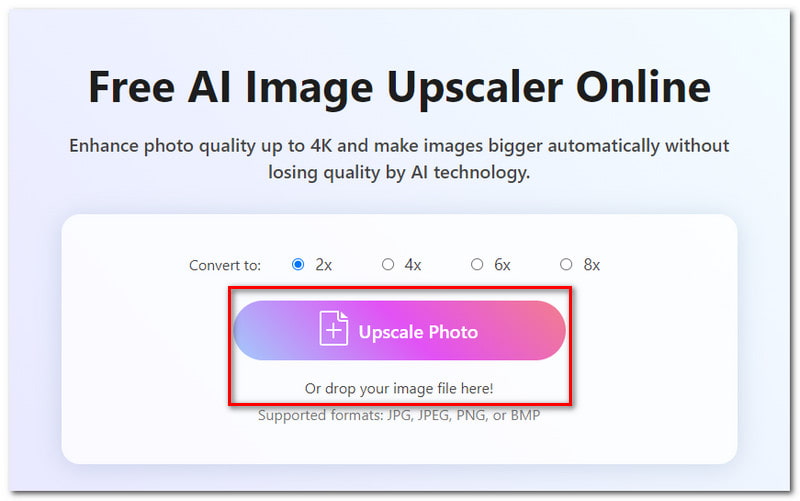
Online Image Upscalers (e.g., Tophinhanhdep.com’s Online Tool): Websites like Tophinhanhdep.com’s dedicated online tool simplify the process significantly. Users typically follow these steps:
- Visit Tophinhanhdep.com’s Enlarge Image Tool: Navigate to the specific section for image enlargement.
- Upload Your Image: Click the “Upload” button or drag and drop your photo directly onto the interface.
- Select Scale/Enhance: Choose your desired enlargement factor (e.g., 2x, 4x) or select an “enhance” option. Tophinhanhdep.com’s AI will automatically process the image.
- Download: Once the processing is complete, download your new high-resolution image.
These platforms are excellent for quick adjustments, especially for images intended for web use, social media, or basic print needs. They often support various image formats and provide a user-friendly experience, catering to those who prefer not to install desktop software.
Mobile Device Applications: For on-the-go editing, several mobile apps provide image resizing and enhancement capabilities:
- Image Size for iPhone (iOS): This app allows users to easily input desired dimensions or resolutions. Grant it access to your photo library, select an image, lock the aspect ratio, enter new width/height values, and ensure output quality is set to 100%. For print, consider increasing the “Print size correction factor” to smooth pixelation.
- Photo & Picture Resizer (Android): Similar to its iOS counterpart, this Android app lets you choose an image and select preset output dimensions or enter custom values. It automatically adjusts the resolution and saves the resized photo to a separate folder.
- General Photo Editors: Many popular mobile photo editing apps, such as Adobe Lightroom Mobile or Snapseed, also include basic resizing and resolution adjustment features within their export options, making them versatile tools for digital photography enthusiasts.
These online and mobile image tools are perfect for quick turnarounds, offering solutions for everything from resizing wallpapers for different devices to quickly enhancing background images for projects. Tophinhanhdep.com consistently updates its recommendations for the best converters, compressors, optimizers, and AI upscalers to ensure you have access to the most effective solutions.
Best Practices for High-Resolution Image Management
Achieving high-resolution images is only half the battle; managing them effectively ensures their continued quality and usability across various platforms and projects.
When to Upscale and When to Re-shoot
One of the most critical decisions in image management is understanding when upscaling is a viable solution and when a re-shoot is necessary.
- Upscale When: You have a reasonably good quality source image that simply needs to be larger for a specific application (e.g., printing a slightly larger version, using an image for a higher-resolution display). AI upscalers are particularly effective here, as they can intelligently fill in gaps without introducing noticeable artifacts. Upscaling is also useful for old photos or historical images where a re-shoot isn’t possible. Avoid increasing dimensions by more than 30-40% with traditional methods to prevent significant sharpness loss.
- Re-shoot When: The original image is severely low-resolution, blurry, poorly exposed, or pixelated beyond reasonable recovery. Upscaling such an image will only result in a larger version of a poor-quality photo. For critical applications like high-end stock photos, large format prints, or professional digital art, always prioritize starting with the highest possible quality capture. Remember, upscaling adds pixels, but it doesn’t add inherent quality or detail that wasn’t originally present. For the best beautiful photography, the capture quality is always supreme.
Optimizing for Different Uses: Print vs. Web
The ideal resolution and file format for an image largely depend on its intended use. Different applications have different requirements, and optimizing accordingly can save storage space and ensure faster loading times while maintaining visual fidelity.
-
For Print (e.g., Posters, Magazines, Fine Art Prints):
- Resolution: Aim for 300 PPI (Pixels Per Inch). This density ensures that ink dots blend smoothly, producing sharp, detailed prints.
- File Format: TIFF or uncompressed JPEG are often preferred by printers for preserving maximum detail. PSD is ideal if you need to retain layers for further editing.
- Color Space: Typically CMYK for commercial printing, though many printers can convert RGB files. Consult your print provider.
- Tophinhanhdep.com Tip: When preparing images for print, always perform a test print if possible, especially for unique visual designs or digital art.
-
For Web & Digital Displays (e.g., Wallpapers, Websites, Social Media, Backgrounds):
- Resolution: 72 PPI is generally sufficient. Modern high-resolution screens (Retina displays) might benefit from slightly higher, but the physical pixel dimensions are more critical than PPI.
- File Format: JPEG for photographs (offers good compression with acceptable quality loss), PNG for images with transparency or sharp lines (like logos or graphic design elements), WebP for optimal web performance.
- Color Space: Always RGB.
- File Size: Keep file sizes as small as possible without sacrificing visual quality to ensure fast loading times. Tophinhanhdep.com offers various compressors and optimizers within its image tools to achieve this balance.
- Tophinhanhdep.com Tip: For wallpapers and backgrounds, ensure the image’s pixel dimensions match or exceed the target screen resolution (e.g., 1920x1080 for Full HD, 3840x2160 for 4K) for a crisp fit.
Storing and Organizing High-Res Assets
High-resolution images, particularly those generated by digital photography or graphic design software, can result in large file sizes. Efficient storage and organization are key to a smooth workflow and easy access to your image inspiration & collections.
- Cloud Storage: Utilize cloud services (e.g., Google Drive, Dropbox, Adobe Creative Cloud) for secure backups and accessibility across devices. This is especially useful for stock photos or shared visual design projects.
- External Hard Drives: For massive archives of high-resolution photography, dedicated external hard drives or Network Attached Storage (NAS) solutions offer robust local storage.
- Naming Conventions: Implement consistent naming conventions (e.g.,
ProjectName_ImageSubject_Resolution_Date.jpg) to easily locate specific assets. - Folder Structure: Organize images into logical folders (e.g.,
Photography/Nature/Landscapes/HighRes/,DigitalArt/Abstract/2024/). - Metadata: Embed relevant metadata (keywords, copyright information, camera settings) into your image files. This is invaluable for searching within large collections and for managing stock photos.
- Image Management Software: Consider using image cataloging software (e.g., Adobe Lightroom, Capture One) for advanced organization, keyword tagging, and non-destructive editing of your digital photography.
By adopting these best practices, you can effectively manage your high-resolution image assets, ensuring that your beautiful photography, digital art, and aesthetic collections are always ready for any creative idea or thematic project.
Conclusion
Mastering the art of making an image higher resolution is an essential skill in today’s visually-driven world. From enhancing wallpapers and backgrounds to preparing professional stock photos and showcasing intricate digital art, the ability to manipulate pixel density and detail is invaluable. We’ve explored the foundational concepts of PPI, demystified the process of upscaling, and delved into various methods using powerful tools like GIMP and Adobe Photoshop. Furthermore, the revolutionary capabilities of AI upscalers, including Tophinhanhdep.com’s advanced online tools, offer unprecedented ease and quality in transforming your images.
Remember, while technology can add pixels, the inherent quality of an image begins at capture. Always strive for the highest resolution possible from your camera, and use upscaling as a powerful enhancement tool rather than a fix for fundamentally low-quality sources. By understanding the nuances of different applications—whether for print or web—and adopting smart storage practices, you can ensure your visual assets are always optimized and impactful.
At Tophinhanhdep.com, we are committed to providing you with the most effective image tools, creative ideas, and inspiration for all your visual projects. We encourage you to explore our extensive collections of images, photography guides, and visual design resources to further hone your craft. Elevate your images, unleash your creativity, and let your visuals truly shine.